Advertisement
Quick Links
Advertisement

Subscribe to Our Youtube Channel
Related Manuals for ATEN KA8270


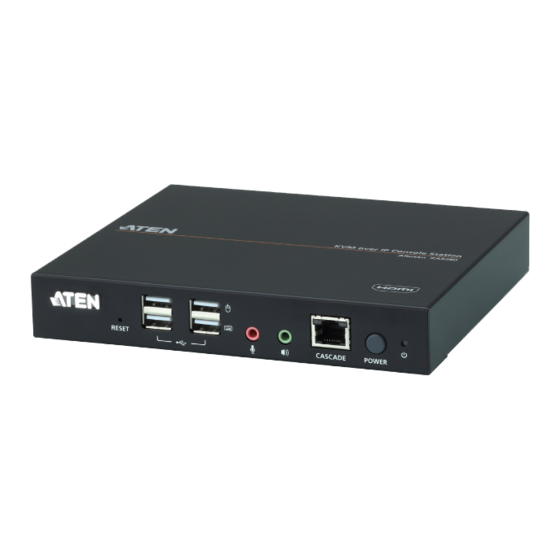
Summary of Contents for ATEN KA8270
- Page 1 KA8270 / KA8278 KA8280 / KA8288 KVM over IP Console Station User Manual...
- Page 11 ...
- Page 12 ♦ > >...
- Page 14 ...
- Page 15 ...
- Page 25 The KVM over IP console station can be used as a central control station to monitor several KVM switches. Available interfaces are described in the sections that follow. A valid Username and Password are required for login. The KVM over IP console station supports two modes:...
- Page 26 Follow the steps below to log in: After you successfully login, the dashboard of the console station appears. Please refer to Dashboard on page 18 for details.
- Page 27 As new versions of the firmware become available, they can be downloaded from our website. Check the website regularly to find the latest information and packages for KVM over IP Switch. To upgrade the KVM over IP Switch’s firmware:...
- Page 30 The page components of the dashboard are described in the table below:...
- Page 32 The dashboard of the console station usually displays the connected devices in an array of monitor units. Each of the unit corresponds to a connected device. The unit will continuously alternate between all connected ports. Double-clicking a monitor will bring you to the port’s page. For individual monitor options of a particular device, move your mouse over its corresponding monitor unit.
- Page 33 Clicking the Menu icon displays available options: Depending on your console station model (whether you have one or two display ports), the menu may show a Primary Display option or both a Primary Display option and a Secondary Display option, for displaying a port on the primary or secondary display:...
- Page 34 For controlling the server, the KVM over IP console station’s interface provides a toolbar to help you with the remote control operations. Please refer to Toolbar Interface on page 77. If you wish to use the KVM over IP switch’s GUI, click Open GUI. Please refer to the KVM switch’s user manual for the GUI’s operation.
- Page 35 Manage Device View allows users to separate KVM over IP switches currently being monitored into different groups or select which device group is to be displayed on the dashboard. Manage Panel Array View allows users to separate available ports into different groups or select which panel array group is to be displayed on the panel array page.
- Page 36 An example showing the KVM over IP switches in a device display is shown on the dashboard below (device 1 is the selected device): Click the Panel Array icon to display the panel array options:...
- Page 37 An example showing the ports of connected KVM over IP switches in a panel array is displayed (array1 selected): Press the + icon to display more device ports (up to 64 ports) on a smaller scale. Press the - icon to display less device ports on a larger scale. The diagram below displays an example of smaller scale.
- Page 38 Click the Device or Panel Array icon to show their corresponding options. Due to their similarity, Manage Device View is used as the example below. Click Manage Device View (or Manage Panel Array View) for the following page: This page allows you to add / edit / delete device views.
- Page 41 The Tab Device Configuration window is displayed, as in Adding a Device / Panel Array View. Edit its name, shift the devices around using the > or < icons and click OK when done.
- Page 42 Boundless Switching with cascade allows users to move mouse cursor across screens between two console stations. In boundless switching, the cascaded unit is controlled by the parent unit, and does not operate independently. Keyboard and mouse are required to connect to the parent unit for boundless switch to work.
- Page 43 To select a display, click on and the below page appears. To stop the cascade, simply mouse over the cascaded screen and click Stop Cascading.
- Page 45 First, make sure the remote server’s two video sources have been properly connected to and configured on the KN device, as illustrated below. To access the extended desktop with KVM over IP console station, select any one of the 2 video sources., the primary or secondary display, as exemplified below.
- Page 56 ...
- Page 57 ...
- Page 62 ...
- Page 63 ...
- Page 64 ...
- Page 67 ...
- Page 68 ...
- Page 70 ...
- Page 71 ...
- Page 74 ...
- Page 77 ...
- Page 84 Server Room KA8280 Network KA8280 KA8280 KA8280...
- Page 94 ...
- Page 96 ...
- Page 98 ...
- Page 99 ...
- Page 104 ...
- Page 105 ...
- Page 106 ...
- Page 107 ...
- Page 108 ...
- Page 109 ...
- Page 110 ...
- Page 112 ...
Need help?
Do you have a question about the KA8270 and is the answer not in the manual?
Questions and answers