MINN KOTA RIPTIDE INSTINCT QUEST Installation Instructions Manual
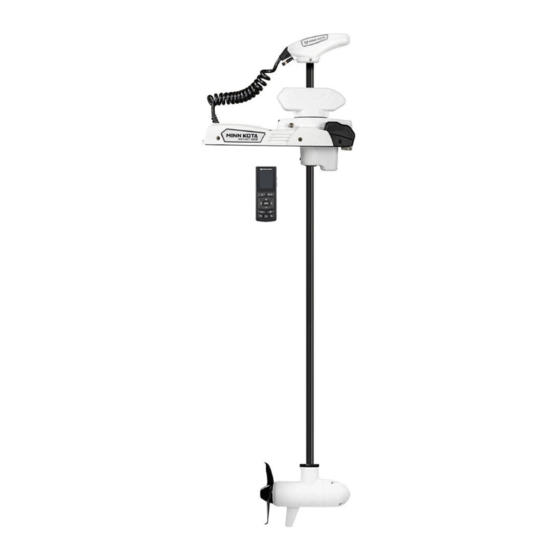
Bow-mount trolling motor
Hide thumbs
Also See for RIPTIDE INSTINCT QUEST:
- Owner's manual (57 pages) ,
- Owner's manual (82 pages) ,
- Quick reference manual (2 pages)
Table of Contents
Advertisement
Quick Links
Advertisement
Table of Contents

Subscribe to Our Youtube Channel
Related Manuals for MINN KOTA RIPTIDE INSTINCT QUEST


Summary of Contents for MINN KOTA RIPTIDE INSTINCT QUEST
- Page 1 RIPTIDE INSTINCT QUEST BOW-MOUNT TROLLING MOTOR Installation Instructions...
-
Page 2: Motor Information
Thank you for choosing Minn Kota. We believe that you should spend more time fishing and less time positioning your boat. That’s why we build the smartest, toughest, most intuitive trolling motors on the water. Every aspect of a Minn Kota trolling motor is thought out and rethought until it’s good enough to bear our name. -
Page 3: Safety Considerations
WARNING You are responsible for the safe and prudent operation of your vessel. We have designed your Minn Kota product to be an accurate and reliable tool that will enhance boat operation and improve your ability to catch fish. This product does not relieve you from the responsibility for safe operation of your boat. -
Page 4: Know Your Boat
KNOW YOUR BOAT Starboard Starboard Port Port Inboard Inboard Outboard Outboard Keel Keel Port Port Starboard Starboard Gunwale Gunwale Transom Transom Stern Stern Gunwale Gunwale Stern Stern Hull Hull 4 | minnkota.johnsonoutdoors.com ©2023 Johnson Outdoors Marine Electronics, Inc. - Page 5 INSTALLING THE RIPTIDE INSTINCT QUEST Your new Riptide Instinct QUEST comes with everything you’ll need to install it directly to the boat. The motor can be mounted directly to the bow or coupled with a Minn Kota quick release bracket for ease of mounting and removal. For compatible quick release brackets and to locate your nearest dealer, visit minnkota.johnsonoutdoors.com.
-
Page 6: Mounting Considerations
Control Head and that they do not extend off the side of the boat. All six mounting holes must be used when securing the Riptide Instinct QUEST to the boat deck. If the desired mounting location does not allow for all six mounting holes and mounting bolts, a Boat Deck Reinforcement Kit (1854058) should be used or a new mounting location selected. - Page 7 NOTICE: The trolling motor weighs up to 90lb. Minn Kota recommends having a second person help with the installation. Remove the four Sideplate Screws using a #3 Phillips Screwdriver. Two of these screws will be located on each side of the mount.
- Page 8 Drilling Locations Drilling Locations NOTICE: New mounting holes are required when upgrading from an Ulterra to a Riptide Instinct QUEST. New mounting holes will accommodate the higher NOTICE: The mounting surface for the Riptide Instinct thrust motor and ensure the installation is secure.
- Page 9 INSTALLING THE RIPTIDE INSTINCT QUEST ITEM(S) NEEDED #1 x 6 #2 x 6 #3 x 6 #4 x 6 #5 x 1 NOTICE: To prevent seizing of the stainless steel hardware, do not use high-speed installation tools. Hex Head Hex Head...
-
Page 10: Battery & Wiring Installation
CAUTION These guidelines apply to general rigging to support your Minn Kota motor. Powering multiple motors or additional electrical devices from the same power circuit may impact the recommended conductor gauge and circuit breaker size. If you are using wire longer than that provided with your unit, follow the conductor gauge and circuit breaker sizing table below. -
Page 11: Selecting The Correct Batteries
Minn Kota recommends using Minn Kota brand chargers to recharge the batteries connected to your Minn Kota trolling motor, as they have been engineered to work with motors that include a bonding wire. Learn more about Minn Kota chargers online at minnkota.johnsonoutdoors.com. -
Page 12: Connecting The Batteries In Series
Additional Accessories Connected to Trolling Motor Batteries Significant damage to your Minn Kota motor, your boat electronics, and your boat can occur if incorrect connections are made between your trolling motor batteries and other battery systems. Minn Kota recommends using an exclusive battery system for your trolling motor. - Page 13 CONNECTING THE BATTERIES IN SERIES 36-Volt Systems Three 12-volt batteries are required. The batteries must be wired in series, only as directed in the wiring diagram, to provide 36 volts. Make sure that the motor is switched off (speed selector on “0”). +36 Volts to trolling motor To trolling motor negative positive (or circuit breaker)
-
Page 14: Completing The Installation
Each time the trolling motor is powered "on," the control board will auto-detect the power supplied from the battery system and adjust the thrust output based on a 24V or 36V battery system. To verify power to the trolling motor, connect the Riptide Instinct QUEST to power. - Page 15 GPS signal strength of one bar, The Wireless Remote comes from the factory NOTICE: all remaining functions will become available. paired to the Riptide Instinct QUEST. NOTICE: Attaching the Lanyard (Item #7) to the NOTICE: A Remote Cradle accessory (1866675) can Wireless Remote is optional.
- Page 16 ADVANCED GPS NAVIGATION Your Minn Kota trolling motor and Humminbird fish finder communicate with each other to change the way you fish. Advanced GPS Navigation offers a large array of features including controlling speed, steering, Spot-Lock, and the ability to record and retrace paths on the water, all at your fingertips.
- Page 17 ETHERNET CABLES - Minn Kota provides one 30 ft Ethernet cable with every trolling motor equipped with Advanced GPS Navigation. The 30 ft Ethernet cable will accommodate a standard Ethernet connection for most installations to a Humminbird fish finder and is "Apex and Solix Ready."...
- Page 18 ADVANCED GPS NAVIGATION ITEM(S) NEEDED #13 x 1 Advanced GPS Advanced GPS NOTICE: Your fish finder should be turned off until this Ethernet Ethernet Control Control Eight-Pin Eight-Pin procedure is complete. Connector Connector Head Head Connector Connector NOTICE: For instructions on deploying the Riptide Instinct QUEST, see the “Quick Stow &...
- Page 19 ADVANCED GPS NAVIGATION Take the Receptacle on the end of the Ethernet Receptacle Receptacle Ethernet Cable Ethernet Cable Cable covered in a braided sleeve. The Receptacle with the braided sleeve will be inserted into the Coil Cord and connected to the Advanced GPS Ethernet Bare Bare Braided...
- Page 20 Cable Cable Cable to secure the connection. Helix Adapter Cable Helix Adapter Cable NOTICE: Minn Kota provides one Helix Adapter Cable (AS EC QDE - Ethernet Adapter Cable - 720074-1) with every trolling motor equipped with Advanced GPS Navigation. Ethernet...
- Page 21 CAUTION Do not over-tighten the Cable Tie as it may damage the wires. NOTICE: Minn Kota recommends routing the Ethernet Leave 6” of slack where the Ethernet Cable exits the Cable through the Coil Cord. Bypassing the Coil Cord Coil Cord. Bundle any excess cable in a loose loop when routing the Ethernet Cable is not recommended.
-
Page 22: Installing The Prop
INSTALLING THE PROP Installing the Prop ITEM(S) NEEDED #9 x 1 #10 x 1 #11 x 1 #12 x 1 CAUTION Drive Drive Disconnect the motor from the battery before beginning any prop work or maintenance. Take the Drive Pin (Item #12) and slide it through Armature Armature the Hole in the Armature Shaft. - Page 23 OPTIMIZING THE PERFORMANCE OF THE RIPTIDE INSTINCT QUEST WITH THE WIRELESS REMOTE OR ONE-BOAT NETWORK APP Minn Kota® and Humminbird® have joined forces to bring you the One-Boat Network, including the latest Advanced GPS Navigation Wireless Remote and the One-Boat Network app. The Wireless Remote comes from the factory paired to the trolling motor.
-
Page 24: Keel Offset
ONE-BOAT NETWORK ADJUSTMENTS ONE-BOAT NETWORK ADJUSTMENTS KEEL OFFSET The Riptide Instinct QUEST comes from the factory with the Lower When the motor is installed from the factory, NOTICE: Unit parallel to the Mount. When the Lower Unit is parallel to the the Keel Offset is 0 degrees. - Page 25 KEEL OFFSET Press the Menu button on the Wireless Remote. Use the Speed Up or Speed Down button to find the Motor Settings menu. Use the Steer Right button to select Motor Settings. In the Motor Settings Menu, use the Speed Up or Speed Down button to find Setup/Calibration.
- Page 26 KEEL OFFSET Setting the Keel Offset with the One-Boat Network App Power on the trolling motor by pressing the Power Indicator Panel Indicator Panel button on the Indicator Panel. When the trolling System System motor is on, the System Status LED will be blue.
- Page 27 KEEL OFFSET In the Motor Settings menu, find and tap Setup and Calibration. In Setup and Calibration, find and tap Keel Mount Offset. Review all safety warnings. Follow the prompts in the One-Boat Network app. If the placement of the trolling motor is pointing forward and parallel to the keel, tap Set.
- Page 28 STRAIGHT ON DEPLOY Minn Kota recommends setting the Keel Offset when the position of the Lower Unit is parallel with the Keel. Save the Keel Offset before exploring the Straight on Deploy feature. Straight on Deploy uses the position recorded in Keel Offset to know where to position the Lower Unit to be parallel with the Keel.
- Page 29 STRAIGHT ON DEPLOY To Toggle Straight on Deploy with the One-Boat Network App Open the One-Boat Network (OBN) app on a mobile device. Make sure the mobile device is paired with the trolling motor and that the motor is powered "on." From the OBN home screen, tap the Motor menu.
- Page 30 STOW ORIENTATION STOW ORIENTATION The Stow Orientation is a term used to describe the lower unit and Prop position when the motor is stowed. The lower unit will automatically rotate into the Stow Orientation when stowing the motor. The Stow Orientation can be set to Prop Left or Prop Right through the Wireless Remote or One-Boat Network app.
- Page 31 STOW ORIENTATION Setting the Stow Orientation with the One-Boat Network App Open the One-Boat Network (OBN) app on a mobile device. Make sure the mobile device is paired with the trolling motor and that the motor is powered "on." From the OBN home screen, tap the Motor menu. The Motor menu opens the Motor home screen.
- Page 32 Boat Scale provides a method of adjusting how the trolling motor will perform to account for these and other variables. The Riptide Instinct QUEST comes from the factory with Boat Scale set to zero. Boat Scale can be adjusted up (+2) or down (-2) to increase or decrease how the motor control software applies power while using a navigation mode like Spot-Lock.
- Page 33 BOAT SCALE Adjusting Boat Scale with the One-Boat Network App Open the One-Boat Network (OBN) app on a mobile device. Make sure the mobile device is paired with the trolling motor and that the motor is powered "on." From the OBN home screen, tap the Motor menu. The Motor menu opens the Motor home screen.
- Page 34 ONE-BOAT NETWORK BUTTONS Minn Kota trolling motors equipped with Advanced GPS Navigation are compatible with devices enabled with the One-Boat Network (OBN), such as the Wireless Remote. OBN functions can be enabled and disabled through four customizable OBN buttons on the Wireless Remote.
- Page 35 CUSTOMIZING THE ONE-BOAT NETWORK BUTTONS ON THE WIRELESS REMOTE One-Boat Network functions can be enabled and disabled through four One-Boat Network buttons on the Wireless Remote. The One- Boat Network buttons can be customized to control the following functions, depending on your setup: Function Icon Description...
- Page 36 CUSTOMIZING THE ONE-BOAT NETWORK BUTTONS ON THE WIRELESS REMOTE Customize the One-Boat Network Buttons on the Wireless Remote On the Wireless Remote, press the Menu button to open the Motor Menu. In the Motor Menu, use the Speed Down Speed Up button to find the Motor Settings menu.
- Page 37 Advanced GPS Navigation Wireless Remote, Foot Pedal, One-Boat Network app, or a connected Humminbird® fish finder. It’s instant. Effortless. And it makes Riptide Instinct QUEST the easiest-to-use motor on the water. Use the following procedures to stow and deploy the motor. If the motor stalls when attempting to stow, the motor may be encountering an error.
- Page 38 STOWING WITH THE WIRELESS REMOTE Press the Steer Right button to select Deploy. The motor will automatically deploy. WARNING As soon as Deploy is selected, the motor will automatically deploy. Be sure that the motor is clear from obstructions and has a clear path of travel. The Prop is disabled while the motor is stowing or deploying to prevent accidental contact with the rotating Prop.
- Page 39 STOWING WITH THE WIRELESS REMOTE Use the Speed Up or Speed Down button to find Stow. Use the Steer Right button to select it. Once selected, the motor will automatically stow, and the Prop will be disabled. WARNING As soon as Stow is selected, the motor will automatically stow.
- Page 40 DEPLOYING WITH THE OBN APP STOWING AND DEPLOYING WITH THE ONE-BOAT NETWORK (OBN) APP Deploying with the OBN App Open the One-Boat Network (OBN) app on the mobile device. Make sure the mobile device is paired with the trolling motor. From the OBN home screen, tap the Motor menu.
- Page 41 STOWING WITH THE OBN APP Stowing with the OBN App Open the One-Boat Network (OBN) app on the mobile device. Make sure the mobile device is paired with the trolling motor. From the OBN home screen, tap the Motor menu. The Motor menu opens the Motor home screen.
- Page 42 ADJUSTING THE DEPTH (TRIM) OF THE RIPTIDE INSTINCT QUEST ADJUSTING THE DEPTH (TRIM) OF THE RIPTIDE INSTINCT QUEST Once the boat is on the water, it may be necessary to adjust the trim of the Lower Unit up or down to achieve an optimum depth for motor performance.
- Page 43 TRIMMING WITH THE WIRELESS REMOTE Once in Instinct Menu, use the Speed Up Speed Down button to select Trim Up or Trim Down. Trimming up will raise the motor and trimming down will lower the motor. Press and hold the Steer Right button to select it.
- Page 44 To avoid churning or agitation of surface water, ensure that the top of the motor is submerged at least 12" below the surface of the water. This completes the installation of your Riptide Instinct QUEST. A complete Owner’s Manual can be downloaded at minnkota.johnsonoutdoors.com.
- Page 45 NOTES ©2023 Johnson Outdoors Marine Electronics, Inc. minnkota.johnsonoutdoors.com | 45...
-
Page 46: Recommended Accessories
Stop buying new batteries and start taking care of the ones you’ve got. Many chargers can actually damage your battery over time – creating shorter run times and shorter overall life. Digitally controlled Minn Kota chargers are designed to provide the fastest charge that protect and extend battery life. MK212PCL...
Need help?
Do you have a question about the RIPTIDE INSTINCT QUEST and is the answer not in the manual?
Questions and answers