Table of Contents
Advertisement
Quick Links
Advertisement
Table of Contents

Related Manuals for FLIR CM57-2


Summary of Contents for FLIR CM57-2
- Page 1 Quick Start Flex Clamp Meter with Bluetooth ® MODEL CM57–2...
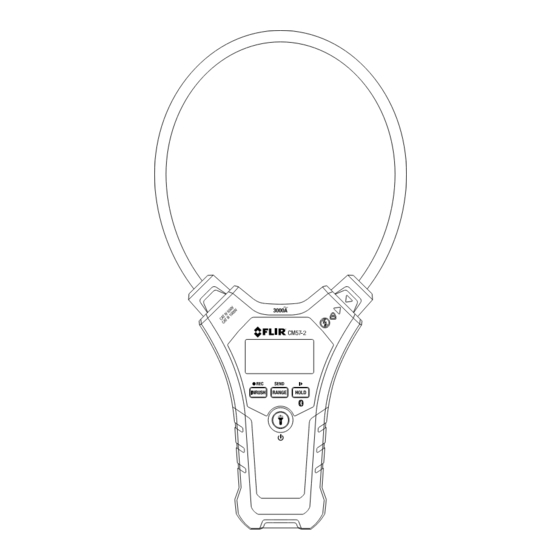
- Page 2 Bluetooth (real time readings will now be available to Bluetooth paired devices). • Long press SEND to transmit bulk stored readings via Bluetooth (refer to the user manual for complete instructions; link below). https://support.flir.com METER DESCRIPTION 1. Worklights 2. Flexible current clamp coil 3.
- Page 3 CONTROL BUTTONS • Press to access/exit INRUSH mode • Long press to open/close the data logger (REC); use the Start/ Stop button to control the data logger • Press to step through the ranges manually • Long press while in manual range mode to return to Auto range mode •...
- Page 4 1. Switch the meter OFF and switch power to the device under test OFF. 2. Turn the clamp lock (1) counterclockwise to release the flexible clamp (2), as shown. 3. Fully enclose only one conductor of the device under test in the clamp, as shown in the image, on left, below.
- Page 5 5. Re-secure the clamp lock after clamping around a single conductor. 6. Do not attempt to measure current higher > 3000 A. 7. Switch the meter ON and then switch power ON to the device under test. 8. Read the current value on the display. OL will display if the measured signal exceeds the range.
- Page 6 CUSTOMER SUPPORT https://support.flir.com WARRANTY This product is protected by FLIR’s Limited Lifetime Warranty. Visit the site below to view the warranty and to register your product. https://flir.com/testwarranty #NAS100141; r. AA/89762/89785; en-GB...
- Page 8 Customer support http://support.flir.com Copyright © 2023, FLIR Systems, Inc. All rights reserved worldwide. Disclaimer Specifications subject to change without further notice. Models and accessories subject to regional market considerations. License procedures may apply. Products described herein may be subject to US Export Regulations. Please refer to exportquestions@flir.com with any questions.
Need help?
Do you have a question about the CM57-2 and is the answer not in the manual?
Questions and answers