Advertisement
Available languages
Available languages
Quick Links
Advertisement
Chapters

Related Manuals for Kärcher FC 2-4


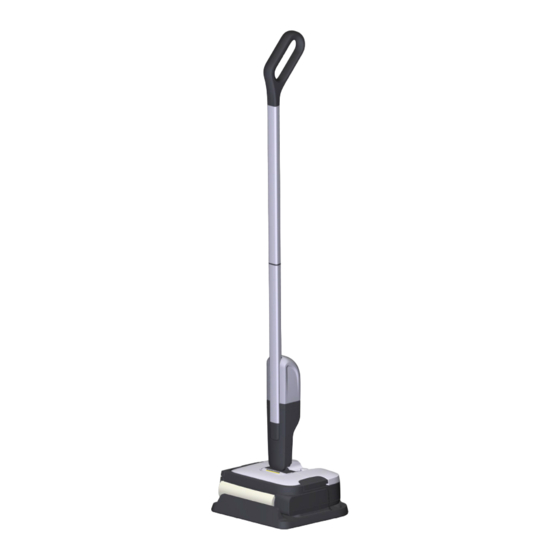
Summary of Contents for Kärcher FC 2-4
- Page 1 FC 2-4 中文 English Indonesia Việt ไทย ែខ្ម រ (08/23) 59800770...
- Page 5 目录 安全提示 在您第一次使用本设备之前,请先阅读本安全提示、本 按规定使用........ 原厂操作说明书、随附在蓄电池组中的安全提示以及随 环境保护........附的蓄电池组/充电器原厂操作说明书。按照其中的说 附件和备件........ 明操作。请妥善保存好这些手册,以备日后或供后来的 供货范围........设备所有者查阅。 质量保证........除了操作说明书的提示外,还要遵守法律上一般安全规 安全提示........定和意外事故防范规定。 设备上的标志......危险等级 设备说明........危险 安装........● 提示导致人员重伤或死亡的直接威胁性危险。 投入运行........警告 运行........● 提示可能导致人员重伤或死亡的危险状况。 保养和维护........ 小心 拆卸........● 提示可能导致轻度伤害的危险状况。 故障时的帮助......注意 技术参数........● 提示可能产生财产损失的危险状况。 按规定使用 电气组件 该设备仅与 KÄRCHER Battery Power 4 V 系统的蓄电池 危险...
- Page 6 请勿使用该设备清洗地板垫或地毯。 ● 不得将设备放到 投入运行 对流式加热器的地面回风口上。如果设备拖过地面回风 给蓄电池组充电 口上时,它无法吸入溢出的水。 ● 较长时间的工作暂停 和使用后,请通过总开关/设备开关将设备关闭。 ● 勿 1. 给蓄电池组充电(参见蓄电池组和充电器的操作说 在 0 °C 以下使用本设备。 ● 防止设备受到雨淋。不得 明书和安全提示)。 将设备存放在室外区域。 装入蓄电池组 设备上的标志 1. 将蓄电池组压入设备上的蓄电池组槽中,直到听到 卡入的声音。 危险 图 C 触电危险 放入污水箱 该设备包含电气元件。 1. 将设备放在地面上。 不要用流动水清洁本设备。不得将设备 2. 握住污水箱的凹槽把手,将污水箱滑入吸尘头导 浸泡在水中。 轨。 图...
- Page 7 提示 结束运行 为了获得最佳清洁效果,首次使用之前在 60°C 的洗衣 1. 将设备手柄置于垂直位置。 机中清洗滚刷。 关闭设备。 注意 2. 将设备置于放置底座上。 图 R 滚刷松动会导致财产损失 注意 洗衣机可能会损坏。 将滚刷放在洗衣网中,并在洗衣机中装入其他衣物。 顽固污垢 注意 顽固污垢会损坏设备。 建议每次使用后彻底清洁设备。 用柔顺剂清洁滚刷或使用滚筒烘干机时的损害 清洁设备 3. 清洁设备(参见章节 )。 对超细维的损害 用洗衣机洗涤时不要使用柔顺剂。 保管设备 不要把滚刷放入滚筒烘干机。 注意 开始使用其进行工作 液体/潮湿脏污 注意 如果设备在存放时仍含有液体/潮湿脏污,可能会导致 产生异味。 移动失控 存放设备时,必须完全清空清水和污水箱。 设备和财产损失 使用清洁刷将吸尘头盖板头发过滤器中的头发和灰尘颗...
- Page 8 清洁滚刷 5. 取出并清洁滚刷(参见章节 )。 3. 按下头发过滤器的解锁按钮。 图 M 图 L 6. 如果清水箱中仍然有水,请取出并清空清水箱。 头发过滤器松开,并且可以被取出。 7. 用湿布擦去外壳上的残留污垢或清洁剂。 4. 用流水清洗头发过滤器。 5. 用清洁刷将咬死的脏污清除,例如:过滤器梳子里 清洁污水箱 咬死的脏污。 注意 图 P 图 Q 顽固污垢 6. 将头发过滤器以 45°角插入吸尘头,然后将其压 顽固污垢会损坏设备。 下,直到听到卡入的声音。头发过滤器必须牢牢固 定期清洁污水箱。 定在设备中。 清空污水箱 关于取下污水箱方法的信息,参见章节 。 图 T 1. 通过侧面压片打开并拆下污水箱盖。 2.
-
Page 9: Table Of Contents
设备不工作 FC 2-4 蓄电池组未在设备中正确就位。 蓄电池额定电压 3.6 - 将蓄电池组压入设备上的蓄电池组槽中,直至其卡 入。 蓄电池组的电量太低。 充满电蓄电池 (2.5 Ah) 的最大工 给蓄电池组充电,参见章节 给蓄电池组充电 。 作时长 蓄电池组或充电器有缺陷。 添加量 更换蓄电池组或充电器,参见章节 按规定使用 。 清水箱容积 该设备不收集脏污 清水箱中没有水。 污水箱容积 补注清洁液 在清水箱中补注水,参见章节 。 尺寸和重量 清水箱未在设备中正确就位。 放入清水箱时,请确保其在设备中牢固就位。 重量(不含附件和清洁剂) 污水箱缺失,无法插入设备或卡住。... -
Page 10: Accessories And Spare Parts
correct operation of the appliance. Appliances marked CAUTION ● Have repair work carried out by by this symbol are not allowed to be disposed of togeth- the authorised customer service only. ● Check the de- er with the household rubbish. vice and accessories for proper condition and opera- Notes on the content materials (REACH) tional safety before each use. -
Page 11: Symbols On The Device
Symbols on the device Initial startup Battery pack charging DANGER 1. Charge the battery pack (see operating instructions Risk of electric shock and safety instructions for the battery pack and the The device contains electrical compo- charger). nents. Fitting the battery pack Never clean the device under running water. - Page 12 Emptying the waste water tank Before starting work and storing the device, remove ob- jects such as shards, pebbles, screws or toy parts from 1. Bring the device handle into a vertical position. the floor. The device switches off. Illustration W 2.
-
Page 13: Care And Service
4. Place the wet roller to dry on the floor head pedestal. 2. Clean the waste water tank and cap with fresh wa- Illustration S ter. Illustration N 5. Remove the battery pack (see chapter Removing the battery pack). 3. Alternatively, the waste water tank can be cleaned in 6. -
Page 14: Disassembly
Troubleshooting guide 3. Press the hair filter unlocking button. Illustration L Malfunctions often have simple causes that you can The hair filter is released and can be removed. remedy yourself using the following overview. When in 4. Clean the hair filter under running water. doubt, or in the case of malfunctions not mentioned 5. -
Page 15: Technical Data
Contact the authorised Customer Service. kedap air. Technical data Perlindungan lingkungan FC 2-4 Bahan kemasan dapat didaur ulang. Buang kemasan dengan cara yang ramah lingkungan. Electrical connection Perangkat elektrik dan elektronik berisi bahan... - Page 16 Petunjuk keselamatan di wilayah setempat ● Perangkat tidak dirancang untuk digunakan oleh anak-anak atau orang dengan Sebelum menggunakan perangkat untuk kali pertama, keterbatasan fisik, sensoris, atau mental serta bacalah petunjuk keselamatan, panduan seseorang yang tidak terbiasa menggunakan panduan pengoperasian asli, petunjuk keselamatan yang perangkat ini.
- Page 17 Deskripsi perangkat Memasang unit baterai 1. Tekan unit baterai ke dalam dudukan unit baterai Deskripsi jumlah maksimum peralatan ada di panduan pada perangkat hingga unit baterai terpasang pengoperasian ini. Terdapat perbedaan pada cakupan dengan benar. pengiriman, tergantung model yang digunakan (lihat Gambar C kemasan).
- Page 18 Mengosongkan tangki air kotor Sebelum memulai pengoperasian, singkirkan benda seperti pecahan kaca, kerikil, sekrup, atau komponen 1. Posisikan gagang perangkat secara vertikal. mainan anak dari lantai. Perangkat mati. Gambar W 2. Tekan tombol untuk melepas tangki air kotor Petunjuk keluarkan tangki air kotor menggunakan dudukan ●...
- Page 19 Membersihkan tangki air kotor 1. Biarkan tangki air kotor yang kosong mengering sebelum dipasang pada perangkat. PERHATIAN 2. Tempatkan perangkat di tempat parkir. Kotoran yang sulit dibersihkan Gambar R Kotoran yang sulit dibersihkan dapat merusak 3. Lepaskan rol dan bersihkan bila perlu (lihat bab perangkat seiring waktu.
- Page 20 Bersihkan filter rambut secara rutin dengan sikat HATI-HATI pembersih. Risiko cedera PERHATIAN Menggunakan obeng pada perangkat yang terkunci Kerusakan karena membersihkan filter rambut di dapat mengakibatkan risiko obeng tergelincir sehingga dalam mesin pencuci piring dapat melukai pengguna. Proses pembilasan dapat membuat tepi pengikis Gunakan obeng dengan hati-hati pada perangkat yang melengkung sehingga tidak lagi dapat menekan rol terkunci.
-
Page 21: Mục Đích Sử Dụng
Filter rambut tidak terpasang atau tidak dipasang FC 2-4 dengan benar di dalam perangkat. Durasi pengoperasian maksimal Pasang filter rambut dengan benar pada perangkat. saat baterai terisi daya penuh (2,5 Rol kotor atau telah usang. Bersihkan rol, lihat bab Membersihkan rol, atau ganti. -
Page 22: Phụ Kiện Và Bộ Phận Thay Thế
Chỉ dẫn về các chất liệu thành phần (REACH) CHU ́ Ý ● Không chèn bất kỳ vật nào vào ngăn chứa Bạn có thể truy cậ p thông tin các chất liệu thành phần pin, ngoại trừ các bộ pin của hệ thống KÄRCHER tại: www.kaercher.de/REACH Battery Power 4 V. -
Page 23: Các Kí Hiệu Trên Thiết Bị
Các kí hiệu trên thiết bị Lắp bộ pin 1. Đẩy các bộ pin vào ngăn chứa bộ pin trên thiết bị NGUY HIÊ ̉ M cho đến khi nghe thấy tiếng khớp vào đúng vị trí. CA ̉ NH BA ́ O C Nguy cơ... - Page 24 Thêm chất tẩy rửa ● Tuân thủ các hướng dẫn của nhà sản xuất tầm lót sàn. 1. Đổ đầy bình chứa nước sạch (xem chương Đổ đầy Lưu ý bình chứa nước sạch). Làm việc lùi lại về phía cửa để tránh để lại dấu chân trên CHU ́...
-
Page 25: Chăm Sóc Và Bảo Dưỡng
Tháo bộ pin Sau mỗi lần sử dụng, rửa con lăn dưới vòi nước chảy hoặc làm sạch con lăn trong máy giặt. Lưu ý CHU ́ Ý Trong trường hợp công việc bị gián đoạn lâu hơn, hãy tháo các bộ pin khỏi thiết bị và bảo vệ chúng khỏi bị sử Hư... -
Page 26: Tháo Dỡ
Chấ t tẩ y rư ̉ a và chăm so ́ c Nhấn bộ pin vào ngăn chứa bộ pin trên thiết bị cho đến khi khớp vào vị trí. CHU ́ Ý Trạng thái sạc của bộ pin quá thấp. Sử... -
Page 27: Dữ Liệu Kĩ Thuật
ไซเคิ ล ได ้และองค์ ป ระกอบ เช ่ น แบตเตอรี ่ แบตเตอรี ่ แบบชาร์ จ ได ้หรื อ นํ ้ า มั น ที ่ อ าจเป็ นอั น ตรายร ้ายแรงต่ อ FC 2-4 สุ ข ภาพของมนุ ษ ย์ แ ละส ิ ่ ง แวดล ้อมได ้ หากจั ด การหรื อ... - Page 28 ส ั ญล ักษณ์ บ นอุ ป กรณ์ ระว ัง ดํ า เนิ น งานซ ่ อ มแซมโดยบุ ค ลากรจากฝ่ าย ● บริ ก ารที ่ ผ ่ า นการรั บ รองเท่ า นั ้ น ตรวจสอบเครื ่ อ งและอุ ป กรณ์ ● ...
- Page 29 ใส ่ ช ุ ด แบตเตอรี ่ เ ข้ า ไป หมายเหตุ ทํ า งานทิ ศ ทางย ้อนกลั บ ไปทางประตู เ พื ่ อ ไม่ ใ ห ้มี ร อยเท ้าบน 1. กดชุ ด แบตเตอรี ่ ล งในอุ ป กรณ์ ย ึ ด ชุ ด แบตเตอรี ่ บ นเครื ่ อ งจน พื...
- Page 30 เติ ม นํ ้ า ยาทํ า ความสะอาด ถอดชุ ด แบตเตอรี ่ อ อก เติ ม นํ ้ า ในถั ง เก็ บ หมายเหตุ 1. เติ ม นํ ้ า ในถั ง เก็ บ นํ ้ า สะอาด (โปรดดู ท ี ่ บ ท นํ...
- Page 31 ข้ อ ควรใส ่ ใ จ นํ ้ า ยาทํ า ความสะอาดและนํ ้ า ยาบํ า รุ ง ร ักษา ข้ อ ควรใส ่ ใ จ ความเส ี ย หายที ่ เ กิ ด จากการทํ า ความสะอาดลู ก กลิ ้ ง ด้ ว ย นํ...
- Page 32 ชาร์ จ ไฟชุ ด โปรดดู ก ารชาร์ จ ไฟชุ ด แบตเตอรี ่ ท ี ่ บ ท แบตเตอรี ่ FC 2-4 ชุ ด แบตเตอรี ่ ห รื อ เครื ่ อ งชาร์ จ ไฟช ํ า รุ ด การต่ อ ไฟ...
- Page 33 ការការ របរ ិ ្ថ ន ក្រមិ ត េ្រ ះ ្ន ក់ ចយកមកែកៃឆ្ន េ ឡើ ង វ ិ ញ េ្រ ះ ្ន សំ រៈស្រ ប់ េ វចខ្ច ប ់ ន។ ● ស ្ញ ប ្ហ ញពី ល ទ្ធ ពេ្រ ះ ្ន ក់ ជ ិ ត េកើ ត នេឡើ...
- Page 34 ឬ្របសិ ន េបើ ព ួ ក េគ្រតវ នែណ ំ េ យបុ គ ្គ ល ែដលទទួ ល ខុ ដងកាន់ ស្រតវចំ េ ះសុ វ ត្ថ ិ ពរបស់ ព ួ ក េគេលើ កា រេ្របើ ្រ ស់ េ យសុ វត្ថ ិ ពៃនយូ នី ត ធុ...
- Page 35 កំ ណ ត់ ស ្គ ល់ បញ លរ ូឡ េដើ ម ី ទ ទួ ល នលទ្ធ ផ ល ងស ្អ តល្អ បំ ផ ុ ត 1. ចុ ច ប៊ូ តុ ង េ ះគ្រមបចំ េ ហ ង េហើ យ េ ះគ្រមបេចញ។ សូ...
- Page 36 ក់ ប ំ េ ពញទឹ ក ស ្អ ត ដកកញ ្ច ប់ ថ ្ម េ ចញ កំ ណ ត់ ស ្គ ល់ 1. បំ េ ពញធុ ង ទឹ ក បរ ិសុ ទ ្ធ (សូ មេមើ ល ជំ ព ូ ក បំ...
- Page 37 ស ្អ តដុ ំ រ ូឡ 5. យកធូ ល ី ែដល ប់ េ ះេចញ ឧ. េ ក ុ ង ស្ន ិ ត ៃនត្រមង េ យេ្របើ ្រ ស ងស ្អ ត។ ការេ្រកើ ន រលឹ ក រ ូប ងP កេម្ទ ច ប៊ ូ េ សល់...
- Page 38 កញ្ច ប់ ថ ្ម ឬ ្ន ំ ង ក នប ្ហ ។ FC 2-4 ប រកញ្ច ប់ ថ ្ម ី ឬ ្ន ំ ង កថ្ម ី សូ មេមើ ល ជំ ព ូ ក ការ ្ជ ប់ ច រន្ត អ គ្គ ី ស នី...
- Page 40 THANK YOU! MERCI! DANKE! ¡ GRACIAS! Registrieren Sie Ihr Produkt und profitieren Sie von vielen Vorteilen. Register your product and benefit from many advantages. Enregistrez votre produit et bénéficier de nombreux avantages. Registre su producto y aproveche de muchas ventajas. www.kaercher.com/welcome Bewerten Sie Ihr Produkt und sagen Sie uns Ihre Meinung.
Need help?
Do you have a question about the FC 2-4 and is the answer not in the manual?
Questions and answers