Ergotron StyleView SV43 User Manual
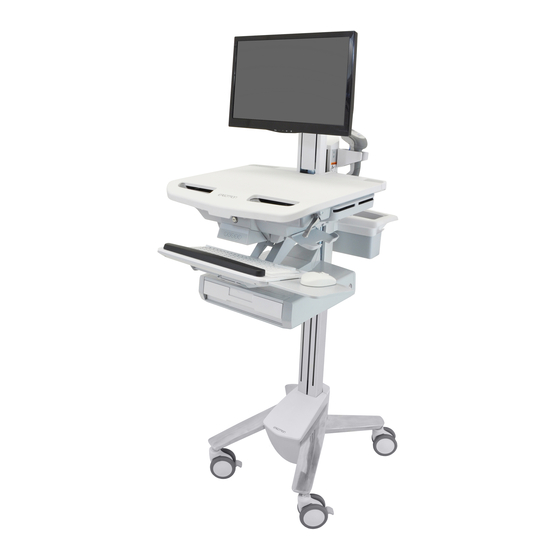
Cart with hd monitor mount
Hide thumbs
Also See for StyleView SV43:
- Tech sheet (17 pages) ,
- User manual (8 pages) ,
- User manual (9 pages)
Advertisement
Quick Links
Features & Specifi cations ............................................... 2 - 5
Set-up ............................................................................ 6 - 18
Adjustment ................................................................. 13 - 14
Auto-Lock Drawer ....................................................... 15 - 17
Ergonomics .........................................................................18
Maintenance & Safety ................................................ 19 - 20
For Warranty visit: www.ergotron.com/warranty
For Service visit: www.ergotron.com
For local customer care phone numbers visit: http://contact.ergotron.com
For the latest User Installation Guide and StyleLink Software Download please visit: www.ergotron.com
User's Guide - English
Guía del usuario - Español
Manuel de l'utilisateur - Français
Gebruikersgids - Deutsch
Benutzerhandbuch - Nederlands
Guida per l'utente - Italiano
Användarhandbok - svenska
ユーザーガイ ド : 日本語
用户指南 : 汉语
888-24-367-G-00 rev. A • 05/17
StyleView® SV43 Cart
with HD Monitor Mount
User Guide
Includes
Constant Force™
Technology
1/20
Advertisement

Related Manuals for Ergotron StyleView SV43


Summary of Contents for Ergotron StyleView SV43
-
Page 1: Table Of Contents
Maintenance & Safety ..........19 - 20 For Warranty visit: www.ergotron.com/warranty For Service visit: www.ergotron.com For local customer care phone numbers visit: http://contact.ergotron.com For the latest User Installation Guide and StyleLink Software Download please visit: www.ergotron.com User's Guide - English Includes Guía del usuario - Español Constant Force™... -
Page 2: Features & Specifi Cations
é quipement fixé, d’ e xpédier le chariot, de stocker le chariot TIPPING HAZARD Lower cart before moving. Failure to follow these instructions may www.ergotron.com cause cart to tip resulting in equipment damage and/or personal injury. 826-501... - Page 3 Operation of this equipment in a residential area is likely to cause harmful interference in which case the user will be required to correct the interference at his own expense. Changes or modifi cations not expressly approved by Ergotron, Inc. could void the user’s authority to operate the equipment.
- Page 4 Features & Specifi cations Part Number Auto-Lock Drawer SV43-2530-0 3 Drawers*/48 compartments SV43-2550-0 5 Drawers*/44 compartments SV43-2570-0 7 Drawers*/40 compartments SV43-2590-0 9 Drawers*/36 compartments *Auto-Lock Drawer 3 Drawers 5 Drawers 7 Drawers 9 Drawers Weight Capacity 14-24 lbs (6.3-10.8 kg) 0 lbs (0 kg) Open Worksurface <5 lbs (2.3 kg)
- Page 5 Features & Specifi cations 20˚ 5" (127 mm) 16" 5˚ (406 mm) 12˚ 24˚ 180˚ Features & Specifi cations 14.63" 19.5" (372 mm) (495 mm) 7" - 12" 17" (178-305 mm) (432 mm) 13.4" 50.5" 3.27" 3.4" (340 mm) (1282 mm) (83 mm) (86 mm) 11.1"...
-
Page 6: Set-Up
Set-up Components M3.5 x 6mm M4 x 8mm M4 x 10mm M4 x 10mm M4 x 8mm M4 x 12mm Tools Needed 10mm 14mm (9/16") 6/20 888-24-367-G-00 rev. A • 05/17... - Page 7 Set-up Release Brake to move riser. CAUTION! Completely release brake engagement before raising or lowering the cart. Raising or lowering the cart with the brake partially engaged may cause product damage. 40" (1016 mm) M3.5 x 6mm 7/20 888-24-367-G-00 rev. A • 05/17...
- Page 8 Set-up CAUTION: Close worksurface before opening drawers. Open only one drawer at a time. Do Not push cart when drawers or worksurface are open. Failure to follow these instructions may cause the cart to be unstable. 8/20 888-24-367-G-00 rev. A • 05/17...
- Page 9 Set-up Connect Keyboard and Mouse to USB Hub USB (Type A) USB (Type A) NOTE: Bar Code Scanner should be connected directly to computer USB port. DO NOT connect Bar Code Scanner to the USB Hub. 0˚ 0˚ M4 x 8mm 75x75mm / 100x100mm WARNING M4 x 10mm...
- Page 10 Set-up To increase space and improve airfl ow, power brick may be stored under the storage area. M4 x 12mm Route power cable down along tower. WARNING! DO NOT OPERATE WITHOUT GUARD IN PLACE. Only WARNING remove guard when routing a cable with a large connector through the bottom of the compartment.
- Page 11 Set-up Place computer and AC power adaptors in compartment. Do not place power bricks near computer or compartment air vents. M4 x 10mm Plug the following factory connected cables into your computer. USB: This cable runs from the USB Hub to your computer and uses your computer to power the USB Hub, Keyboard Lights and Fan. (NOTE: Your computer must be turned on for the USB Hub, Keyboard Lights and Fan to function).
- Page 12 Set-up Placement of CPU's in Secure Storage Area: USFF (Ultra Small Form Factor) Thin Client DO NOT OBSTRUCT AIR VENTS! Obstructing air vents may cause overheating and result in equipment damage. Center CPU in storage area. To increase space and improve airfl ow, power brick may be stored under the storage area.
-
Page 13: Adjustment
Set-up Adjustment It is important that you adjust this product according to the weight of the mounted equipment as described in the following steps. Any time equipment is added or removed from this product, resulting in a change in the weight of the mounted load, you should repeat these adjustment steps to ensure safe and optimum operation. - Page 14 Adjustment Tilt – Forward and Backward Loosen knob, tilt Display to desired position then retighten knob. Lift – Up and down Follow these instructions to tighten or loosen tension. 10mm Pan - Side-to-Side Follow these instructions to tighten or loosen tension. 14/20 888-24-367-G-00 rev.
-
Page 15: Auto-Lock Drawer
Auto-Lock Drawer AutoLock Drawer Battery Pack Batteries may not come fully charged and may need to charge for several hours. To charge ALD batteries computer needs to be powered on and connected to the USB hub. AA Rechargeable Nickel Metal Hydride WARNING! Only use NiMh rechargeable batteries. - Page 16 - PINs entered on the cart and not managed by StyleLink may vary in length from 4-7 digits. - Ergotron recommends the following for choosing PIN digit length (assumes less than 1 in 25 chance of guessing random User PIN): Max number of User PINs >50, 5+digit length recommended...
- Page 17 Auto-Lock Drawer Unlock Drawer (2 methods): NOTE: All Drawers in row must be closed before a new row can be unlocked. • Enter User PIN and press ENTER (only numbers for available drawer rows fl ash green), then press desired drawer row number*. •...
-
Page 18: Ergonomics
Set-up Keyboard Light 1. Turn Computer on. 2. Test Keyboard Light. Keyboard Light will automatically turn off after 15 minutes if not manually turned off . Ergonomics Moving Working stow - before you go customize - to your size 1 During normal movement, release brake and lower worksurface to 1 Set top of monitor screen about one inch below eye level - Release brake and lift or lower riser lowest position for optimal stability and unobstructed view. -
Page 19: Maintenance & Safety
It is recommended that any cleaning solution be tested on a small, inconspicuous area to ensure surface is not harmed. Adjustment, Service, Replacement - DO NOT attempt to adjust, service or replace any part of the StyleView Cart unless directed to do so through Ergotron-approved documentation (i.e. - Page 20 CAUTION: Release Lift Brake before moving work surface! Moving work surface while Lift Brake is engaged may cause serious damage to Lift Engine. WARNING: In the event that repair of the StyleView Cart is needed, contact Ergotron Customer Care immediately. Cart repair can only be performed by Ergotron, Inc. or by an Ergotron authorized agent.
Need help?
Do you have a question about the StyleView SV43 and is the answer not in the manual?
Questions and answers