Advertisement
Quick Links
Advertisement

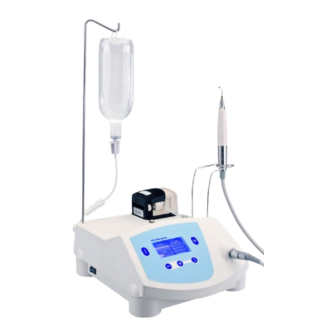
Summary of Contents for Woodpecker ULTRASURGERY
- Page 1 ULTRASURGERY MANUAL OF USE AND MAINTENANCE...
-
Page 2: Table Of Contents
Content 1. Introduction .......................1 ....................5 3. Testing of the device ..................6 4. Delivery ......................6 .............7 ......................9 7. Controls ......................1 3 ............1 9 ..................2 5 ................2 6 ............2 6 ........................2 7 ......................2 7 ....................2 8 ....................3 1 16. After service ....................3 2 ................3 2 ..................3 3 ...............3 3... -
Page 3: Introduction
1. Introduction 1.1 Foreword Important: To avoid causing personal injuries or damages to property, read all the points concerning “safety requirement” contained in this manual with particular attention. Danger(always referred to personal injury) Warning(referred to possible damage to property) - Page 4 1.3 Intended Use...
- Page 5 the tissues. Danger: Intended use. Danger: Contraindications. Danger: Contraindications. products.
- Page 6 Danger: Use only original Woodpecker accessories and spare parts. Danger: Check the condition of the device before treatment. Danger: Breakage and wear of the tips. Danger: Do not install this equipment anywhere there is a risk of explosions. Danger: Personnel injury.
- Page 7 Danger: Contraindication. Danger: Contraindication. to your enquiry. Website : http://www.glwoodpecker.com Fig.1...
-
Page 8: Testing Of The Device
Fig.2 Fig.3 3. Testing of the device 4. Delivery... - Page 9 5. List of material included in the supply Warning: Handpiece and cord can’t be detached. Device Torque wrench cord Connection for the cord Footswitch list list...
- Page 11 Fig.4 6. Installation Danger: The wiring system of the premises where the apparatus is installed and used must comply with the applicable standards and the relevant electrical safety requirements. Danger: Do not install the apparatus in places where there is a risk of explosion.
- Page 12 heat. Install it such a way that there is an adequate circulation of air around fan on the rear. (Fig.6) Warning: Do not expose the apparatus to direct sunlight or to sources of UV light. Warning: The apparatus is transportable, however it must be handled with care when it is moved.
- Page 13 Fig.5 Danger: personnel injury.
- Page 14 Fig.6 Fig.7 Fig.8...
-
Page 15: Controls
7. Controls Fig.9 Fig.10... - Page 16 Fig.11...
- Page 17 Danger: Contraindications. Danger: Breakage and wear of the tips. Danger: Control of infections. Warning: Contraindication. Warning: Contraindication. Warning: The electrical contacts inside the cord connector must be...
- Page 18 dry. Warning: To use the device correctly, it is necessary to press the footswitch and start it up without letting the tip rest on the part to be treated. This will allow the electronic circuit to detect the point where resonance of the tip is without any interference, thus enabling optimum performance.
- Page 19 7.5 Instruction for use Warning: Do not grip the end part of the handpiece or the cord, only the plastic casting (Fig.8) and do not turn it while fastening the tip in place;...
- Page 20 of the device. Insert Mode Endo...
- Page 21 Warning: Processing limit:...
- Page 22 Note: cloth Note:...
- Page 23 15883. the next section «Disinfection». Note: 8.4 Disinfection...
- Page 24 15883. Cleaning and disinfecting steps by using Washer-disinfector: Note: together.
- Page 25 8.5 Drying minutes. Note: Note:...
- Page 26 Note: use. Note:...
- Page 27 9. Regular maintenance together. Danger: Check regularly that the power cable is intact, if it is damaged, replace it with an Woodpecker spare.
- Page 28 10. Replacement of the fuses Fig.12 11. Disposal procedures and precautions Danger: Hospital waste...
- Page 29 12. Tips 13. Symbols diving...
- Page 30 Used indoor only directive Recovery Follow instructions for use 14. Troubleshooting Problem Possible cause solution The connector on the end of The device does not turn on when the switch it...
- Page 31 Problem Possible cause solution The connector of the Insert the footswitch connector The connector on the The footswitch will not centre. tightened onto the correctly. The device is switched correctly. deformed. The connector of the cord Dry the connectors. is wet. Cord not connected to the Connect the cord to the device.
- Page 32 Problem Possible cause solution liquid. full one. Close the cover. centre. correctly.
- Page 33 Problem Possible cause solution LCD screen mess or 15. Technical data 500ms...
-
Page 34: After Service
16. After service 17. Environmental protection... - Page 35 18. Manufacturer’s right 20. Declaration of conformity- EMC...
- Page 38 environment. 21. Guarantee...
- Page 40 22. Statement...


Need help?
Do you have a question about the ULTRASURGERY and is the answer not in the manual?
Questions and answers