Table of Contents
Advertisement
Advertisement
Table of Contents

Related Manuals for Woodpecker i-Scan


Summary of Contents for Woodpecker i-Scan
-
Page 2: Table Of Contents
Catalogue Preface------------------------------------------------------------------------- 3 1 Production introduction --------------------------------------------------- 3 2 Product installation and function description -------------------------- 4 3 Operation instructions-----------------------------------------------------11 4 Notes ------------------------------------------------------------------------19 5. Troubleshooting -----------------------------------------------------------20 6 Cleaning, disinfection and sterilization ---------------------------------20 7 Storage, maintenance and transportation -------------------------------21 8 Environment protection ---------------------------------------------------22 9 After-sales service ---------------------------------------------------------22 10 Electromagnetic compatibility -----------------------------------------22 11 European authorized representative -----------------------------------27... -
Page 3: Preface
Preface Thank you for purchasing the imaging plate scanner produced by Guilin Woodpecker Medical Instrument Co., Ltd. Woodpecker is a high-tech enterprise researching, developing, producing and selling dental products. It owns a sound quality control system. To ensure that you use the equipment correctly and safely, please read the full text of the instruction manual carefully before use. -
Page 4: Product Installation And Function Description
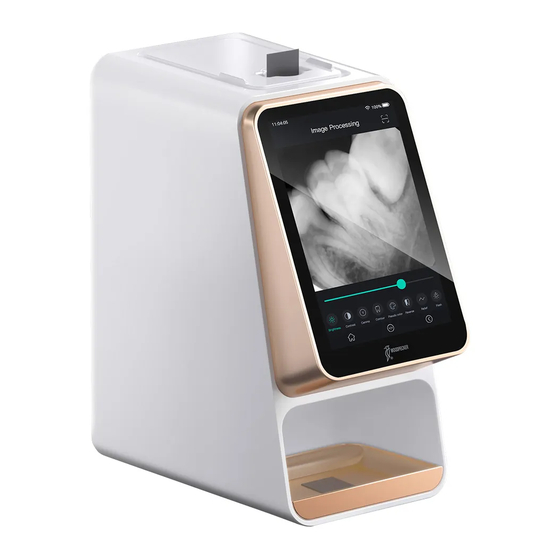
mixture with air, oxygen, or nitrous oxide: Equipment cannot be used in the presence of a flammable anesthetic mixture with air, oxygen, or nitrous oxide. 1.8 Primary technical parameters 1.8.1 Power adapter input: 100-240V 50/60Hz,1.5A 1.8.2 Power adapter output: DC 30V 3A 1.8.3 IP imaging plate model: 0;... - Page 5 IP imaging plate inlet Touch screen IP imaging Power switch plate tray USB interface Power supply socket Figure 1 Schematic diagram of imaging plate scanner (Left is the back of the device and right is the front of the device) 2.2 Accessories installation 2.2.1 Installation area Take out all the parts from the packing box.
- Page 6 plate scanner is in use. The computer system must also meet the following configuration requirements: Windows®: Recommended configuration Operating system Windows® 7 , Windows® 8 , Windows® 10 . Processor Intel® Core 2 Memory 2 GB or above Hard disk 320 GB or above USB port 4 high-speed USB 2.0 ports...
- Page 7 Figure 4 d) Read the license agreement. The user chooses whether to agree to this agreement, if the user agrees, click the "Next" button, do not agree, cancel the installation, as shown in Figure 5: Figure 5 e) Select components. The user selects the corresponding component as needed, and then click the “Next”...
- Page 8 Figure 7 g) Click the “Install” button to start the installation, as shown in Figure 8: Figure 8 h) After the “Install” button is clicked, the program starts to install. The user just waits for the completion of installation, as shown in Figure 9: Figure 9 i) After the software is installed, click the “Finish”...
- Page 9 Figure 10 2.3.4 WIFI connection a) Click "Settings" on the home screen...
- Page 10 Click"Open WIFI" d) Click the WIFI to connect e) Open the software, click the Acquisition button, and select the I-SCAN device type. After connecting the device, the IP address will be displayed below the device type. Click open, and the device will enter the acquisition...
-
Page 11: Operation Instructions
3 Operation instructions 3.1 Preparation before X-ray photographing 3.1.1 Start the image management software on the image workstation and create a new patient file or open an existing patient file. 3.1.2 Take out the IP imaging plate of the required size from the storage box. - Page 12 sprayed with disinfectant. ② Wear protective gloves when placing the disposable protective bag of IP imaging plate into the patient’s mouth. 3.2.1 Place the sealed protective bag with the IP imaging plate in the patient’s mouth, parallel to the longitudinal axis of the teeth. The back (black side) of the protective bag must face the X-ray generator.
- Page 13 3.4 Erase IP imaging plate After reading, the image data of IP imaging plate will be automatically erased before the plate falls into the tray of imaging plate scanner. However, if the IP imaging plate is used for the first time, or it has been stored for more than 24 hours, or it has been stored in a dark room, or the image data of imaging plate scanner is not erased, it is necessary to conduct erasing.
- Page 14 After entering the software interface, the WIFI name will be displayed in the software status bar. Click the “Acquisition” button, connect the i-Scan device to WIFI, and select the i-Scan device type. When the device is connected, the IP address will be displayed under the device type. Click “Open”, the device will enter the acquisition state, and start to acquire images.
- Page 15 Figure 15 Image preview Click the “Preview” button to view acquired images. Select an image, right- click and select “Export” to export the image to the local. Select “Information” to view the information of the image. Select “Delete” to delete the image. Double-click the image to enter the diagnosis interface.
- Page 16 Temporary State” button to save the image quality at this time. Select the temporary state in the drop-down box to reproduce the image. There are delete, export, and image information functions above the processed image. These functions are similar to the corresponding functions of the patient module.
- Page 17 Figure 18 3.5.5 Setting module Click the “Setting” button to enter the setting module. a) Basic setting Click the “Basic Setting” button to enter the basic setting page. Click the “Sign Out” button to return to the login interface. Click the language drop- down box to select the software language.
- Page 18 Figure 20 c) Image processing Click the “Image Processing” button to enter the image processing interface. Select the HD checkbox, select “HD”, and the acquired image will be initialized and HD processed automatically. Select “Ultra HD”, and the acquired image will be initialized and Ultra HD processed automatically. As is shown in Figure 21: Figure 21 d) IP setting...
-
Page 19: Notes
Woodpecker accessories and operated according to the operating instructions. -
Page 20: Troubleshooting
4.11 When the image quality is affected by excessive use or artificial damage of IP imaging plate, the device needs to be replaced in time. 5. Troubleshooting Fault Possible cause Solution 1. Reinstall the WIFI The software interface WIFI driver is not driver shows the connection installed. -
Page 21: Storage, Maintenance And Transportation
6.3 Cleaning, disinfection and sterilization of storage box of IP imaging plate a) The storage box of IP imaging plate can be cleaned with a non-abrasive cloth dipped in a detergent. The recommended detergents are cold water, warm water, soapy water, and medical ethanol. Make sure the parts are completely dried before use. -
Page 22: Environment Protection
8 Environment protection This device cannot be disposed of as household waste. Therefore, this equipment should be placed in a special recycling place for waste electronic medical and electrical equipment. For more detailed information about equipment disposal and recycling, please contact the dental equipment dealer. 9 After-sales service Since the date of sale, if the device fails to work normally due to quality problems, our company will be responsible for the maintenance with the... - Page 23 The imaging plate scanner is intended for use in the electromagnetic environment specified below. The customer or the user should assure that it is used in such an environment. Emission test Compliance Electromagnetic environment-guidance The imaging plate scanner uses RF energy only for its internal function.
- Page 24 ±1kV line to ±1kV line to Mains power quality should be Surge line line that of a typical commercial or GB/T 17626.5 ±2kV line to hospital environment. earth <5 % UT <5 % UT (>95% dip in (>95% dip in Mains power quality should be Voltage UT.) for 0.5...
- Page 25 d = 150kHz~80MHz d = 80MHz~800MHz d = 800MHz~2.5GHz Portable and mobile RF communication equipment should be used no closer to any part of the imaging plate scanner, including cables, than the recommended separation distance calculated from the equation applicable to the frequency of the transmitter.
- Page 26 a. Field strengths from fixed transmitters, such as base stations for radio (cellular/ cordless) telephones and land mobile radios, amateur radio, AM and FM radio broadcast and TV broadcast cannot be predicted theoretically with accuracy. To assess the electromagnetic environment due to fixed RF transmitters, an electromagnetic site survey should be considered.
-
Page 27: European Authorized Representative
Electromagnetic propagation is affected by the absorption and emission from buildings, objects and human bodies. Notes: a) Without the explicit consent of Woodpecker, unauthorized changes or modifications to the equipment may cause electromagnetic compatibility problems of this equipment or other equipment. -
Page 28: Statement
All rights of modifying the equipment design, product technology or accessories, instruction manual and packaging content at any time are reserved to Woodpecker without further notice. 14 FCC Statement This device complies with part 15 of the FCC Rules. Operation is subject... - Page 29 -- Connect the equipment into an outlet on a circuit different from that to which the receiver is connected. -- Consult the dealer or an experienced radio/TV technician for help.
- Page 30 ZMN-SM-318 V1.0- 20210118...
Need help?
Do you have a question about the i-Scan and is the answer not in the manual?
Questions and answers
Is there a way to add a note on the image shown on the computer? Such as, caries, Root canal, etc. All systems that I have used in the past have this, but I can't find it on your software.
Yes, notes can be added to images in the Woodpecker i-Scan software. The software allows users to perform measurements on images, and the corresponding annotations of the measurement lines are displayed in the annotation section.
This answer is automatically generated
Πως μπορεί να βγει το ακτινογραφικο πλακάκι που μπλοκαρε
Τοακτινογραφικο πλακάκι μποκαρε πως θα βγει;