Vivo STAND-TV09 Instruction Manual
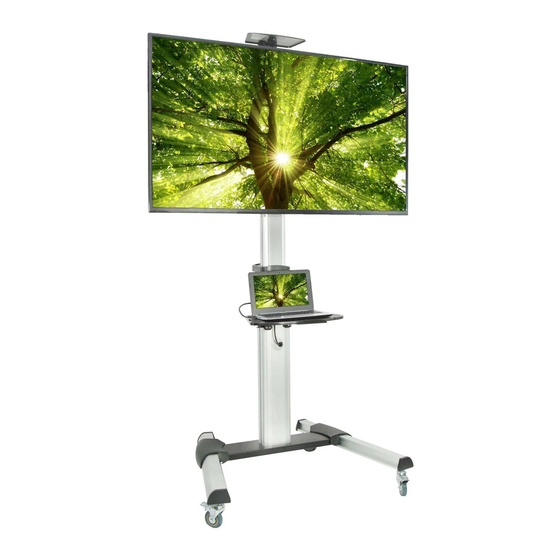
Silver mobile tv cart
Hide thumbs
Also See for STAND-TV09:
- Instruction manual (9 pages) ,
- Instruction manual (6 pages) ,
- Instruction manual (8 pages)
Table of Contents
Advertisement
Quick Links
Silver Mobile TV Cart
Instruction Manual
SKU: STAND-TV09
Scan the QR code with your mobile device or follow the link
for helpful videos and specifications related to this product.
https://vivo-us.com/products/stand-tv09
GET IN TOUCH | Monday-Friday from 7:00am-7:00pm CST
help@vivo-us.com
www.vivo-us.com
Chat live with an agent!
309-278-5303
Advertisement
Table of Contents

Related Manuals for Vivo STAND-TV09


Summary of Contents for Vivo STAND-TV09
- Page 1 Silver Mobile TV Cart Instruction Manual SKU: STAND-TV09 Scan the QR code with your mobile device or follow the link for helpful videos and specifications related to this product. https://vivo-us.com/products/stand-tv09 GET IN TOUCH | Monday-Friday from 7:00am-7:00pm CST help@vivo-us.com www.vivo-us.com...
-
Page 2: Package Contents
WARNING! If you do not understand these directions, or if you have any doubts about the safety of the installation, please call a qualified technician. Check carefully to make sure there are no missing or defective parts. Improper installation may cause damage or serious injury. -
Page 3: Tools Needed
TOOLS NEEDED 110 LBS 11 LBS (50kg) (5kg) Phillips Screwdriver ASSEMBLY STEPS STEP 1 Slide Base (D) over Legs (E) and fasten using M6x16mm Screws (S-C), M6x40mm Screws (S-F), and 5mm Allen Wrench (T-A). Snap Left and Right Covers (I, J) onto Base (D), making sure the arrows are facing towards the front. - Page 4 STEP 2 Press down the lever on Casters (M) to engage the lock. Screw Casters (M) onto Legs (E). Note: Lock casters before installation Use to Wrench (T-C) to adjust Caster height if needed. STEP 3 Lay Lower Column (C) on an elevated surface. Attach the base assembly to Lower Column (C) using Support Plate (K), M8x30mm Screws (S-E), and 6mm Allen Wrench (T-B).
- Page 5 STEP 4 Loosen screws on Shelf (F) using 5mm Allen Wrench (T-A) to create a gap 4mm or larger between the shelf and metal plates. Slide Shelf (F) onto Lower Column (C), aligning the metal plates within the slots. Adjust the Shelf to desired height and tighten screws uning 5mm Allen Wrench (T-A).
- Page 6 STEP 5 Attach Upper Column (B) to Lower Column (C) using M8x20mm Screws (S-D) and 6mm Allen Wrench (T-B). Slide Handle (L) onto Upper Column (B), ensure it fully covers the jointed section. Press Grommet Cover (N) into the cable access hole on Upper Column (B).
- Page 7 STEP 6 Loosen the screw on Mount (A) using 5mm Allen Wrench (T-A) to create a gap 4mm or larger between the mount and metal plates. Slide Mount (A) onto Upper Column (B) with the metal plates within the slots. Adjust to desired height and tighten screws uning 5mm Allen Wrench (T-A).
- Page 8 STEP 7 Attach VESA Brackets (G) to back of TV using appropriate screws (M-A thru M-D) and M8 Washers (M-E). If needed, Spacers (M-F, M-G) are provided. STEP 8 Hang TV with VESA Brackets (G) onto Mount (A). Adjust the TV so it is positioned in the center of the Mount and fasten using M6x12mm Screws (S-B) and a Phillips screwdriver.
-
Page 9: Landscape Orientation
Adjust as Desired LANDSCAPE ORIENTATION: Ensure the arrow on Mount (A) is facing up. Lock the position using M6x8mm Screws (S-A) and a Phillips screwdriver. PORTRAIT ORIENTATION: Rotate Mount (A) so the arrow is pointing sideways. Lock the position using M6x8mm Screws (S-A) and a Phillips screwdriver. - Page 10 Cable Managment Use provided cable management holes on assembled stand to route cords. Store Allen Wrenches (T-A, T-B) in Handle (L) for future adjustments.
- Page 11 [ THIS PAGE INTENTIONALLY LEFT BLANK ]...
- Page 12 : 1HR 8M (within office hrs) - 23% within < 15m - 38% within < 30m - 61% within < 1hr - 83% within < 2hr - 92% within < 3hr FOR MORE VIVO PRODUCTS, CHECK OUT OUR WEBSITE AT: www.vivo-us.com...
Need help?
Do you have a question about the STAND-TV09 and is the answer not in the manual?
Questions and answers