Sign In
Upload
Download
Table of Contents
Contents
Add to my manuals
Delete from my manuals
Share
URL of this page:
HTML Link:
Bookmark this page
Add
Manual will be automatically added to "My Manuals"
Print this page
×
Bookmark added
×
Added to my manuals
Manuals
Brands
Midea Manuals
Air Conditioner
V6 Series
Service manual
Midea V6 Series Service Manual
Commercial air conditioners
Hide thumbs
1
2
3
4
5
6
7
8
9
10
11
12
13
14
15
16
17
18
19
20
21
22
23
24
25
26
27
28
29
30
31
32
33
34
35
36
37
38
39
40
41
42
43
44
45
46
47
48
49
50
51
52
53
54
55
56
57
58
59
60
61
62
63
64
65
66
67
68
69
70
71
72
73
74
75
76
77
78
79
80
81
82
83
84
85
86
87
88
89
90
91
92
93
94
95
96
97
98
99
100
101
102
103
104
105
106
107
108
109
110
111
112
113
114
115
116
117
118
119
120
121
122
123
124
125
126
127
128
129
130
131
132
133
134
135
136
page
of
136
Go
/
136
Contents
Table of Contents
Bookmarks
Table of Contents
Part 1 General Information
Indoor and Outdoor Unit Capacities
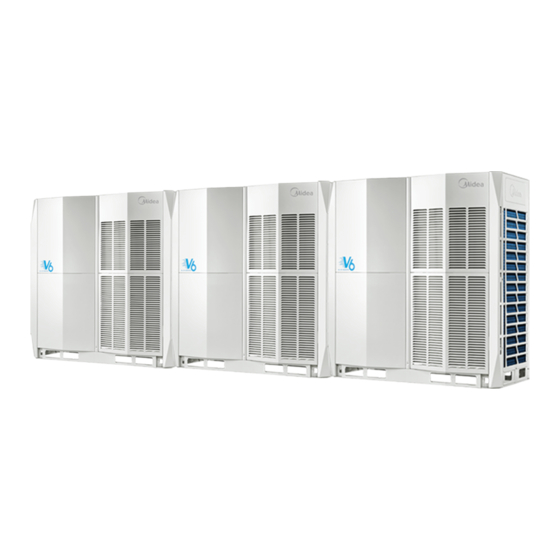
External Appearance
Outdoor Unit Combinations
Combination Ratio
Part 3 Control
Table of Contents
General Control Scheme Flowchart
Standby Control
Stop Operation
Startup Control
Normal Operation Control
Protection Control
Special Control
Advertisement
Quick Links
1
Indoor and Outdoor Unit Capacities
2
Outdoor Unit Combinations
3
Table of Contents
Download this manual
Service
Manual
MV6-252WV2GN1-E
MV6-280WV2GN1-E
MV6-335WV2GN1-E
MV6-400WV2GN1-E
MV6-450WV2GN1-E
MV6-500WV2GN1-E
Commercial Air Conditioners
MV6-560WV2GN1-E
MV6-615WV2GN1-E
MV6-670WV2GN1-E
MV6-730WV2GN1-E
MV6-785WV2GN1-E
MV6-850WV2GN1-E
MV6-900WV2GN1-E
R410A
Table of
Contents
Previous
Page
Next
Page
1
2
3
4
5
Advertisement
Chapters
Part 1 General Information
4
Part 3 Control
34
Table of Contents
Need help?
Do you have a question about the V6 Series and is the answer not in the manual?
Ask a question
Questions and answers
Related Manuals for Midea V6 Series
Air Conditioner Midea V6-i Series Service Manual
Commercial air conditioners (131 pages)
Air Conditioner Midea V6-i Series Manual
Commercial air conditioners (118 pages)
Air Conditioner Midea V6R Series Owner's Manual
Vrf (12 pages)
Air Conditioner Midea V6R Series Manual
Commercial air conditioners (131 pages)
Air Conditioner Midea V6R VRF Series Service Manual
R410a commercial air conditioners (167 pages)
Air Conditioner Midea Atom X Series Manual
Commercial air conditioners (152 pages)
Air Conditioner Midea Vertu series Service Manual
Media airconditioner dc inverter split wall-mounted type vertu series (54 pages)
Air Conditioner Midea V5 X VRF Series Technical & Service Manual
3 phase, 380-415v, 50hz (170 pages)
Air Conditioner Midea V4 Plus S Series Service Manual
Commercial (165 pages)
Air Conditioner Midea VRF V4 Plus I Series Manual
R410a dc inverter (115 pages)
Air Conditioner Midea V4+R Series Service Manual
(104 pages)
Air Conditioner Midea VRF Technical & Service Manual
60hz indoor unit (106 pages)
Air Conditioner Midea VRF Series Service Manual
(168 pages)
Air Conditioner Midea V8 Series Manual
(130 pages)
Air Conditioner Midea VC Pro Series Engineering Data
(192 pages)
Air Conditioner Midea V8 VRF Series Service Manual
Commercial air conditioners (109 pages)
This manual is also suitable for:
Mv6-252wv2gn1-e
Mv6-560wv2gn1-e
Mv6-615wv2gn1-e
Mv6-280wv2gn1-e
Mv6-670wv2gn1-e
Mv6-335wv2gn1-e
...
Show all
Mv6-730wv2gn1-e
Mv6-400wv2gn1-e
Mv6-785wv2gn1-e
Mv6-450wv2gn1-e
Mv6-850wv2gn1-e
Mv6-500wv2gn1-e
Mv6-900wv2gn1-e
Table of Contents
Save PDF
Print
Rename the bookmark
Delete bookmark?
Delete from my manuals?
Login
Sign In
OR
Sign in with Facebook
Sign in with Google
Upload manual
Upload from disk
Upload from URL


Need help?
Do you have a question about the V6 Series and is the answer not in the manual?
Questions and answers