
Subscribe to Our Youtube Channel
Related Manuals for AML Oceanographic AML-3


Summary of Contents for AML Oceanographic AML-3
- Page 1 AML-3 and AML-6 LGR: User Manual Multiparameter Logger Instrument For more information visit AMLoceanographic.com or call +1 250-656-0771...
- Page 2 Revision History Revision Date Description Aug 31, 2022 Document Created 1.09 Mar 31, 2023 Addition of monitoring display/format settings AML Oceanographic Ltd. 2 / 43...
-
Page 3: Table Of Contents
3.6 Firmware Updates 3.7 Command Prompt 3.8 GPS Offline Assist 4 Contact AML Service Sales 5 Appendix A - Full command list 5.1 Sampling commands 5.2 Monitor Configurations and commands 5.3 Log File Format/Monitor Output AML Oceanographic Ltd. 3 / 43... - Page 4 8.3 Seals and Plugs 9 Appendix E - Long Term Storage Recommendations 10 Appendix F - USB FAQ 11 Appendix G - Regulatory Information 12 Appendix H - Warranty Statement AML Warranty Policy: New Product (Instrumentation) AML Oceanographic Ltd. 4 / 43...
-
Page 5: Introduction
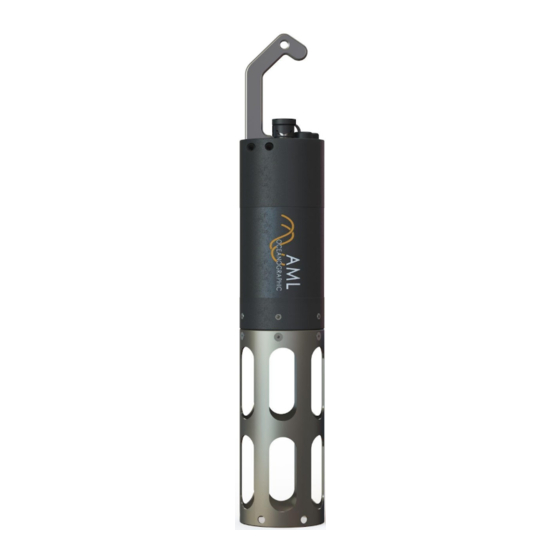
The AML LGR series is a highly configurable family of multiparameter sondes designed for a wide range of data collection applications. This series includes both the AML-3 LGR and the AML-6 LGR, where the ‘3’ and ‘6’ designations refer to the number of sensors that may be simultaneously installed on the instrument’s endcap. - Page 6 Figure 1 depicts a typical AML-3 LGR. NOTE: Different cage lengths are available, depending on the sensor payload. Shown above is the shortest cage option. Figure 1: A typical AML-3 LGR. The instrument shown here representative only and may differ from the Reader’s instrument.
- Page 7 Reader’s instrument. By default, both the AML-3 and AML-6 LGR instruments come equipped with a shackle, a USB-C connector, a power switch, and a status indicator LED. The shackle has a hole coincident with the axis of the instrument to facilitate suspension during deployment.
- Page 8 AML-6 utilizes a bolted-on sensor cage. In some configurations the cage may be different lengths depending on the sensors installed (AML-3 only) or made from a copper alloy to prevent biofouling (AML-6 only). The default cage for both instruments uses stainless steel.
-
Page 9: Communicating With The Instrument
PC to host two WiFi connections - the on-board WiFi adapter remains connected with the local network, and the USB adapter connects directly to the instrument. AML’s software, Sailfish, allows the user to selectively use available WiFi adapters to connect to the instrument. AML Oceanographic Ltd. 9 / 43... -
Page 10: Charging The Instrument
‘off’ - typically on the order of 8hrs. When deploying an AML-3 or AML-6 LGR Instrument where the indicator cannot be viewed directly, it is recommended the internal battery thresholds be modified to protect the battery from completely discharging, causing damage to the instrument. -
Page 11: Auxiliary Sensors
AML-3 LGR instruments can accommodate one auxiliary sensor and AML-6 LGR instruments can accommodate two auxiliary sensors for a maximum sensor load of 4 and 8 sensors, respectively. -
Page 12: Indicator Led Flash Patterns
2 - The instrument may be deployed in any of these states. Data will be logged. 3 - 6000m variants of AML-6 and AML-3 LGR instruments do not have on-board GPS. Double-flash will not occur. -
Page 13: Getting Started
Refer to section Configuring an Instrument later in this document for more details. To use Sailfish to configure the AML-3 and AML-6 LGR instrument, follow the procedure described below: AML Oceanographic Ltd. - Page 14 The instrument is equipped with fast-charge capabilities so it may become warm during this time. b. 6000m AML-3 LGR instruments do not have WiFi; connection must be done via USB-C. 6. A tile corresponding to available instrument connections will appear in the Devices tab of Sailfish.
-
Page 15: Conducting A Profile
2. The instrument’s indicator LED will flash if it is attempting to acquire a GPS signal. If GPS is locked, the instrument’s LED will turn solid. Refer the LED Flash Patterns in Section 1.5 for more details. AML Oceanographic Ltd. 15 / 43... - Page 16 Sailfish prior to deployment (by pressing Disconnect ), then the instrument will need to be manually re-connected to Sailfish by the user. b. If re-connecting via USB-C, dry the instrument prior to removing the USB-C waterproof cover. AML Oceanographic Ltd. 16 / 43...
-
Page 17: Connecting A Gps Listener
3. Configure the settings according to your external GPS listener device. Both serial and UDP connections are supported. Sailfish will remember your GPS listener settings and automatically connect next time you add the listener. AML Oceanographic Ltd. 17 / 43... - Page 18 7. If connection to the GPS listener is lost, you can still sync to the last known location until you disable the GPS listener or close Sailfish. 8. To automatically sync your instrument to the GPS listener every time you reconnect to Sailfish, enable the ‘Auto Update Instrument Location” setting. AML Oceanographic Ltd. 18 / 43...
-
Page 19: Configuration Using Sailfish
Options are /second (per second), /minute (per minute), /hour (per hour), seconds, minutes and hours. Sample Rate Available when time is selected as the sample trigger. Works with Sample Unit setting to determine sample rate. AML Oceanographic Ltd. 19 / 43... -
Page 20: Log Parameters
In-Water WiFi Sleep Timeout The amount of time before the WiFi chip will be disabled (secs) once the instrument detects that it is underwater. Power Timeout Specify if the instrument should turn itself off if left idle. AML Oceanographic Ltd. 20 / 43... -
Page 21: Manage Files
(requires internet connection) and transfer the Offline Assist data to the instrument upon connecting. The instrument will utilize the transferred satellite data during its next boot sequence to reduce GPS lock time. AML Oceanographic Ltd. 21 / 43... - Page 22 Enables Sailfish to download Offline Assist data from the internet and send it to the connected instrument. This can dramatically improve GPS lock times. Offline Assist Last Download Specifies the last day that Offline Assist data was Date downloaded. AML Oceanographic Ltd. 22 / 43...
-
Page 23: Contact Aml
4 Contact AML Service To request an RMA or technical support Email: service@AMLoceanographic.com Phone: 1-250-656-0771 Phone: 1-800-663-8721 (NA) http://www.AMLoceanographic.com Sales For all general sales inquiries Email: sales@AMLoceanographic.com Phone: 1-250-656-0771 Phone : 1-800-663-8721 (NA) http://www.AMLoceanographic.com AML Oceanographic Ltd. 23 / 43... -
Page 24: Appendix A - Full Command List
Display the current burst mode settings. set trigger [time | sound | pressure] Set the sampling trigger to sample by time, sound velocity increment or pressure increment. Sampling by sound or pressure increment is not supported in burst mode. AML Oceanographic Ltd. 24 / 43... -
Page 25: Monitor Configurations And Commands
Min value: 5 This command applies only to monitoring via serial connection set monitor startup [y | n] Enable/disable monitoring on startup. When enabled the instrument will start monitoring when powered on. AML Oceanographic Ltd. 25 / 43... - Page 26 Ex. Set Monitor Sync 600 When the instrument is monitoring, it will remain idle until the next 10 min mark. At this point the monitoring and data flow will begin. display monitor Print the current monitor settings. AML Oceanographic Ltd. 26 / 43...
-
Page 27: Log File Format/Monitor Output
(Charger Board Status) nosn (Serial Number) nodep (Calculated Depth) nosal (Calculated Salinity) noden (Calculated Density) nosound (Calculated Sound Velocity) noraw (Raw Values) set derive <parameter> [y | n] Enable/disable a parameter to be calculated if AML Oceanographic Ltd. 27 / 43... -
Page 28: Uv Antifouling
“.aml” while the amlx format has extension “.amlx”. If ALL is selected, two files will be created, one in each format. See Appendix B for more details on these two formats. AML Oceanographic Ltd. 28 / 43... -
Page 29: Help
Print information about all connected sensors. rawtalk <port> Start a rawtalk session with a connected sensor. Send <1s pause>+++<1s pause> to exit the rawtalk session. 5.9 System commands Command Description set fulltime <yyyy-mm-dd> Set the system date and time. AML Oceanographic Ltd. 29 / 43... -
Page 30: Gps Commands
<longitude> Set the instrument’s longitude location. This command always changes the instrument’s manual longitude setting, even if not in manual mode. The instrument only uses this AML Oceanographic Ltd. 30 / 43... -
Page 31: Power Commands
It is not recommended to set this lower than 6.2 V. Note: This is a secure command. set batvnoboot <voltage> On power up if the battery voltage is less than the batvnoboot value, the instrument will not boot up. AML Oceanographic Ltd. 31 / 43... - Page 32 Note: This is a secure command. set batinoboot <voltage> On power up if the battery current in mA is larger than the batinoboot value, the instrument will not boot up. Note: This is a secure command. AML Oceanographic Ltd. 32 / 43...
-
Page 33: Appendix B - Output Formats
5.2 Monitor commands 6.1 Column-Based Format The factory default of both the AML-3 and AML-6 instruments is column-based formatting, typically using a comma delimiter (the delimiter is configurable). This format is preferred for applications where human readability of the raw data is required as it is easy to quickly parse and interpret the scrolling columns of measurements. - Page 34 Dissolved Oxygen Dissolved Oxygen CDOM/FDOM Chloro-blue Chlorophyll, blue excitation Chloro-red Chlorophyll, red excitation Fluorescein Fluorescein dye Oil-crude Crude oil Oil-fine Fine oil Brighteners Optical brighteners Phycocyanin Phycocyanin (freshwater cyanobacteria) Phycoerythrin Phycoerythrin (marine cyanobacteria) PTSA PTSA AML Oceanographic Ltd. 34 / 43...
- Page 35 Rhodamine Rhodamine Tryptophan Tryptophan AML Oceanographic Ltd. 35 / 43...
-
Page 36: Appendix C - Calculated Parameters
7 Appendix C - Calculated Parameters The AML-3 and AML-6 instruments have the ability to calculate certain parameters depending on your sensor configuration. Below is a table outlining the parameters that can be calculated. Parameter Required Sensors Equation Range Salinity... -
Page 37: Appendix D - Equipping An Instrument
All AML-3 instruments come with a sensor cage (small, medium or long) that is threaded onto the pressure housing. There are no screws installed which hold the sensor cage in place, therefore it can simply be removed by rotating it off the pressure housing. -
Page 38: X2Change™ Sensors
X2Change™ sensors are installed on the AML-3 or AML-6 sensor end cap. There are 3 sensor ports available on the AML-3 and 6 sensor ports available on the AML-6 (and 1 port for an optional UV Antifouling system). Sensors are installed or removed by hand with no special tools required. -
Page 39: Removing Sensors
6. Screw down the orange locking sleeve until it stops. The bottom of the sleeve should be within 1 mm of the instrument end cap. Notes: ● X2Change™ sensors are identified by their orange locking sleeve matching AML-3 and AML-6's orange sensor ports. AML Oceanographic Ltd. -
Page 40: Seals And Plugs
● Older AML Xchange™ sensors with blue locking sleeves are not compatible with the AML-3 and AML-6 line of instruments. ● CT X2Change™ should be installed in port 1 on both the AML-3 and AML-6 due to the mechanical fit between the sensor and the cage. All other X2Change™ sensors can be installed in any of the remaining sensor ports. -
Page 41: Appendix E - Long Term Storage Recommendations
9 Appendix E - Long Term Storage Recommendations AML recommends fully charging the internal battery of the instrument before storage, as well as re-charging the instrument fully every 6 months. Failure to maintain battery charge can damage the instrument. AML Oceanographic Ltd. 41 / 43... -
Page 42: Appendix F - Usb Faq
USB cable. In cases where you instrument? have to use a different one, you may do so but AML cannot guarantee that it meets the required specification in order to work seamlessly with our instrument. AML Oceanographic Ltd. 42 / 43... -
Page 43: Appendix G - Regulatory Information
The warranty applies only to the original purchaser of the instruments and only to instruments and sensors manufactured by AML Oceanographic. The warranty of third party sensors will apply as per the specific vendor’s warranty policy. The warranty does not apply if the instrument has been damaged, by accident or misuse, and is void if repairs or modifications are made by other than authorized personnel.
Need help?
Do you have a question about the AML-3 and is the answer not in the manual?
Questions and answers