Table of Contents
Advertisement
Advertisement
Table of Contents

Related Manuals for Life Fitness Aspire ASPT-SL


Summary of Contents for Life Fitness Aspire ASPT-SL
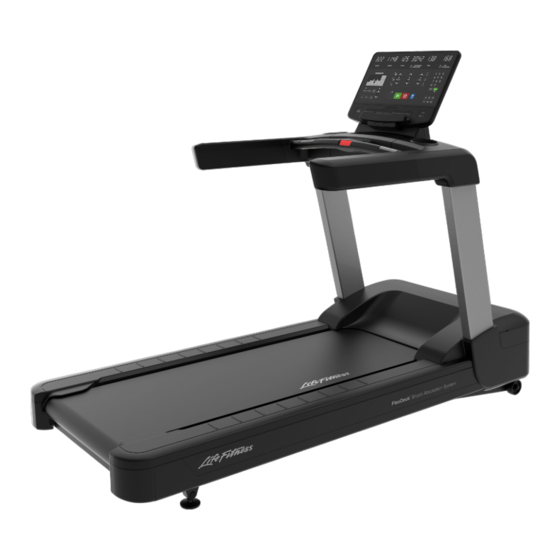
- Page 1 Aspire Treadmill ASPT-SL, PF-ASPT-SL Service Manual REV March 23, 2023...
- Page 3 Latin America and Caribbean* Germany, Austria, and Switzerland Hong Kong Life Fitness, LLC Life Fitness Europe GMBH Life Fitness Asia Pacific LTD 10601 W Belmont Ave Neuhofweg 9 26/F, Global Trade Square Franklin Park, IL 60131 U.S.A. 85716 Unterschleißheim...
-
Page 4: Table Of Contents
Copyright 2023, Life Fitness, LLC. All Rights Reserved. Life Fitness, Hammer Strength, Cybex, ICG and SCIFIT are registered trademarks of Life Fitness, LLC and its affiliated companies and subsidiaries. Disclaimer: Images and specifications are current as of the date of publication and are subject to change. -
Page 5: Safety Instructions
• Life Fitness Family of Brands does not warrant nor guarantee that component parts used in the manufacture of products offered under the Life Fitness Family of Brands are latex-free. Users of these products must take all necessary precautions to prevent accidental contact that could lead to an adverse latex reaction. -
Page 6: Immobilization Method - Sl
• Allow LCD consoles to “normalize” with respect to temperature for one hour before plugging the unit in and using. • When the product is not in use, Life Fitness recommends unplugging the product. Disconnect from the electrical outlet when not in use, and before putting on or taking off parts. To disconnect, turn power OFF at the ON/OFF switch, then remove plug from electrical outlet. - Page 7 2. Scroll to Immobilization and press ENTER. 3. Display IMMOBILIZE:XXX where XXX is ON or OFF. Scroll through ON and OFF using the SPEED UP/DOWN arrow keys. 4. Select ON or OFF and press ENTER. 5. Press STOP to exit. Page 5 of 98...
-
Page 8: Introduction
Life Fitness, Hammer Strength, and ICG. • http://www.lifefitness.com/parts service parts ordering for Life Fitness, Cybex, SCIFIT, Hammer Strength, and ICG products along with warranty parts ordering and technician requests. • https://lfworld.lifefitness.com easy to find Knowledge Base articles with answers to frequently asked questions and product support documentation for Life Fitness, Cybex, SCIFIT, Hammer Strength, and ICG. -
Page 9: Maintenance
3. Maintenance Preventive Maintenance Schedule Item Weekly Monthly Biannually Console Overlays Clean Inspect Bottle Holders / Accessory Trays Clean Inspect Console Mounting Bolts Inspect Hardware Inspect Frame Clean Inspect Plastic Covers Clean Inspect Lifepulse Sensors Clean / Inspect Striding Belt Centered Inspect Emergency Stop Magnet Clean / Inspect... - Page 10 PureGreen 24 is available in a spray which is convenient for gym staff to use. Apply the spray to a microfiber cloth and wipe down the equipment. Use PureGreen 24 on the equipment for at least 2 minutes for general disinfection purposes and at least 10 minutes for fungus and viral control.
-
Page 11: How To's
4. How To's Knowledge Base Knowledge Base for more detailed information. Cycle Power Cycling the power will reset the treadmill and reboot the console. Cycle the power by turning the power switch off, then on. The power switch is located at the front left of the treadmill. Item Description Power switch... -
Page 12: Belt Adjust And Deck Replacement
NOTE: Do not exceed one full turn of the adjusting screws in either direction. If after one full turn the belt does not track properly, contact Life Fitness Customer Support. Do not overtighten the tensioning bolts while making belt adjustments. Overtightening of bolts may over stretch and damage the striding belt or roller. - Page 13 Tensioning an Existing Striding Belt 1. Press GO and operate the treadmill for five minutes at 5.0 MPH (8.0 KPH). NOTE: Do not run or walk on belt! 2. Reduce the speed to 2.0 MPH (3.2 KPH). Walk on the treadmill. Tightly grip the handrails and apply force with feet on the striding belt near the motor cover against the moving belt direction.
- Page 14 Deck Replacement Tools Required: • Phillips screwdriver • 8 mm Allen wrench • 4 mm Allen wrench • Torque wrench Time: 45 minutes Disconnect Power Source Unplug power cord from power outlet. WARNING: Shock and electrocution hazard. • Unplug unit and let sit 10 minutes before cleaning or performing maintenance. •...
- Page 15 Remove Anti-Slip Rails 1. Remove screw securing anti-slip rail using a Phillips screwdriver. Item Description Qty. Screw 2. Remove anti-slip rail from base frame assembly by sliding backwards. Item Description Qty. Anti-Slip Rail 3. Repeat steps for other anti-slip rail. Remove Deck 1.
- Page 16 2. Remove four deck mounting bolts using a 4 mm Allen wrench. Item Description Striding belt Bolt Deck Frame 3. Remove deck out of striding belt. Install Deck 1. Slide deck into striding belt. 2. Install four deck mounting bolts using a 4 mm Allen wrench. Torque to 2.5 ft. lbs (3.4 Nm). Item Description Striding belt...
- Page 17 Install Anti-Slip Rails 1. Place anti-slip rail on base frame assembly and push forward to lock into place. Item Description Qty. Anti-Slip Rail 2. Install screw securing anti-slip rail into place using a Phillips screwdriver. Torque to 3 ft-lb (4 Nm). Item Description Qty.
- Page 18 NOTE: Do not exceed one full turn of the adjusting screws in either direction. If after one full turn the belt does not track properly, contact Life Fitness Customer Support. Do not overtighten the tensioning bolts while making belt adjustments. Overtightening of bolts may over stretch and damage the striding belt or roller.
- Page 19 Tensioning an Existing Striding Belt 1. Press GO and operate the treadmill for five minutes at 5.0 MPH (8.0 KPH). NOTE: Do not run or walk on belt! 2. Reduce the speed to 2.0 MPH (3.2 KPH). Walk on the treadmill. Tightly grip the handrails and apply force with feet on the striding belt near the motor cover against the moving belt direction.
-
Page 20: Replacement
Drive Motor Replacement Tools Required: • Phillips screwdriver • Torque wrench • 3 mm Allen wrench • Side cutter • 8 mm Allen wrench • Straight edge • 13 mm socket wrench • Gear puller • 15 mm socket wrench •... -
Page 21: Drive Motor
2. Remove motor cover by lifting vertically. It is held in place with Tinnerman clips on the motor side shrouds and front cover. Item Description Qty. Motor Cover Remove Drive Motor 1. Disconnect motor cable from IMDB. 2. Remove cable tie at rear of motor pan using side cutters. NOTE: Make note of cable tie location over the heat shrink tubing to replicate location after replacement. - Page 22 6. Remove four nylon nuts, four flat washers, and four hat washers securing drive motor using a 13 mm socket with extension. Item Description Drive motor Nylon nut Flat washer Hat washer 7. Lift drive motor out of frame. 8. Remove two set screws securing drive pulley to drive motor using a 3 mm Allen wrench. Item Description Drive motor...
- Page 23 Install Drive Motor 1. Install flywheel on drive motor. Item Description Drive motor Flywheel Bolt 2. Install bolt securing flywheel to drive motor using a 15 mm socket wrench. Torque to 19.91 ft. lbs. (27 Nm). 3. Install drive pulley and key onto drive motor. Item Description Drive motor...
- Page 24 6. Loosely install nylon nut, flat washer, and hat washer at stud nearest the drive belt. Finger tighten locknut only. NOTE: Center mounting stud in hole closest to striding belt. Item Description Stud nearest drive belt Center mounting stud in this hole 7.
- Page 25 12. Loop drive belt over drive pulley. 13. Ensure front roller is seated in the slots in the main frame. 14. Loosen tighten the two tensioning bolts at rear of the treadmill using an 8 mm Allen wrench. 15. Connect motor cable to IMDB. 16.
- Page 26 NOTE: Do not exceed one full turn of the adjusting screws in either direction. If after one full turn the belt does not track properly, contact Life Fitness Customer Support. Do not overtighten the tensioning bolts while making belt adjustments. Overtightening of bolts may over stretch and damage the striding belt or roller.
- Page 27 Tensioning an Existing Striding Belt 1. Press GO and operate the treadmill for five minutes at 5.0 MPH (8.0 KPH). NOTE: Do not run or walk on belt! 2. Reduce the speed to 2.0 MPH (3.2 KPH). Walk on the treadmill. Tightly grip the handrails and apply force with feet on the striding belt near the motor cover against the moving belt direction.
-
Page 28: Replacement
E-Stop Switch Replacement Tools Required: Phillips screwdriver Time: 30 minutes Disconnect Power Source Unplug power cord from power outlet. WARNING: Shock and electrocution hazard. • Unplug unit and let sit 10 minutes before cleaning or performing maintenance. • Electrical charge can remain in unit after unplugging. •... -
Page 29: E-Stop Switch
Remove Back Bottom Bridge Shroud 1. Unplug E-stop key from bridge. Item Description E-stop key Back bottom bridge shroud Screw 2. Remove eight screws securing back bottom bridge shroud to top bridge shroud using a Phillips screwdriver. 3. Remove back bottom bridge shroud from top bridge shroud. Remove E-Stop Switch 1. - Page 30 Install E-Stop Switch 1. Install two screws securing E-Stop switch to top bridge shroud using a Phillips screwdriver. Item Description Top bridge shroud E-Stop switch Screw 2. Install screw securing E-Stop tether to back bottom bridge shroud using a Phillips screwdriver. Item Description Screw...
- Page 31 Install Front Bottom Bridge Shroud Install five screws securing front bottom bridge shroud to top bridge shroud using a Phillips screwdriver. Item Description Screw Front bottom bridge shroud Install Heart Rate Grips 1. Install the black heart rate wires to the lower heart rate grips. Item Description Upper heart rate grip...
-
Page 32: Foam Arm Replacement
Foam Arm Replacement Tools Required: Phillips screwdriver Time: 45 minutes Disconnect Power Source Unplug power cord from power outlet. WARNING: Shock and electrocution hazard. • Unplug unit and let sit 10 minutes before cleaning or performing maintenance. • Electrical charge can remain in unit after unplugging. •... - Page 33 Remove Foam Arm Replacement Remove foam arm by sliding to the rear of console weldment. Item Description Foam arm Console weldment Top bridge shroud Install Foam Arm Replacement Install foam arm by sliding forward onto console weldment until flush / snug with the edge of top bridge shroud. Item Description Foam arm...
- Page 34 Install Heart Rate Grips 1. Install the black heart rate wires to the lower heart rate grips. Item Description Upper heart rate grip Lower heart rate grip Screw 2. Install the white heart rate wires to the upper heart rate grips. 3.
-
Page 35: Front Roller And Pulley
Front Roller and Pulley Replacement Tools Required: • Phillips screwdriver • 8 mm Allen wrench • 10 mm socket wrench • Torque wrench Time: 45 minutes Disconnect Power Source Unplug power cord from power outlet. WARNING: Shock and electrocution hazard. •... - Page 36 Remove Anti-Slip Rails 1. Remove screw securing anti-slip rail using a Phillips screwdriver. Item Description Qty. Screw 2. Remove anti-slip rail from base frame assembly by sliding backwards. Item Description Qty. Anti-Slip Rail 3. Repeat steps for other anti-slip rail. Remove Front Roller 1.
- Page 37 2. Push front roller forward, then lift out of frame slots and slide out towards the user’s right side. Item Description Front roller Frame slots Remove Front Roller Pulley 1. Remove four bolts securing front roller pulley to front roller using an 10 mm socket wrench. Item Description Front roller...
- Page 38 2. Tighten four bolts in the following sequence using an 10 mm socket wrench. Torque to 8.9 ft. lbs. (12 Nm). Install Front Roller 1. Slide front roller into striding belt and set into frame slots. Item Description Front roller Frame slots 2.
- Page 39 Install Anti-Slip Rails 1. Place anti-slip rail on base frame assembly and push forward to lock into place. Item Description Qty. Anti-Slip Rail 2. Install screw securing anti-slip rail into place using a Phillips screwdriver. Torque to 3 ft-lb (4 Nm). Item Description Qty.
- Page 40 NOTE: Do not exceed one full turn of the adjusting screws in either direction. If after one full turn the belt does not track properly, contact Life Fitness Customer Support. Do not overtighten the tensioning bolts while making belt adjustments. Overtightening of bolts may over stretch and damage the striding belt or roller.
- Page 41 Tensioning an Existing Striding Belt 1. Press GO and operate the treadmill for five minutes at 5.0 MPH (8.0 KPH). NOTE: Do not run or walk on belt! 2. Reduce the speed to 2.0 MPH (3.2 KPH). Walk on the treadmill. Tightly grip the handrails and apply force with feet on the striding belt near the motor cover against the moving belt direction.
-
Page 42: Heart Rate Grip
Heart Rate Grip Replacement Tools Required: Phillips screwdriver Time: 15 minutes Disconnect Power Source Unplug power cord from power outlet. WARNING: Shock and electrocution hazard. • Unplug unit and let sit 10 minutes before cleaning or performing maintenance. • Electrical charge can remain in unit after unplugging. •... - Page 43 Complete installation 1. Plug power cord into power outlet. 2. Operate unit at all levels to verify proper operation. Page 41 of 98...
-
Page 44: Imdb - Integrated Motor Drive Board
IMDB - Integrated Motor Drive Board Replacement Tools Required: • Phillips screwdriver • Long Phillips screwdriver • Torque wrench • ESD (Electrostatic Discharge) grounding strap Time: 30 minutes NOTICE: Component damage. Wear an ESD grounding strap during this procedure. Connect ESD grounding strap to frame bolts or unpainted metal of frame. - Page 45 2. Remove motor cover by lifting vertically. It is held in place with Tinnerman clips on the motor side shrouds and front cover. Item Description Qty. Motor Cover Remove IMDB 1. Disconnect all cables from IMDB. Note the location of each cable. 2.
- Page 46 2. Install screw over the ferrite bracket and into the farthest hole at right side of treadmill. Tighten to 1.8 ft. lbs. (2.5 Nm). Item Description Ferrite bracket assembly IMDB board Screw Washer 3. Install screw at rear wall of motor pan using a Philips screwdriver. Tighten to 1.8 ft. lbs. (2.5 Nm). 4.
- Page 47 2. Install screw securing motor cover to front shroud using a Phillips screwdriver. Item Description Qty. Screw, M6 x 16, Phillips Pan Head Tighten hardware to 3 ft-lb (4 Nm). Complete installation 1. Plug power cord into power outlet. 2. Operate unit at all levels to verify proper operation. Page 45 of 98...
-
Page 48: Incline Home Switch
Incline Home Switch Replacement Tools Required: • Phillips screwdriver • Torque wrench Time: 20 minutes Disconnect Power Source Unplug power cord from power outlet. WARNING: Shock and electrocution hazard. • Unplug unit and let sit 10 minutes before cleaning or performing maintenance. •... - Page 49 Remove Incline Home Switch 1. Remove the two cables from incline home switch, noting the colors of wire insulation and their positions on incline home switch. Item Description Screw Incline home switch cables 2. Remove screws from the adapter plate using a Phillips screwdriver. 3.
- Page 50 3. Install screws securing adapter plate to frame using a Phillips screwdriver. Tighten to 1.8 ft. lbs. (2.5 Nm). Item Description Screw Incline home switch cables 4. Install the two cables to incline home switch, noting the colors of wire insulation and their positions on incline home switch.
- Page 51 Complete installation 1. Plug power cord into power outlet. 2. Operate unit at all levels to verify proper operation. Page 49 of 98...
-
Page 52: Replacement
Incline Motor Replacement Tools Required: • Phillips screwdriver • Side cutter • Needle nose pliers • Block, 4" (10 cm), (2) • Cable tie Time: 30 minutes Disconnect Power Source Unplug power cord from power outlet. WARNING: Shock and electrocution hazard. •... -
Page 53: Incline Motor
2. Remove motor cover by lifting vertically. It is held in place with Tinnerman clips on the motor side shrouds and front cover. Item Description Qty. Motor Cover Remove Incline Motor 1. Remove cable tie securing ferrite to vertical bracket. 2. - Page 54 5. Remove cotter pin from the lower clevis pin using needle nose pliers. Item Description Lift frame Lower clevis pin Cotter pin Incline motor tube nut 6. Remove lower clevis pin from the lift frame while holding the incline motor tube nut from above to relieve pressure from the lower clevis pin.
- Page 55 4. Rotate incline motor case towards the front of treadmill and under the support tube. Item Description Support tube Upper clevis pin Cotter pin Incline motor 5. Install upper clevis pin through support tube and incline motor. 6. Install cotter pin into upper clevis pin. 7.
- Page 56 2. Install screw securing motor cover to front shroud using a Phillips screwdriver. Item Description Qty. Screw, M6 x 16, Phillips Pan Head Tighten hardware to 3 ft-lb (4 Nm). Complete installation 1. Plug power cord into power outlet. 2. Operate unit at all levels to verify proper operation. Page 54 of 98...
-
Page 57: Leveler Foot
• 5/8" (16 mm) drill bit or larger, for M8 size AVK nuts • Rubber mallet • 5/8" (16 mm) drill bit or larger, for M10 size AVK nuts • Drill Life Fitness AVK Replacement Procedure article for parts numbers and additional information. Parts required (for AVK replacement): Item... - Page 58 2. Remove four screws securing leveler foot to frame using a 10 mm socket wrench. Item Description Leveler foot Screw Frame 3. Remove leveler foot. NOTE: If AVK nuts need to be replaced in frame follow the following procedures. If not skip to Install Leveler Foot.
- Page 59 Install AVK Nut 1. Thread the nut about halfway onto the bolt. Item Description Bolt Washer AVK nut 2. Install the washer and AVK nut to bolt. Tighten until the washer is snug between the nut and AVK nut. Video link 3.
- Page 60 Install Leveler Foot 1. Install four screws securing leveler foot to frame using a 10 mm socket wrench. Tighten to 9.2 ft. lbs. (12.5 Nm). Item Description Leveler foot Screw Frame 2. Remove the 4" (10 cm) block. Complete installation 1.
-
Page 61: Motor Cover
Motor Cover Replacement Tools Required: Phillips screwdriver Time: 15 minutes Disconnect Power Source Unplug power cord from power outlet. WARNING: Shock and electrocution hazard. • Unplug unit and let sit 10 minutes before cleaning or performing maintenance. • Electrical charge can remain in unit after unplugging. •... - Page 62 Install Motor Cover 1. Snap Tinnerman clips on motor cover into place on base frame assembly, motor side shrouds, and front cover. Item Description Qty. Motor Cover 2. Install screw securing motor cover to front shroud using a Phillips screwdriver. Item Description Qty.
-
Page 63: Replacement
Power Supply Replacement Power supplies are only used with an attachable TV kit. The SL console base does not come standard with a power supply. Tools Required: • Phillips screwdriver • Side cutter • Cable tie, (2) Time: 30 minutes Disconnect Power Source Unplug power cord from power outlet. -
Page 64: Power Supply
Remove Power Supply 1. Cut two cable ties securing power supply to power supply bracket. Item Description Power supply Cable tie Power supply bracket 2. Remove power supply from power supply bracket. Install Power Supply 1. Place power supply in power supply bracket. Item Description Power supply... - Page 65 Install Motor Cover 1. Snap Tinnerman clips on motor cover into place on base frame assembly, motor side shrouds, and front cover. Item Description Qty. Motor Cover 2. Install screw securing motor cover to front shroud using a Phillips screwdriver. Item Description Qty.
-
Page 66: Rear Roller Replacement
Rear Roller Replacement Tools Required: • Phillips screwdriver • 8 mm Allen wrench • Torque wrench Time: 45 minutes Disconnect Power Source Unplug power cord from power outlet. WARNING: Shock and electrocution hazard. • Unplug unit and let sit 10 minutes before cleaning or performing maintenance. •... - Page 67 Remove Anti-Slip Rails 1. Remove screw securing anti-slip rail using a Phillips screwdriver. Item Description Qty. Screw 2. Remove anti-slip rail from base frame assembly by sliding backwards. Item Description Qty. Anti-Slip Rail 3. Repeat steps for other anti-slip rail. Remove Rear Roller 1.
- Page 68 Install Rear Roller 1. Slide rear roller into striding belt and set into frame. Item Description Rear roller Frame Bolt Washer 2. Install the two tensioning bolts and washers. 3. Align the striding belt so it is centered laterally on the front and rear rollers. 4.
- Page 69 2. Install screw securing anti-slip rail into place using a Phillips screwdriver. Torque to 3 ft-lb (4 Nm). Item Description Qty. Screw 3. Repeat steps for other anti-slip rail. Page 67 of 98...
- Page 70 NOTE: Do not exceed one full turn of the adjusting screws in either direction. If after one full turn the belt does not track properly, contact Life Fitness Customer Support. Do not overtighten the tensioning bolts while making belt adjustments. Overtightening of bolts may over stretch and damage the striding belt or roller.
- Page 71 Tensioning an Existing Striding Belt 1. Press GO and operate the treadmill for five minutes at 5.0 MPH (8.0 KPH). NOTE: Do not run or walk on belt! 2. Reduce the speed to 2.0 MPH (3.2 KPH). Walk on the treadmill. Tightly grip the handrails and apply force with feet on the striding belt near the motor cover against the moving belt direction.
-
Page 72: Replacement
Striding Belt Replacement Tools Required: • Phillips screwdriver • 8 mm Allen wrench • 4 mm Allen wrench • Torque wrench Time: 75 minutes Disconnect Power Source Unplug power cord from power outlet. WARNING: Shock and electrocution hazard. • Unplug unit and let sit 10 minutes before cleaning or performing maintenance. •... - Page 73 Remove Anti-Slip Rails 1. Remove screw securing anti-slip rail using a Phillips screwdriver. Item Description Qty. Screw 2. Remove anti-slip rail from base frame assembly by sliding backwards. Item Description Qty. Anti-Slip Rail 3. Repeat steps for other anti-slip rail. Remove Striding Belt 1.
-
Page 74: Striding Belt
3. Push front roller forward, then lift out of frame slots and slide out towards the user’s right side. Item Description Front roller Frame slots 4. Remove four deck mounting bolts using a 4 mm Allen wrench. Item Description Striding belt Deck Bolt Frame... - Page 75 4. Slide front roller into striding belt and set into frame slots. Item Description Front roller Frame slots 5. Slide rear roller into striding belt and set into frame. Item Description Rear roller Frame Bolt Washer 6. Align the striding belt so it is centered laterally on the front and rear rollers. 7.
- Page 76 2. Install screw securing anti-slip rail into place using a Phillips screwdriver. Torque to 3 ft-lb (4 Nm). Item Description Qty. Screw 3. Repeat steps for other anti-slip rail. Page 74 of 98...
- Page 77 NOTE: Do not exceed one full turn of the adjusting screws in either direction. If after one full turn the belt does not track properly, contact Life Fitness Customer Support. Do not overtighten the tensioning bolts while making belt adjustments. Overtightening of bolts may over stretch and damage the striding belt or roller.
- Page 78 Tensioning an Existing Striding Belt 1. Press GO and operate the treadmill for five minutes at 5.0 MPH (8.0 KPH). NOTE: Do not run or walk on belt! 2. Reduce the speed to 2.0 MPH (3.2 KPH). Walk on the treadmill. Tightly grip the handrails and apply force with feet on the striding belt near the motor cover against the moving belt direction.
-
Page 79: Replacement
Top Bridge Shroud Replacement This procedure will give access to upright hardware and internal console cabling. Tools Required: • Phillips screwdriver • Torque wrench Time: 45 minutes Disconnect Power Source Unplug power cord from power outlet. WARNING: Shock and electrocution hazard. •... - Page 80 2. Remove rear console shroud assembly. Remove Front Bottom Bridge Shroud 1. Remove five screws securing front bottom bridge shroud to top bridge shroud using a Phillips screwdriver. Item Description Screw Front bottom bridge shroud 2. Remove front bottom bridge shroud from top bridge shroud. Remove Back Bottom Bridge Shroud 1.
-
Page 81: Top Bridge Shroud
Remove Top Bridge Shroud 1. Remove four screws securing top bridge shroud to console weldment using a Phillips screwdriver. Item Description Top bridge shroud Console weldment Screw 2. Remove top bridge shroud from console weldment. Install Top Bridge Shroud 1. Place top bridge shroud onto console weldment. Item Description Top bridge shroud... - Page 82 2. Plug E-stop key into bridge. Install Front Bottom Bridge Shroud Install five screws securing front bottom bridge shroud to top bridge shroud using a Phillips screwdriver. Item Description Screw Front bottom bridge shroud Install Rear Console Shroud Assembly Install screws securing rear console shroud assembly to console support weldment using a Phillips screwdriver. Tighten to 10.6 in-lbs.
- Page 83 2. Install the white heart rate wires to the upper heart rate grips. 3. Install four screws securing upper and lower heart rate grips to handlebar using a Phillips screwdriver. Complete installation 1. Plug power cord into power outlet. 2. Operate unit at all levels to verify proper operation. Page 81 of 98...
-
Page 84: Troubleshooting
Using a voltmeter, verify power at outlet. If no power exists, reset circuit breaker at panel. Line cord is damaged. Replace line cord. Contact Life Fitness Customer Support. Line cord is improperly seated in socket. Inspect power connections at wall outlet and at machine for proper contact. -
Page 85: Rate
• Incorrect console or power supply. • Line cord at treadmill • Power switch • All console connections • All lower electronics connections Contact Life Fitness Customer Support. Unit resets randomly or pauses. Probable Cause Corrective Action Power source is insufficient. - Page 86 If only Wireless Heart Rate is not working: • Turn on a Polar Simulator and place it in the reading rack. If the correct wireless heart rate is reported, then wireless heart rate is working, but range is reduced (possibly due to noise or adhesive failure). •...
-
Page 87: Software
6. Software Refer to Console Service Manual This product uses multiple consoles. Refer to the specific Console Service Manual for more detailed information. List of consoles are found in the Related Products section of the Introduction chapter. Page 85 of 98... -
Page 88: Diagnostics
7. Diagnostics Refer to Console Service Manual This product uses multiple consoles. Refer to the specific Console Service Manual for more detailed information. List of consoles are found in the Related Products section of the Introduction chapter. Page 86 of 98... -
Page 89: Error Code List
8. Error code list Error codes notify user of a problem condition and are displayed on the console. Error codes can also help to indicate the part of the unit most likely to be causing the problem. Refer to Console Service Manual This product uses multiple consoles. -
Page 90: Refer To Console Service
9. Network Information Refer to Console Service Manual This product uses multiple consoles. Refer to the specific Console Service Manual for more detailed information. List of consoles are found in the Related Products section of the Introduction chapter. Page 88 of 98... -
Page 91: Schematics
10. Schematics Block Diagram Page 89 of 98... -
Page 92: Schematic - Aspire
Schematic - Aspire Treadmill Console Page 90 of 98... - Page 93 Base Page 91 of 98...
-
Page 94: Led Chart
11. LED Chart IMDB - Integrated Motor Drive Board LED's NOTE: Always ensure that the software is up to date before beginning troubleshooting. Update the software and restart the unit if software is an old version. LED # Color Normal Condition Indicates Green Flashing rapidly... -
Page 95: Imdb - Integrated Motor Drive Board
IMDB - Integrated Motor Drive Board Connectors Connector Description P101 Engineering use only P200 AC Input power P300 Motor connection P501 Engineering use only P700 Lift Motor connection P800 Lift Switches P900 Communication with console P901 Power to SL console P902 Attachable TV connection NOTE: Connectors P100, P101 and P501 are for engineering use only and are not used in the field. - Page 96 P300: 6-pin Megafit used for drive motor. Pin# Description Phase U Phase V Phase W Thermal switch Thermal switch Frame ground P700: 8-pin Minifit Jr. for control of lift motor. Pin# Description Lift up Not connected AC line Not connected Lift down Not connected Lift identification...
- Page 97 P901: 10-pin Minifit Jr. that provides power to the console and E-Stop circuits and acts as a passthrough for an attachable TV. Pin# Description Not connected TV voltage Low-Side ground Console voltage E-Stop voltage to console Not connected Low-Side ground Console voltage Low-Side ground E-Stop voltage to console...
-
Page 98: Glossary
Light Emitting Diode - LED's provide display functionality and are commonly used for indicator lights. Lifepulse ™ Life Fitness' proprietary hardware and software system designed to measure user's heart rate by making electrical contact at user’s palms. IMDB Integrated Motor Drive Board - Motor Drive Board and System Interface Board combined. -
Page 99: Warranty
Who Pays Transportation and Insurance For Service If the Product or any covered part must be returned to a service facility for repairs, We, Life Fitness Family of Brands, will pay all transportation and insurance charges for the first year. You are responsible for transportation and insurance charge after the first year. -
Page 100: Changes In Warranty Not Effects Of State Laws
Changes in Warranty Not Authorized No one is authorized to change, modify or extend the terms of this limited warranty. Effects of State Laws This warranty gives you specific legal rights, and you may have other rights which vary from state to state and country by country.
Need help?
Do you have a question about the Aspire ASPT-SL and is the answer not in the manual?
Questions and answers