Advertisement
Quick Links
Advertisement

Related Manuals for Life Fitness Activate


Summary of Contents for Life Fitness Activate
- Page 1 ACTIVATE TREADMILL OST ASSEMBLY INSTRUCTIONS M051-00K75-0002 REV B...
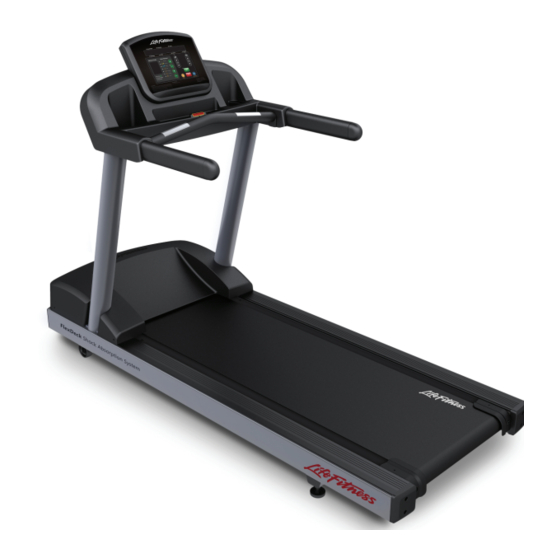
- Page 2 If, at any time while exercising, the user experiences faintness, dizziness, pain, or shortness of breath, he or she must stop immediately. Physical Dimensions Activate Console Treadmill Base Length 14 in. / 35.56 cm 80.68 in. / 204.93 cm Width 12 in.
-
Page 3: Important Safety Instructions
To disconnect, turn power OFF at the ON/OFF switch, then remove plug from electrical outlet. • Never operate a Life Fitness product if it has a damaged power cord or electrical plug, or if it has been dropped, damaged, or even partially immersed in water. Contact Life Fitness Customer Support Services. - Page 4 Use these products for their intended use as described in this manual. Do not use attachments that have not been recommended by the manufacturer. ReADmILLS • Keep the area 6.5 ft. (2 m) by 3 ft. (0.9 m) behind the Life Fitness treadmill clear of any ARNING obstructions, including walls, furniture, and other equipment. •...
-
Page 5: Power Requirements
Read the Activate Cardio Series Operation Manual before setting up the Life Fitness product. Contact Life Fitness Cus- tomer Support Services to request a printed copy of the Activate Cardio Series Operation Manual. Follow all safety instructions. Place the product where it will be used before beginning the set-up procedure. -
Page 6: How To Position And Stabilize The Life Fitness T Readmill
OW TO OSITION AND TABILIze THe ITNeSS ReADmILL Follow all safety instructions. Move the treadmill to the location in which it will be used. AFeTY LeARANCeS The following information is supplied as regional reference data regarding safety clearances around the exterior of the treadmill. -
Page 7: Power Cord Routing
Connect the power cord to the power receptacle (C) in the front of the treadmill. The power cord can be routed left or right depending on installation / site needs. CAUTION: Make sure that there is 6.5 ft. (2 m) of clearance behind the treadmill. Contact Life Fitness Customer Support Services for an optional longer power cord if necessary. - Page 8 ReVeNTIVe AINTeNANCe Life Fitness products are backed by the engineering excellence and reliability of Life Fitness and are one of the most rugged and trouble-free pieces of exercise equipment on the market today. Commercial Life Fitness equipment are among the most popular of aerobic trainers in health clubs, colleges and military facilities worldwide.
- Page 9 ReVeNTIVe AINTeNANCe CHeDULe Item Weekly Monthly Bi-Annually Console Overlays Clean Inspect Bottle Holders / Accessory Trays Clean Inspect Console Mounting Bolts Inspect Hardware Inspect Frames Clean Inspect Plastic Covers Clean Inspect Inspect Lifepulse Sensors Clean / Inspect Pedals and Straps Clean Inspect Toe Guards, Endcaps...
-
Page 10: Part Description
, & A OmPONeNT ARDWARe SSemBLY The following Component List and step-by-step assembly instructions are provided to make the set-up of this treadmill as quick and easy as possible. Part Description qty. Left Upright Right Upright 3/8 x 5” Hex Head Bolt 3/8”... - Page 11 ARDWARe #10 X 0.5´´ PHILLIPS HEAD SCREW (Silver) (#17) M4.2 X 19MM PHILLIPS HEAD SCREW (#13) M8 X 25MM HEX HEAD BOLT (#7) M5 X 25MM PHILLIPS HEAD SCREW (#15) 3/8´´ NUT (#5) M8 LOCK NUT (#9) #10 X 0.5´´ PHILLIPS HEAD SCREW (Black) (#22) 3/8´´...
- Page 12 MAKE SURE ALL HARDWARE IS TIGHT Controleer of alle bevestigingen goed vast zitten Vérifier que toute la visserie est serrée Sicherstellen, dass alle Befestigungsteile festgezogen sind Assicurarsi che tutta la bulloneria sia ben stretta Certifique-se de que todas as peças estejam bem apertadas Asegúrese de que todas las piezas estén firmes Убедитесь...
- Page 14 2x (Left & Right) (5-12mm)
- Page 17 (5-12mm)
- Page 22 100%...
- Page 23 OST-INTHX, OST-INTHC...
Need help?
Do you have a question about the Activate and is the answer not in the manual?
Questions and answers