Daikin Altherma EBLQ011CAV3 Service Manual
Monobloc
Hide thumbs
Also See for Altherma EBLQ011CAV3:
- Operation manual (12 pages) ,
- Installer's reference manual (108 pages) ,
- Installation manual (28 pages)
Table of Contents
Advertisement
Advertisement
Table of Contents

Related Manuals for Daikin Altherma EBLQ011CAV3


Summary of Contents for Daikin Altherma EBLQ011CAV3
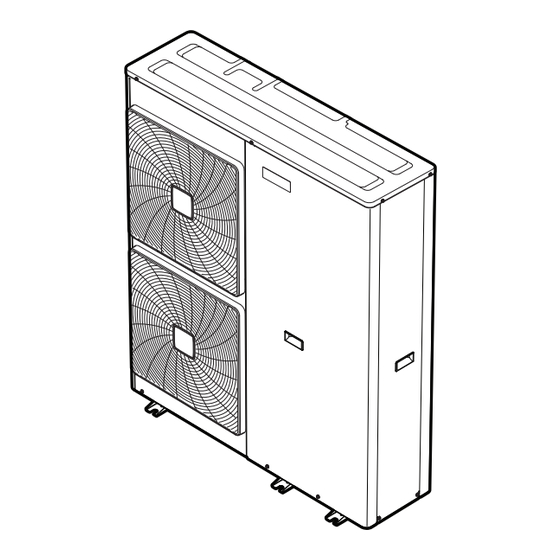
- Page 1 Service manual Daikin Altherma – Monobloc EBLQ011~016CAV3 EBLQ011~016CAW1 EDLQ011~016CAV3 EDLQ011~016CAW1 EBLQ011~016CA3V3 EBLQ011~016CA3W1 EDLQ011~016CA3V3 EDLQ011~016CA3W1 EKCB07CAV3 EK2CB07CAV3 Service manual EKMBUHCA3V3 English Daikin Altherma – Monobloc EKMBUHCA9W1...
- Page 2 Disclaimer The present publication is drawn up by way of information only and does not constitute an offer binding upon Daikin Europe N.V.. Daikin Europe N.V. has compiled the content of this publication to the best of its knowledge. No express or implied warranty is given for the completeness, accuracy, reliability or fitness for particular purpose of its content and the products and services presented therein.
-
Page 3: Table Of Contents
2.13.1 Checking procedures ........... 57 1.4.50 L3-00 – Electrical component temperature 2.13.2 Repair procedures ............57 abnormality ..............19 2.14 Hydro PCB ................. 58 EBLQ+EDLQ011~016CAV3+W1 + EBLQ+EDLQ011~016CA3V3+W1 Service manual + EK(2)CB07CAV3 + EKMBUHCA3V3+9W1 Daikin Altherma – Monobloc ESIE18-04 – 2019.02... - Page 4 Wiring diagram ................101 Possible cause: Faulty or dirty water filter. 5.2.1 Wiring diagram: Single phase ........101 5.2.2 Wiring diagram: Three phase........112 Service manual EBLQ+EDLQ011~016CAV3+W1 + EBLQ+EDLQ011~016CA3V3+W1 + EK(2)CB07CAV3 + EKMBUHCA3V3+9W1 Daikin Altherma – Monobloc ESIE18-04 – 2019.02...
-
Page 5: 04 - Abnormal Flow (Domestic Hot Water)
11 Perform a check of the hydro PCB. See "2.14 Hydro PCB" on page 58. 9 Perform a check of the 3-way valve. See "2.1 3-way valve" on page 35. Possible cause: Faulty hydro PCB. EBLQ+EDLQ011~016CAV3+W1 + EBLQ+EDLQ011~016CA3V3+W1 Service manual + EK(2)CB07CAV3 + EKMBUHCA3V3+9W1 Daikin Altherma – Monobloc ESIE18-04 – 2019.02... -
Page 6: 06 - Abnormal Flow (Cooling/Defrost)
13 Perform a check of the booster heater. See "2.6 Booster "2.23 Thermistors" on page 82. heater" on page 49. Possible cause: Faulty booster heater. Possible cause: Faulty outlet water thermistor. Service manual EBLQ+EDLQ011~016CAV3+W1 + EBLQ+EDLQ011~016CA3V3+W1 + EK(2)CB07CAV3 + EKMBUHCA3V3+9W1 Daikin Altherma – Monobloc ESIE18-04 – 2019.02... -
Page 7: Water Heat Exchange Freezing Abnormality
It is recommended to perform the checks in the listed or domestic hot order. water. 1 Check the water circuit for an external heat source. See "3.3 Water circuit" on page 95. EBLQ+EDLQ011~016CAV3+W1 + EBLQ+EDLQ011~016CA3V3+W1 Service manual + EK(2)CB07CAV3 + EKMBUHCA3V3+9W1 Daikin Altherma – Monobloc ESIE18-04 – 2019.02... -
Page 8: 00 - Backup Heater Outlet Water Temperature Increase
Automatic reset after INFORMATION Q3L in mixed circuit operating. reset of thermal It is recommended to perform the checks in the listed is activated. protector. order. Service manual EBLQ+EDLQ011~016CAV3+W1 + EBLQ+EDLQ011~016CA3V3+W1 + EK(2)CB07CAV3 + EKMBUHCA3V3+9W1 Daikin Altherma – Monobloc ESIE18-04 – 2019.02... -
Page 9: A1-01 - Eeprom Abnormality
3 Perform a check of the air purge valves. See "3.3 Water temperature reaches circuit" on page 95. 59.5°C (saturated condensing Possible cause: Air in the water circuit. temperature), 15 times in 300 minutes. EBLQ+EDLQ011~016CAV3+W1 + EBLQ+EDLQ011~016CA3V3+W1 Service manual + EK(2)CB07CAV3 + EKMBUHCA3V3+9W1 Daikin Altherma – Monobloc ESIE18-04 – 2019.02... -
Page 10: Booster Heater Overheating
3 Perform a check of the hydro PCB. See "2.14 Hydro PCB" on tank. See "3.1 Power supply" on page 91. page 58. Service manual EBLQ+EDLQ011~016CAV3+W1 + EBLQ+EDLQ011~016CA3V3+W1 + EK(2)CB07CAV3 + EKMBUHCA3V3+9W1 Daikin Altherma – Monobloc ESIE18-04 – 2019.02... -
Page 11: C0-00 - Flow Sensor Malfunction
Possible cause: Water flow is too low. page 58. 3 Perform a check of the air purge valves. See "3.3 Water Possible cause: Faulty hydro PCB. circuit" on page 95. EBLQ+EDLQ011~016CAV3+W1 + EBLQ+EDLQ011~016CA3V3+W1 Service manual + EK(2)CB07CAV3 + EKMBUHCA3V3+9W1 Daikin Altherma – Monobloc ESIE18-04 – 2019.02... -
Page 12: C4-00 - Indoor Heat Exchanger Thermistor Abnormality
(measured pressure >38 bar) occurs 16 To solve the error code times within INFORMATION 300 minutes. It is recommended to perform the checks in the listed order. Service manual EBLQ+EDLQ011~016CAV3+W1 + EBLQ+EDLQ011~016CA3V3+W1 + EK(2)CB07CAV3 + EKMBUHCA3V3+9W1 Daikin Altherma – Monobloc ESIE18-04 – 2019.02... -
Page 13: E5-00 - Overheat Of Inverter Compressor Motor
7 Perform a check of the expansion valve. See "2.11 Expansion page 38. valve" on page 54. Possible cause: Faulty 4‑way valve. Possible cause: Faulty expansion valve. EBLQ+EDLQ011~016CAV3+W1 + EBLQ+EDLQ011~016CA3V3+W1 Service manual + EK(2)CB07CAV3 + EKMBUHCA3V3+9W1 Daikin Altherma – Monobloc ESIE18-04 – 2019.02... -
Page 14: E7-00 - Fan Lock Abnormality
Possible cause: operating. ▪ Faulty or disturbance of the power supply (imbalance >10%), ▪ Power drop, ▪ Short circuit. Service manual EBLQ+EDLQ011~016CAV3+W1 + EBLQ+EDLQ011~016CA3V3+W1 + EK(2)CB07CAV3 + EKMBUHCA3V3+9W1 Daikin Altherma – Monobloc ESIE18-04 – 2019.02... -
Page 15: Domestic Hot Water Temperature Increase
50°C. 1.4.36 EC-04 – Tank preheating temperature >60°C~65°C Trigger Effect Reset Unit is preheating the Unit will NOT stop Automatic reset. tank. operating. EBLQ+EDLQ011~016CAV3+W1 + EBLQ+EDLQ011~016CA3V3+W1 Service manual + EK(2)CB07CAV3 + EKMBUHCA3V3+9W1 Daikin Altherma – Monobloc ESIE18-04 – 2019.02... -
Page 16: Abnormal High Pressure
▪ Leaking refrigerant circuit. Possible cause: Faulty external indoor or outdoor ambient 3 Perform a check of the heat exchanger thermistor. See thermistor. "2.23 Thermistors" on page 82. Service manual EBLQ+EDLQ011~016CAV3+W1 + EBLQ+EDLQ011~016CA3V3+W1 + EK(2)CB07CAV3 + EKMBUHCA3V3+9W1 Daikin Altherma – Monobloc ESIE18-04 – 2019.02... -
Page 17: H3-00 - High Pressure Switch Defect
8 minutes: unit interface. page 50. will stop operating. Possible cause: Faulty compressor. 4 Perform a check of the reactor. See "2.20 Reactor" on page 78. EBLQ+EDLQ011~016CAV3+W1 + EBLQ+EDLQ011~016CA3V3+W1 Service manual + EK(2)CB07CAV3 + EKMBUHCA3V3+9W1 Daikin Altherma – Monobloc ESIE18-04 – 2019.02... -
Page 18: H9-00 - Outdoor Air Thermistor Abnormality
Possible cause: Faulty main PCB. INFORMATION If all procedures listed above have been performed and the problem is still present, contact the helpdesk. Service manual EBLQ+EDLQ011~016CAV3+W1 + EBLQ+EDLQ011~016CA3V3+W1 + EK(2)CB07CAV3 + EKMBUHCA3V3+9W1 Daikin Altherma – Monobloc ESIE18-04 – 2019.02... -
Page 19: L3-00 - Electrical Component Temperature Abnormality
4 Perform a check of the main PCB. See "2.17 Main PCB" on 1 Perform a check of the inverter PCB. See "2.15 Inverter page 66. PCB" on page 61. EBLQ+EDLQ011~016CAV3+W1 + EBLQ+EDLQ011~016CA3V3+W1 Service manual + EK(2)CB07CAV3 + EKMBUHCA3V3+9W1 Daikin Altherma – Monobloc ESIE18-04 – 2019.02... -
Page 20: U0-00 - Shortage Of Refrigerant
▪ Faulty or disturbance of the power supply (imbalance order. >10%), 1 Perform a check of the hydro PCB. See "2.14 Hydro PCB" on ▪ Power drop, page 58. ▪ Short circuit. Service manual EBLQ+EDLQ011~016CAV3+W1 + EBLQ+EDLQ011~016CA3V3+W1 + EK(2)CB07CAV3 + EKMBUHCA3V3+9W1 Daikin Altherma – Monobloc ESIE18-04 – 2019.02... -
Page 21: U7-00 - Transmission Abnormality Between Outdoor Main Microcomputer - Sub Microcomputer
3 Perform a check of the hydro PCB. See "2.14 Hydro PCB" on page 58. 1 Check the wiring between the hydro PCB and the extension PCB. See "3.1 Power supply" on page 91. EBLQ+EDLQ011~016CAV3+W1 + EBLQ+EDLQ011~016CA3V3+W1 Service manual + EK(2)CB07CAV3 + EKMBUHCA3V3+9W1 Daikin Altherma – Monobloc ESIE18-04 – 2019.02... -
Page 22: Extension Pcb / Hydro Pcb Mismatch Error
Possible cause: Faulty hydro PCB. 4 Perform an electrical check of the extension PCB. See "2.12 Extension PCB" on page 56. Possible cause: Faulty extension PCB. 5 Check for applicable ESV. Service manual EBLQ+EDLQ011~016CAV3+W1 + EBLQ+EDLQ011~016CA3V3+W1 + EK(2)CB07CAV3 + EKMBUHCA3V3+9W1 Daikin Altherma – Monobloc ESIE18-04 – 2019.02... -
Page 23: Symptom Based Troubleshooting
Check water pump. Replace water pump. Air purge blocked - air trapped in Component failure. Check air purge valve. Replace air purge valve. water circuit. EBLQ+EDLQ011~016CAV3+W1 + EBLQ+EDLQ011~016CA3V3+W1 Service manual + EK(2)CB07CAV3 + EKMBUHCA3V3+9W1 Daikin Altherma – Monobloc ESIE18-04 – 2019.02... -
Page 24: Tap Water Related
Bad quality/contamination of Check the water quality (odour/ Assure that quality of entering water. supply water. contamination) at cold domestic water is OK. water inlet. Service manual EBLQ+EDLQ011~016CAV3+W1 + EBLQ+EDLQ011~016CA3V3+W1 + EK(2)CB07CAV3 + EKMBUHCA3V3+9W1 Daikin Altherma – Monobloc ESIE18-04 – 2019.02... -
Page 25: User Interface Is Failure Or Frozen Screen
Water loop temperature is too low countermeasure required. too low. (<24°C) causing ONLY the backup heater to operate. Compressor will start when water temperature reaches 24°C or more. EBLQ+EDLQ011~016CAV3+W1 + EBLQ+EDLQ011~016CA3V3+W1 Service manual + EK(2)CB07CAV3 + EKMBUHCA3V3+9W1 Daikin Altherma – Monobloc ESIE18-04 – 2019.02... - Page 26 (partial) blockage. by flow sensor, plate type heat exchanger, ▪ Check water side plate type ▪ Check the water quality. heat exchanger for blockage. Service manual EBLQ+EDLQ011~016CAV3+W1 + EBLQ+EDLQ011~016CA3V3+W1 + EK(2)CB07CAV3 + EKMBUHCA3V3+9W1 Daikin Altherma – Monobloc ESIE18-04 – 2019.02...
-
Page 27: Abnormal Presence Of Ice
▪ Fix leaks. Ice build-up at entry spot of Refrigerant shortage. ▪ Check refrigerant charge, ▪ Replace refrigerant, refrigerant. ▪ Check for leaks. ▪ Fix leaks. EBLQ+EDLQ011~016CAV3+W1 + EBLQ+EDLQ011~016CA3V3+W1 Service manual + EK(2)CB07CAV3 + EKMBUHCA3V3+9W1 Daikin Altherma – Monobloc ESIE18-04 – 2019.02... -
Page 28: Domestic Hot Water Capacity Shortage
▪ Replace suction thermistor, ▪ Check expansion valve ▪ Replace discharge pipe correct operation, thermistor. ▪ Check suction thermistor, ▪ Check discharge pipe thermistor. Service manual EBLQ+EDLQ011~016CAV3+W1 + EBLQ+EDLQ011~016CA3V3+W1 + EK(2)CB07CAV3 + EKMBUHCA3V3+9W1 Daikin Altherma – Monobloc ESIE18-04 – 2019.02... - Page 29 Water filter blocked. Dirty water. ▪ Check water filter, ▪ Clean the water filter, ▪ Check water quality. ▪ Check the water quality. EBLQ+EDLQ011~016CAV3+W1 + EBLQ+EDLQ011~016CA3V3+W1 Service manual + EK(2)CB07CAV3 + EKMBUHCA3V3+9W1 Daikin Altherma – Monobloc ESIE18-04 – 2019.02...
-
Page 30: Space Heating Capacity Shortage
Check setting [C‑07]. Adjust setting to match application with setting [C‑07] on value 2 (= control method. - see installer reference guide. RT control). Service manual EBLQ+EDLQ011~016CAV3+W1 + EBLQ+EDLQ011~016CA3V3+W1 + EK(2)CB07CAV3 + EKMBUHCA3V3+9W1 Daikin Altherma – Monobloc ESIE18-04 – 2019.02... -
Page 31: Inaccurate Temperature Control
(external influence) in case of in the correct position to measure interface for more accurate room temperature. room thermostat control (setting the correct room temperature. temperature measurement. [C‑07]=2). EBLQ+EDLQ011~016CAV3+W1 + EBLQ+EDLQ011~016CA3V3+W1 Service manual + EK(2)CB07CAV3 + EKMBUHCA3V3+9W1 Daikin Altherma – Monobloc ESIE18-04 – 2019.02... -
Page 32: Power Consumption Too High
Service manual EBLQ+EDLQ011~016CAV3+W1 + EBLQ+EDLQ011~016CA3V3+W1 + EK(2)CB07CAV3 + EKMBUHCA3V3+9W1 Daikin Altherma – Monobloc ESIE18-04 – 2019.02... -
Page 33: System Does Not Start Or Operate
Displayed date/time is wrong - Daylight Saving Time NOT set Check Daylight Saving Time Set Daylight Saving Time schedules NOT correctly executed. correctly. settings. according to operation manual. EBLQ+EDLQ011~016CAV3+W1 + EBLQ+EDLQ011~016CA3V3+W1 Service manual + EK(2)CB07CAV3 + EKMBUHCA3V3+9W1 Daikin Altherma – Monobloc ESIE18-04 – 2019.02... - Page 34 Repair Cooling/heating operation starts, ▪ Refrigerant overcharge, Check refrigerant. After vacuum drying, charge but stops immediately. correct amount of refrigerant. ▪ Mixing refrigerant system. Service manual EBLQ+EDLQ011~016CAV3+W1 + EBLQ+EDLQ011~016CA3V3+W1 + EK(2)CB07CAV3 + EKMBUHCA3V3+9W1 Daikin Altherma – Monobloc ESIE18-04 – 2019.02...
-
Page 35: Components
3 Manually put the 3‑way valve in the space heating position by rotating the 3‑way valve knob. Exit Temperature Domestic hot water Same as the 3-way valve inlet EBLQ+EDLQ011~016CAV3+W1 + EBLQ+EDLQ011~016CA3V3+W1 Service manual + EK(2)CB07CAV3 + EKMBUHCA3V3+9W1 Daikin Altherma – Monobloc ESIE18-04 – 2019.02... -
Page 36: Repair Procedures
5 Loosen the screw. Clip 3-way valve body 6 Remove the 3‑way valve body. 7 To install 3‑way valve body, "2.1.2 Repair procedures" on page 36. Service manual EBLQ+EDLQ011~016CAV3+W1 + EBLQ+EDLQ011~016CA3V3+W1 + EK(2)CB07CAV3 + EKMBUHCA3V3+9W1 Daikin Altherma – Monobloc ESIE18-04 – 2019.02... - Page 37 3 Install the 3‑way valve motor on the 3‑way valve body. 4 Tighten the screw to fix the 3‑way valve motor to the 3‑way valve body. EBLQ+EDLQ011~016CAV3+W1 + EBLQ+EDLQ011~016CA3V3+W1 Service manual + EK(2)CB07CAV3 + EKMBUHCA3V3+9W1 Daikin Altherma – Monobloc ESIE18-04 – 2019.02...
-
Page 38: 4-Way Valve
To perform a mechanical check of the 4-way valve Skip the next step of this Prerequisite: Turn OFF the unit via the user interface. procedure. Prerequisite: Turn OFF the respective circuit breaker. Service manual EBLQ+EDLQ011~016CAV3+W1 + EBLQ+EDLQ011~016CA3V3+W1 + EK(2)CB07CAV3 + EKMBUHCA3V3+9W1 Daikin Altherma – Monobloc ESIE18-04 – 2019.02... -
Page 39: Repair Procedures
4‑way valve body 2 Cut all tie straps that fix the 4‑way valve coil harness. 3 Disconnect the 4‑way valve coil connector from the main PCB. EBLQ+EDLQ011~016CAV3+W1 + EBLQ+EDLQ011~016CA3V3+W1 Service manual + EK(2)CB07CAV3 + EKMBUHCA3V3+9W1 Daikin Altherma – Monobloc ESIE18-04 – 2019.02... -
Page 40: Accumulator Assembly
5 Add refrigerant to the refrigerant circuit, see "3.2.2 Repair procedures" on page 93. Prerequisite: Turn OFF the unit via the user interface. Prerequisite: Turn OFF the respective circuit breaker. Service manual EBLQ+EDLQ011~016CAV3+W1 + EBLQ+EDLQ011~016CA3V3+W1 + EK(2)CB07CAV3 + EKMBUHCA3V3+9W1 Daikin Altherma – Monobloc ESIE18-04 – 2019.02... -
Page 41: Backup Heater
Return to the troubleshooting of voltage measurements before, on and after each contactor the specific error and continue MUST be the same. with the next procedure. EBLQ+EDLQ011~016CAV3+W1 + EBLQ+EDLQ011~016CA3V3+W1 Service manual + EK(2)CB07CAV3 + EKMBUHCA3V3+9W1 Daikin Altherma – Monobloc ESIE18-04 – 2019.02... - Page 42 NOTICE The info above is an example of how to operate. Check the wiring diagram for correct backup heater terminals, see "5.2 Wiring diagram" on page 101. Service manual EBLQ+EDLQ011~016CAV3+W1 + EBLQ+EDLQ011~016CA3V3+W1 + EK(2)CB07CAV3 + EKMBUHCA3V3+9W1 Daikin Altherma – Monobloc ESIE18-04 – 2019.02...
- Page 43 Check the condition of the O-rings and replace if needed. Apply water to the O-rings before installation. 2 Install the lower backup heater coupling and install the clip. EBLQ+EDLQ011~016CAV3+W1 + EBLQ+EDLQ011~016CA3V3+W1 Service manual + EK(2)CB07CAV3 + EKMBUHCA3V3+9W1 Daikin Altherma – Monobloc ESIE18-04 – 2019.02...
- Page 44 3 Install the backup heater thermal protector sensor in the backup the next procedure. heater. To remove the backup heater contactors Prerequisite: Turn OFF the unit via the user interface. Service manual EBLQ+EDLQ011~016CAV3+W1 + EBLQ+EDLQ011~016CA3V3+W1 + EK(2)CB07CAV3 + EKMBUHCA3V3+9W1 Daikin Altherma – Monobloc ESIE18-04 – 2019.02...
-
Page 45: Backup Heater Kit
8 Check if the fuse of the backup heater has tripped. 2 Open all circuit breakers. CAUTION To prevent damage to the unit, all fuses MUST be opened before using a Megger. EBLQ+EDLQ011~016CAV3+W1 + EBLQ+EDLQ011~016CA3V3+W1 Service manual + EK(2)CB07CAV3 + EKMBUHCA3V3+9W1 Daikin Altherma – Monobloc ESIE18-04 – 2019.02... - Page 46 9 Separate the lower backup heater coupling. Prerequisite: Remove the required plate work. 1 Drain water from the water circuit, see "3.3.2 Repair procedures" on page 96. Service manual EBLQ+EDLQ011~016CAV3+W1 + EBLQ+EDLQ011~016CA3V3+W1 + EK(2)CB07CAV3 + EKMBUHCA3V3+9W1 Daikin Altherma – Monobloc ESIE18-04 – 2019.02...
- Page 47 Backup heater pipe Prerequisite: Turn off the respective circuit breaker of the unit and Backup heater coupling the backup heater. Prerequisite: Remove the required plate work. EBLQ+EDLQ011~016CAV3+W1 + EBLQ+EDLQ011~016CA3V3+W1 Service manual + EK(2)CB07CAV3 + EKMBUHCA3V3+9W1 Daikin Altherma – Monobloc ESIE18-04 – 2019.02...
-
Page 48: Backup Heater Thermal Protector
Backup heater thermal protector sensor Prerequisite: Turn OFF the unit via the user interface. Backup heater Prerequisite: Turn OFF the respective circuit breaker. Service manual EBLQ+EDLQ011~016CAV3+W1 + EBLQ+EDLQ011~016CA3V3+W1 + EK(2)CB07CAV3 + EKMBUHCA3V3+9W1 Daikin Altherma – Monobloc ESIE18-04 – 2019.02... -
Page 49: Booster Heater
Install and tighten the 2 screws. with the next procedure. 4 Install the backup heater thermal protector bracket on the switch box. Install and tighten the 2 screws. EBLQ+EDLQ011~016CAV3+W1 + EBLQ+EDLQ011~016CA3V3+W1 Service manual + EK(2)CB07CAV3 + EKMBUHCA3V3+9W1 Daikin Altherma – Monobloc ESIE18-04 – 2019.02... -
Page 50: Booster Heater Thermal Protector
3 Remove the cover of the compressor wire terminals. Compressor wire terminals cover 4 Disconnect the Faston connectors from the compressor wire terminals U, V and W. Service manual EBLQ+EDLQ011~016CAV3+W1 + EBLQ+EDLQ011~016CA3V3+W1 + EK(2)CB07CAV3 + EKMBUHCA3V3+9W1 Daikin Altherma – Monobloc ESIE18-04 – 2019.02... -
Page 51: Repair Procedures
The measured insulation resistance MUST be 5 Remove the 3 nuts and remove the compressor from the unit. >3 MΩ. ▪ U–ground, ▪ V–ground, ▪ W–ground. EBLQ+EDLQ011~016CAV3+W1 + EBLQ+EDLQ011~016CA3V3+W1 Service manual + EK(2)CB07CAV3 + EKMBUHCA3V3+9W1 Daikin Altherma – Monobloc ESIE18-04 – 2019.02... -
Page 52: Crankcase Heater
4 Wrap a wet rag around the compressor pipes and solder the the specific error and continue compressor pipes to the refrigerant pipes. with the next procedure. Replace the crankcase heater, "2.9.2 Repair procedures" on page 53. Service manual EBLQ+EDLQ011~016CAV3+W1 + EBLQ+EDLQ011~016CA3V3+W1 + EK(2)CB07CAV3 + EKMBUHCA3V3+9W1 Daikin Altherma – Monobloc ESIE18-04 – 2019.02... -
Page 53: Repair Procedures
When reconnecting a connector to the PCB, do NOT apply Is the problem solved? Action force, as this may damage the connector or connector pins No further actions required. of the PCB. EBLQ+EDLQ011~016CAV3+W1 + EBLQ+EDLQ011~016CA3V3+W1 Service manual + EK(2)CB07CAV3 + EKMBUHCA3V3+9W1 Daikin Altherma – Monobloc ESIE18-04 – 2019.02... -
Page 54: Expansion Valve
MUST be approximately the same. ▪ Connector pin 1‑6, ▪ Connector pin 2‑6, ▪ Connector pin 3‑6, ▪ Connector pin 4‑6. Expansion valve motor Expansion valve motor harness Service manual EBLQ+EDLQ011~016CAV3+W1 + EBLQ+EDLQ011~016CA3V3+W1 + EK(2)CB07CAV3 + EKMBUHCA3V3+9W1 Daikin Altherma – Monobloc ESIE18-04 – 2019.02... - Page 55 Overheating the valve will damage or destroy it. 2 Remove the putty. Keep for re-use. Putty Putty Expansion valve pipe Expansion valve pipe Expansion valve body Expansion valve body EBLQ+EDLQ011~016CAV3+W1 + EBLQ+EDLQ011~016CA3V3+W1 Service manual + EK(2)CB07CAV3 + EKMBUHCA3V3+9W1 Daikin Altherma – Monobloc ESIE18-04 – 2019.02...
-
Page 56: Extension Pcb
Prerequisite: Turn OFF the respective circuit breaker. PCB. Prerequisite: Remove the required plate work, see "2.19 Plate 3 Connect the expansion valve motor connector to the main PCB. work" on page 77. Service manual EBLQ+EDLQ011~016CAV3+W1 + EBLQ+EDLQ011~016CA3V3+W1 + EK(2)CB07CAV3 + EKMBUHCA3V3+9W1 Daikin Altherma – Monobloc ESIE18-04 – 2019.02... -
Page 57: Repair Procedures
2 Latch the PCB supports using a small pliers to fix the extension PCB. 3 Connect all connectors and ground wire to the extension PCB. EBLQ+EDLQ011~016CAV3+W1 + EBLQ+EDLQ011~016CA3V3+W1 Service manual + EK(2)CB07CAV3 + EKMBUHCA3V3+9W1 Daikin Altherma – Monobloc ESIE18-04 – 2019.02... -
Page 58: Hydro Pcb
To perform a power check of the hydro PCB 1 Measure the voltage on the connector X26A on the PCB. The measured voltage MUST be 230 V AC. Service manual EBLQ+EDLQ011~016CAV3+W1 + EBLQ+EDLQ011~016CA3V3+W1 + EK(2)CB07CAV3 + EKMBUHCA3V3+9W1 Daikin Altherma – Monobloc ESIE18-04 – 2019.02... - Page 59 To check the fuse of the hydro PCB 1 Measure the continuity of the fuse. If no continuity is measured, the fuse is blown. HAP LED EBLQ+EDLQ011~016CAV3+W1 + EBLQ+EDLQ011~016CA3V3+W1 Service manual + EK(2)CB07CAV3 + EKMBUHCA3V3+9W1 Daikin Altherma – Monobloc ESIE18-04 – 2019.02...
-
Page 60: Repair Procedures
2 Carefully pull the hydro PCB and unlatch the PCB supports one PCB. by one using a small pliers. 3 Connect all connectors and ground wire to the hydro PCB. Service manual EBLQ+EDLQ011~016CAV3+W1 + EBLQ+EDLQ011~016CA3V3+W1 + EK(2)CB07CAV3 + EKMBUHCA3V3+9W1 Daikin Altherma – Monobloc ESIE18-04 – 2019.02... -
Page 61: Inverter Pcb
4 Connect the Faston connectors to the Inverter Analyzer (SPP Make sure the fuse is plugged‑in correctly (contact with the number 1368521). fuse holder). EBLQ+EDLQ011~016CAV3+W1 + EBLQ+EDLQ011~016CA3V3+W1 Service manual + EK(2)CB07CAV3 + EKMBUHCA3V3+9W1 Daikin Altherma – Monobloc ESIE18-04 – 2019.02... -
Page 62: Double Fan Outdoor Unit - Three Phase
12 Press the switch BS3 once. The LED status should be as follows: 13 All LED’s on the Inverter Analyzer must lit. 14 Turn off the respective circuit breaker. Service manual EBLQ+EDLQ011~016CAV3+W1 + EBLQ+EDLQ011~016CA3V3+W1 + EK(2)CB07CAV3 + EKMBUHCA3V3+9W1 Daikin Altherma – Monobloc ESIE18-04 – 2019.02... - Page 63 8 Press the switch BS2 twice. The LED status should be as the next procedure. follows: Adjust the wiring of the inverter PCB, see "Repair procedures" on page 64. EBLQ+EDLQ011~016CAV3+W1 + EBLQ+EDLQ011~016CA3V3+W1 Service manual + EK(2)CB07CAV3 + EKMBUHCA3V3+9W1 Daikin Altherma – Monobloc ESIE18-04 – 2019.02...
- Page 64 9 Cut the tie straps at the rear of the main PCB mounting plate to improve manoeuvrability of the main PCB mounting plate. 10 Lift the main PCB mounting plate and place it on a support. Service manual EBLQ+EDLQ011~016CAV3+W1 + EBLQ+EDLQ011~016CA3V3+W1 + EK(2)CB07CAV3 + EKMBUHCA3V3+9W1 Daikin Altherma – Monobloc ESIE18-04 – 2019.02...
- Page 65 Is the problem solved? Action No further actions required. Return to "Checking procedures" on page 62 of the inverter PCB and continue with the next procedure. EBLQ+EDLQ011~016CAV3+W1 + EBLQ+EDLQ011~016CA3V3+W1 Service manual + EK(2)CB07CAV3 + EKMBUHCA3V3+9W1 Daikin Altherma – Monobloc ESIE18-04 – 2019.02...
-
Page 66: Lan Adapter Pcb
Select the correct type. procedures" on page 66 of the LAN adapter PCB and continue with the next procedure. Replace the LAN adapter PCB, "2.16.2 Repair procedures" on page 66. Service manual EBLQ+EDLQ011~016CAV3+W1 + EBLQ+EDLQ011~016CA3V3+W1 + EK(2)CB07CAV3 + EKMBUHCA3V3+9W1 Daikin Altherma – Monobloc ESIE18-04 – 2019.02... -
Page 67: Double Fan Outdoor Unit - Single Phase
2 Enter the model name of your unit and check if the installed spare part number corresponds with the spare part number indicated in the webbank. EBLQ+EDLQ011~016CAV3+W1 + EBLQ+EDLQ011~016CA3V3+W1 Service manual + EK(2)CB07CAV3 + EKMBUHCA3V3+9W1 Daikin Altherma – Monobloc ESIE18-04 – 2019.02... - Page 68 11 Slightly lift the upper assembly and slide it to the right to release 10 Insert 2 flathead screwdrivers in the slots and unlatch the upper the 3 hooks. and lower assemblies. Service manual EBLQ+EDLQ011~016CAV3+W1 + EBLQ+EDLQ011~016CA3V3+W1 + EK(2)CB07CAV3 + EKMBUHCA3V3+9W1 Daikin Altherma – Monobloc ESIE18-04 – 2019.02...
- Page 69 X32A and X111A from the main PCB. Connector X12A Connector X21A 15 Loosen the wire terminals NA, LA , LB and NB. Connector X22A EBLQ+EDLQ011~016CAV3+W1 + EBLQ+EDLQ011~016CA3V3+W1 Service manual + EK(2)CB07CAV3 + EKMBUHCA3V3+9W1 Daikin Altherma – Monobloc ESIE18-04 – 2019.02...
- Page 70 6 Install the upper assembly on the lower assembly and slide it to the left to hook and latch the upper and lower assemblies. Upper assembly Lower assembly Hook Service manual EBLQ+EDLQ011~016CAV3+W1 + EBLQ+EDLQ011~016CA3V3+W1 + EK(2)CB07CAV3 + EKMBUHCA3V3+9W1 Daikin Altherma – Monobloc ESIE18-04 – 2019.02...
-
Page 71: Double Fan Outdoor Unit - Three Phase
1 Adjust the wiring according to the wiring diagram and connection diagram, see "5.2 Wiring diagram" on page 101. 2 Check that all connectors are fully plugged‑in. All colour codes MUST correspond. EBLQ+EDLQ011~016CAV3+W1 + EBLQ+EDLQ011~016CA3V3+W1 Service manual + EK(2)CB07CAV3 + EKMBUHCA3V3+9W1 Daikin Altherma – Monobloc ESIE18-04 – 2019.02... - Page 72 Is the wiring on the main PCB Action correct? Return to "Checking procedures" on page 71 of the main PCB and continue with the next procedure. Service manual EBLQ+EDLQ011~016CAV3+W1 + EBLQ+EDLQ011~016CA3V3+W1 + EK(2)CB07CAV3 + EKMBUHCA3V3+9W1 Daikin Altherma – Monobloc ESIE18-04 – 2019.02...
-
Page 73: Outdoor Unit Fan Motor
4 Connect all connectors to the main PCB assembly. 1 Check the state of the propeller fan blade assemblies for damage, deformations and cracks. EBLQ+EDLQ011~016CAV3+W1 + EBLQ+EDLQ011~016CA3V3+W1 Service manual + EK(2)CB07CAV3 + EKMBUHCA3V3+9W1 Daikin Altherma – Monobloc ESIE18-04 – 2019.02... - Page 74 PCB. The voltage MUST be 3 Measure the voltage on the DC fan motor connector pins 4-7. 270~330 V DC. The measured voltage MUST be 270~330 V DC. Service manual EBLQ+EDLQ011~016CAV3+W1 + EBLQ+EDLQ011~016CA3V3+W1 + EK(2)CB07CAV3 + EKMBUHCA3V3+9W1 Daikin Altherma – Monobloc ESIE18-04 – 2019.02...
-
Page 75: Repair Procedures
After all checking procedures listed above have been performed: Is the problem solved? Action No further actions required. Return to the troubleshooting of the specific error and continue with the next procedure. EBLQ+EDLQ011~016CAV3+W1 + EBLQ+EDLQ011~016CA3V3+W1 Service manual + EK(2)CB07CAV3 + EKMBUHCA3V3+9W1 Daikin Altherma – Monobloc ESIE18-04 – 2019.02... - Page 76 Is the problem solved? Action No further actions required. Return to "2.18.1 Checking procedures" on page 73 of the outdoor unit fan motor and continue with the next procedure. Service manual EBLQ+EDLQ011~016CAV3+W1 + EBLQ+EDLQ011~016CA3V3+W1 + EK(2)CB07CAV3 + EKMBUHCA3V3+9W1 Daikin Altherma – Monobloc ESIE18-04 – 2019.02...
-
Page 77: Plate Work
This procedure is just an example and may differ on some details for your actual unit. Prerequisite: Turn OFF the unit via the user interface. EBLQ+EDLQ011~016CAV3+W1 + EBLQ+EDLQ011~016CA3V3+W1 Service manual + EK(2)CB07CAV3 + EKMBUHCA3V3+9W1 Daikin Altherma – Monobloc ESIE18-04 – 2019.02... -
Page 78: To Install The Hydrobox
The reactor will trip at a temperature of 115°C and will reset at a temperature of 95°C. 3 Measure the resistance on the following locations of the reactor. Resistance values MUST be as follows: Service manual EBLQ+EDLQ011~016CAV3+W1 + EBLQ+EDLQ011~016CA3V3+W1 + EK(2)CB07CAV3 + EKMBUHCA3V3+9W1 Daikin Altherma – Monobloc ESIE18-04 – 2019.02... -
Page 79: Repair Procedures
Prerequisite: Turn OFF the unit via the user interface. 37.13 Prerequisite: Turn OFF the respective circuit breaker. 38.56 39.98 Prerequisite: Remove the required plate work, see "2.19 Plate work" on page 77. EBLQ+EDLQ011~016CAV3+W1 + EBLQ+EDLQ011~016CA3V3+W1 Service manual + EK(2)CB07CAV3 + EKMBUHCA3V3+9W1 Daikin Altherma – Monobloc ESIE18-04 – 2019.02... -
Page 80: Repair Procedures
5 Fix the refrigerant pressure sensor harness using new tie straps. 6 Add refrigerant according requirements, "3.2.2 Repair procedures" on page 93. Is the problem solved? Action No further actions required. Service manual EBLQ+EDLQ011~016CAV3+W1 + EBLQ+EDLQ011~016CA3V3+W1 + EK(2)CB07CAV3 + EKMBUHCA3V3+9W1 Daikin Altherma – Monobloc ESIE18-04 – 2019.02... -
Page 81: Solenoid Valve
Prerequisite: If needed, remove any parts to create more space for the removal. 1 Remove solenoid valve coil, "2.22.2 Repair procedures" on page 81. 2 Cut the solenoid valve body pipes using a pipe cutter. EBLQ+EDLQ011~016CAV3+W1 + EBLQ+EDLQ011~016CA3V3+W1 Service manual + EK(2)CB07CAV3 + EKMBUHCA3V3+9W1 Daikin Altherma – Monobloc ESIE18-04 – 2019.02... -
Page 82: Thermistors
3 Determine the thermistor resistance that matches the measured temperature. Prerequisite: Turn OFF the respective circuit breaker. Prerequisite: Remove the required plate work, see "2.19 Plate work" on page 77. Service manual EBLQ+EDLQ011~016CAV3+W1 + EBLQ+EDLQ011~016CA3V3+W1 + EK(2)CB07CAV3 + EKMBUHCA3V3+9W1 Daikin Altherma – Monobloc ESIE18-04 – 2019.02... - Page 83 Measured resistance: 21.86 kΩ, ▪ Measured resistance value is inside the range. R1T thermistor passes the check. INFORMATION All thermistors have a resistance tolerance of 5%. EBLQ+EDLQ011~016CAV3+W1 + EBLQ+EDLQ011~016CA3V3+W1 Service manual + EK(2)CB07CAV3 + EKMBUHCA3V3+9W1 Daikin Altherma – Monobloc ESIE18-04 – 2019.02...
-
Page 84: Water Thermistors
Is the thermistor correctly Action installed (thermal contact between the thermistor and the piping)? Perform an electrical check of the specific thermistor, see "Checking procedures" on page 84. Service manual EBLQ+EDLQ011~016CAV3+W1 + EBLQ+EDLQ011~016CA3V3+W1 + EK(2)CB07CAV3 + EKMBUHCA3V3+9W1 Daikin Altherma – Monobloc ESIE18-04 – 2019.02... - Page 85 NOT correct on the user interface display, replace the applicable PCB. EBLQ+EDLQ011~016CAV3+W1 + EBLQ+EDLQ011~016CA3V3+W1 Service manual + EK(2)CB07CAV3 + EKMBUHCA3V3+9W1 Daikin Altherma – Monobloc ESIE18-04 – 2019.02...
- Page 86 When reconnecting a connector to the PCB, do NOT apply Insulation force, as this may damage the connector or connector pins Thermistor wire Clip of the PCB. Thermistor Thermistor holder Service manual EBLQ+EDLQ011~016CAV3+W1 + EBLQ+EDLQ011~016CA3V3+W1 + EK(2)CB07CAV3 + EKMBUHCA3V3+9W1 Daikin Altherma – Monobloc ESIE18-04 – 2019.02...
-
Page 87: User Interface
6 Using the graphic below, determine the expected sensor output Tool. Re-install the software with the Updater Tool if versions do voltage based on the displayed flow rate. NOT match. EBLQ+EDLQ011~016CAV3+W1 + EBLQ+EDLQ011~016CA3V3+W1 Service manual + EK(2)CB07CAV3 + EKMBUHCA3V3+9W1 Daikin Altherma – Monobloc ESIE18-04 – 2019.02... -
Page 88: Repair Procedures
"3.3.2 Repair procedures" on page 96. INFORMATION 2 Loosen the water flow sensor connector nut. The flow sensor connector MUST be plugged into X4A on hydro PCB. Service manual EBLQ+EDLQ011~016CAV3+W1 + EBLQ+EDLQ011~016CA3V3+W1 + EK(2)CB07CAV3 + EKMBUHCA3V3+9W1 Daikin Altherma – Monobloc ESIE18-04 – 2019.02... -
Page 89: Water Pump
Water flow sensor connector nut Clip Rotor shaft Water flow sensor Water pump motor 2 Inspect the rotor of the water pump motor. It MUST rotate smoothly. EBLQ+EDLQ011~016CAV3+W1 + EBLQ+EDLQ011~016CA3V3+W1 Service manual + EK(2)CB07CAV3 + EKMBUHCA3V3+9W1 Daikin Altherma – Monobloc ESIE18-04 – 2019.02... -
Page 90: Repair Procedures
Is the problem solved? Action No further actions required. Return to "2.26.1 Checking procedures" on page 89 of the water pump and continue with the next procedure. Service manual EBLQ+EDLQ011~016CAV3+W1 + EBLQ+EDLQ011~016CA3V3+W1 + EK(2)CB07CAV3 + EKMBUHCA3V3+9W1 Daikin Altherma – Monobloc ESIE18-04 – 2019.02... -
Page 91: Third Party Components
Return to the troubleshooting of the specific error and continue with the next procedure. Adjust the wiring where needed, "3.1.2 Repair procedures" on page 92. Connector Water pump housing EBLQ+EDLQ011~016CAV3+W1 + EBLQ+EDLQ011~016CA3V3+W1 Service manual + EK(2)CB07CAV3 + EKMBUHCA3V3+9W1 Daikin Altherma – Monobloc ESIE18-04 – 2019.02... -
Page 92: Repair Procedures
Liquid stop valve Gas stop valve Add or recuperate refrigerant until correctly charged, see 2 Check if the stop valve is completely open. "3.2.2 Repair procedures" on page 93. Service manual EBLQ+EDLQ011~016CAV3+W1 + EBLQ+EDLQ011~016CA3V3+W1 + EK(2)CB07CAV3 + EKMBUHCA3V3+9W1 Daikin Altherma – Monobloc ESIE18-04 – 2019.02... -
Page 93: Repair Procedures
To open the stop valve of the refrigerant circuit Prerequisite: Remove the required plate work, see "2.19 Plate work" on page 77. 1 Remove the caps. EBLQ+EDLQ011~016CAV3+W1 + EBLQ+EDLQ011~016CA3V3+W1 Service manual + EK(2)CB07CAV3 + EKMBUHCA3V3+9W1 Daikin Altherma – Monobloc ESIE18-04 – 2019.02... - Page 94 ▪ Flush the piping before brazing with nitrogen to avoid oxidation state. of the inside of the copper tubes (nitrogen purity ≥99.99%). ▪ R32 can be charged in gas phase. Service manual EBLQ+EDLQ011~016CAV3+W1 + EBLQ+EDLQ011~016CA3V3+W1 + EK(2)CB07CAV3 + EKMBUHCA3V3+9W1 Daikin Altherma – Monobloc ESIE18-04 – 2019.02...
-
Page 95: Water Circuit
It is recommended to perform the checks in the listed Return to the troubleshooting of order. the specific error and continue with the next procedure. EBLQ+EDLQ011~016CAV3+W1 + EBLQ+EDLQ011~016CA3V3+W1 Service manual + EK(2)CB07CAV3 + EKMBUHCA3V3+9W1 Daikin Altherma – Monobloc ESIE18-04 – 2019.02... -
Page 96: Repair Procedures
1 Connect the drain hose to the drain and fill valve. A leak was found in the Action installation? Repair the leak in the installation, "3.3.2 Repair procedures" on page 96. Service manual EBLQ+EDLQ011~016CAV3+W1 + EBLQ+EDLQ011~016CA3V3+W1 + EK(2)CB07CAV3 + EKMBUHCA3V3+9W1 Daikin Altherma – Monobloc ESIE18-04 – 2019.02... - Page 97 5 Purge as much air as possible from the water circuit, see "3.3.2 Repair procedures" on page 96. 6 Refill the circuit until the pressure is ±2.0 bar. EBLQ+EDLQ011~016CAV3+W1 + EBLQ+EDLQ011~016CA3V3+W1 Service manual + EK(2)CB07CAV3 + EKMBUHCA3V3+9W1 Daikin Altherma – Monobloc ESIE18-04 – 2019.02...
-
Page 98: Manuafacturer Components
Wait for the outdoor temperature To repair the leak in the water circuit to return within the operating 1 Repair the leak in the water circuit. range. Service manual EBLQ+EDLQ011~016CAV3+W1 + EBLQ+EDLQ011~016CA3V3+W1 + EK(2)CB07CAV3 + EKMBUHCA3V3+9W1 Daikin Altherma – Monobloc ESIE18-04 – 2019.02... -
Page 99: Maintenance
ALWAYS clean spilled water. 5 Clean the water filter with water and a soft brush. Water filter EBLQ+EDLQ011~016CAV3+W1 + EBLQ+EDLQ011~016CA3V3+W1 Service manual + EK(2)CB07CAV3 + EKMBUHCA3V3+9W1 Daikin Altherma – Monobloc ESIE18-04 – 2019.02... -
Page 100: Technical Data
See the installer reference guide on business portal for more information. 5.1.2 Detailed information setting mode: Remote controller See the installer reference guide on business portal for more information. Service manual EBLQ+EDLQ011~016CAV3+W1 + EBLQ+EDLQ011~016CA3V3+W1 + EK(2)CB07CAV3 + EKMBUHCA3V3+9W1 Daikin Altherma – Monobloc ESIE18-04 – 2019.02... -
Page 101: Wiring Diagram
Printed circuit board (main) only) A2P (V3 only) Printed circuit board (service) L1R (V3 only) Reactor A2P (W1 only) Printed circuit board (inverter) L1R~L3R (W1 Reactor only) EBLQ+EDLQ011~016CAV3+W1 + EBLQ+EDLQ011~016CA3V3+W1 Service manual + EK(2)CB07CAV3 + EKMBUHCA3V3+9W1 Daikin Altherma – Monobloc ESIE18-04 – 2019.02... - Page 102 Hydro switch box supplied from circuit) compressor module compressor module Extension PCB (control, optional) Hydro switch box Hydro switch box User interface PCB Indoor Indoor Service manual EBLQ+EDLQ011~016CAV3+W1 + EBLQ+EDLQ011~016CA3V3+W1 + EK(2)CB07CAV3 + EKMBUHCA3V3+9W1 Daikin Altherma – Monobloc ESIE18-04 – 2019.02...
- Page 103 # Electrical meters Backup heater element (1 kW) X*A (A4P) Connector Backup heater element (2 kW) Terminal strip Backup heater element Optional Field supply Overcurrent fuse backup heater EBLQ+EDLQ011~016CAV3+W1 + EBLQ+EDLQ011~016CA3V3+W1 Service manual + EK(2)CB07CAV3 + EKMBUHCA3V3+9W1 Daikin Altherma – Monobloc ESIE18-04 – 2019.02...
- Page 104 Control box power supply: 230 V + earth X1M: L-N-PE X1M: L-N-PE 2 core 230 V External indoor thermistor X2M: 1a-2a Power supply signal Only for KRCS01-1 4D115044A Service manual EBLQ+EDLQ011~016CAV3+W1 + EBLQ+EDLQ011~016CA3V3+W1 + EK(2)CB07CAV3 + EKMBUHCA3V3+9W1 Daikin Altherma – Monobloc ESIE18-04 – 2019.02...
- Page 105 Correct diagrams are supplied with the unit and can also be found in the technical data book. Control box X4/7M 4D115042 EBLQ+EDLQ011~016CAV3+W1 + EBLQ+EDLQ011~016CA3V3+W1 Service manual + EK(2)CB07CAV3 + EKMBUHCA3V3+9W1 Daikin Altherma – Monobloc ESIE18-04 – 2019.02...
- Page 106 Correct diagrams are supplied with the unit and can also be found in the technical data book. Backup heater kit X14M X15M 4D115042 Service manual EBLQ+EDLQ011~016CAV3+W1 + EBLQ+EDLQ011~016CA3V3+W1 + EK(2)CB07CAV3 + EKMBUHCA3V3+9W1 Daikin Altherma – Monobloc ESIE18-04 – 2019.02...
- Page 107 2 3 4 X106A X107A X22A X21A X17A Front Position of compressor terminal S1NPH M1F MS M2F MS Injection Main Upper fan Lower fan 4D115042 EBLQ+EDLQ011~016CAV3+W1 + EBLQ+EDLQ011~016CA3V3+W1 Service manual + EK(2)CB07CAV3 + EKMBUHCA3V3+9W1 Daikin Altherma – Monobloc ESIE18-04 – 2019.02...
- Page 108 H1P H2P H3P H4P H5P H6P H7P Z7C N=5 X516A X517A Z8C N=6 M1F MS M2F MS Front Upper fan Lower fan Position of compressor terminal 4D115042 Service manual EBLQ+EDLQ011~016CAV3+W1 + EBLQ+EDLQ011~016CA3V3+W1 + EK(2)CB07CAV3 + EKMBUHCA3V3+9W1 Daikin Altherma – Monobloc ESIE18-04 – 2019.02...
- Page 109 1 3 5 X20A X28A X16A X25A X31A X26A X45A X7M 1 2 3 4 Hydro switch box E11H E12H E13H E14H E15H 4D115042 EBLQ+EDLQ011~016CAV3+W1 + EBLQ+EDLQ011~016CA3V3+W1 Service manual + EK(2)CB07CAV3 + EKMBUHCA3V3+9W1 Daikin Altherma – Monobloc ESIE18-04 – 2019.02...
- Page 110 X2M/12 X2M/13 X2M/14 X2M/15 Control box X14M X14M i t p y l n r o f i t p 9 * ( 4D115042 Service manual EBLQ+EDLQ011~016CAV3+W1 + EBLQ+EDLQ011~016CA3V3+W1 + EK(2)CB07CAV3 + EKMBUHCA3V3+9W1 Daikin Altherma – Monobloc ESIE18-04 – 2019.02...
- Page 111 Min. load 10mA Min. load 10mA External indoor ambient Electric pulse meter inputs: sensor option 5 V DC pulse detection (voltage supplied by PCB) 4D115042 EBLQ+EDLQ011~016CAV3+W1 + EBLQ+EDLQ011~016CA3V3+W1 Service manual + EK(2)CB07CAV3 + EKMBUHCA3V3+9W1 Daikin Altherma – Monobloc ESIE18-04 – 2019.02...
-
Page 112: Wiring Diagram: Three Phase
Fan motor Printed circuit board (noise filter) PS (A1P) (V3 Switching power supply A4P (V3 only) Printed circuit board (communication) only) BS1~BS4 (A2P) Push-button switch Service manual EBLQ+EDLQ011~016CAV3+W1 + EBLQ+EDLQ011~016CA3V3+W1 + EK(2)CB07CAV3 + EKMBUHCA3V3+9W1 Daikin Altherma – Monobloc ESIE18-04 – 2019.02... - Page 113 (standard) DS1 (A4P) DIP switch Only for preferential kWh rate Only for preferential kWh rate Booster heater (3 kW) power supply (compressor) power supply (compressor) EBLQ+EDLQ011~016CAV3+W1 + EBLQ+EDLQ011~016CA3V3+W1 Service manual + EK(2)CB07CAV3 + EKMBUHCA3V3+9W1 Daikin Altherma – Monobloc ESIE18-04 – 2019.02...
- Page 114 Backup heater element S5P-S6P # Electrical meters Overcurrent fuse backup heater X*A (A4P) Connector F1T, F2T Thermal fuse backup heater Terminal strip Optional Field supply Service manual EBLQ+EDLQ011~016CAV3+W1 + EBLQ+EDLQ011~016CA3V3+W1 + EK(2)CB07CAV3 + EKMBUHCA3V3+9W1 Daikin Altherma – Monobloc ESIE18-04 – 2019.02...
- Page 115 Control box power supply: 230 V + earth X1M: L-N-PE X1M: L-N-PE 2 core 230 V External indoor thermistor X2M: 1a-2a Power supply signal Only for KRCS01-1 4D115044A EBLQ+EDLQ011~016CAV3+W1 + EBLQ+EDLQ011~016CA3V3+W1 Service manual + EK(2)CB07CAV3 + EKMBUHCA3V3+9W1 Daikin Altherma – Monobloc ESIE18-04 – 2019.02...
- Page 116 Correct diagrams are supplied with the unit and can also be found in the technical data book. Control box X4/7M 4D115042 Service manual EBLQ+EDLQ011~016CAV3+W1 + EBLQ+EDLQ011~016CA3V3+W1 + EK(2)CB07CAV3 + EKMBUHCA3V3+9W1 Daikin Altherma – Monobloc ESIE18-04 – 2019.02...
- Page 117 Correct diagrams are supplied with the unit and can also be found in the technical data book. Backup heater kit X14M X15M 4D115042 EBLQ+EDLQ011~016CAV3+W1 + EBLQ+EDLQ011~016CA3V3+W1 Service manual + EK(2)CB07CAV3 + EKMBUHCA3V3+9W1 Daikin Altherma – Monobloc ESIE18-04 – 2019.02...
- Page 118 2 3 4 X22A X21A X17A X106A X107A Front Position of compressor terminal S1NPH M1F MS M2F MS Injection Main Upper fan Lower fan 4D115042 Service manual EBLQ+EDLQ011~016CAV3+W1 + EBLQ+EDLQ011~016CA3V3+W1 + EK(2)CB07CAV3 + EKMBUHCA3V3+9W1 Daikin Altherma – Monobloc ESIE18-04 – 2019.02...
- Page 119 H1P H2P H3P H4P H5P H6P H7P Z7C N=5 X516A X517A Z8C N=6 M1F MS M2F MS Front Upper fan Lower fan Position of compressor terminal 4D115042 EBLQ+EDLQ011~016CAV3+W1 + EBLQ+EDLQ011~016CA3V3+W1 Service manual + EK(2)CB07CAV3 + EKMBUHCA3V3+9W1 Daikin Altherma – Monobloc ESIE18-04 – 2019.02...
- Page 120 1 3 5 X28A X20A X16A X25A X31A X26A X45A X7M 1 2 3 4 Hydro switch box E11H E12H E13H E14H E15H 4D115042 Service manual EBLQ+EDLQ011~016CAV3+W1 + EBLQ+EDLQ011~016CA3V3+W1 + EK(2)CB07CAV3 + EKMBUHCA3V3+9W1 Daikin Altherma – Monobloc ESIE18-04 – 2019.02...
- Page 121 X2M/12 X2M/13 X2M/14 X2M/15 Control box X14M X14M i t p y l n r o f i t p 9 * ( 4D115042 EBLQ+EDLQ011~016CAV3+W1 + EBLQ+EDLQ011~016CA3V3+W1 Service manual + EK(2)CB07CAV3 + EKMBUHCA3V3+9W1 Daikin Altherma – Monobloc ESIE18-04 – 2019.02...
- Page 122 Min. load 10mA Min. load 10mA External indoor ambient Electric pulse meter inputs: sensor option 5 V DC pulse detection 4D115042 (voltage supplied by PCB) Service manual EBLQ+EDLQ011~016CAV3+W1 + EBLQ+EDLQ011~016CA3V3+W1 + EK(2)CB07CAV3 + EKMBUHCA3V3+9W1 Daikin Altherma – Monobloc ESIE18-04 – 2019.02...
-
Page 123: Piping Diagram: Outdoor Unit
Liquid pipe thermistor Crankcase heater Electronic expansion valve (injection) Water side Refrigerant side Outlet Inlet Field installed Refrigerant flow - cooling Refrigerant flow – heating EBLQ+EDLQ011~016CAV3+W1 + EBLQ+EDLQ011~016CA3V3+W1 Service manual + EK(2)CB07CAV3 + EKMBUHCA3V3+9W1 Daikin Altherma – Monobloc ESIE18-04 – 2019.02... -
Page 124: Component Overview
Plate type heat exchanger Heat exchanger Pump Air thermistor R1T Air purge valve Heat exchanger (middle) thermistor R5T Suction thermistor R3T Heat exchanger thermistor R4T Expansion vessel Service manual EBLQ+EDLQ011~016CAV3+W1 + EBLQ+EDLQ011~016CA3V3+W1 + EK(2)CB07CAV3 + EKMBUHCA3V3+9W1 Daikin Altherma – Monobloc ESIE18-04 – 2019.02... - Page 125 Refrigerant gas connection Expansion valve Liquid thermistor R6T Outlet water after plate type heat exchanger thermistor R1T Compressor High pressure switch Refrigerant liquid connection EBLQ+EDLQ011~016CAV3+W1 + EBLQ+EDLQ011~016CA3V3+W1 Service manual + EK(2)CB07CAV3 + EKMBUHCA3V3+9W1 Daikin Altherma – Monobloc ESIE18-04 – 2019.02...
-
Page 126: Component Overview: Three Phase
Heat exchanger Pump Air thermistor R1T Air purge valve Heat exchanger (middle) thermistor R5T Suction thermistor R3T Heat exchanger thermistor R4T Expansion vessel Accumulator Service manual EBLQ+EDLQ011~016CAV3+W1 + EBLQ+EDLQ011~016CA3V3+W1 + EK(2)CB07CAV3 + EKMBUHCA3V3+9W1 Daikin Altherma – Monobloc ESIE18-04 – 2019.02... - Page 127 Refrigerant gas connection High pressure switch Liquid thermistor R6T Outlet water after plate type heat exchanger thermistor R1T Compressor Expansion valve Refrigerant liquid connection EBLQ+EDLQ011~016CAV3+W1 + EBLQ+EDLQ011~016CA3V3+W1 Service manual + EK(2)CB07CAV3 + EKMBUHCA3V3+9W1 Daikin Altherma – Monobloc ESIE18-04 – 2019.02...
-
Page 128: Field Information Report
5 Technical data Field information report See next page. Service manual EBLQ+EDLQ011~016CAV3+W1 + EBLQ+EDLQ011~016CA3V3+W1 + EK(2)CB07CAV3 + EKMBUHCA3V3+9W1 Daikin Altherma – Monobloc ESIE18-04 – 2019.02... - Page 129 In case a problem occurred on the unit which could not be resolved by using the content of this service manual or in case you have a problem which could be resolved but of which the manufacturer should be notified, we advise you to contact your distributor. To facilitate the investigation, additional information is required.
- Page 130 Application information Application (house, apartment, office,…): New project or reimbursement: Heat emitters (radiators / under floor heating / fan coils /…): Hydraulic layout (simple schematic): Unit / Installation information Model name: Serial number: Installation / commissioning date: Software version hydro PCB A1P Software version hydro PCB A5P Software version user interface: Software version outdoor PCB:...
-
Page 131: Service Tools
Also additional information on the service tools (instruction, latest software) can be found here. Field settings See next page. EBLQ+EDLQ011~016CAV3+W1 + EBLQ+EDLQ011~016CA3V3+W1 Service manual + EK(2)CB07CAV3 + EKMBUHCA3V3+9W1 Daikin Altherma – Monobloc ESIE18-04 – 2019.02... - Page 132 Field settings table [6.8.2] = ..ID8281 (*1) (*2) [6.8.2] = ..ID8282 (*3) (*4) Applicable units EDLQ011CAV3 EDLQ011CA3V3 EDLQ014CAV3 EDLQ014CA3V3 EDLQ016CAV3 EDLQ016CA3V3 EBLQ011CAV3 EBLQ011CA3V3 EBLQ014CAV3 EBLQ014CA3V3 EBLQ016CAV3 EBLQ016CA3V3 EDLQ011CAW1 EDLQ011CA3W1 EDLQ014CAW1 EDLQ014CA3W1 EDLQ016CAW1 EDLQ016CA3W1 EBLQ011CAW1 EBLQ011CA3W1 EBLQ014CAW1 EBLQ014CA3W1 EBLQ016CAW1 EBLQ016CA3W1 Notes (*1) *B*CAV3/CAW1...
- Page 133 Field settings table Installer setting at variance with default value Breadcrumb Field code Setting name Range, step Date Value Default value User settings └─ Preset values └─ Room temperature 7.4.1.1 Comfort (heating) [3-07]~[3-06], step: A.3.2.4 21°C 7.4.1.2 Eco (heating) [3-07]~[3-06], step: A.3.2.4 19°C 7.4.1.3 Comfort (cooling)
- Page 134 Field settings table Installer setting at variance with default value Breadcrumb Field code Setting name Range, step Date Value Default value A.2.1.8 [7-02] Number of LWT zones 0: 1 LWT zone 1: 2 LWT zones A.2.1.9 [F-0D] Pump operation mode 0: Continuous 1: Sample 2: Request...
- Page 135 Field settings table Installer setting at variance with default value Breadcrumb Field code Setting name Range, step Date Value Default value A.3.1.3.2 [9-0A] Cooling 3~10°C, step: 1°C 5°C └─ Room thermostat A.3.2.1.1 [3-07] Room temp. range Minimum temp (heating) 12~18°C, step: A.3.2.4 16°C A.3.2.1.2 [3-06]...
- Page 136 Field settings table Installer setting at variance with default value Breadcrumb Field code Setting name Range, step Date Value Default value A.6.C 0: Manual 1: Automatic └─ Overview settings [0-00] Leaving water value for high ambient temp. for LWT add zone heating WD curve. [9-05]~min(45, [9-06])°C, step: 1°C 35⁰C [0-01]...
- Page 137 Field settings table Installer setting at variance with default value Breadcrumb Field code Setting name Range, step Date Value Default value [4-03] Operation permission of the booster heater 0: Limited 1: No limit 2: Most optimum 3: Optimum 4: Only legionella [4-04] How to protect the water pipes from freezing 0: Continuous pump operation...
- Page 138 Field settings table Installer setting at variance with default value Breadcrumb Field code Setting name Range, step Date Value Default value [8-06] Leaving water temperature maximum modulation. 0~10°C, step: 1°C 3°C [8-07] What is the desired comfort main LWT in cooling? [9-03]~[9-02], step: 1°C 18°C [8-08]...
- Page 139 Field settings table Installer setting at variance with default value Breadcrumb Field code Setting name Range, step Date Value Default value [D-04] Is the option box used for PCC ? 0: No 1: Yes [D-05] Is the pump allowed to run if prefer. kWh rate PS is cut? 0: Forced off 1: As normal [D-07]...
- Page 140 ESIE18-04 2019.02...
Need help?
Do you have a question about the Altherma EBLQ011CAV3 and is the answer not in the manual?
Questions and answers