
Related Manuals for SUTO S606


Summary of Contents for SUTO S606
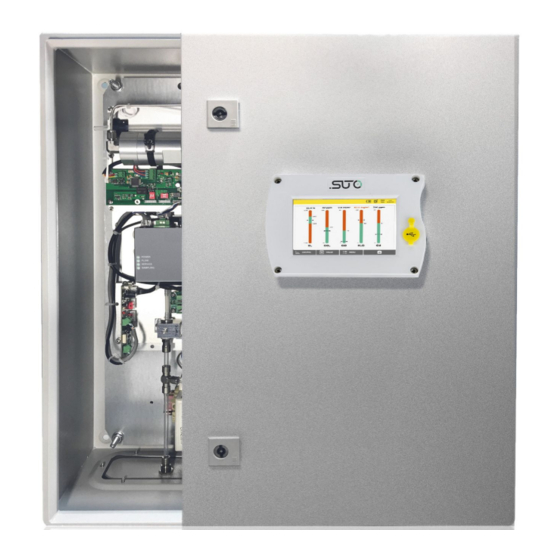
- Page 1 English Instruction and Operation Manual S606 Stationary Breathing Air Quality Analyzer...
- Page 2 The device is destined exclusively for the described application. SUTO offers no guarantee for the suitability for any other purpose. SUTO is also not liable for consequential damage resulting from the delivery, capability or use of this device.
-
Page 3: Table Of Contents
9.4.4 Calibration of Gas Sensors.............27 9.4.5 Files..................28 9.4.6 Logger Setting..............29 9.4.7 Alarm Setting...............30 9.4.8 Communication..............31 10 Software Installation...............32 11 Firmware Updates................33 12 Calibration..................35 12.1 Calibration for DP Sensor and Oil Sensor........35 12.2 Calibration for O2,CO, CO2 Sensor..........35 12.2.1 Calibration Gases..............36 12.2.2 Calibration Procedure............37 S606... - Page 4 13 Optional Accessories................43 14 Maintenance...................43 15 Disposal or Waste................43 16 Warranty..................43 17 Appendix - Modbus Holding Register Table..........44 17.1 Modbus Interface..............44 17.2 Modbus Register Table...............45 S606...
-
Page 5: Safety Instructions
• The system must be disconnected from any power supply during maintenance work. • Do not exceed the permitted operating parameters as specified in the data sheet, this manual or written on the instrument. • Make sure the product is operated in its permitted limitations. S606... - Page 6 Or you may use any reference meter. Only after doing these examinations, you can rely on the measurement results after the instrument have been used for other measurement cycles. S606...
- Page 7 • Check your measurement point with the enclosed test kit, by purging air in prior to the use of the instrument through the test kit. A clean tissue may help to identify oil, water or any other lubricants in the air. S606...
-
Page 8: Registered Trademarks
Z180.1-0, and more. The S606 provides a safe and healthy environment for the operator. The S606 is mainly used in the industrial environment. It can not be used in hazardous or explosive environment and it is not suitable for permanent outside applications. -
Page 9: Technical Data
0.4 ... 1.5 MPa(g) For higher pressure need pressure reducer externally Storage & Transport temperature -10°C … + 50°C Ambient temperature 0°C … +50°C Ambient humidity 0... 90% rH Sample flow rate 6 LPM@4 MPa(g), depends on input pressure S606... - Page 10 Sensor principle Photo ionization detector UV lamp lifetime 6,000 working hours or 1 year, whichever comes first Oil Mist and Particle Sensor (Only for version S606-C) Measuring range 0.0 ... 5.0 mg/m³ (Based on 1000 hPa(a), 20°C, 0% relative humidity) Accuracy 15% of reading ±...
-
Page 11: Dimensions
±3 °C Td (-100 … -70 °C Td) Resolution 0.1°C Td Sensor principle QCM + Polymer Pressure Sensor Measuring range 0 ... 16 bar(g) Accuracy 0.5% full scale Resolution 0.01 bar Sensor principle Piezzo resistive pressure sensor 6 Dimensions Dimensions in mm: S606... -
Page 12: Installation On Site
7 Installation on Site Make sure that all components listed below are included in your package. Qty. Description Item No. S606 Stationary Breathing Air Quality S606-I version: Analyzer in a wall mountable cabinet D500 0606 (with oil vapor sensor) S606-C version:... -
Page 13: Mount On The Wall
7 Installation on Site 7.2 Mount on the Wall S606... -
Page 14: Electrical Connections
7 Installation on Site 7.3 Electrical Connections The S606 provides the following electrical connectors: • The power supply is installed through a PG cable gland. The wires are connected to the internal screw terminals. • One M12 connector for Modbus/RTU •... -
Page 15: Power Supply
Please observe voltage ranges and power levels! 7.3.2 RS-485 Networking (Modbus/RTU) Through the M12 connector, the S606 can be connected to the RS-485 network over the Modbus/RTU protocol. The RS-485 networking uses the following 3 pins in the M12 connector. -
Page 16: Alarm Outputs
S606 provides one relay (I terminal) for summary alarm output 250V 6A/DC 30V 6A) in the S606 cabinet. The following figure shows the back of the S606 where the relay terminal I is located. There is an optional 8 channel relay module available (AC: 0.5 A @ 120 V;... -
Page 17: Compressed Air Connection
7 Installation on Site 7.4 Compressed Air Connection The S606 offers a compressed air inlet at the bottom of the cabinet. S606 bottom view ATTENTION! Permissible pressure! Please observe the maximum permissible incoming pressure. It must be in between 0.4 and 1.5 MPa. If the pressure exceeds, the device will be damaged. -
Page 18: Water Filling Connector
S606, thus the CO sensor will not be damaged because the measured gas is too dry. The water filling connector is located on the left side of S606. The water draining connector is located on the bottom of the S606. -
Page 19: Calibration Connector
7.6 Calibration Connector The calibration connector is located on the left side of the S606. When the sensors need to be calibrated, remove the connector cap, connect calibration hose and do the calibration. When the calibration is finished, put on the cap to avoid the dust or other substance entering. -
Page 20: Setup
8 Setup 8 Setup The S606 is configured ex-work and ready to measure when you get it. The setup settings are saved in the device and will not be lost even after a power failure. The device also enables you to change the ex-work settings. For more information, see section 9.4. - Page 21 Clicking No goes to the Value screen. Note: If your system pressure is greater than 15 bar, make sure to enter your system pressure correctly, otherwise it may affect the measurement! The value screen appears, as shown on the left. S606...
-
Page 22: Main Screen
Alarm triggered your local dealer. Low water level indication High water level indication S4A remote connected 4G/LTE signal strength Type of the connected sensor does not match with the sensor type configured in the device. S606... -
Page 23: Value Screen
9.3 Graphic Screen Shows the dynamic graphs of all measurements. Press Graphic to view the graphic screen. The graphic view is pre-configured in the factory. You can view the S606 measurement graph directly or configure the graphic freely. S606... -
Page 24: Menu
Channel data area - One click can switch the single channel - Long touch is for settings 9.4 Menu Enables you to change the S606 settings. You can enter the main menu by pressing Menu in the quick buttons bar at the bottom. -
Page 25: System Setting
9.4.2 System Setting Enables you to configure general settings of the S606. Password To configure a password to protect the S606 from unauthorized operations. Back light To adjust the back light brightness and the dimming timeout. -
Page 26: Service Company Information
System Update To update the system firmware. Reset To reboot the display. 9.4.3 Service Company Information Enables you to add the contacts of the service provider, which can be shown on the report. The company logo can be imported. S606... -
Page 27: Calibration Of Gas Sensors
Calibrate the gas sensors and display general information about the calibration. Zero calibration Do the zero calibration. Span calibration Do the span calibration. Calibration Check the sensor calibration information, such as information last calibration data, next calibration date etc. Calibration Set the reference value. settings S606... -
Page 28: Files
All alarm information can be checked in the alarm history. Clicking the camera icon can capture screenshots. Memory status shows the free and total space at present. The files and screenshots can be deleted and exported. The captured screenshots can be viewed directly on the display. S606... -
Page 29: Logger Setting
• Memory mode: Choose a mode as needed. • Wrap around: If the memory is full, new logging data overwrites the oldest data. S606... -
Page 30: Alarm Setting
9 Operation and Configuration 9.4.7 Alarm Setting You can define alarms for the S606. The S606 offers one internal alarm relay I and an optical alarm indication (flashing value). The relay I indicates the summary alarm by default. The summary alarm is... - Page 31 After setting the alarms, you can view the activated alarms or pend some alarms through Menu > Alarm > Activated alarm. ATTENTION! Before installing the relay module, turn off the S606. After the relay module is installed, power on the S606 again. Otherwise, the normal use of the relay module may be affected.
-
Page 32: Communication
Field-bus Enter an IP address for the S606 or select DHCP for the Ethernet S606 to be assigned with a dynamic IP address. You also can read the system information or set some parameters through this communication. -
Page 33: Firmware Updates
11 Firmware Updates 11 Firmware Updates To update the firmware, just need a OTG-USB drive (supplied with the S606) and the firmware file (format like DIS606_1.82.tar) 1. Insert the USB to the connector on the front panel. Note: Do this after the S606 has fully booted. - Page 34 • Do not disconnect the USB. • Wait until the device is fully booted again before removing the USB. After the update is done, you may now select the new language or use new functions offered in the update. S606...
-
Page 35: Calibration
12.1 Calibration for DP Sensor and Oil Sensor For the dew point sensor and oil sensor, the calibration is complicated and time consuming, so SUTO provides the exchange service, that is, the complete sensor unit is exchanged with a newly-calibrated unit. -
Page 36: Calibration Gases
(the cal gas is 20 ppm ◦ Test gas CO : 500 ppm CO background(the cal gas is 1000 ppm CO Uncertainty of gases is 1% (K=2) Attention! Please select the suitable calibration gas, otherwise the sensor measurement accuracy will be affected. S606... -
Page 37: Calibration Procedure
Do not inhale the calibration gas. It can be harmful to health or even death! Alarms are triggered by calibration gas. You can disable relays to prevent from triggering external devices. S606... - Page 38 12 Calibration Calibration Settings The calibration reference data can be set before the calibration through Menu > Calibration > User Calibration Settings. Zero calibration Enter the zero calibration through Menu > Calibration > Zero calibration. S606...
- Page 39 10. After the calibration is done, close the gas supply and remove the hose. After the calibration, you can check the calibration result by using another span gas. Just perform the same steps as above, but select the test in the span calibration menu. S606...
- Page 40 12 Calibration Calibration Records You can view the calibration records through Menu > Files > Calibration Records. Example for calibration records file: S606...
- Page 41 12 Calibration The figure below is an example for the gas connection. S606...
- Page 42 CO: 20 ppm CO, N background : 1000 ppm CO background 34L, steel calibration gas cylinders Test Gas MESA CO: 10 ppm CO, N background : 500 ppm CO2 background 34L, steel calibration gas cylinders Transport casing MESA Carrying cases ID:500 Website: https://mesagas.com/ S606...
-
Page 43: Optional Accessories
Please find the warranty as a separated warranty card included with the instrument delivery. The warranty does not cover any wear parts or consumables, therefore the UV lamp with limited lifetime as well as the internal filter are not covered by the warranty. S606... -
Page 44: Appendix - Modbus Holding Register Table
(EMMMMMMM *) SEEEEEEE) Byte 0 Byte 3 UINT32 1-0-3-2 Byte 1 Byte 2 INT32 Byte 1 Byte 0 UINT16 INT16 Byte 1 Byte 0 UINT8 XXX * DATA INT8 * S: Sign, E: Exponent, M: Mantissa, XXX: no value S606... -
Page 45: Modbus Register Table
Number of Measuring 2010 INT16U 2-Byte 1...96 Channels 2011 STRING 16-Byte Device description R/W “S605” etc. 2019 INT16U 2-Byte Version of Modbus Definition 0x0201 = 02.01 2020 INT16U 2-Byte Version of this register table Start from 0x100 =1.00 S606... - Page 46 R/W User can enter a text 2035 STRING 16-Byte Measurement Point R/W User can enter a text How many and which SUTO sensors are 2043 INT16U 2-Byte Number of sensors connected to the main unit. Their settings are found from 10000 up.
- Page 47 2165 FLOAT 4-Byte threshold Pressure Low alarm 2167 FLOAT 4-Byte threshold 2169 FLOAT 4-Byte Pressure Hysteresis 2171 INT16U 2-Byte Relay port/status See explanation at 2136 Temperature High alarm 2172 FLOAT 4-Byte threshold Temperature Low alarm 2174 FLOAT 4-Byte threshold S606...
- Page 48 FLOAT 4-Byte Temperature Channel Value Humidity 2315 FLOAT 4-Byte Gas S. Device specific System Information for S605/606 2600 INT32U 4-Byte General System status Bit1 bit0(water level): 00 : normal 01: low level indicator 10: high level indicator 11: N/A S606...
- Page 49 4-Byte Maximum value temperature 2633 FLOAT 4-Byte Minimum value humidity gas Maximum value humidity 2635 FLOAT 4-Byte 2637 FLOAT 4-Byte Minimum value barometer 2639 FLOAT 4-Byte Maximum value barometer Specific Settings of integrated Sensors 10000 BYTE[1K] O2 sensor settings S606...
- Page 50 (Reserved) User calibration point 1 10513 FLOAT 4-Byte actual value (Reserved) 11000 BYTE[1K] CO sensor settings 11000 INT32U 4-Byte Serial number Factory S/N High = 0xFF, 11002 INT16U 2-Byte HW version 10 = 1.0 Low byte HW version S606...
- Page 51 Serial number Factory S/N High = 0xFF, 12502 INT16U 2-Byte HW version 10 = 1.0 Low byte HW version New firmware version FW version (low 3 Bytes 12503 INT32U 4-Byte format: used) XX.XX.XX Atmospheric pressure (in 12505 FLOAT 4-Byte hPa) S606...
- Page 52 SUTO iTEC GmbH SUTO iTEC (ASIA) Co., Ltd. Grißheimer Weg 21 Room 10, 6/F, Block B, Cambridge Plaza D-79423 Heitersheim 188 San Wan Road, Sheung Shui, N.T. Germany Hong Kong Tel: +49 (0) 7634 50488 00 Tel: +852 2328 9782 Email: sales@suto-itec.com...
Need help?
Do you have a question about the S606 and is the answer not in the manual?
Questions and answers