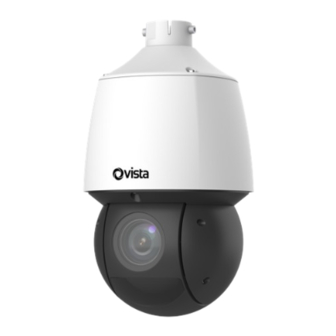
Vista VIP Series Quick Manual
Ip external ptz camera
Hide thumbs
Also See for VIP Series:
- Quick manual (16 pages) ,
- Manual (16 pages) ,
- Quick manual (19 pages)
Summary of Contents for Vista VIP Series
- Page 1 IP External PTZ Camera VIP-P4MPX25IRVRAUAL VIP Series External PTZ VIP-P4MPX25IRVRAUAL Quick Guide Ver 1.2 2023-01...
-
Page 2: Before You Begin
CCTV, IT and electrical wiring and products. Technical Support If you still have questions after referring to the guide, or require more information, please contact Vista Technical Support or use the QR code. Vista Technical Support +44 (0) 118 912 5125... -
Page 3: Packing List
Packing List Please contact Norbain if any items are missing or damaged and note contents will vary according to each camera model number. ➢ Camera ➢ Power Adapter ➢ This guide ➢ Cable unit* ➢ Cable unit sun shield* ➢ ESD gloves ➢... - Page 4 Drilling and Mounting - All Cameras The VIP series PTZ range of cameras require the addition of a bracket for installation according to your requirement. This should have been specified when ordering your camera. The examples show the wall bracket fixing – yours may vary.
-
Page 5: Audio Out
VIP-P4MPX25IRVRAUAL Appearance and cable identification may vary between each model. Display device Audio input Alarm output (Sound pickup) (Alarm indicator) 6 7 8 Third-party device Alarm input connected through (Voice activated switch) RS485 interface Ground Power adapter IP Network IP Network Audio output Interface Usage... - Page 6 (Optional) Insert Micro SD Card For cameras supporting Micro SD, insert card after opening the relevant cover of the camera. Do not hot plug SD cards - power-down first! 1. Remove 4 screws on the back cover. 2. Insert micro SD card into slot. 3.
- Page 7 Using the wall bracket as an example for installing the PTZ; Fix the bracket adapter ring (G1 ½ male thread) and secure to the bracket adapter with the locking screw (below). Attach the safety wire from the camera to the bracket for safety! Now pass all leads of the cameras cable through the bracket as shown to the right.
- Page 8 3. Attach dome to the bracket adapter by aligning the two keys on the top of the camera holder so that they engage into the inner tracks of the bracket adapter. Once engaged, (below), push the camera up, and then rotate the camera anti-clockwise until it makes contact with the bracket adapter screw.
- Page 9 Connect all required cables and apply and make use of any supplied waterproofing grommets and\or seals. Now attach the bracket to the wall with flat washers, spring washers and nuts while feed-back all cable slack through the wall. NOTE! • When mounting the camera, please install the bracket adapter ring to the bracket first and then mount the camera to the bracket.
- Page 10 Power-up and Access Camera After installing camera, connect either PoE Ethernet or Ethernet & 12VDC PSU with correct power rating for the camera. Refer to following table for power details later in this guide. The camera performs a self-test every time it’s powered up, including pan, tilt and zoom operations.
- Page 11 4. Login to camera with ID and password – use the default provided earlier. Ensure you change to a strong password after first logging 5. Refer to example [Network] menu below and make any static IP address changes required.
-
Page 12: Camera Model
Power Requirements per Camera Model CAMERA MODEL PSU Minimum 802.3at VIP-P4MPX25IRVRAUAL 12VDC @ 3Amp This completes the procedure. Carryout any individual camera settings required for your specific installation before adding the camera to you NVR recorder. Refer to the provided QR code for additional manuals and resources. Factory Defaulting Where the camera is provided with a hardware reset button (indicated in each camera model section previously in this guide) simply use a pin to... - Page 13 This is a Class A product. In a domestic environment this product may cause radio interference in which case the user may be required to take adequate measures. No liability will be accepted by Vista for any errors or omissions in this information and reserves the right to make changes to the product and...


Need help?
Do you have a question about the VIP Series and is the answer not in the manual?
Questions and answers