Table of Contents
Advertisement
Quick Links
Advertisement
Table of Contents

Subscribe to Our Youtube Channel
Related Manuals for Vista VP960H


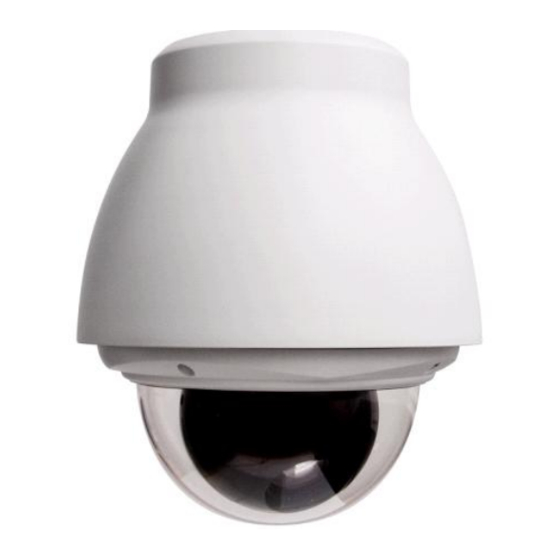
Summary of Contents for Vista VP960H
- Page 1 VP960H Dome range Instalation and programming manual VP-960H Dome manual V1.2...
-
Page 3: Warnings And Cautions
Warnings and Cautions WARNING TO REDUCE THE RISK OF FIRE OR ELECTRIC SHOCK, DO NOT EXPOSE THIS PRODUCT TO RAIN OR MOISTURE. DO NOT INSERT ANY METALLIC OBJECTS THROUGH THE VENTILATION GRILLS OR OTHER OPENINGS ON THE EQUIPMENT. CAUTION EXPLANATION OF GRAPHICAL SYMBOLS The lightning flash with arrowhead symbol, within an equilateral triangle, is intended to alert the user to the presence of uninsulated "dangerous voltage"... -
Page 4: Important Safeguards
IMPORTANT SAFEGUARDS 1. Read these instructions. 2. Keep these instructions. 3. Heed all warnings. 4. Follow all instructions. 5. Do not use this apparatus near water. 6. Clean only with dry cloth. 7. Do not block any ventilation openings. Install in accordance with the manufacturer's instructions. -
Page 5: Table Of Contents
Table of Contents Chapter 1 — Introduction ....................1 1.1 Features ........................... 1 Chapter 2 — Installation and Configuration ..............3 2.1 Package Contents ......................3 2.2 Dome Installation types ....................4 2.2.1 Direct ceiling mounting......................4 2.2.2 External pendant mount ......................4 2.2.3 In-ceiling mount ..........................4 2.3 Basic Configuration of VP-960H Dome Camera System .......... - Page 6 3.15 Motion Setup ....................... 34 Appendix A — Specifications ..................37 Appendix B — Troubleshooting ................. 40 Appendix C — Glossary ....................41...
-
Page 7: Chapter 1 - Introduction
Optional Clear bubble with black liner (shelter) for concealing the camera. Optional Tinted Bubble, Indoor & Outdoor pendant housing with heater & blower, Indoor Flush mount, Co-axial control with Vista-FSK. Auto sensing RS485 telemetry supporting: Vista-485, Pelco P & D protocols. - Page 8 push bubble ring ass'y remove camera window screw push remove window assemble bubble ring ass'y Note: It is recommended to remove camera window for improving picture quality when you use bubble ring assembly. CAUTION : When installing a dome on a high pole outside, caution should be taken to avoid vibration and shaking of dome due to wind or shock of passing heavy vehicles.
-
Page 9: Chapter 2 - Installation And Configuration
Chapter 2 — Installation and Configuration 2.1 PACKAGE CONTENTS The package contains the following. ………………………1 VP-960H (Dome Camera) ………………………1(Optional) Bubble Ring ………………………1 Instruction Manual (This Document) ………………………3 Assembly Screws for Attaching VP-960H ………………………3 Plastic Anchor ………………………1 10Pin Connector ………………………2 12Pin Connector Cable Requirements For RS485 operation, the VP-960H dome requires video, power, alarm and data cables. -
Page 10: Dome Installation Types
2.2 DOME INSTALLATION TYPES 2.2.1 Direct ceiling mounting The dome camera’s base should be attached to a structural object, such as hard wood, wall stud or ceiling rafter that supports the weight of the dome camera. CABLE ENTRY SURFACE(CEILING) Unlock Lock BASE Align extruded tap in the base to... - Page 11 2. With a smoked bubble use the In Ceiling mount: VDM-ICMD/B (Black trim ring) VDM-ICMD/C (Cream trim ring)
-
Page 12: Basic Configuration Of Vp-960H Dome Camera System
2.3 BASIC CONFIGURATION OF VP-960H DOME CAMERA SYSTEM Note: FGND not used The dome camera must be installed by qualified service personnel in accordance with all local electrical and building regulations. -
Page 13: Setting Dome Camera Termination
Layout of Switches 2.3.1 Setting Dome Camera Termination The device which is connected at end of line, whether it be a dome camera or keyboard controller, must have the cable for communication terminated by setting the appropriate DIP switch. Without proper termination, there is potential for control signal errors. -
Page 14: Rs485 Biasing
Using the joystick move down to ” DOME COMMUNICATION” and then move the joystick to the right to select this option, the following screen will appear: DOME COMMUNICATION SETUP COMMUNICATION MODE : S/W DOME ID : 0001 PROTOCOL : AUTO BAUDRATE : 9600 PARITY : NONE VISTA-FSK : ON SAVE AND EXIT(ESC TO CANCEL) - Page 15 See Chapter 3 — Program and Operation for DOME COMMUNICATION. If you want to set the address to greater than 999, you should contact the service provider. NOTE: C is set to S/W, the Hardware (H/W) setting is ignored. OMMUNICATION MODE COMMUNICATION MODE set to H/W Dome camera address (ID) and Protocol are set using the DIP switches on the dome base.
-
Page 16: Setting Dome Camera Protocol
2.5 SETTING DOME CAMERA PROTOCOL Note: Co-axial control with Vista-FSK operates regardless of the Dip Switch. As default the VP-960H are set to the auto detection setting, which will automatically detect Vista or Pelco RS485 protocols. UNCTION NTSC S4-1 Enable... -
Page 17: Connections
2.6 CONNECTIONS • Connecting to the RS485/ 422 The dome camera can be controlled remotely by an external device or control system, such as a control keyboard, using RS485 half-duplex, RS422 full duplex or simplex serial communications signals. For RS485 connect the ports marked Tx+, Tx- to Tx+(Rx+) and Tx-(Rx-) If control system is RS422, connect Rx+(Tx+), Rx+(Tx-) and Rx+, Rx- of the dome camera to Rx+, Rx- and Tx+, Tx- of the control device respectively. -
Page 18: Getting Started
2.8 GETTING STARTED Once installed apply power to the dome camera. The dome camera will start a configuration sequence. PRESET TITLE AREA TITLE STATUS of AF AE FUNCTION FOCUS and AE UNDER RUNNING CAMERA TITLE INFORMATION EMPTY DATA DISPLAY CAMERA ID PAN &... -
Page 19: Chapter 3 - Program And Operation
Chapter 3 — Program and Operation 3.1 DOME CAMERA SELECTION Before you program or operate a dome camera, you must select the dome camera by selecting the dome address number followed by the camera key on the keyboard. Example: Pressing 1 , 0 and CAM key sequentially will select dome camera 10. The selected dome camera ID will be displayed on the LCD monitor of the VKBD4 keyboard. -
Page 20: Auto Scan
3.4 AUTO SCAN The Auto scan supports up to 17 programmed positions and the speed at which the dome moves between these positions. Follow these steps to program Auto Scan: AUTO SCAN SETUP NUMBER : 01 TITLE : A01 MODE : NORMAL SPEED : 5 STEP... -
Page 21: Preset
Auto Scan. 3.5 PRESET Up to 240 presets may be programmed. Presets can be recalled No. + PRESET. Presets on the VP960H are very powerful and allow you to set the camera parameters and even a motion alarm for each preset. - Page 22 Follow steps below to store the Preset positions: 1. Use the Joystick to move the cursor to the preset position you wish to add/adjust. 2. After selecting a preset position (blank or already populated), press the (IO/FN) key ‘CTRL’ is displayed. Move to the desired location and zoom position then press the (IC/FF) key then ‘CTRL’...
- Page 23 Select ‘AE SETUP’ and move the Joystick to the right, the AE setup menu is displayed. AE SETUP MODE : MANUAL DSS LIMIT : OFF GAIN : MIN BRIGHT : 024 SHUTTER : 1/50 FLICKERLESS : --- BACK LIGHT : OFF : --- WDR LEVEL : ---...
-
Page 24: Shortcut Of Preset Program
3.6 SHORTCUT OF PRESET PROGRAM This can be achieved after selecting the desired scene e.g. with VKBD4 by pressing FUNCTION (Fn) then the No. (1 to 120) then PRESET key sequentially. The current view will be stored to the selected Preset number. -
Page 25: Pattern Setup (Learn Tour)
Use the Joystick to move the cursor to the alpha numeric character table displayed and select the required character with the (IO/FN) keys. 7. To save changes highlight ‘SAVE AND EXIT’ and move Joystick right. Joystick left exits without saving. You can expand the Tour sequence by inserting another Tour into one of the ‘---‘... -
Page 26: Alarm
3.9 ALARM Use the Joystick to move the cursor and (Tele/Wide) to adjust. To save changes highlight ‘SAVE AND EXIT’ and move Joystick right. Joystick left exits without saving. ALARM SETUP NO PRI FUN IN OUT HLD LATCH 01 1 001 NC OFF 03 02 2... -
Page 27: Area Title
ALARM SETUP ALARM DISABLED CHECK THE DIP SWITCH EXIT(ESC TO EXIT) There are 9 levels of priority. The function can be selected by Preset, Auto scan, Pattern or Tour and “0” is the highest priority. Lower priority alarms won’t be serviced until the higher priority alarm is completed. Equal priority alarms will be serviced repeatedly with the dwell time. -
Page 28: Privacy Zone
3.11 PRIVACY ZONE Hide up to 8 unwanted scenes in a camera. PRIVACY ZONE SETUP (CTRL KEY) TITLE METHOD 01 ABC ON BLOCK 02 DEF ON BLOCK OFF ---- OFF ---- OFF ---- OFF ---- OFF ---- OFF ---- SAVE AND EXIT(ESC TO CANCEL) Follow steps below to program the Privacy Zone: 1. -
Page 29: Camera Menu
3.12 CAMERA MENU CAMERA SETUP FOCUS CONTROL WB CONTROL AE CONTROL DNR CONTROL LINE LOCK CONTROL SHARPNESS : 07 RESOLUTION : LOW DIGITAL ZOOM : OFF IMAGE FLIP : OFF PRESET FREEZE : OFF STABILIZATION : OFF SAVE AND EXIT(ESC TO CANCEL) SHARPNESS The higher the value, the more the edging in the picture will be enhanced (0 - 15) -
Page 30: Wb (White Balance) Control
3.12.2 WB (White Balance) CONTROL Use the Joystick to move the cursor and (Tele/Wide) to adjust. To save changes highlight ‘SAVE AND EXIT’ and move Joystick right. Joystick left exits without saving. WB SETUP MODE : AWB R GAIN : --- B GAIN : --- SAVE AND EXIT(ESC TO CANCEL) -
Page 31: Dnr Control
FLICKERLESS OFF / ON BACK LIGHT OFF / BLC / HLC (NOTE: When BLC or HLC, WDR will be disabled.) OFF / ON (NOTE: When ON, BACKLIGHT will be disabled.) WDR LEVEL LOW / MIDLOW / MID / MIDHIGH / HIGH NIGHT SHOT AUTO / B/W / COLOUR NOTE: Values in ( ) are for PAL Camera. -
Page 32: Dome Setup
3.13 DOME SETUP Use the Joystick to move the cursor, right to select sub menu (if applicable) and (Tele/Wide) to adjust. To save changes highlight ‘SAVE AND EXIT’ and move Joystick right. Joystick left exits without saving. CONFIGURATION MENU LANGUAGE : ENGLISH HOME FUNCTION SETUP OSD DISPLAY... -
Page 33: Osd Display
3.13.3 OSD DISPLAY Use the Joystick to move the cursor, right to select sub menu (if applicable) and (Tele/Wide) to adjust. To save changes highlight ‘SAVE AND EXIT’ and move Joystick right. Joystick left exits without saving. OSD DISPLAY SETUP CAMERA TITLE : DOMEID VIEW DIRECTION... -
Page 34: View Angle Setup
3.13.4 VIEW ANGLE SETUP VIEW ANGLE SETUP PANNING RANGE FLIP : 90 TILT ANGLE LIMIT : 00 SAVE AND EXIT(ESC TO CANCEL) FLIP: OFF,90 ,100 ,110 ,120 ,AUTO OFF: the dome camera moves until 90 vertically. 90 , 100 , 110 , 120 : allows the image to flip digitally when the camera moves over the setting angle vertically. -
Page 35: Data Management
3.13.5 DATA MANAGEMENT The Data management menu allows dome settings to be stored in the cameras base as well as the dome body. If a fault occurs in the dome body, then the settings can be quickly downloaded into a replacement, saving set up time. -
Page 36: Origin Offset
ERASE PROGRAMMED DATA Use the Joystick to move the cursor and (Tele/Wide) to adjust. To save changes highlight ‘SAVE AND EXIT’ and move Joystick right. Joystick left exits without saving. Erase all stored data from the Flash-ROM of the selected dome camera. You will be asked to enter ON or OFF. -
Page 37: Dome Reset
3.13.7 DOME RESET DOME RESET ARE YOU SURE ? CANCEL This feature is used to re-calibrate the orientation of a selected dome camera. Origin offset value is not affected by this function. (Offset is still valid after origin set). 3.13.8 SYSTEM MENU SYSTEM MENU MOTOR SETUP PASSWORD EDIT... - Page 38 MOTOR SETUP Use the Joystick to move the cursor and (Tele/Wide) to adjust. To save changes highlight ‘SAVE AND EXIT’ and move Joystick right. Joystick left exits without saving. MOTOR SETUP PROPOTIONAL P/T : ON P/T MODE : NORMAL SLOW PAN MAXIMUM : 40 /SEC SLOW TILT MAXIMUM : 40 /SEC NORMAL PAN MAXIMUM : 90 /SEC...
-
Page 39: System Information
ORIGIN CHECK If the presets or privacy zones appear to have moved, carry out an origin check as this will re zero the camera module position. Use the Joystick to move the cursor and right or (IO/FN) to accept selection. ORIGIN CHECK ARE YOU SURE ? CANCEL... -
Page 40: Dome Communication
VISTA-FSK. COMMUNICATION MODE : H/W (Hardware) , S/W(Software) DOME ID : 000 - 999 PROTOCOL : Auto(default) / F2,F2E / Sensormatic / Pelco-P/D / Vicon / Ernitec /VISTA/ F2/ Philips / Dynacolor BAUDRATE : 2400/4800/9600(default)/19200/38400 bps PARITY : None, Even... - Page 41 To enable the motion on the preset, set MOTION to ON. To enter the motion setup, push the joystick to right on the motion setup. MOTION SETUP SENSITIVITY : 12 POSITION : ALL DELAY : 00SEC OUTPUT : OFF HOLD TIME : 03SEC EXIT(ESC TO EXIT) SENSITIVITY : 1-15...
-
Page 43: Appendix A - Specifications
Appendix A — Specifications 22X Optical Zoom Dome System MODEL MODULE CCD Type 1/4" Super HAD CCD II (Double Scan) Optical / Digital Zoom 22X / 16X Resolution (NTSC/PAL) 700 TVL Focal length f = 3.9mm ~ 85.8mm 3.9mm – 49.5° (H) Angle of view 85.8mm –... - Page 44 Electrical Input Voltage 18 to 30VAC; 24VAC nominal 24VAC 1A ( Dome body only – Not external housing) Power Requirement Power Consumption Maximum 20W Alarm Output 4 Normal relays 24VDC/1A Max. (selectable NC/NO) Alarm Input 8 Normal dry contact (selectable NC/NO) RS-485/422 baud rate: 2400~38.4k bps Control (default: 9600bps)
-
Page 46: Appendix B - Troubleshooting
Appendix B — Troubleshooting If problems occur, verify the installation of the camera with the instructions in this manual and with other operating equipment. Isolate the problem to the specific piece of equipment in the system and refer to the equipment manual for further information. -
Page 47: Home Position
Appendix C — Glossary ALARM ACTIONS The assigned responses for the dome camera when inputs change from normal to abnormal states. The dome may run a Preset, Pattern, or have no assigned action for each of the four dome inputs. The dome may also send alarm states to the host controller for processing. -
Page 48: Slow Shutter
NAME INFORMATION Relates to the display the dome name, the area where the dome is pointing, the name of the preset or pattern that is running, and alarm names. The display of each type of name setting can be enabled or disabled.
Need help?
Do you have a question about the VP960H and is the answer not in the manual?
Questions and answers