Vivo DESK-V130EB Instruction Manual
Electric multi motor corner desk frame
Hide thumbs
Also See for DESK-V130EB:
- Instruction manual (8 pages) ,
- Instruction manual (4 pages) ,
- Instruction manual (8 pages)
Advertisement
Quick Links
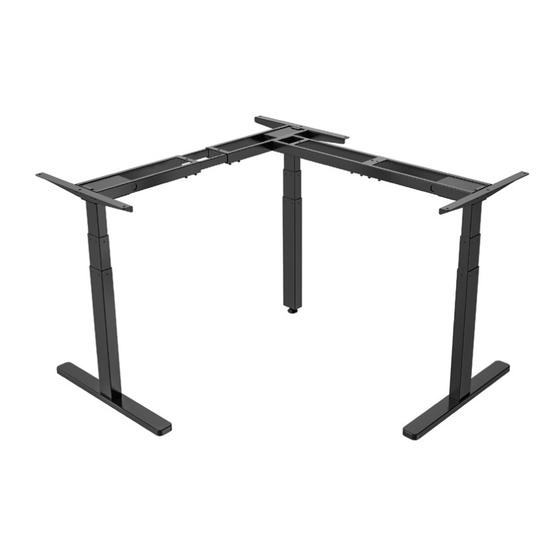
Electric Multi Motor Corner Desk Frame
SKU: DESK-V130EB/W
Instruction Manual
ASSEMBLY VIDEO AVAILABLE:
Follow along step-by-step with our video walk through by scanning
the QR code with your mobile device or by following the product
link: vivo-us.com/products/desk-v130eb
help@vivo-us.com
www.vivo-us.com
309-278-5303
Advertisement

Related Manuals for Vivo DESK-V130EB


Summary of Contents for Vivo DESK-V130EB
- Page 1 Electric Multi Motor Corner Desk Frame SKU: DESK-V130EB/W Instruction Manual ASSEMBLY VIDEO AVAILABLE: Follow along step-by-step with our video walk through by scanning the QR code with your mobile device or by following the product link: vivo-us.com/products/desk-v130eb www.vivo-us.com help@vivo-us.com 309-278-5303...
- Page 2 We offer a hassle-free 30 day return on all products. Contact customer missing a part, please reach out to us within 30 days of support at 309-278-5303 or help@vivo-us.com. Please note: For items product delivery to have it replaced at no cost.
-
Page 3: Package Contents
Pinch points are created during lifting and lowering the work surface. A (x2) T-A (x1) S-B (x4) Failure to follow these instructions may result in serious personal injury. Side Leg 5mm Allen Wrench M6x11mm Screw Have a question? Give us a quick call / chat! 309-278-5303 or vivo-us.com... - Page 4 T-A (x1) D (x2) H (x2) S-B (x12) T-A (x1) B (x1) M6x11mm Screw 5mm Allen Wrench Side Bracket Foot M6x11mm Screw 5mm Allen Wrench Center Leg Have a question? Give us a quick call / chat! 309-278-5303 or vivo-us.com...
- Page 5 Attach Anti-Vibrations Pads (O) in the locations shown on Side Brackets (D), Side Legs (A), Center Leg (B), and Outer Crossbar (G). O (x17) G (x1) C (x2) Anti-Vibration Pad Outer Crossbar Inner Crossbar Have a question? Give us a quick call / chat! 309-278-5303 or vivo-us.com...
- Page 6 Please select an option and proceed with assembly The remainder of this manual will show assembly using two 60” Layout desktops bottom side up on the floor as shown. If using VIVO desktops, make sure the VIVO desktops. The assembly process should remain the same but control panel pilot holes are facing towards the inside corner.
- Page 7 T-A (x1) S-C (x2) G (x1) E (x1) F (x1) T-A (x1) S-C (x3) M8x12mm Screw 5mm Allen Wrench Outer Crossbar Rail Slider 5mm Allen Wrench M8x12mm Screw Have a question? Give us a quick call / chat! 309-278-5303 or vivo-us.com...
- Page 8 0.125” (3mm) drill bit. Make sure not to extend the Inner Crossbars past the slot cutouts on each side. C (x2) Inner Crossbar Have a question? Give us a quick call / chat! 309-278-5303 or vivo-us.com...
- Page 9 Outer Crossbar (G) using ST5x16mm Screws (S-A) and a Phillips screwdriver. N (x2) S-A (x17) T-A (x1) S-A (x8) ST5x16mm Screw 5mm Allen Wrench Connecting Plate ST5x16mm Screw Have a question? Give us a quick call / chat! 309-278-5303 or vivo-us.com...
- Page 10 0.375” (10mm) deep holes using a 0.125” (3mm) drill bit. S-B (x16) S-D (x4) T-A (x1) I (x1) J (x1) M6x11mm Screw ST4x15mm Screw 5mm Allen Wrench Control Unit Control Panel Have a question? Give us a quick call / chat! 309-278-5303 or vivo-us.com...
- Page 11 Connect Power Cable (K) to Control Unit (I) and a power source. Remove Layout desktops bottom side up on the floor as shown. If using VIVO desktops, make sure the protective film from Cable Clips (P) and use them to cable manage.
- Page 12 T-A (x1) S-C (x2) G (x1) E (x1) F (x1) T-A (x1) S-C (x3) M8x12mm Screw 5mm Allen Wrench Outer Crossbar Rail Slider 5mm Allen Wrench M8x12mm Screw Have a question? Give us a quick call / chat! 309-278-5303 or vivo-us.com...
- Page 13 0.125” (3mm) drill bit. Make sure not to extend the Inner Crossbars past the slot cutouts on each side. C (x2) Inner Crossbar Have a question? Give us a quick call / chat! 309-278-5303 or vivo-us.com...
- Page 14 Outer Crossbar (G) using ST5x16mm Screws (S-A) and a Phillips screwdriver. N (x2) S-A (x17) T-A (x1) S-A (x8) ST5x16mm Screw 5mm Allen Wrench Connecting Plate ST5x16mm Screw Have a question? Give us a quick call / chat! 309-278-5303 or vivo-us.com...
- Page 15 0.375” (10mm) deep holes using a 0.125” (3mm) drill bit. S-B (x16) S-D (x4) T-A (x1) I (x1) J (x1) M6x11mm Screw ST4x15mm Screw 5mm Allen Wrench Control Unit Control Panel Have a question? Give us a quick call / chat! 309-278-5303 or vivo-us.com...
- Page 16 K (x1) L (x1) M (x1) P (x4) Power Cable Short Extension Cable Long Extension Cable Cable Clip Have a question? Give us a quick call / chat! 309-278-5303 or vivo-us.com...
-
Page 17: Controller Overview
CONTROLLER - Overview Power Saving Mode When no actions are made for over 2 minutes, the system will enter power-saving mode. Touch any button to enter operating mode. Function Mode Press and hold the up and down arrows together until the desk beeps and moves to the fully lowered position Press and hold the “M”... -
Page 18: Need Assistance
83% within <2hr 92% within < 3hr VIVO is more than a brand of ergonomic office furniture. We are a team of creative and innovative indivuduals working together to offer high quality, affordable ergonomic solutions. We think and work outside of the box to serve... - Page 19 LOVE YOUR NEW VIVO SETUP? Ready to share that new amazing setup? Want to brag about that amazing new ergonomic solution? Tag us in your photo! VIVO-us @vivo_us FOR MORE GREAT VIVO PRODUCTS, CHECK OUT OUR WEBSITE AT: WWW.VIVO-US.COM LAST UPDATED: 08/01/2023 REV1LF...
Need help?
Do you have a question about the DESK-V130EB and is the answer not in the manual?
Questions and answers