
Related Manuals for Classic Exhibits visionary designs VK-2084


Summary of Contents for Classic Exhibits visionary designs VK-2084
- Page 1 Step 1 Order #XXXXX - VK-2084 - General Layout 866.652.2100 10’ 20’ Plan View WHEN DISASSEMBLING ALUMINUM EXTRUSION, TIGHTEN ALL SETSCREWS AND LOCKS TO PREVENT LOSS DURING SHIPPING © 2015 w w w . c l a s s i c e x h i b i t s . c o m Page 1 of 3...
- Page 2 Step 2 Order #XXXXX - General Information 866.652.2100 Using Your Setup Instructions The Visionary Designs Setup Instructions are created specifically for your Detail A configuration. They are laid out sequentially, including an exploded view of the entire display, and then a logical series of detailed steps to assemble the main structure and components.
-
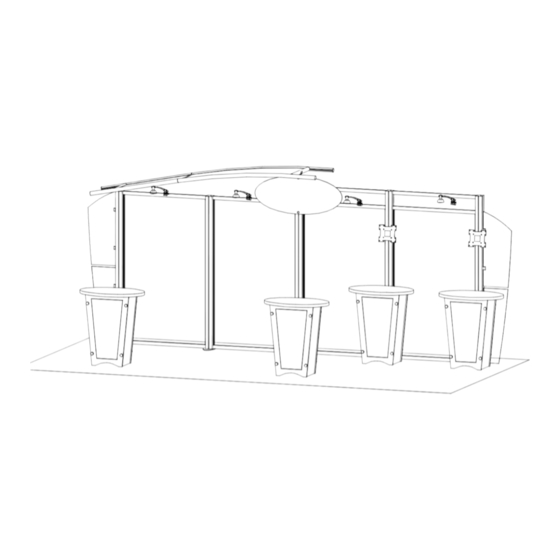
Page 3: Back View
Step 1 Order #XXXXX - VK-2084 - Backwall Assembly 866.652.2100 Item Qty. Description Oval Baseplate Example of Clamp Attachment 80” Vertical Extrusion When desired location 80” Vertical Extrusion is found, tighten 80” Vertical Extrusion set screw to secure. 80” Vertical Extrusion 80”... - Page 4 Step 2 Order #XXXXX - VK-2084 - Header Assembly 866.652.2100 Steps: Item Qty. Description 1) Attach Extrusions [14, 14a] to ends of Extrusions 16.4” Horizontal Extrusion [15, 15a] as indicated. 19.4” Horizontal Extrusion 2) Insert Infills between Extrusions [14-15 & 14a-15a] 24.5”...
- Page 5 Step 3 Order #XXXXX - LTK-1001 - Pedestal Assembly 866.652.2100 Steps 1) Use standoff screws to secure the front panel with door and back panel of the pedestal to the side panels. QTY - 4 2) After assembling front, back, and side panels, slide floor into the bottom of the pedestal.
Need help?
Do you have a question about the visionary designs VK-2084 and is the answer not in the manual?
Questions and answers