Table of Contents
Advertisement
Quick Links
Advertisement
Table of Contents

Related Manuals for Ballard Designs Fenwick MQ111


Summary of Contents for Ballard Designs Fenwick MQ111
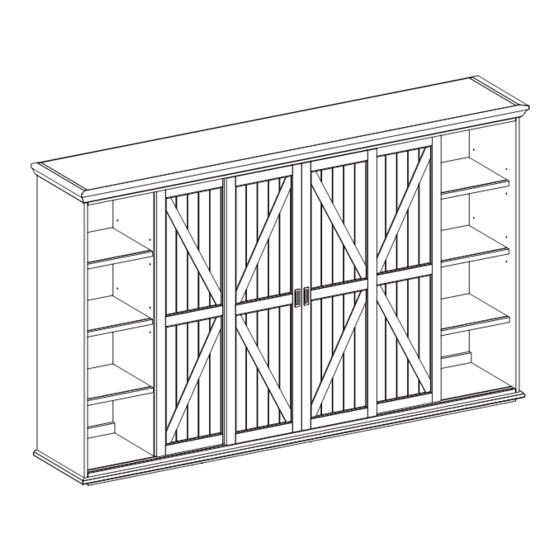
- Page 1 Customer Service: 800-367-2810 Online: www.ballarddesigns.com PRODUCT NAME: Fenwick Media Hutch ITEM NUMBER: MQ111 ASSEMBLED DIMENSIONS : 59”H x 99 3/4”W x 19 5/8”D PRODUCTS ARE NOT INTENDED MADE IN CHINA FOR COMMERCIAL USE. UPDATED: 12/26/2019 Page 1 of 6...
- Page 2 Assemble in location for intended use. TOOLS NEEDED: -Phillips Screwdriver, Pencil Hardware -Two person assembly suggested. Shelves (H,G) Remove all parts, hardware and protective packaging from carton and carefully arrange on a clean, level, padded surface. NOTE: To avoid accidentally discarding small parts or hardware, retain all carton contents until assembly and installation are complete.
- Page 3 Assemble in location for intended use. STEP 1: Carefully lift Hutch (F) and place on top of Console (Sold Separately/MQ112). Align back edges then position Connector Plate (C) as shown and attach using Screws (D). NOTE: Be certain Connector Plates are centered over solid portions of furniture. Use Phillips Screwdriver to drive Screws into solid wood and firmly tighten and secure.
- Page 4 Assemble in location for intended use. STEP 3: Align and place wheels on bottom of Left Inside Door (I) and Right Inside Door (J) into REAR TRACK in base of Hutch (F) then gently push top of each Door into Hutch. NOTE: Be certain track guides on the top of each door are pushed in and locked before pushing door in.
- Page 5 Assemble in location for intended use. STEP 5: With Hutch (F) pushed against wall in front of previously marked studs, slide L-Bracket (E) over top back edge of Hutch and center in front of each stud. USE A PENCIL TO MARK WALL AT TOP OF EACH L-BRACKET.
- Page 6 Assemble in location for intended use. STEP 7: Carefully slide Hutch (F) under installed L-Brackets and attach to Hutch using remaining Screws (D). NOTE: Use SHORT SCREWS for this step. Your floor molding may prevent Hutch from going back far enough to permit all L-Bracket holes to cover top. Use screws in holes which cover. Cleaning &...
Need help?
Do you have a question about the Fenwick MQ111 and is the answer not in the manual?
Questions and answers