ETS NORD NORDcanopy Instructions For Installation, Use And Maintenance Manual
Hide thumbs
Also See for NORDcanopy:
- Instructions for installation, use and maintenance manual (27 pages) ,
- Installation manual (22 pages) ,
- Installation, use & maintenance manual (14 pages)
Table of Contents
Advertisement
Quick Links
Advertisement
Table of Contents

Related Manuals for ETS NORD NORDcanopy


Summary of Contents for ETS NORD NORDcanopy
- Page 1 NORDcanopy HM Installation, Use and Maintenance Manual www.nordcooking.com...
-
Page 2: Table Of Contents
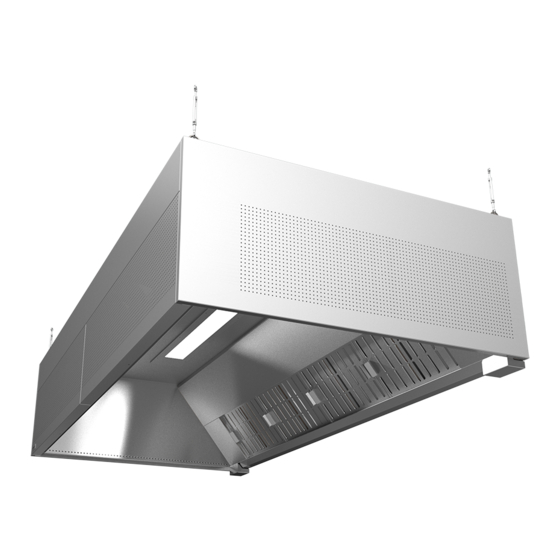
Electrical connections to the system may only be made by an authorized electrician. Risk of falling! Make sure installation and service personnel have stable work platforms when installing the device. Only original spare parts purchased from ETS NORD may be used! www.etsnord.com RDM-076-0623... - Page 3 ® NORDcanopy | HM 1 – Suspension points 2 – Supply air adjustment plate 3 – Supply air connection 4 – Cable bushings 5 – Lighting 6 – Exhaust air regulating plate 7 – Exhaust air connection 8 – 1/2“ water inlet 9 –...
- Page 4 ® NORDcanopy | HM In the kit: G – Control box A – Ceiling panel for modular connection H – Water system assembly B – Loop nut I – Solenoid C – HFM Labyrinth filters J – W3 Spiral cable D –...
-
Page 5: Removing The Ceiling Panel (Optional)
® NORDcanopy | HM Safety It is prohibited to hold or add additional weight on the top of the canopy. 1. Removing the Ceiling Panel (Optional) With larger canopies, removing the center ceiling panel can provide better access for exhaust duct and insulation installation. -
Page 6: Leveling The Canopy
® NORDcanopy | HM 3. Leveling the Canopy Is performed for each section. 4. Opening the Front Panel The panel locks automatically. ATTN! At the end of the installation, make sure that the panels are correctly fixed. 5. Fastening Kitchen Canopy Sections Together 5.1 Hanging the Canopy Sections... - Page 7 ® NORDcanopy | HM 5.2 Removing the Support Strip for the Exhaust Chamber Access Hatch 5.3 Sequential Connection 5x D 6x D 5.4 Installation of the Ceiling Panel Between the Sections 4x E Images are for illustrative purposes. RDM-076-0623 We reserve the right to make changes.
- Page 8 ® NORDcanopy | HM 5.5 Fastening Sides Back-to-Back Requires additional bolt holes. 4x D 5.6 Installing Exhaust Chamber Support Strip 2x D www.etsnord.com RDM-076-0623...
-
Page 9: Water Connection
® NORDcanopy | HM 6. Water Connection 6.1 Plumbing Diagram 6.2 Water Connection Sizes 1/2" 2" 360° Images are for illustrative purposes. RDM-076-0623 We reserve the right to make changes. -
Page 10: Installing Hfm Labyrinth Filters
® NORDcanopy | HM 6.3 Adjust the Pressure Reducing Regulator to 2 Bar 7. Installing HFM Labyrinth Filters PUSH www.etsnord.com RDM-076-0623... -
Page 11: Electrical Installation
® ® NORDcanopy | HM 8. Electrical Installation Risk of electric shock! Electrical connections to the system may only be made by an authorized electrician. Risk of falling! Make sure installation and service personnel have stable work platforms when installing the device. - Page 12 ® NORDcanopy | HM Connection Diagram HM CONTROL 3G0,75 3G0,75 3G0,75 8x0,25 min. 3x0,25 3G0,5 Electrical supply Canopy Electromagnetic valve Spiral cable for "Handshake" circuit between 1 phase 230 VAC lighting for water illumunated push-buttons HM control boxes in case of (to junction box XB1) (to junction box XB2;...
- Page 13 ® NORDcanopy | HM 1 – Control box suspension clamps 2 – IEC C14 socket for lighting connection (XD2) 3 – IEC C13 socket for power connection (XD3) 4 – Terminal block for controls (X3) X3 signal IO names Explanation...
- Page 14 ® NORDcanopy | HM 8.1 Installing Control Box 8.2 Connecting the Solenoid Valve to the Control Box 8.3 Lighting Connection www.etsnord.com RDM-076-0623...
- Page 15 ® NORDcanopy | HM 8.4 Connecting the Power Cable 8.5 Connecting the Front Panel Before closing the front panel connect control buttons. Images are for illustrative purposes. RDM-076-0623 We reserve the right to make changes.
-
Page 16: Using The Hm Kitchen Canopy
® NORDcanopy | HM 9. Using the HM Kitchen Canopy Water mist Lighting HM Canopy is controlled by two buttons located under front panel. Lighting and water mist are off Lighting is on but water mist is off Both lighting and water mist are turned on Note that when you turn off the lights when the water mist is on it will turn off both the lights and water mist functions. -
Page 17: Measuring And Adjusting Airflow
NORDcanopy | HM 10. Measuring and Adjusting Airflow NORDcanopy canopies are fitted with measuring nozzles located inside the canopy. ATTN! During measurement, all HFM Labyrinth filters and exhaust chamber access hatches must be in place and the front panel must be closed. -
Page 18: Accessories
® NORDcanopy | HM 11. Accessories 11.1 Installation of Cover Plates 12. Kitchen Canopy Maintenance All internal and external surfaces of the kitchen canopy, including light fixtures, are cleaned using neutral cleaning agents. Carefully rinse the surfaces after cleaning, in order to avoid harmful interactions of cleaning agents and high temperatures. - Page 19 ® NORDcanopy | HM 12.1 Removing Exhaust Chamber Access Hatches PUSH 12.2 Removing HFM Labyrinth Filters 12.3 Removing the Access Hatch Support Strip Images are for illustrative purposes. RDM-076-0623 We reserve the right to make changes.
- Page 20 ® NORDcanopy | HM 12.4 Removing Water Nozzles When servicing nozzles, make sure they are installed in the right direction. Water spray should be parrallel to the rear wall. Turn nozzles so that they are all in line. www.etsnord.com RDM-076-0623...
- Page 21 21363 Malmö Sweden Phone: +46 40-94 68 70 Address: Förrådsvägen 5 151 58 Södertälje Sweden Phone: +46 8 550 301 40 info@etsnord.se www.etsnord.se ETS NORD International info@etsnord.com www.etsnord.com ETS NORD Ventilation Manufacturing LLC UAE Sepin Rayo sepin.rayo@etsnord.com +971 5257 02916...
Need help?
Do you have a question about the NORDcanopy and is the answer not in the manual?
Questions and answers