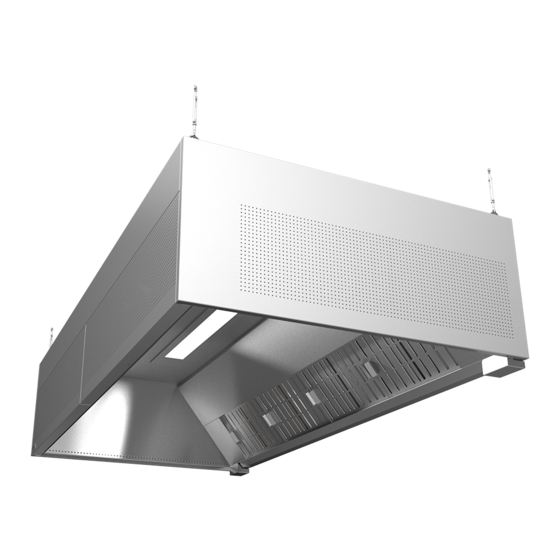
ETS NORD NORDcanopy Installation Manual
Hide thumbs
Also See for NORDcanopy:
- Instructions for installation, use and maintenance manual (27 pages) ,
- Installation, use & maintenance manual (14 pages) ,
- Installation and maintenance manual (11 pages)
Table of Contents
Advertisement
Quick Links
Advertisement
Table of Contents

Related Manuals for ETS NORD NORDcanopy


Summary of Contents for ETS NORD NORDcanopy
- Page 1 NORDcanopy UV-C Cleaning System Installation Guide...
-
Page 2: Table Of Contents
® NORDcanopy | UV 1.0 installation guide Table of contents General Product safety instructions Check your product WARNINGS! System overview 1. Installation of the Control Unit 2. Installation of UV-C lamps 3. Remote Access Device connection 4. Installation of the Control Panel 5. -
Page 3: General
NORDcanopy | UV 1.0 installation guide General This guide contains information for the safe installation of an integrated Control Unit into an ETS NORD kitchen canopy with UV cleaning. Read the guide carefully before installing, setting up or performing maintenance! Check that the packaged products do not have visible damage. - Page 4 ® NORDcanopy | UV 1.0 installation guide The UV cleaning system consists of three separate components: - One or more Control Unit(s) - UV-C lamp(s) to support the exhaust airflow - LCD Control Panel - Remote Access Device* * Allows the user to access and manage the UV cleaning system remotely, from the LAN or Internet.
-
Page 5: Product Safety Instructions
ETS NORD AS assumes no liability if the product is not used in accordance with the manufacturer’s instructions in this guide. The installation of the Control Unit may only be carried out by persons trained and authorized by ETS NORD in accordance with international standards and regulations. -
Page 6: Warnings
Always make sure that the UV system is powered off at the main electrical closet or safety breaker. Only original spare parts and UV-C lamps purchased from ETS NORD may be used in the UV 1.0 Control Unit! UV-C lamps can be ordered from ETS NORD Customer Service. -
Page 7: Installation Of The Control Unit
® NORDcanopy | UV 1.0 installation guide 1. Installation of the Control Unit 1 – UV-C lamp “L” power sockets* 7 – Exhaust pressure measurement nozzle 2 – Control Unit fastening clamps 8 – Ambient pressure measurement nozzle 3 – On/Off switch 9 –... - Page 8 ® NORDcanopy | UV 1.0 installation guide 1.2 Mounting the Control Unit to the supply chamber Next, fasten the Control Unit up against the ceiling of the supply chamber using its four fastening clamps. www.etsnord.com RDM-064-0722...
- Page 9 ® NORDcanopy | UV 1.0 installation guide 1.3 Installation of pressure measurement hoses NOTE! To prevent dirt or debris from entering the Control Unit or pressure measurement hoses, cap them off until installation is ready to be performed. Next, two pressure measurement hoses shall be connected between the nipples protruding from the Control Unit to their respective nipples on the ceiling of the supply chamber.
-
Page 10: Installation Of Uv-C Lamps
® NORDcanopy | UV 1.0 installation guide 2. Installation of UV-C lamps NOTE! Before installing UV-C lamps, make sure that the system is turned off. 2.1 Removing UV shield and grease filters 2.2 Mounting UV-C lamps to the exhaust chamber Carefully attach each UV-C lamp to the ceiling of the exhaust chamber so that the blue plastic part at the ends of the lamp, not the glass portion, remains between the clamps. - Page 11 ® NORDcanopy | UV 1.0 installation guide Connect each lamp power cord “quick plug” to a connector on the exhaust chamber ceiling and twist its locking ring clockwise. 2.3 Mounting safety UV shield and grease filters NB! When replacing the UV shield, make sure that it is in place correctly.
-
Page 12: Remote Access Device Connection
® NORDcanopy | UV 1.0 installation guide 3. Remote Access Device connection To install the Remote Access Device, attach the DIN rail to the control panel in the prescribed place. Next, mount the device securely to the Control Unit. A – Ethernet port for network connection B –... -
Page 13: Installation Of The Control Panel
® NORDcanopy | UV 1.0 installation guide 4. Installation of the Control Panel NOTE! Always install the Control Panel in a visible location easily accessible to the staff, or in the immediate vicinity of it. Avoid placing it above kitchen appliances. - Page 14 ® NORDcanopy | UV 1.0 installation guide 4.2 Attaching and removing the LCD screen 4.3 Connecting the LAN cable to the Control Unit Next, route the cable into the canopy supply air chamber and insert the connector into the Control Unit RJ45 socket.
-
Page 15: Electrical Connections Of Control Unit
® NORDcanopy | UV 1.0 installation guide 5. Electrical connections of Control Unit NOTE! The Control Unit shall be electrically interlocked with the exhaust ventilation system so that the entire system powers off when the ventilation is switched off. 5.1 Power connection for UV-C lamps with Control Unit Depending on the Control Unit installed, there could be 1-4 UV-C lamp power plugs that need to be connected. - Page 16 ® NORDcanopy | UV 1.0 installation guide 5.3 Connecting the power cable to the control panel 5.4 Data connector connections 1 - 3 – Modbus, interconnection of Control Units 4 - 5 – UV shield safety switch 6 - 10 – Empty canopy* 11 - 14 –...
- Page 17 ® NORDcanopy | UV 1.0 installation guide 5.5 Compatibility with building automation UV cleaning system is compatible with building automation. The following table shows the functions of the data connector pins. Data connection IO name Terminological name Modbus data (A)-...
- Page 18 ® NORDcanopy | UV 1.0 installation guide Electric scheme of terminal block Images are for illustrative purposes. RDT-064-0722 We reserve the right to make changes.
-
Page 19: Maintenance
In the case of a soiled but functioning lamp, cleaning is required. In the case of a defective lamp, it must be replaced. Only replacement parts supplied by ETS NORD Customer Service may be used when servicing ETS NORD equipment. The defective lamp shall be delivered to the appropriate waste treatment site. - Page 20 ® NORDcanopy | UV 1.0 installation guide 6.2 UV-C lamp electrical disconnection Disconnect the lamp from the power circuit by first twisting the locking rings counterclockwise, then pulling the connectors downward. Never pull on the cables themselves, only the connectors.
-
Page 21: Facts About Uv And Ozone
® NORDcanopy | UV 1.0 installation guide Facts about UV and ozone • UV radiation is a radiation invisible to the eye, consisting of several sub-rays divided by wavelength. The most dangerous of these are VUV and UVC, which are blocked by the Earth’s ozone layer. Only UVB and UVA can escape the ozone layer, the dangerous effects of which are manifested by prolonged exposure. - Page 22 ETS NORD AS Address: Peterburi tee 53 11415 Tallinn Estonia Phone: +372 680 7360 info@etsnord.ee www.etsnord.ee ETS NORD Finland Address: Pakkasraitti 4 04360 Tuusula Finland Phone: +358 40 18 42 842 info@etsnord.fi www.etsnord.fi ETS NORD Sweden Address: Järsjögatan 7 69235 Kumla...
Need help?
Do you have a question about the NORDcanopy and is the answer not in the manual?
Questions and answers