Table of Contents

Related Manuals for Pro-Line Boats 23 XP 2007

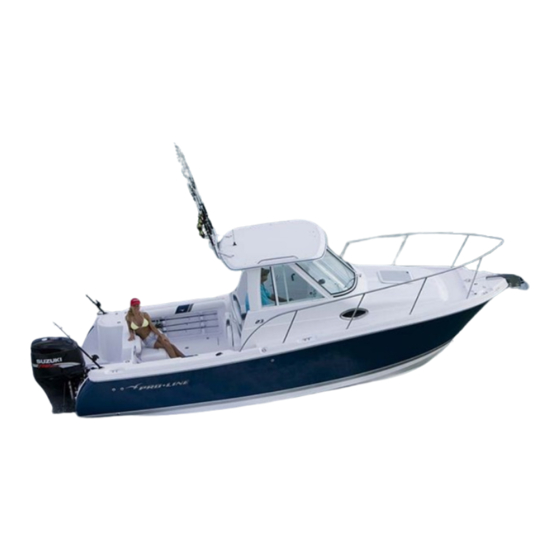
Summary of Contents for Pro-Line Boats 23 XP 2007
- Page 1 2007 Owner’s Manual 23 XP Specifications subject to change without notice. Actual boats may vary from drawings and/or photos. Copyright 2007 Pro-Line Boats Inc., PO Box 1348, Crystal River, FL 34423 All rights reserved. April 9, 2007...
-
Page 3: Table Of Contents
Table of Contents Page Introduction ........................Specifications Dealer Responsibilities ..........................................Customer Responsibilities ........................Owner’s Package Insurance and Registration ..............................................Capacity ..........................Warranty Safety ........................Carbon Monoxide Emergency Treatment for CO Poisoning ..............Where CO May Accumulate ................................How To Protect Others and Yourself Fire ............................ - Page 4 Page Lighting Systems ........................Baitwell Light ............................................Cabin Light ..................Cockpit Lights (Optional) ..............Navigation & Anchor/All Around Lights Remote Spot Light (Optional) ................... Courtesy/Dome Light ......................................Spreader Light (Optional) ........................Instrumentation ...................... Compass Horn – Electric ......................Full Instrumentation / Analog Gauges (Digital - Verado) .........
- Page 5 Page Thru Hull Fittings ...................... Rod Holder Storage ..................................Dive Platform - Integrated with Ladder ....................Cockpit / Deck Drains ......................... Drain Plug Cabin Interior ........................Upholstery ............................................Cabin V-Berth ....................Cabin Sink & Cabinet ......................Stove (Optional) Hard Top ..........................
- Page 6 Page Windows ..................................................... Windshield ....................Curtain (Aft Canvas Curtain) ........................Canvas Isinglass ........................Vinyl ......................................Interior Vinyl – Cabin Headliner & Cabin Bolsters ........Exterior Vinyl – Upholstered Seats and Cockpit Bolsters ............................Cloth Cabin Cushions ......................Single Burner Butane Stove ....................
-
Page 8: Introduction
Introduction Congratulations on the purchase of your new Pro-Line Boats 23 XP sport fishing boat. Welcome into the proud family of satisfied Pro-Line owners. Every expedition lets you enjoy the outstanding features designed into every boat we construct. Your new Pro-Line is more than just a boat, it's a whole new lifestyle. -
Page 9: Customer Responsibilities
• Read and understand the limited warranty. Sign the warranty registration card and mail it to Pro-Line Boats. • Contact your local Pro-Line dealer for assistance with any warrantable repairs. -
Page 10: Capacity
The Pro-Line Boats Limited Warranty is attached to the warranty card. After signing the warranty card, your dealer will provide you with your copy of the warranty and mail the warranty card to Pro-Line Boats, Inc. A copy of the Pro-Line Boats Limited Warranty is also included in this chapter. - Page 11 Names of dealership personnel involved with the situation Record of service performed and approximate dates When contacting Pro-Line Boats, please keep in mind that your issue will most likely be resolved at the dealership, using their facilities, equipment, personnel and/or sublet repair facilities.
-
Page 13: Safety
Safety Your Pro-Line boat has been constructed with safety in mind. But, remember, boating safety and the safety of your passengers is YOUR ultimate responsibility. You should fully understand the operations of your vessel as well as the basics in boating safety. Your local U.S. -
Page 14: Where Co May Accumulate
• Contact medical help. If the victim is not breathing, perform rescue breathing or approved cardiopulmonary resuscitation (CPR), as appropriate, until medical help arrives. Prompt action can mean the difference between life and death. • Shut off potential sources of CO, if possible. Correct ventilation problems and/or repair exhaust problems as appropriate. -
Page 15: Fire
• Know where and how CO may accumulate in and around your boat. • Maintain fresh air circulation throughout the boat at all times. Run exhaust blowers whenever the generator is operating. • Know where your engine and generator exhaust outlets are located and keep everyone away from these areas. -
Page 16: Flooding
• • First aid kit and blankets Anchor and sea anchor with sufficient line • • Mooring lines and fenders Bailing device • • Combination oar/boat hook Tool kit and lubricant • • Spare prop and hardware Spare fasteners, hose clamps and plugs •... -
Page 17: Regulations
Regulations The USCG is the authority of all waterways. Local authorities enforce State Boating Regulations. You are subject to marine traffic laws and "Rules of the Road" for both federal and state waterways. Therefore, you must submit to boarding if requested by the proper authority. There are many publications available from the Coast Guard concerning regulations. -
Page 18: Controls
Controls Controls and engine systems vary greatly from one engine manufacturer to another. Please read your engine owner’s manual carefully. Note: If your engine package was not factory installed, some components that are normally standard installations may not be included. Throttle &... -
Page 19: Shift / Throttle / Trim
Shift / Throttle / Trim Your Pro-Line can be ordered with different shift/throttle systems based upon motor type. Refer to the owner's packet to find the manual pertaining to your particular installation. Each motor has an individual tilt/trim switch located on the port throttle lever. Separate shift and throttle controls are available for each outboard motor. -
Page 20: Steering
Steering Your Pro-Line is equipped with a self-contained hydraulic steering system when your engine is factory installed. When the steering wheel is turned, the helm pump pumps fluid to the steering cylinder causing it to extend or retract. Periodically, check the fluid level and fill as necessary. Beware of adding too much fluid, especially if the ambient temperature is cold because subsequent expansion could cause leaking or damage to your system. - Page 21 While underway and in open water, clear of other boaters, depress the top half of the switches in half- second increments to achieve the desired degree of trim. To correct a starboard list, depress the top half of the port switch in small increments until the list is corrected. To avoid over trim, allow a few seconds between tab adjustments to allow the boat to respond.
-
Page 22: Systems And Accessories
Systems and Accessories Electrical System 12 Volt Receptacle (Optional) The 12-volt receptacle is installed on the console. It is easily accessible and can be used to charge your cell phone, operate a hand held remote spotlight, etc. Battery Switch for Dual Batteries (Optional) The battery switch is located behind the hatch that is installed in the port aft corner of the cockpit. - Page 23 Circuit Breakers – On the switch panel below the individual switches Horn - The horn is used to signal, warn, or alert other boats, swimmers or people on shore. Depress the horn switch to the up or forward position to activate the horn. Release the horn switch to deactivate the horn.
- Page 24 For the pump to operate properly you need to make sure the seacock is in the open position. The seacock is wide open when the yellow seacock lever is vertical. When the yellow seacock lever is horizontal, the seacock is closed. The underside of the seacock thru-hull is equipped with a scoop to allow the water to be picked up even when the boat is on plane.
-
Page 25: Lighting Systems
Lighting Systems Baitwell Light The baitwell light switch is located on the switch panel and is labeled baitwell with a light symbol on the switch. To turn on the baitwell light, press the switch forward and open the baitwell lid to see if the baitwell light is on. -
Page 26: Courtesy/Dome Light
all around toggle lever (on the left side of the panel) can be moved in an up, down, left or right position to rotate the light assembly in the desired direction. Remote Spot Light Remote Spot Light Control Panel Courtesy/Dome Light The dome shaped courtesy light is mounted to the bottom of the hard top. -
Page 27: Full Instrumentation / Analog Gauges (Digital - Verado)
deactivate the horn. Using different sequences of horn blasts indicates different and sometimes dangerous situations to you or someone around you. See the Safety Section in this manual for more information. Avoid any horn use without an appropriate purpose. Additional information regarding audible warning signals should be covered in a safe boating course. -
Page 28: Head Waste System
Head Waste System WHAT IS THE LAW? Congress enacted the Clean Water Act of 1972 (amended in 1987). This law addresses a wide spectrum of water pollution problems, including marine sewage from boats in navigable U.S. waters including coastal waters up to three miles offshore. The law further provides for "no discharge"... -
Page 29: Fresh Water Tank And Fill (Optional)
diameter hose at the top is the water fill hose and the smaller diameter hose is the water vent hose. The hose at the bottom of the tank is connected directly to the fresh water pump. Inspect the hoses for leaks and make certain that the hose connections are secure. -
Page 30: Sea Water System
Important: There must be fresh water in the fresh water tank in order for the fresh water pump to operate. Operating the pump with an empty tank could cause serious damage to the pump. Sea Water System Bilge Pump The 1100-gph bilge pump and float switch are installed as far Float Switch aft as possible in the bilge. - Page 31 Before turning the pump on from the helm, check to be sure that the seacock is open. The seacock is wide open when the yellow seacock lever is vertical. When the yellow seacock lever is horizontal, the seacock is closed. The seacock should remain closed when the pump is not in use. Note: The round filter attached to the side of the washdown pump should be removed and cleaned often with running water.
-
Page 32: Fish Box With Macerator Pump
Fish Boxes with Macerator Pump Your boat is equipped with two 40-gallon aft fish boxes with a total capacity of 80 gallons. They are both plumbed to a fish box pump that is installed in the aft bilge that is mounted on the starboard stringer. This pump operates on a 2-way rocker switch (labeled fish box) that is located on the switch panel. -
Page 33: Fuel Water Separator
The fuel level information is sent to the fuel gauge and keeps you informed of the approximate fuel level in the tank. If you feel that your fuel gauge is reading incorrectly, before considering changing the gauge, have your Pro-Line dealer’s Service Department or a qualified professional remove the fuel sender and check to make sure that the float is able to move up and down freely. -
Page 34: Fuel / Oil Leaks
Fuel / Oil Leaks The fuel tank is vented via the vented fuel fill fitting and the vent should be inspected for obstructions regularly. Verify that all of the fuel hoses remain properly secured and located according to NMMA standards. Inspect all hose clamps and fittings to ensure they are double clamped where needed and that there are no fuel leaks in any of the hoses. -
Page 35: Seating
Based upon the availability from our vendors, this equipment changes from time to time. Therefore, we request that you refer to the owner’s manual provided by the manufacturer of the XM unit for operational procedures and for information related to the care and maintenance of their product. Seating The 23 XP comes equipped with two captain’s chairs at the helm. -
Page 36: Windshield - Tempered Glass
Cabin Portholes - Two portholes are installed in the cabin. One is located on each side of the cabin. Windshield – Tempered Glass The windshield assembly is constructed of white powder coated aluminum and tempered glass and is vented on both sides. Each of the side vent windows will open to allow air circulation. - Page 37 Access Hatch Locations Anchor Locker Binnacle Fuel Fill Fuel Vent Hose Fuel sender (Pie is in step up) Fuel pick-ups Fuel fill & fuel vent hose connection at the tank (On the deck, below the optional aft facing bench seat) Battery switch Breakers Bilge Access...
-
Page 38: Cabin/Companionway Door
Cabin/Companionway Door The poly bi-fold cabin/companionway door comes equipped with a latch, strap and poly hatch. To open the door, twist the latch to the left to disengage the latch, lift the hatch and pull the door open. Use the black strap and snap to secure the door when it is open. -
Page 39: Thru Hull Fittings
Thru Hull Fittings Thru hull fittings provide overboard drainage. The following photos indicate the source of drainage for each of the thru hulls. Port Side Baitwell Drain (Upper Fitting) Cabin Sink Drain (Optional Fresh Port Cockpit/Deck Drain & Water System) Bilge Hatch Drain (Bottom Fittings) Starboard Side... -
Page 40: Rod Holder Storage
Rod Holder Storage In addition to the rocket launchers installed on the hard top, the following rod holder storage is available: • Rod Holders w/Inserts - One pair of stainless steel rod holders with PVC inserts to protect your rods. As an option, an additional pair of rod holders can be installed. •... -
Page 41: Cabin V-Berth
Please see the Service and Care section of this manual for information on how to clean and care for your cabin cushions and vinyl upholstery. Cabin V Berth To prepare the berth for sleeping, you will need to select one of the following options: Cabin filler board with cushion Cabin table with filler cushion Place either the poly filler board or cabin table over the porta-potti and set the filler cushion on top. -
Page 42: Hard Top
See the Service and Care section of this manual for cleaning recommendations for the anodized aluminum frame and the fiberglass hard top. Note: Pro-Line Boats DOES NOT recommend installing aftermarket Set of 4 Rod outriggers on this hard top or frame. -
Page 43: Operation & Performance
Operation and Performance Trim / Tilt The power trim system allows the operator to raise and lower the motor(s) throughout an infinite number of settings between its upper and lower limits. There is a trim setting that will yield maximum speed, stability or maneuverability for every throttle setting. -
Page 44: Propellers
Propellers If your Pro-Line was ordered with a factory installed engine, it will have a propeller that has been performance tested to provide the best all-round performance for your engine/hull combination at sea level. In some situations, it may be desirable to re-prop your Pro-Line to enhance the desired performance needs for your area. -
Page 45: Fueling
• Check for fuel, oil and water leaks. If any leaks are found, shut down the engines and make the necessary repairs before continuing on with your voyage. • Follow the break-in procedures as recommended by the engine manufacturer for your engines. -
Page 46: Trailering And Launching
Trailering and Launching Selecting A Trailer Choose the proper trailer for your boat and make sure the trailer you use is certified. Consult your state authority for state regulations pertaining to trailering a boat. More damage can be done to a boat by the stress of road travel than by normal water operation. - Page 47 • Too much weight on the rear of the trailer will cause the trailer to "fishtail" and may reduce traction or even lift the rear wheels of the tow vehicle off the ground. • The safety chains are attached crisscrossing under the coupler to the frame of the tow vehicle.
-
Page 48: Backing A Trailer
Make certain that water from rain or cleaning has been removed from the boat. Water weighs approximately eight pounds per gallon and can add weight that will shift with the movement of the trailer. Backing A Trailer Practice backing with a trailer before you get into a confined launch site. Get accustomed to using the trailer in an open area. -
Page 49: Launching
Launching • Keep the rear wheels of the tow vehicle out of the water. This will generally keep the exhaust pipes out of the water. If the exhaust pipes become immersed in the water, the engine may stall. • Set the parking brake and place tire chocks behind the rear wheels. •... -
Page 50: Service And Care
Service and Care To enjoy trouble free use of your Pro-Line, follow the recommended procedures and instructions relating to the service and care of your boat. Failure to follow proper maintenance practices will result in shorter life of your equipment and may void your warranty. Much of the installed equipment on your Pro-Line is warranted separately. -
Page 51: Graphics
This is done so that the epoxy coat will properly adhere to the hull, and when done correctly, will not void the hull warranty. Pro-Line Boats does not recommend using an etching primer in lieu of sanding the bottom. -
Page 52: Fuel Water Separators
Fuel Water Separators If fuel water separators are installed on your boat, the “spin on” filter cartridges should be renewed every season at a minimum. Fuel tanks that are not kept full accumulate water faster due to condensation. Therefore, filter cartridges may need to be replaced more often depending upon usage and conditions or if motors begin to run rough. -
Page 53: Stainless Steel
Stainless Steel Stainless steel is used for bow rails and deck fittings on your Pro-Line. Stainless steel is not completely free from corrosion attack. It is NOT stain or rust proof. When used in contact with chloride salts, sulfides or other rusting metals, stainless will discolor, rust or even corrode. The degree of surface oxidation is directly affected by local atmosphere and saltwater concentrations. -
Page 54: Windshield
windows with a mild soap, lukewarm water and a soft cloth. Make sure that there is no cross contamination on the cloth. Polish with a mild automobile polish. Minor scratches on the lens/window can be removed or minimized by using a mild automobile polish such as Johnson’s Paste Wax or Mirro Glaze Plastic Polish. -
Page 55: Isinglass
When it's time for a thorough cleaning, Sunbrella fabrics can be cleaned while still installed on your boat. It is important to observe the following: • Brush off loose dirt. • Hose down. • Prepare a cleaning mixture of water and mild soap (Ivory Snow, Dreft or Woolite - no detergents). -
Page 56: Exterior Vinyl - Upholstered Seats And Cockpit Bolsters
Caution: Powered abrasives, abrasive cleaners and steel wool will damage vinyl, as do strong solvents, lacquer solutions and inks. Lotions, suntan oil, waxes and polishes, etc., contain oils and dyes that can cause stiffening and staining of the vinyl. Never use steam, heat guns or hair dryers. -
Page 57: Winterizing And Storage
Burner head and surroundings: Keep the flame holes on the burner head clean. Clogged flame holes will affect the combustion process. Use a metal brush to clean the flame hole. Do no immerse in water. Ignition plug: The ignition plug will not function if it is wet. If the plug becomes wet, dry it with a soft cloth or allow it to air dry. -
Page 58: Resealing
Resealing In the heat and sun, silicone and sealant can degrade over time. We recommend that you reseal around everything that comes in contact with the deck or hull with a high quality silicone such as 3M 5200 sealant annually. This includes but is not limited to the following: Hatches on the top cap Windlass Port lights... -
Page 59: Appendix
Appendix Helpful Check Lists Print and use these checklists, and do not operate your boat without doing the following: Each Time You Go On a Boat Trip Make sure you know where CO exhaust outlets are located on your vessel. Educate all passengers about the symptoms of CO poisoning and where CO may accumulate. -
Page 60: Boat Identification Information
Boat Identification Information Owner: Home Port: Dealer: Boat Name: Registration Number: Hull ID Number: Boat Model: LOA: Beam: Draft: Vertical Clearance: Hull: Deck: Interior: Warranty Registration Date: Fuel Capacity (Gallons): Ignition Key #: Cabin/Head Door Key #: Other Key #: Radio Call Letters: Bat.: Engine Make:... -
Page 61: Trouble Shooting Chart
Trouble Shooting Chart PROBLEM: POSSIBLE CAUSE Poor speed or fuel Wrong propeller for load or conditions. economy: Trim is in too far. Load is too far forward or too heavy. Boat has taken on water. Marine growth on hull. Line or anchor is dragging. Fuel is stale or partially blocked.
Need help?
Do you have a question about the 23 XP 2007 and is the answer not in the manual?
Questions and answers