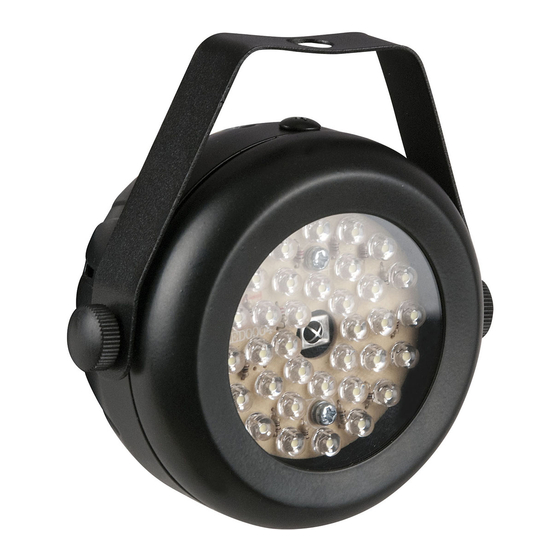
Summary of Contents for SHOWTEC Bumper Strobe V1
- Page 1 MANUAL ENGLISH Bumper Strobe Ordercode: 30873 Highlite International B.V. – Vestastraat 2 – 6468 EX – Kerkrade – the Netherlands...
-
Page 2: Table Of Contents
Bumper Strobe Table of contents Warning ....................................2 Safety Instructions ................................. 2 Operating Determinations ............................4 Rigging .................................... 4 Connection with the mains............................5 Return Procedure ................................6 Claims ....................................6 Description of the device ..............................7 Frontside..................................7 Backside ..................................8 Installation ................................... -
Page 3: Warning
Save the carton and all packing materials. In the event that a fixture must be returned to the factory, it is important that the fixture be returned in the original factory box and packing. Your shipment includes: Showtec Bumper Strobe DC 12V 1A power adapter (1,2 m) ... - Page 4 • If your Showtec device fails to work properly, discontinue the use immediately. Pack the unit securely (preferably in the original packing material), and return it to your Showtec dealer for service.
-
Page 5: Operating Determinations
Bumper Strobe • The user is responsible for correct positioning and operating of the Bumper Strobe. The manufacturer will not accept liability for damages caused by the misuse or incorrect installation of this device. • This device falls under protection class I. Therefore it is essential to connect the yellow/green conductor to earth. -
Page 6: Connection With The Mains
Bumper Strobe The Bumper Strobe can be placed on a flat stage floor or mounted to any kind of truss with a clamp. Improper installation can cause serious injuries and/or damage of property! Connection with the mains Connect the device to the mains with the power-plug. Always check if the right color cable is connected to the right place. -
Page 7: Return Procedure
Bumper Strobe Return Procedure Returned merchandise must be sent prepaid and in the original packing, call tags will not be issued. Package must be clearly labeled with a Return Authorization Number (RMA number). Products returned without an RMA number will be refused. Highlite will not accept the returned goods or any responsibility. Call Highlite 0031-455667723 or mail aftersales@highlite.nl and request an RMA prior to shipping the fixture. -
Page 8: Description Of The Device
Bumper Strobe Description of the device Features The Bumper Strobe is a light effect with high output and great effects. • Input voltage: 100-240V AC, 60/50Hz • Power supply: 12V 1A DC power adapter • Power consumption: 5W • Light source: 35 x 5 mm White LEDs •... -
Page 9: Backside
Bumper Strobe Backside Fig. 02 02) Mounting bracket with inclination screw 03) 12V 1A DC power connector IN 04) Adjustment screw Installation Remove all packing materials from the Bumper Strobe. Check if all foam and plastic padding is removed. Connect all cables. Do not supply power before the whole system is set up and connected properly. -
Page 10: Control Modes
Bumper Strobe Control Modes There are 2 modes: • Static mode • Strobe mode One Bumper Strobe (Static mode) 01) Fasten the effect light to a firm trussing. Leave at least 0,5 meter on all sides for air circulation. 02) Always use a safety cable (ordercode 70140 / 70141). 03) Plug the end of the electric mains power cord into a proper electric power supply socket. -
Page 11: Static Mode
Bumper Strobe Button Function Description Blackout Switch the LEDs OFF Strobe speed Choose the strobe speed: fast, normal, slow Full on Switch the LEDs to FULL ON 1. Static mode 01) Press the button to switch all the LEDs ON. 02) Press the button to switch all the LEDs OFF. -
Page 12: Troubleshooting
01) Power supply. Check if the unit is plugged into an appropriate power supply. 02) The LEDs. Return the Bumper Strobe to your Showtec dealer. 03) The internal fuse. Return the Bumper Strobe to your Showtec dealer. 04) If all of the above appears to be O.K., plug the unit in again. -
Page 13: Product Specifications
Bumper Strobe Product Specifications Model: Showtec Bumper Strobe Power supply: 12V 1A DC power adapter Input voltage: 100-240V AC, 60/50Hz Power consumption: 5W (full output) Dimensions: 55 x 105 x 104 mm (LxWxH) Weight: 0,2 kg Electro-mechanical effects: Light source:... -
Page 14: Notes
Bumper Strobe Notes Ordercode: 30873... - Page 15 Bumper Strobe Ordercode: 30873...
- Page 16 ©2016 Showtec...


Need help?
Do you have a question about the Bumper Strobe V1 and is the answer not in the manual?
Questions and answers