
Related Manuals for SHOWTEC Galactic B1000


Summary of Contents for SHOWTEC Galactic B1000
- Page 1 Galactic B1000 ORDERCODE 51331 Highlite International B.V. Vestastraat 2 6468 EX Kerkrade The Netherlands Phone: +31 45-5667700...
- Page 2 For more information: iwant@showtec.info You can get some of the best quality, best priced products on the market from Showtec. So next time, turn to Showtec for more great lighting equipment. Always get the best -- with Showtec ! Thank you!
-
Page 3: Table Of Contents
Showtec Showtec Galactic B1000 Product Guide ™ Warning ....................................2 Safety Instructions ................................. 2 Laser safety for a Class 4 Laser Product ........................4 Operating Determinations ............................5 Rigging .................................... 5 Return Procedure ................................6 Claims ....................................6 Description of the device ..............................7 Overview .................................. -
Page 4: Warning
Save the carton and all packing materials. In the event that a fixture must be returned to the factory, it is important that the fixture be returned in the original factory box and packing. Your shipment includes: • Galactic B1000 • IEC powercable 1,75m • Remote plug and 2 keys •... - Page 5 If your Showtec device fails to work properly, discontinue use immediately. Pack the unit securely (preferably in the original packing material), and return it to your Showtec dealer for service.
-
Page 6: Laser Safety For A Class 4 Laser Product
Laser safety for a Class 4 Laser Product CAUTION: AVOID EXPOSURE TO BEAM: Avoid direct eye contact with laser light. Never intentionally expose your eyes or others to direct laser radiation. Compliance Statement Your Galactic Laser has been designed to comply with FDA and IEC Standards for it classification. The Galactic is a Class 4 laser product. -
Page 7: Operating Determinations
Proper Usage Safety and Compliance Information According to FDA Regulations you should operate this product as stated on the left. Operating Determinations • This device is not designed for permanent operation. Consistent operation breaks will ensure that the device will serve you for a long time without defects. •... -
Page 8: Return Procedure
Connection with the mains Connect the device to the mains with the power-plug. Always pay attention, that the right color cable is connected to the right place. International EU Cable UK Cable US Cable BROWN YELLOW/COPPER FASE BLUE BLACK SILVER NULL YELLOW/GREEN GREEN... -
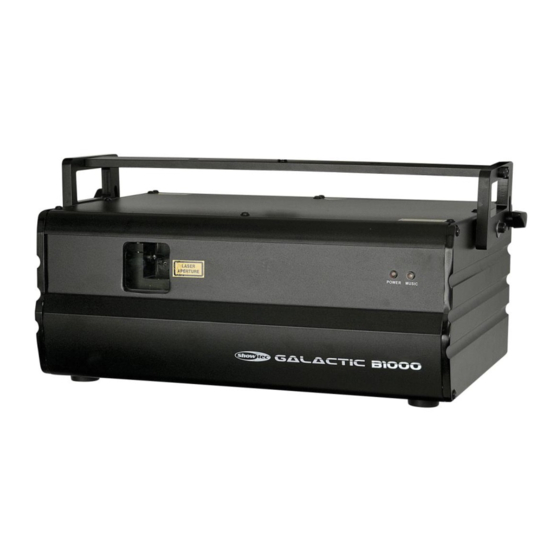
Page 9: Description Of The Device
• Due to the strong 1W output this unit is capable of making great beam shows at in- and outdoor events • If you like to create a more impressive show you can combine the B1000 with the Showtec G300 (51332) •... -
Page 10: Backside
Backside 12 13 14 15 Fig.2 2 3 4 5 6 7 8 9 10 11 16 17 18 19 1) Mountingbracket with adjustment screw 11) Y-size 2) Cooling Fan 12) Remote Interlock safety connection 3) Earth connection 13) Music Sensitivity 4) ON/OFF 14) X-Size 5) IEC Powerconnector + Fuse 1,6A... -
Page 11: Set Up And Operation
Set Up and Operation Before plugging the unit in, always make sure that the power supply matches the product specification voltage. Do not attempt to operate a 120V specification product on 230V power, or vice versa. Connect the device to the main power supply. The device can be music-controlled by its built-in microphone. -
Page 12: Control Modes
Control Modes There are 4 modes: • Autoshow 1 + Autoshow 2 • Musicshow 1 + Musicshow 2 • Master/Slave • DMX512 One Galactic (Autoshow 1 + Autoshow 1. Fasten the effect light onto firm trussing. Leave at least 0,5 meter on all sides for air circulation. 2. -
Page 13: Multiple Galactic (Dmx Control)
Multiple Galactic (DMX Control) 1. Fasten the effect light onto firm trussing Leave at least 1 meter on all sides for air circulation. 2. Always use a safety cable (ordercode 70140 / 70141). 3. Use a 3-p XLR cable to connect the Galactic lasers. 4. -
Page 14: Control Panel
Control Panel Fig. 5 A. LED Display D. Down Button B. Func Button E. Enter Button C. Up Button Control Mode The fixtures are individually addressed on a data-link and connected to the controller. The fixtures respond to the DMX signal from the controller. DMX Addressing The control panel on the front side of the base allows you to assign the DMX fixture address, which is the first channel from which the Galactic will respond to the controller. -
Page 15: Menu Overview
Menu Overview... -
Page 16: Main Menu Options
Main Menu Options 1. Automatic / Sound-controlled Show 2. SD Show 3. DMX address 4. Master/Slave Mode 5. Setting Menu: Colours, Mirror, Sensitivity 1. Automatic / Sound-controlled Show 1) Press the FUNC button, until the display shows 2) Use the Up / Down buttons to scroll through the entire menu. is a fast and exhilarating show, which is better suited for disco applications is a slow and relaxing show, which is better suited for lounge applications is a fast and exhilarating show, which is better suited for disco applications... -
Page 18: Dmx Mode
4) Press ENTER to open a specific folder. 5) Press Up / Down buttons to choose your show mode: ILDA single show PRG preprogrammed show. 6) Press ENTER to confirm the desired laser show. 7) Use the Up / Down buttons to scroll through the entire file menu. Attention: Please ONLY put ILD-format laser shows on the SD card. -
Page 19: Settings Mode
5. Settings Mode With this menu you are able to create a special setup. 1) Press the FUNC button, until the display shows 2) Use the Up / Down buttons to choose between 3 main menus: Color, Mirror or Music. 3) Press ENTER to open a specific menu. -
Page 20: Dmx Channels
DMX Channels 13 Channels Channel 1 – Built-in Programs / Sound-controlled Mode 0-73 Laser OFF 74-110 PRG Show only via the SD card 111-147 ILD Show only via the SD card 148-165 Auto Show 1 166-184 Auto Show 2 185-202 Music-controlled Show 1 203-221 Music-controlled Show 2... - Page 21 Channel 7 – Y-axis Rolling 0-10 No Rolling 11-110 0-359 degree fixed Y Axis rolling 111-255 Rolling from slow to fast Channel 8 – X-axis Rolling 0-10 No Rolling 11-110 0-359 degree fixed X Axis rolling 111-255 Rolling from slow to fast Channel 9 –...
-
Page 22: Patterns
Patterns 000-001 051-053 102-104 153-155 207-209 003-005 054-056 105-107 156-158 210-212 006-008 057-059 108-110 159-161 213-215 009-011 060-062 111-113 162-164 216-218 012-014 063-065 114-116 165-167 219-221 015-017 066-068 117-119 168-173 222-224 018-020 069-071 120-122 174-176 225-227 021-023 072-074 123-125 177-179 228-230 024-026 075-077... -
Page 23: Ild And Prg Files On Sd Card
ILD and PRG files on SD Card Abstract DinRin.ild plough.ild glass.ild Citsloet.ild abs01.ild Dog.ild RHINO2.ild LA^TERNR.ild Dizzy.ild abs02.ild dragfire.ild Roo.ild PLANKS.ild Dwntown.ild abs03.ild dragon1.ild runrab.ild set2.ild easterI.ild abs04.ild dragon2.ild sardine.ild skullrot.ild easteri1.ild abs05.ild eagle.ild Seamonst.ild tregrow.ild easterIL.ild abs06.ild eagle1f.ild shark.ild wkinlite.ild Factory.ild abs08.ild... - Page 24 nova3e.ild cardgive.ild Deckchr.ild Led.ild falls1.ild npaper.ild chainsa.ild fishskel.ild mmann.ild falls2.ild Oscar.ild Character.PRG flower.ild NEON.ild falls3.ild pencil.ild Chef.ild FRANKN.ild notemv.ild grassmv.ild pinky&B.ild Coolie.ild ghost.ild ohmike.ild grfire.ild sweeper.ild demon.ild Goul.ild PIANO.ild h20splsh.ild zippy.ild eskimo.ild Griffin.ild piano2.ild lightnin.ild eyeblnk.ild Iguana.ild strip.ild Nature.PRG Celebrat Facemorf.ild lizz.ild taenzer.ild...
- Page 25 litehous.ild Sports.PRG.bak f11.ild PLASMA.ild movcam.ild sprinter.ild formula1.ild SPIND.ild oilderek.ild style.ild frigate.ild spiral.ild ph.ild surfer2.ild gallsea.ild stargrid.ild Phring.ild swingg.ild heli.ild SWIRL.ild pliers.ild volball.ild helibig.ild tunnel.ild plnetexp.ild windsur.ild hor&carr.ild wall.ild pour.ild jeepdus1.ild WUERFEL.ild reelcam.ild Text jeepdust.ild X2D.PRG robofoot.ild Birthday.ild Jet.ild robot1.ild Crazy.ild rikshaw.ild saveth.ild Dance.ild...
-
Page 26: Maintenance
Maintenance The Showtec Galactic requires almost no maintenance. However, you should keep the unit clean. Otherwise, the fixture’s light-output will be significantly reduced. Disconnect the mains power supply, and then wipe the cover with a damp cloth. Do not immerse in liquid. Wipe lens clean with glass cleaner and a soft cloth. - Page 27 Problem Probable cause(s) Remedy No power to the fixture • Check that power is switched on One or more and cables are plugged in. fixtures are Primary fuse blown. • Replace fuse. completely dead. Fixtures reset The controller is not connected. •...
-
Page 28: Product Specification
• Due to the strong 1W output this unit is capable of making great beam shows at in- and outdoor events • If you like to create a more impressive show you can combine the B1000 with the Showtec G300 (51332) •...
Need help?
Do you have a question about the Galactic B1000 and is the answer not in the manual?
Questions and answers