Advertisement
Quick Links
GSM Retail Australia Pty Ltd ABN: 53 007 582 475
For Warranty and technical queries: 1300 373 199 Aus Or 0800 764 912 NZ www.belliniappliances.com.au
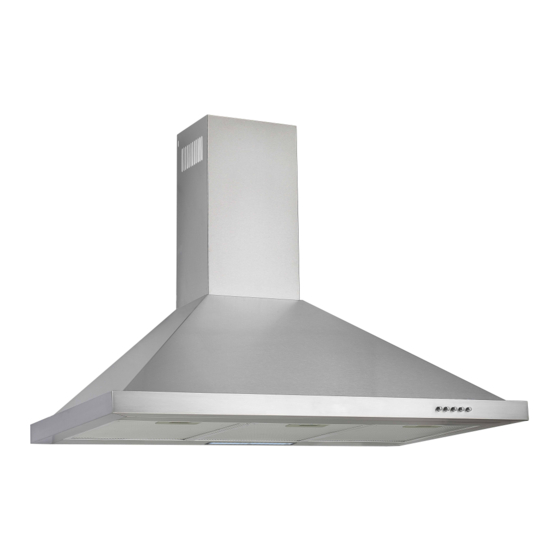
Model: BRA603CPX2-F FINELINE:0220602 BRA903CPX2-F FINELINE:5102529 60cm/90cm Canopy Range hood
INSTALLATION & OPERATION
INSTRUCTIONS
60cm/90cm Canopy Range hood
Model No.
BRA603CPX2
BRA603CPX2-F
BRA903CPX2
BRA903CPX2-F
FINELINE: 0220602
FINELINE: 5102529
V.3 Sep20
Advertisement

Summary of Contents for Bellini BRA603CPX2
- Page 1 BRA903CPX2 BRA903CPX2-F FINELINE: 5102529 V.3 Sep20 GSM Retail Australia Pty Ltd ABN: 53 007 582 475 For Warranty and technical queries: 1300 373 199 Aus Or 0800 764 912 NZ www.belliniappliances.com.au Model: BRA603CPX2-F FINELINE:0220602 BRA903CPX2-F FINELINE:5102529 60cm/90cm Canopy Range hood...
- Page 2 Thank you Thank you for choosing Bellini Appliances. Bellini prides itself on ‘affordable living’ making sure there is no compromise in your favourite room … The Kitchen All Bellini appliances carry a 3 year In Home warranty, be sure to retain your installation and user manual and receipt.
-
Page 3: Table Of Contents
Maintenance and cleaning -------------------13 Warranty------------------------------------------ 14 GSM Retail Australia Pty Ltd ABN: 53 007 582 475 For Warranty and technical queries: 1300 373 199 Aus Or 0800 764 912 NZ www.belliniappliances.com.au Model: BRA603CPX2-F FINELINE:0220602 BRA903CPX2-F FINELINE:5102529 60cm/90cm Canopy Range hood... -
Page 4: Safety Instructions
In case of failure, only the Authorised Technical Service may repair this range hood. Otherwise the guarantee will be null and void. All Bellini Appliances are for domestic use only. Never to do:... - Page 5 Safety instructions Never to do: Always to do: This range hood cannot be installed for outdoor use. Attention should be given to ensure that any It is prohibited to fit the range hood over a solid fuel applicable regulations concerning discharge stove of exhaust air are fulfilled.
-
Page 6: Product Description
BRA603CPX2,BRA603CPX2-F,BRA903CPX2,BRA903CPX2-F Component list: Technical data: 1. Upper decorative chimney bracket* 2. Upper decorative chimney(Inner) Power supply: 220 – 240v, 50Hz 3. Lower decorative chimney bracket Light: 1x1.5w LED Light Motor: 190W 4. Flexible exhaust pipe 5. Lower decorative chimney(outer)* Length of power cord: 1.5m 6. - Page 7 Operation Mode Your range hood can be operated in two optional modes, choose the m ode suitable for your kitchen before installation. Air Extraction For air extraction mode, a ducting kit is re quired, the air To outside is drawn in and cleaned by the grease filters and directed outside.
-
Page 8: Installation
Installation Dimensions: BRA603CPX2, BRA603CPX2-F, Width=600; BRA903CPX2, BRA903CPX2-F, Width=900... - Page 9 Installation: Warning: Check that the installatio n complies with the standards of local building, gas and electrical authorities. Before connecting to the mains supply ensure the mains vo ltage corresponds to the voltage on the applian ce rating plate inside the range hood. When installing the range hood, make sure you adhere to the minimum and maximum distances from the range hood base to the cooktop hob surface.
- Page 10 1. Using a spirit level mark a vertical centre line on t h e wall where the hood is to be positioned, and a horizontal line where the hood base will be. NOTE: The distance from the horizontal line to an electrical cooktop underneath must be minimum of 600mm &...
- Page 11 2. Based on above drawing and dimension to drill holes(8mm diameter) and hammer dry wall anchor plugs into holes Use 2pcs ST4x8mm screws to attach lower and upper chimney together, do not fasten screws too much, make sure upper decorative chimney can be telescopically adjusted after assembled. Upper decorative chimney (Inner) Lower Chimney bracket Lower decorative chimney (Outer)
- Page 12 7. Hang on the hood onto the hook of the hood mount bracket, make sure the mount slot on cooker hood completely slide into hooks. *Above photo is just for reference only, actual product could be varies… 8. Fasten the 2pcs anti-tilt ST4x30mm screws onto wall to ensure horizontality of cooker hood. You can find out screw holes inside hood near the motor chamber.
- Page 13 Secure the lower chimney bracket onto wall with 2 x ST4x40mm screws. 12. Extend the upper decorative chimney to desired height and fix it with the upper decorative chimney bracket by 2pcs ST4x8mm screws. 13. Remove all blue protective film on chimney and cooker hood, the installation is now finished.
-
Page 14: Start Using Your Range Hood
Start Using Your Range Hood BRA603CPX2, BR A603CPX2-F, BR A903CPX2, BRA903CPX2-F Push button Off button It’s used for turning off the fan. Low Speed button It’s used for Ventilation on the kitchen. It is suitable for simmering and cooking which do not make much steam. -
Page 15: Maintenance And Cleaning
Maintenance and cleaning Caution: GREASE MESH FILTERS • Before maintenance or cleaning is carried out, the The mesh filters can be cleaned either by hand or in range hood should be disconnected from the main the dishwasher. After cleaning ensure that the filters power supply. -
Page 16: Warranty
Consumer until the expiry of three (3) year (Warranty Period). If within the Warranty Period a manufacturing defect is discovered in the Bellini product or it fails to perform to the Company’s specifications as a result of some defect in materials, components or workmanship (Defect) then the Company will, at its option, repair the Bellini product or supply a replacement Bellini product free of charge. - Page 17 1.10 If you are required to transport the Bellini product to the Company or its service agent, you must ensure it is safely disconnected by a qualified tradesman and securely packed and insured. The Company does not accept any responsibility for loss or damage of the Bellini product prior to it being received by the Company or its service agent.


Need help?
Do you have a question about the BRA603CPX2 and is the answer not in the manual?
Questions and answers