Advertisement
Quick Links
INSTALLATION & USER MANUAL
GSM Retail Australia Pty Ltd ABN: 53 007 582 475
For Warranty and technical queries: 1300 373 199 Aust www.belliniappliances.com.au
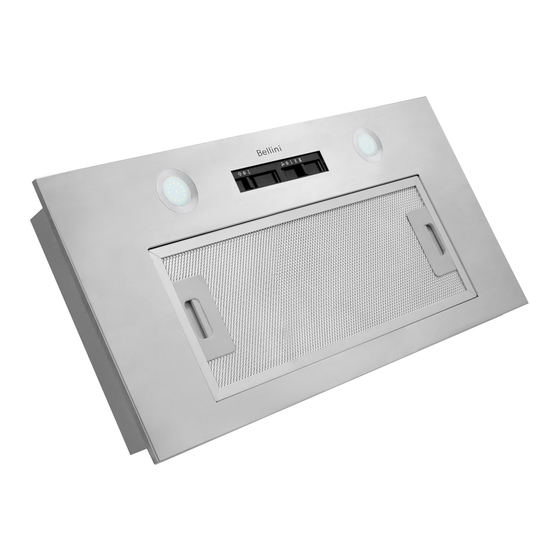
Model: BRA52UX Fineline: 81476 Model: BRA75UX Fineline: 133506 52cm & 75cm Undermount Rangehood
52cm & 75cm Undermount
Rangehood
Model No
BRA52UX
BRA75UX
Compatible
Filter
CF110
Not Included
FINELINE: 81476
FINELINE: 133506
FINELINE: 5102399
V.6 Sep20
Advertisement

Related Manuals for Bellini BRA52UX


Summary of Contents for Bellini BRA52UX
- Page 1 CF110 FINELINE: 5102399 Not Included GSM Retail Australia Pty Ltd ABN: 53 007 582 475 For Warranty and technical queries: 1300 373 199 Aust www.belliniappliances.com.au V.6 Sep20 Model: BRA52UX Fineline: 81476 Model: BRA75UX Fineline: 133506 52cm & 75cm Undermount Rangehood...
- Page 2 For all warranty and technical queries please contact 1300 373 199 GSM Retail Australia Pty Ltd ABN: 53 007 582 475 For Warranty and technical queries: 1300 373 199 Aust www.belliniappliances.com.au Model: BRA52UX Fineline: 81476 Model: BRA75UX Fineline: 133506 52cm & 75cm Undermount Rangehood...
-
Page 3: Table Of Contents
Maintenance & Cleaning ---------------------10 Environment Protection-----------------------13 Warranty------------------------------------------14 GSM Retail Australia Pty Ltd ABN: 53 007 582 475 For Warranty and technical queries: 1300 373 199 Aust www.belliniappliances.com.au Model: BRA52UX Fineline: 81476 Model: BRA75UX Fineline: 133506 52cm & 75cm Undermount Rangehood... -
Page 4: Safety Instructions
SAFETY INSTRUCTIONS hismanualexplainstheproperinstallationanduseofyourrangehood, pleasereaditcarefullybeforeusingevenifyouarefamiliarwiththeproduct. Themanualshouldbekeptinasafeplaceforfuturereference. Nevertodo: Alwaystodo: o not try to use the rangehood ● ● mportant! Always switch off the without the grease filters or if the filters electricity supply at the mains during are excessively greasy! installation and maintenance such as light bulb replacement. - Page 5 Alwaystodo: Alwaystodo: ● ● lways put lids on pots and pans aution: The appliance and its when cooking on a gas cooker. accessible parts can become hot during operation. Be careful to avoid ● hen in extraction mode, air in the touching the heating elements.
-
Page 6: Installation
PRODUCT DESCRIPTION Accessories bag Description Picture v-flap(150) 1 pair ST4*18mm screws Installation & User Manual INSTALLATION (VENT OUTSIDE) MOUNTING OF THE V-FLAP If the rangehood does not have an assembled V-flap 1, you should mount the half- parts to its body.The images only show an example of how to mount the V-flap, because the outlet may vary according to different models and configurations. - Page 7 INSTALLATION INSTALLATION If you have an outlet to the outside, your rangehood can be connected as below picture by means of an extraction duct (enamel, aluminum, flexible pipe or non- flammable material with an interior diameter of 150mm)
- Page 8 1. Before installation ensure that the cupboard is structurally sound and is capable of carrying the weight of the rangehood and that the rangehood distance between a cooktop and underneath the rangehood must be minimum of 600mm to a cooktop and a maximum height of 750mm.
- Page 9 35mm and at least 35mm from the other cut out edges front and sides. The cut out hole in the cabinet should measure Width*depth 490*265(mm) for BRA52UX and 715*265(mm) for model BRA75UX. Refer pic below.
-
Page 10: Start Using Your Appliance
Note:The expansion pipe is not included in the product. WARNING: For safety reason, please use only the same size of fixing or mounting screws which are recommended in this instruction manual. Failure to install the screws or fixing device in accordance with these instructions may result in electrical hazards. -
Page 11: Maintenance & Cleaning
Replace blubs as per this Lights not working Broken or faulty bulbs instruction. The distance between the Refit the rangehood to the rangehood and the gas top is Insufficient suction correct distance. too far The rangehood The fixing screw is not tight Tighten the hanging screw and inclines enough... - Page 12 GREASE MESH FILTERS The mesh filters can be cleaned by hand. Soak them for about 3 minute in water with a mild detergent and then brush it gently with a soft brush. Please do not apply too much pressure so as to avoid any damage to it . (Leave to dry naturally out of direct sun light) Filters should be washed separately to crockery and kitchen utensils.
- Page 13 BULB REPLACEMENT The bulb must be replaced by the manufacturer, its Important : service agent or similarly qualified persons. Always switch off the electricity supply before carrying out any operations on the appliance. When handling bulb, make sure it has completely cooled down before any direct contact with hands.
-
Page 14: Environment Protection
ENVIRONMENTAL PROTECTION: This product is marked with the symbol on the selective sorting of waste electronic equipment. This means that this product must not be disposed of with household waste but must be supported by a system of selective collection in accordance with Directive 2012/19/EU. -
Page 15: Warranty
Consumer until the expiry of three (3) year (Warranty Period). If within the Warranty Period a manufacturing defect is discovered in the Bellini product or it fails to perform to the Company’s specifications as a result of some defect in materials, components or workmanship (Defect) then the Company will, at its option, repair the Bellini product or supply a replacement Bellini product free of charge. - Page 16 1.10 If you are required to transport the Bellini product to the Company or its service agent, you must ensure it is safely disconnected by a qualified tradesman and securely packed and insured. The Company does not accept any responsibility for loss or damage of the Bellini product prior to it being received by the Company or its service agent.
Need help?
Do you have a question about the BRA52UX and is the answer not in the manual?
Questions and answers