Advertisement
Curve Glass
Canopy Rangehood
BR603GCX-1, BR603GCX-1F
BR903GCX-1, BR903GCX-1F
BR603GTX-1, BR603GTX-1F
BR903GTX-1, BR903GTX-1F
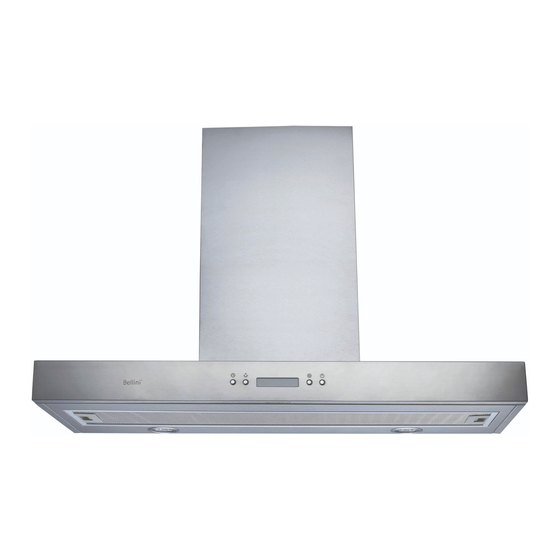
Canopy
Rangehood
BR603CPX,
BR603CPX-F,
BR903CPX,
BR903CPX-F
CRHC9S01-1
CRHC9S01-F
Black Glass Fascia
Rangehood
Installation and User manual
Content
Safety instructions----------------------------------------2
Product description---------------------------------------4
Operation mode-------------------------------------------7
Installation---------------------------------------------------8
Start using the range hood------------------------------13
Maintenance and cleaning------------------------------14
Warranty-----------------------------------------------------15
For warranty service call 1300 373 199(Australia)
or 0508 123108 (New Zealand) to connect you to
the nearest authorised service centre
1
20130218 Issue 4
BDR603TBX
BDR603TBX-F
BDR903TBX
BDR903TBX-F
Advertisement

Subscribe to Our Youtube Channel
Related Manuals for Bellini BR603GCX-1


Summary of Contents for Bellini BR603GCX-1
-
Page 1: Table Of Contents
20130218 Issue 4 Black Glass Fascia Curve Glass Rangehood Canopy Rangehood BDR603TBX BDR603TBX-F BR603GCX-1, BR603GCX-1F BDR903TBX BR903GCX-1, BR903GCX-1F BDR903TBX-F BR603GTX-1, BR603GTX-1F BR903GTX-1, BR903GTX-1F Canopy Installation and User manual Rangehood Content BR603CPX, Safety instructions----------------------------------------2 BR603CPX-F, Product description---------------------------------------4 BR903CPX, Operation mode-------------------------------------------7 BR903CPX-F... -
Page 2: Safety Instructions
Safety instructions This manual explains the proper installation and use of your range hood, please read it carefully before using even if you are familiar with the product. The manual should be kept in a safe place for future reference. Never to do: Always to do: This appliance is not intended for use by persons... - Page 3 Safety instructions Never to do: Always to do: This range hood cannot be installed for outdoor use. Attention should be given to ensure that any It is prohibited to fit the range hood over a solid fuel applicable regulations concerning discharge stove of exhaust air are fulfilled.
-
Page 4: Product Description
Product description BR603GCX-1, BR603GCX-1F, BR903GCX-1, BR903GCX-1F BR603GTX-1, BR603GTX-1F, BR903GTX-1, BR903GTX-1F Accessories bag Description Picture User Manual 1:1 installation guide template Upper decorative chimney bracket Lower decorative chimney bracket Hood mount bracket Dry wall anchors plugs Screw(ST4x8mm) Screw(ST4x30mm) Component list: Technical data: 1. - Page 5 BDR603TBX, BDR603TBX-F, BDR903TBX, BDR903TBX-F Accessories bag Description Picture User Manual 1:1 installation guide template Upper decorative chimney bracket Lower decorative chimney bracket Hood mount bracket Dry wall anchors plugs Screw(ST4x8mm) Screw(ST4x30mm) Component list: Technical data: 1. Upper decorative chimney bracket 2.
- Page 6 BR603CPX, BR603CPX-F, BR903CPX, BR903CPX-F, CRHC9S01-1, CRHC9S01-F Accessories bag Description Picture User Manual 1:1 installation guide template Upper decorative chimney bracket Lower decorative chimney bracket Hood mount bracket Dry wall anchors plugs Screw(ST4x8mm) Screw(ST4x30mm) Component list: Technical data: 1. Upper decorative chimney bracket* 2.
-
Page 7: Operation Mode
Operation Mode Your range hood can be operated in two optional modes, choose the mode suitable for your kitchen before installation. Air Exaction For air exaction mode, a ducting kit is required, the air is To outside drawn in and cleaned by the grease filters and directed outside. -
Page 8: Installation
Installation Dimensions: BDR603TBX, BDR603TBX-F, BR603GC/TX-1, BR603GC/TX -1F Width=600 Width=600 BDR903TBX, BDR903TBX-F BR903GC/TX-1, BR903GC/TX -1F Width=900 Width=900 BR603CPX, BR603CPX-F, Width=600; BR903CPX, BR903CPX-F, CRHC9S01-1, CRHC9S01-F, Width=900... - Page 9 Installation: Warning: Check that the installation complies with the standards of local building, gas and electrical authorities. Before connecting to the mains supply ensure the mains voltage corresponds to the voltage on the appliance rating plate inside the range hood. When installing the range hood, make sure you adhere to the minimum and maximum distances from the range hood base to the cooktop hob surface.
- Page 10 2. Use the installation guide template to determine where screw mount holes should be drilled. Make sure vertical and horizontal line on the installation guide template superpose with the line just drew on the wall. 3. According to the position just marked by installation guide template, drill holes(diameter 7mm) on the wall and hammer dry wall anchor plugs into holes.
- Page 11 7. Secure the hood mount bracket onto wall with 3 x ST4x30mm screws, making sure screws are securely tightened. 8. Hang on the hood onto the hook of the hood mount bracket, make sure the mount slot on cooker hood completely slide into hooks.
- Page 12 12. This step is for BR6/903GC/TX-1, BR6/903GC/TX-1F and BDR6/903TBX, BR6/903TBX-F 12.1 Fasten 2 x ST4x30mm screws onto the wall to fix Lower decorative chimney bracket. 12.2 Attach the upper chimney onto the hook position on lower chimney(both side) Upper decorative chimnsy(Inner) Lower chimney bracket Lower decorative chimney(Outer) 13.
-
Page 13: Start Using The Range Hood
Start using your range hood BR603GCX-1, BR603GCX-1F, BR903GCX-1, BR903GCX-1F BR603CPX, BR603CPX-F, BR903CPX, BR903CPX-F, CRHC9S01-1, CRHC9S01-F Lamp – Turn on/off light; On/Off – Turn on/off unit Speed –select speed to suit cooking conditions Low – light frying/boiling. Depress this button to enter into low speed and again to turn off motor. -
Page 14: Maintenance And Cleaning
Maintenance and cleaning Caution: - By hand: Soak in warm water and a neutral • Before maintenance or cleaning is carried out, the washing up liquid. For stubborn grease stains use a range hood should be disconnected from the main soft nylon brush or sponge to help remove these power supply. -
Page 15: Warranty
Subject to the other clauses of this warranty, the Company warrants to the Consumer that the Bellini product will be free of manufacturing defects and will perform to the Company’s specifications. The benefit of this warranty extends only to the Consumer as original purchaser of a Bellini product which is installed in a residential property. - Page 16 Bellini product for service nor the service agent’s travelling costs to and from your home. 1.10 If you are required to transport the Bellini product to the Company or its service agent, you must ensure it is safely disconnected by a qualified tradesman and securely packed and insured. The Company does not accept any responsibility for loss or damage of the Bellini product prior to it being received by the Company or its service agent.
Need help?
Do you have a question about the BR603GCX-1 and is the answer not in the manual?
Questions and answers