Permobil Explorer Mini User Manual
Hide thumbs
Also See for Explorer Mini:
- Service manual (78 pages) ,
- User manual (142 pages) ,
- Quick reference card (2 pages)
Table of Contents
Advertisement
Quick Links
Advertisement
Table of Contents

Subscribe to Our Youtube Channel
Related Manuals for Permobil Explorer Mini


Summary of Contents for Permobil Explorer Mini
- Page 1 Explorer Mini User manual American English...
- Page 2 How to contact Permobil Welcome to the Permobil family Your child's journey to explore the world with the Explorer Mini Permobil Inc. has just started, and we hope that he or she will have lots of 300 Duke Drive fun together with the Explorer Mini. This wheelchair is designed...
-
Page 3: Table Of Contents
Adjusting the maximum speed setting Technical support Locking and unlocking the Explorer Mini Reporting incidents Driving restrictions Spare parts and accessories Joystick error when the Explorer Mini is turned Ordering documentation Scrapping and recycling 5.10 Joystick error and flashing LEDs Safety instructions 5.11... -
Page 4: Important Information
Warranty Contact your dealer or Permobil Inc. USA for information about Before your child starts to use the Explorer Mini, it is important the warranty period for this product. that you read and understand the contents of this user manual, and in particular the safety instructions. -
Page 5: Reporting Incidents
The expected service life of this product is five years. Ordering documentation Should you need another copy of this manual, one may be ordered from Permobil. Ask for the order number specified on the back cover. Scrapping and recycling Contact Permobil for information about scrapping agreements in force. -
Page 6: Safety Instructions
For instructions on how to charge the batteries, see 5.12.1 Charging the batteries. The Explorer Mini must only be used when an adult is close and monitors the child continuously. Make sure to test the buttons... -
Page 7: Descriptions Of Admonitions
WARNING! up to a certain intensity, which is called its immunity level and that is measured in volts per meter (V/m). The Explorer Mini has Indicates a hazardous situation which, if not avoided, could an immunity level of 20 V/m when tested without accessories,... - Page 8 WARNING! Weight limitations Do not lift or move the wheelchair by any of its removable parts. The child must not use the Explorer Mini if he or she exceeds Doing so could lead to personal injury and property damage, the maximum user weight as listed in the technical specifica- including damage to the wheelchair.
- Page 9 Protect the wheelchair and its electronics from exposure to any type of moisture, including rain, snow, mud or spray. Exposure The Explorer Mini must only be used by the child to whom it was to moisture may cause the chair to short-circuit, catch fire and prescribed.
- Page 10 Do not use parts or accessories not authorized by Permobil. Be careful when using the Explorer Mini in environments where oxygen concentrations might be higher than normal, for The use of non-approved aftermarket accessories and parts example in a hospital ward where oxygen tubes are being used.
- Page 11 Do not use these types of devices close to the product. If you feel the Explorer Mini is not behaving as it should in any regard or if you suspect that something is wrong, stop use, turn off the wheelchair and contact your service provider or Permobil for further information.
- Page 12 NOTICE Investigate tripped main circuit serious accident breaker Stop using the Explorer Mini if it has been dropped, crushed, A tripped main circuit breaker can indicate an electrical fault. exposed to fire, submerged in water, or involved in a vehicular The cause of a tripped main circuit breaker must be inves- accident, or other extraordinary event.
- Page 13 If the child Do not let the child drive the Explorer Mini while the tray top is continues to drive backward, the Explorer Mini can become removed.
- Page 14 WARNING! Dangerous environment support Do not use the Explorer Mini in environments that may cause a risk of injury, for example close to traffic, staircases, high Do not use the joystick as a support. If you do, you can lose obstacles and steep hills.
- Page 15 • If the charging connector to the battery charger or the socket WARNING! Risk of tipping when driving on the Explorer Mini is damaged or gets too hot during downhill charging, it must be replaced. Contact your dealer for replacement of parts.
- Page 16 NOTICE Do not use an extension cable Do not use an extension cable with the supplied charger cable. Make sure that the Explorer Mini is positioned close enough to a wall socket before connecting the cable. CAUTION! Sharp edges on cable Be careful when connecting the cable to the socket.
-
Page 17: Getting To Know Your Wheelchair
3 Getting to know your wheelchair Getting to know your wheelchair - 17... -
Page 18: Overview
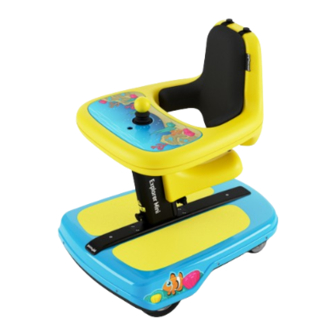
Overview A. Backrest (part of the table and backrest unit) B. Cushion C. Tray top D. Seat E. Caster wheel F. Drive wheel G. Joystick H. On/off button Table (part of the table and backrest unit) Column K. Base module L. -
Page 19: Technical Specifications
Technical specifications Explorer Mini Product name (P): Wheelchair class (W): Height (A) Minimum: 725 mm (28″) Maximum: 920 mm (36″) Width (B) 490 mm (19″) Length (C) 635 mm (25″) 3.2.1 Dimensions and weight Height Minimum: 725 mm (28″) Maximum: 920 mm (36″) 9 steps at 25 mm (1″) each. - Page 20 Width, including overall width in standing position 490 mm (19″) Length 635 mm (25″) Full overall length in standing position 635 mm (25″) Weight, including batteries 23.8 kg (52 lb.) Weight of chassis, heaviest removable part 22.9 kg (50 lb.) Minimum transportation height 722 mm (28″) Minimum transportation width...
- Page 21 3.2.3 Performance The performance values represent the extreme conditions under which the Explorer Mini could be operated in a controlled test environment. However, information provided in chapter 5 Handling and driving describes the safest, recommended conditions for driving the Explorer Mini in the real world.
- Page 22 Acceleration in standing position 0.62 m/s (2 ft/s²) Minimum braking distance from 0.3 m (1 ft.) maximum speed. The Explorer Mini will stop immediately. Retardation in standing position 0.78 m/s² (2.5 ft/s²) Braking performance Parking brakes facing uphill: 12° in standing position Parking brakes facing downhill: 15°...
- Page 23 Dynamic stability, traversing step 75 mm (3″) forward, downward Dynamic stability, traversing step 12 mm (0.5″) rearward, upward Dynamic stability, traversing step 50 mm (2″) rearward, downward Ability to negotiate obstacles, 25 mm (1″) approach distance 0 cm (0″) Ability to negotiate obstacles, 25 mm (1″) approach distance 50 cm (20″) Dynamic stability downhill...
- Page 24 The hip and/or upper torso passes the static strength tests. in standing position The Explorer Mini does not incorporate a raising and lowering mechanism. The Explorer Mini endured 20,000 cycles in the modified multi drum fatigue test. 3.2.4 Batteries Charging time Battery weight 2 x 1.9 kg (4.2 lb.)
-
Page 25: Design And Function
It is intended to be used indoors on dry, flat, firm, and clean surfaces and outdoors in dry weather on dry, paved, and flat surfaces. The Explorer Mini is not intended to be used as a seat in a motor vehicle. - Page 26 3.3.2 Table and backrest unit The table and backrest are combined to one unit. This unit provides ergonomic positions for sitting and standing. The height of the table and backrest unit can be changed to ten different positions. For instructions on adjustments of the table and backrest unit, see 4 Adjustments.
- Page 27 3.3.2.2 Cushion The cushion is attached to the backrest from the start and is intended to provide support to small children. It can be removed and attached as needed. For instructions on removing the cushion, see 4 Adjustments. 3.3.3 Base module The base module has functions for power supply and drive units.
- Page 28 It also functions as a fuse, and the Explorer Mini will automatically be turned off if an electrical fault occurs. This means that the control system is protected from being overloaded, for example if the child keeps driving the Explorer Mini while the wheelchair is stuck.
- Page 29 3.3.3.3 Batteries The batteries are positioned inside the base module. For instructions on how to charge the batteries, see 5 Handling and driving. WARNING! Do not replace batteries 3.3.3.4 Wheels The caster wheels and drive wheels have solid tires and are not inflatable. Getting to know your wheelchair - 29...
-
Page 30: Control Panel
Control panel A. Battery indicator B. Maximum speed indicator C. On/off button D. Reduce speed E. Charger socket F. Horn button G. Increase speed H. Joystick 30 - Getting to know your wheelchair... - Page 31 The control panel has functions for driving, and charging the batteries. It has a joystick, function buttons, indicators for speed, a battery charger, and a charger socket. The charger socket is positioned at the front of the control panel. The on/off button on the control panel is always accessible. To access the other function buttons on the control panel, you need to remove the tray top.
- Page 32 3.4.1 Charger socket Only use the charger socket to charge the batteries of the Explorer Mini. While the Explorer Mini charges, it is automatically locked and cannot be driven. NOTICE Only use supplied battery charger 3.4.2 On/off button The on/off button activates the control panel and drive units.
- Page 33 3.4.3 Maximum speed buttons The maximum speed buttons increase and reduce the maximum speed of the Explorer Mini. 3.4.4 Maximum speed indicator The maximum speed indicator has five settings. The LEDs on the speed indicator show the current maximum speed setting: •...
- Page 34 Please contact your service provider or Permobil. 3.4.7 Joystick The joystick is used to control the Explorer Mini. The neutral position is in the center. Always put the joystick in the neutral position before you turn on or off your child’s wheelchair. This prevents joystick errors.
-
Page 35: Accessories
Accessories Only use accessories intended to be used with the Explorer Mini. You can order them from your Permobil dealer. Accessories for Permobil products are in continuous development. Contact your Permobil dealer for more information about the accessories available for the Explorer Mini. - Page 36 Name and Model version: XXXXXX address of the readable format including: GTIN - global trade item number, date of XXXXXX: XXXXXX manufacturer HVIN: XXXXXX manufacture, and serial number YYYY-MM-DD Patent: www.permobil.com/patents (01)XXXXXXXXXXX (11)YYMMDD (21)XXXXXXXXXX 36 - Getting to know your wheelchair...
- Page 37 Driving restrictions This label shows restrictions for driving. A. Explorer Mini must not be used as a seat in a motor vehicle. B. The maximum safe slope for hill-climbing is 3°. C. The maximum height for obstacle climbing is 12 mm (0.5″).
- Page 38 3.6.5 Main circuit breaker and start button The label shows the positions to turn on and off the main circuit breaker, and the position of the start button. 3.6.6 Wiring diagram The label shows wiring diagram for the batteries and fuses. It includes the battery polarities, the main fuse, and the position of the activation switch.
- Page 39 3.6.7 Electromagnetic interference A tag with information about electromagnetic interference (EMI) hangs on the Explorer Mini. Getting to know your wheelchair - 39...
-
Page 40: Adjustments
4 Adjustments Any adjustments on the Explorer Mini should be done by an adult. Only do adjustments that are described in this user manual. All other maintenance and repairs must be done by qualified service technicians. Carefully read all instructions before doing adjustments and maintenance. - Page 41 Pull out the plunger knob ( ) located under the seat. 2. Carefully move the seat up or down to the new setting. 3. Release the plunger knob ( ). A click signals that the plunger knob is locked. WARNING! Risk of injury 4.1.2 Removing the seat An adult or healthcare provider must decide if seat removal is applicable for...
- Page 42 2. Remove the tightening knob ( ) from the column. 3. Pull out the plunger knob ( ). 4. Push down the seat and slide it off the column. 42 - Adjustments...
- Page 43 5. Put back the tightening knob and tighten it by hand. 4.1.3 Installing the seat The center of gravity is affected when the seat is installed. The table and backrest unit must be in the highest position before you can install the seat.
- Page 44 2. Remove the tightening knob from the column. 3. Pull out the plunger knob ( ). 44 - Adjustments...
- Page 45 4. Push the seat into the groove on the column. 5. Carefully move the seat up or down to a setting. 6. Release the plunger knob ( ). A click signals that the plunger knob is locked. 7. Put back the tightening knob ( ) and tighten it by hand. Table and backrest unit When the height of the table and backrest unit is adjusted, it affects the distance between the seat and the base module.
- Page 46 CAUTION! Pinch risk 4.2.1 Adjusting the height of the table and backrest unit Loosen the tightening knob ( ). 2. Hold the table in its position ( ) to prevent it from sliding down on the base module. 3. While you hold the table in its current position, pull out the plunger knob ( 4.
-
Page 47: Tray Top
Tray top 4.3.1 Removing the tray top Put your fingers in the hole that is positioned at the bottom of the table. Push the tray top upward and lift off the tray top. NOTICE Do not drive the wheelchair while the tray top is removed 4.3.2 Attaching the tray top... -
Page 48: Cushion
Cushion 4.4.1 Removing the cushion The wheelchair has a removable cushion. There are four screws, attached to the cushion, that hold the cushion in place. Remove the four screws from the attachment points on the backrest. 2. Remove the cushion from the backrest. 4.4.2 Attaching the cushion Put the cushion in place on the backrest. -
Page 49: Handling And Driving
5 Handling and driving The Explorer Mini is intended to be used indoors on dry, flat, firm, and clean surfaces and outdoors in dry weather on dry, paved, and flat surfaces. WARNING! Do not let a child use the Explorer Mini... - Page 50 5.1.1 Sitting position When the Explorer Mini is used in the sitting position, the child sits with one leg on each side of the column. The feet should touch the friction surface of the base module. The arms should be positioned on the table, to make sure that he or she can reach the joystick easily.
-
Page 51: Turning On The Explorer Mini
Turning on the Explorer Mini You must turn on the main circuit breaker and press the start button before you activate the control panel. There is no feedback to confirm that you have pressed the start button. Turn on the main circuit breaker ( ). -
Page 52: Turning Off The Explorer Mini
2. Remove the tray top and make sure that the LEDs on the control panel are off. 3. If the Explorer Mini is going to be stored for a week or more, turn off the main circuit breaker ( ). -
Page 53: Battery Saving Function
Battery saving function The battery saving function starts automatically when the Explorer Mini has not been in use for ninety minutes. When this occurs, you have to press the start button for at least one second before you activate the control panel again. - Page 54 WARNING! Obstacles at head level WARNING! Risk of tipping when driving backward 54 - Handling and driving...
-
Page 55: Adjusting The Maximum Speed Setting
4. Show your child that the wheelchair brakes or stops when he or she releases the joystick. The joystick will move to its neutral position. Please note that the back of the Explorer Mini drifts when it turns. Adjusting the maximum speed setting WARNING! Adapt the speed to the child’s needs... -
Page 56: Locking And Unlocking The Explorer Mini
Locking and unlocking the Explorer Mini The Explorer Mini can be locked to prevent other users from driving it. When the Explorer Mini is locked it cannot be driven before it is unlocked again. An adult must lock or unlock the wheelchair. - Page 57 5.7.1 Locking The Explorer Mini is unlocked with the steps below. Step 3 and 4 must be done swiftly, otherwise the procedure gets interrupted and you must start again from step 1. Make sure that the Explorer Mini is turned on.
-
Page 58: Driving Restrictions
5.7.2 Unlocking The Explorer Mini is unlocked with the steps below. Step 4 and 5 must be done swiftly, otherwise the procedure gets interrupted and you must start again from step 2. Remove the tray top. 2. Make sure that the Explorer Mini is turned on. - Page 59 Protect the wheelchair from all types of moisture, including rain, snow, mud, and spray. If the wheelchair has been exposed to moisture, do not drive it until it has dried completely. CAUTION! Do not use the Explorer Mini on dirty ground Handling and driving - 59...
- Page 60 5.8.2 Driving over obstacles The Explorer Mini can climb obstacles up to 12.5 mm (0.5″). WARNING! Driving — high obstacles 5.8.3 Driving on side slopes Make sure that the maximum speed is set to a speed that your child can handle and that the slope is not steeper than 6°, which means a slight slope,...
- Page 61 5.8.4 Driving downhill The stopping distance increases when your child drives downhill. Make sure that the maximum speed is set to a speed that your child can handle and that the downhill gradient is not greater than 6°, which corresponds to for example a threshold ramp.
- Page 62 5.8.5 Driving uphill Make sure that the maximum speed is set to a speed that your child can handle and that the uphill gradient is not greater than 6°, which corresponds to for example a threshold ramp. WARNING! Risk of tipping when driving uphill 62 - Handling and driving...
-
Page 63: Joystick Error When The Explorer Mini Is Turned On
A joystick error can occur if the joystick is moved from its neutral position immediately before, during, or immediately after the Explorer Mini is turned To prevent joystick errors when the Explorer Mini is turned on, make sure that the joystick is in the neutral position. Press the on/off button and wait until the control panel has been active for a few seconds before you move the joystick. -
Page 64: Joystick Error And Flashing Leds
5.11 Electrical fault The main circuit breaker also functions as a fuse, and the Explorer Mini will automatically be turned off if an electrical fault occurs. If this happens you can try to turn on the Explorer Mini again. - Page 65 A good rule of thumb is to charge the batteries at the end of each day to prevent that they become completely discharged. You can charge the Explorer Mini when it is not in use. WARNING! Do not replace batteries...
- Page 66 5.12.1 Charging the batteries The Explorer Mini must only be charged with the supplied battery charger in a dry room with good ventilation. There is a green LED on he battery charger that is lit when the battery is fully charged. Read the user manual supplied with the battery charger.
-
Page 67: Transporting The Wheelchair
5. Disconnect the charger contact from the wall socket. 6. Disconnect the charging connector from the charging socket of the Explorer Mini. 5.13 Transporting the wheelchair DANGER! Do not use the Explorer Mini as a seat in a motor vehicle Handling and driving - 67... - Page 68 Explorer Mini in an upright position. Do not disassemble the Explorer Mini. Adjust the table and backrest unit to its lowest position. 2. Lift the Explorer Mini by the handgrips at the front and back of the base module.
- Page 69 3. Put the Explorer Mini in an upright position in the middle and to the front of the luggage compartment. 4. Attach the straps to the tie-down points. 5. Make sure that the wheelchair is properly secured. CAUTION! Damage during transportation 5.13.1...
- Page 70 5.13.1.1 Batteries The Explorer Mini is equipped with spill-proof batteries. The batteries are securely attached inside the base module and they meet the requirements of Packing Instruction 872 of special provision A67, meaning they are approved for air transport. 5.13.1.2 Dimensions and weight Weight and dimensions of the wheelchair are important depending on the size and type of aircraft that will be used for the transportation.
-
Page 71: Maintenance And Repairs
6 Maintenance and repairs Regular maintenance and correct handling are important to make sure that the Explorer Mini operates well. CAUTION! Maintenance by a qualified service technician Maintenance and repairs - 71... -
Page 72: Maintenance And Inspection Schedule
Follow the recommendations in the maintenance and inspection schedule. Contact your dealer for all service-related needs or questions, including packing and shipping instructions. Replacement units are not available when the Explorer Mini is serviced or repaired. Maintenance and inspection schedule Daily... -
Page 73: Batteries And Storage
Batteries and storage Do not store the Explorer Mini in areas with condensation and moisture on the surfaces, for example laundry rooms. 6.2.1 Short-term storage For short-term storage of the batteries, the room must be at least 5°C (41°F). If the temperature is lower, the batteries might not charge fully and can be more exposed to corrosion. -
Page 74: Cleaning
Cleaning Regular care and maintenance will prevent unnecessary wear to the Explorer Mini. If the Explorer Mini belongs to more than one child, we recommend that you do the cleaning procedure after each child has used the wheelchair. Do not use solvents or abrasive kitchen cleaners. - Page 75 6.3.3 Cushion cover Press the on/off button to turn off the power. 2. Remove the cushion from the Explorer Mini. For instructions, see 4.4.1 Removing the cushion. 3. Remove the cover from the cushion. 4. Turn the cover inside out and follow the cleaning instructions on the label.
-
Page 76: Troubleshooting
Troubleshooting This troubleshooting guide describes the most common events that can occur when you use the Explorer Mini. It also describes possible causes and remedies. This troubleshooting guide is not exhaustive. Contact your service provider or Permobil if you need service. For contact information, see 1.4 Technical support. - Page 77 For instructions, see 5.4 Battery saving function. Reset the main circuit breaker and press and Explorer Mini is turned off. The main circuit breaker is turned off or tripped. hold the start button for at least one second. For instructions, see 5.2 Turning on the Explorer Mini.
- Page 78 Either an incorrect battery charger is used or Make sure that you use the battery charger the battery charger is damaged. that was supplied with the Explorer Mini. If it still is not possible to charge, contact your service provider or Permobil.
-
Page 79: Electromagnetic Compatibility
The Explorer Mini complies with the limit values of harmonized standards for the EU (European Union), in the Medical Device Regulation (EU) 2017/745. The Explorer Mini has not been tested for immunity in standing position. The only difference between the sitting and standing position is the height of the... -
Page 80: Electromagnetic Emissions
The Explorer Mini and the battery charger (PF2401A5SL) are intended for use in the electromagnetic environment specified below. The customer or the user of the Explorer Mini and the battery charger (PF2401A5SL) should ensure that they are used in such an environment. - Page 81 How to contact your production unit Nashville, USA Timrå, Sweden PU TIM PU NAS Permobil AB Permobil Inc. Per Uddéns väg 20 300 Duke Drive Lebanon, TN 37090 861 36 Timrå Sweden +46 60 59 59 00 +1 800 736 0925...
- Page 82 How to contact your local office United States Permobil Inc. 300 Duke Drive Lebanon, TN 37090 +1 800 736 0925 +1 800 231 3256 support@permobil.com www.permobil.com PU NAS 82 - How to contact your local office...
- Page 84 337358 eng-US www.permobil.com 7 330818 366962...
Need help?
Do you have a question about the Explorer Mini and is the answer not in the manual?
Questions and answers