
Related Manuals for bora PKG11UMAU-105


Summary of Contents for bora PKG11UMAU-105
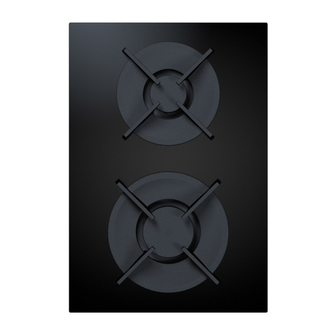
- Page 1 Operating and installation instructions PKG11 BORA Pro gas glass ceramic cooktop with 2 cooking zones PKG11UMAU-105 1043205 www.bora.com...
- Page 2 Please accept our apologies in this eventuality. An updated version can be requested from the BORA Service Team. Subject to printing errors and mistakes.
-
Page 3: Table Of Contents
Warranty, technical service, 5.5.1 Installing the control knob in the floor unit spare parts, accessories front panel ............20 10.1 BORA manufacturer’s warranty ......44 5.5.2 Installing the cooktop ........22 10.2 Service .............. 44 5.5.3 Installation rotated by 180° ......23 10.3... -
Page 4: General Information
INFO BORA Holding GmbH, BORA Vertriebs GmbH & Co KG, BORA APAC Pty Ltd and BORA Lüftungstechnik GmbH - hereinafter referred to as BORA - do not assume any liability for damage Target group arising from non-adherence to these documents... -
Page 5: Presentation Of Information
Caution Indicates a potentially hazardous situation which could lead to slight or minor injuries if ignored. — Caution Indicates a situation which could result in material damage if ignored. Tab. 1.2 Meaning of warning symbols and signal words www.bora.com... -
Page 6: Safety
INFO In recirculation mode, only a slight Switch off the appliance after use. amount of moisture is removed from Keep pets away from the appliance. the cooking vapour. Do not use the appliance to heat the room. www.bora.com... -
Page 7: Safety Instructions - Cooktop Operation
Flammable liquids in the vicinity of the cooktop can explode and cause serious injury. Do not spray aerosols in the vicinity of this appliance while it is in operation. Do not place any flammable liquids in the vicinity of the cooktop. www.bora.com... - Page 8 Do not place any objects on the To choose a suitable stove guard, cooktop while it is hot. contact your specialist supplier or the BORA Service Team. DANGER! Risk of explosion from gas! WARNING! Gas leaks can cause explosions and Risk of burns! serious injuries.
-
Page 9: Safety Instructions - Installation
3 mm (LS regulations and supplementary regulations of the switch and automatic circuit local utility companies. breakers, fuses, contactor). www.bora.com... -
Page 10: Safety Instructions - Cleaning And Maintenance
Do not touch exposed contacts on the electronic unit as they can contain residual charge. www.bora.com... -
Page 11: Safety Instructions - Spare Parts
All misuse is prohibited! INFO BORA Holding GmbH, BORA Vertriebs GmbH & Co KG, BORA APAC Pty Ltd and BORA Lüftungstechnik GmbH do not assume any liability for damage arising from non-adherence to the safety and warning information. -
Page 12: Technical Data
Cooktop energy consumption AUS/NZS natural gas/ 1.00 kPA test point pressure: High power front burner 12.0 Mj/h Normal back burner 7.5 MJ/h 24,5 Device dimensions control knob 15,5 Fig. 3.4 PKG11 Device dimensions side view 10-40 Fig. 3.1 Device dimensions control knob www.bora.com... -
Page 13: Device Description
High-power front burner Power display Normal back burner Front cooking zone display Pan support rear Mode or operating mode display Pan support front Rear cooking zone display Control knob for the back hob Control knob for the front hob www.bora.com... -
Page 14: Functional Principle
This control ensures that The specifications provided in the table are standard the numerous operating functions of the cooktop can be values. adjusted using the control knobs. The power is controlled via power levels 1 – 9 and P. www.bora.com... -
Page 15: Power Setting
55° C After switching it off, the cooking zone remains hot. 70° C appears in the control knob display (residual heat display). The display goes out after a sufficient cooling Tab. 4.5 Heat retention levels time (temperature < 60 °C). www.bora.com... -
Page 16: Safety Shut-Down
The activated power setting is switched back to the previous level. The power setting P can no longer be switched on. The set power level is reduced. The cooktop switches off completely. After a sufficient cooling period, the cooktop can be used again in full. www.bora.com... -
Page 17: Installation
INFO The hose connection must be laid in such a way If there are any missing or damaged parts, please that it is not subject to deformation, buckling or notify BORA After Sales Service immediately. abrasion. Do not under any circumstances install parts which are damaged. -
Page 18: Assembly Instructions
50 cm² is recommended in or using suitable slatted plinths). the front of the kitchen unit, or an opening cross- The return flow aperture is to be enlarged if necessary. section of at least 150 cm² in the plinth area. www.bora.com... -
Page 19: Recirculation When Using The Cooktop Extractor In The Recirculation Mode
+ PKAS + air cleaning unit) Gas cooktop PKG11 Fig. 5.6 Cut-out dimensions for flush installation Cooktop extractor PKAS (recirculation) Air cleaning unit (ULB1, ULB3) Recirculation return flow aperture (total opening cross- section ≥1,000 cm² per air cleaning unit) www.bora.com... -
Page 20: Surface Mounting
INFO Alternatively, the cooktop can be fitted rotated by 180°. 5.5.1 Installing the control knob in the floor unit front panel Fig. 5.8 Cut-out dimensions for surface mounting INFO Pre-drill the bore holes to prevent tearing out the fixed front panel. www.bora.com... - Page 21 12 o’clock position. Tighten the universal nut [2]. The wave spring (if used) must be pressed flat. Slot the knob ring [3] onto the knob casing [1] and align it to the 12 o’clock position. www.bora.com...
-
Page 22: Installing The Cooktop
Boreholes for socket (2x external) Bore holes for control knobs (8x) Cooktop (3x) Fig. 5.18 Cooktop and height adjustment plates Cooktop extractor (2x) Worktop Cooktop Floor unit front panel Height adjustment plates If applicable, insert the height adjustment plates [2]. www.bora.com... -
Page 23: Installation Rotated By 180
Create the connection between the cooktop and the cooktop extractor. Cooking zone connection INFO According to the default settings, the left control knob operates the front cooking zone and the right control knob operates the rear cooking zone. www.bora.com... - Page 24 [4] to the “zone 1” connection on the back of the cooktop [1]. Using the configuration menu, set the correct allocation of the cooking zones in the control knob display (see Configuration menu, 0° or 180° installation). www.bora.com...
-
Page 25: Establishing The Power Connection
This may only be done by an authorised (of the appliance). member of the After Sales Service team. Switch off the main switch/automatic circuit breaker before connecting the cooktop. Secure the main switch/automatic circuit breaker against being switched back on without permission. www.bora.com... -
Page 26: Gas Connection
Ensure that the appliance is equipped with the correct Repeat the leak test until all connections are tight. nozzle type in order to guarantee a correct burner Create a leak test record and give this to the user. flame and safe operation. www.bora.com... -
Page 27: Changing The Gas Type
The test point adapter comes with the appliance. INFO The gas type and pressure may only be changed by a certified engineer or BORA service technician. He/she also assumes responsibility for the proper gas installation and commissioning. -
Page 28: Nozzle Table
INFO Use only stamped and approved nozzles. INFO The gas type and pressure may only be changed Fig. 5.29 Cooktop burner with gas burner nozzle by a certified engineer or BORA service technician. He/she also assumes responsibility Gas burner for the proper gas installation and commissioning. -
Page 29: Configuration Menu
The heating function for the cooktop 5.7.2 Select menu option is deactivated. Demo mode is used, for example, Turn the knob ring to select the menu option you want. for exhibitions. The following menu options are available: www.bora.com... - Page 30 C 3 1 INFO The gas type and pressure may only be changed the cooktop, when using the cooktop extractor in by a certified engineer or BORA service recirculation mode, is used with sufficient technician. He/she also assumes responsibility ventilation; and for the proper gas installation and commissioning.
-
Page 31: Changing The Set Value
C 5 0 appears in the display for 10 seconds. The display then goes out with a beep. INFO If no settings are changed in a menu or submenu option for 2 minutes, the configuration menu is closed automatically. www.bora.com... -
Page 32: Sealing The Devices
Affix the nameplate provided and the nozzle set nameplate to the back of these operating and installation instructions. Provide the user with the accessories and operating and installation instructions to be kept in a safe place. www.bora.com... -
Page 33: Operation
Bora shall not be held liable for any such damages. INFO If you smell gas or have problems with the gas 6.1.2 Using the gas cooktop... -
Page 34: Using The Gas Cooktop With A Cooktop Extractor
INFO If it does not ignite, a beep will be heard and the Avoid using a high power level on the cooktop power level display will flash. extractor when the gas cooktop is set to a low power level. www.bora.com... -
Page 35: Switching On The Cooking Zone
The temperature information can also vary due to the influence of the cooktop extractor. www.bora.com... -
Page 36: Childproofing Feature
Switching the timer off early: The childproofing feature is only deactivated for this Turn the knob ring to the 12 o’clock position. cooking session and you can set the desired power The control knob display changes to , a beep sounds level. www.bora.com... -
Page 37: Pause Function
A beep sounds and the power level selected is shown on the control knob display. The cooking session continues. 6.3.7 Switching off the cooking zone INFO If the control knob display shows , the cooking zone is still hot. Fig. 6.4 Switching off the cooking zone www.bora.com... -
Page 38: Cleaning And Maintenance
Keep the cooktop clean. damp cloth. These spots are normal and do not Remove any dirt immediately. constitute an impairment Only use cookware suitable for glass ceramic cooktops (see Appliance description chapter). www.bora.com... -
Page 39: Cleaning The Pan Supports
Finally, dry the pan supports carefully with a clean so it fits perfectly, taking into account the positioning cloth. aids [4]. Before reassembling the flame openings, burner heads and burner caps must be completely dry. Put the burner parts back together again. www.bora.com... -
Page 40: Cleaning The Control Knobs
7.4.2 Cleaning the touch surface and the knob housing Remove the knob ring. Clean the touch surface and the knob housing with a soft, damp cloth. Dry the touch surface and the knob housing carefully. Place the knob ring back on the knob housing. www.bora.com... -
Page 41: Troubleshooting
If necessary, contact a is defective or has been triggered. specialist electrician. The fuse or the automatic circuit breaker Contact the BORA Service Team. trips several times. The power supply is disconnected. Have a specialist electrician inspect the power supply. - Page 42 After resolving the fault, turn the knob ring to the 12 o’clock position (0 position). In all other cases, contact the BORA Service Team (see Warranty, technical service and spare parts chapter) and enter the error number displayed and the device type.
-
Page 43: Decommissioning, Disassembly And Disposal
Remove the silicone joints. components and other materials. Remove the device from the worktop by lifting it upwards. Remove any other accessories. Dispose of the old device and any contaminated accessories as described under “ Environmentally- friendly disposal”. www.bora.com... -
Page 44: Warranty, Technical Service, Spare Parts, Accessories
In order to file a warranty claim, the end customer is to The BORA Service Team will require the type designation notify their dealer or BORA of the fault and must present and serial number of your device (FD number). -
Page 45: Accessories
BORA gas nozzle set natural gas G20/25 mbar PKGDS2025 BORA gas nozzle set natural gas G20/10 mbar PKGDS2010 BORA gas nozzle set liquid gas G30/G31 50 mbar PKGDS3050 BORA Pro gas nozzle set liquid gas G31/G30 mbar PKGDS3130 BORA gas nozzle set liquid gas G30/G31 28-30 mbar... -
Page 46: Notes
Notes 11 Notes www.bora.com... - Page 48 F +49 (0) 8035 / 9840-300 F +43 (0) 5373 / 62250-90 info@bora.com mail@bora.com www.bora.com www.bora.com Austria: Australia - New Zealand: BORA Vertriebs GmbH & Co KG BORA APAC Pty Ltd Innstraße 1 100 Victoria Road 6342 Niederndorf Drummoyne NSW 2047 Austria Australia...
Need help?
Do you have a question about the PKG11UMAU-105 and is the answer not in the manual?
Questions and answers