bora X Pure Operating And Installation Instructions
Surface induction cooktop with integrated cooktop extractor – exhaust air/recirculation
Hide thumbs
Also See for X Pure:
- User manual ,
- Operating and installation instructions (78 pages) ,
- Operating and installation instructions (60 pages)
Table of Contents
Advertisement
Quick Links
Advertisement
Table of Contents

Related Manuals for bora X Pure


Summary of Contents for bora X Pure
- Page 1 Operating and installation instructions X Pure, Pure X Pure surface induction cooktop with integrated cooktop extractor – exhaust air/recirculation (PUXA/PUXU) Pure induction cooktop with integrated cooktop extractor – exhaust air/recirculation (PURA/PURU) 003292-10004 www.bora.com...
-
Page 2: Table Of Contents
(only on Pure) ..........114 maintenance ..........95 6.6.10 Variable heat retention function Safety instructions – repairs, (only on X Pure) .......... 114 servicing and spare parts ......96 6.6.11 Bridging function Safety instructions – disassembly and (only on X Pure) .......... 115 disposal ............ - Page 3 (PURA, PURU) ..........134 12.1.1 Warranty extension ........154 10.5 Worktop cut-out .........134 12.2 Service ............154 10.5.1 X Pure cut-out dimensions (PUXA, PUXU) . 135 12.3 Spare parts..........154 10.5.2 Pure cut-out dimensions (PURA, PURU) ..135 12.4 Accessories ..........154 10.6 Installing the appliance in exhaust air mode (PUXA, PURA) ....
-
Page 4: General Information
KG, BORA APAC Pty Ltd and BORA Lüftungstechnik Enumeration 1 GmbH – hereinafter referred to as BORA – does Enumeration 2 not assume any liability for damage arising from Information notes point to special features disregard for or non-adherence to the documents that must be taken into account. - Page 5 Caution Indicates a potentially hazardous situation which can cause minor injury or damage to property if not respected. Tab. 1.1 Meaning of the warning symbols and signal words Figures All measurements are provided in millimetres. www.bora.com...
-
Page 6: Safety
Any other use or any use that goes beyond that which is described here is classed as unintended. BORA does not assume any liability for damages caused by incorrect installation, improper use or incorrect operation. All misuse is prohibited! -
Page 7: General Safety Instructions
If necessary, use suitable stove guards or covers. Only use stove guards and covers that are approved by the appliance manufacturer; otherwise, there is a risk of accidents. To choose a suitable stove guard, contact your specialist retailer or the BORA Service Team. General safety instructions DANGER! ÿ... - Page 8 Do not operate the appliance. Do not try to repair or replace damaged components yourself. Contact BORA Service. CAUTION! Appliance components can cause injury if dropped Appliance components (e.g. pan supports, operating controls, covers, grease filters, etc.).
-
Page 9: Safety Information For Installation
Faults and errors In the case of faults and errorsin the “Troubleshooting” chapter. In the event of any faults or errors that are not mentioned, switch the appliance off and contact BORA Service. Pets Keep pets away from the appliance. - Page 10 (certified chimney sweep). Ducting connected to wall sleeves In the case of straight ducting and a distance < 900 mm between the fan and wall sleeve, a safety guard must be provided for (available as an accessory). www.bora.com...
-
Page 11: Safety Instructions - Operation
Certain appliances and their exposed parts become hot during use. They should be left to cool down completely after switching off. Touching hot surfaces can cause serious burns. Do not touch hot appliances. Pay attention to the residual heat indicator. www.bora.com... - Page 12 Fire risk from flambéing While the cooktop extractor is working, it sucks up grease from cooking. Flambéing food can cause the grease to catch fire. Clean the cooktop extractor regularly. Never work with a naked flame while the cooktop extractor is running. www.bora.com...
- Page 13 Ensure a normal and comfortable room climate (humidity of 45–60%), e.g. by opening natural ventilation openings or using domestic ventilation systems. After every use in recirculation mode, switch the cooktop extractor to a low power level for about 20 minutes or activate the automatic after-run function. www.bora.com...
- Page 14 Sugary and salty foods and juices can damage the hot cooking zone. Make sure sugary and salty foods or juices do not get onto the cooking zone while it is hot. Remove sugary and salty foods and juices from the hot cooking zone immediately. www.bora.com...
-
Page 15: Safety Instructions - Cleaning And Maintenance
Switch off the appliance and disconnect it from the mains before removing covers in the vicinity of the fan. Special safety instructions for cooktop cleaning and maintenance Whenever possible, clean the cooktops after every use. Only clean the cooktops when they have cooled down. www.bora.com... -
Page 16: Safety Instructions - Repairs, Servicing And Spare Parts
Work on electrical components must only be conducted by trained electrical personnel. Before disassembly, safely disconnect the appliance from the mains supply. www.bora.com... - Page 17 Securely disconnect the appliance from the mains using LS switches, fuses, automatic circuit breakers or contactors. Use an authorised measuring device to ensure that there is no power to the appliance. Do not touch exposed contacts on the electronic unit as they can contain residual charge. www.bora.com...
-
Page 18: Technical Data
Recirculation system (PUXU) Cooktop extractor power levels 1 – 9, P Size of exhaust opening (W x H)) 445 x 137 mm Maximum activated charcoal 150 h (1 year) filter service life Tab. 3.1 Technical data X Pure (PUXA, PUXU) www.bora.com... -
Page 19: Pure (Pura, Puru)
PUXU device dimensions side view Cooktop extractor power levels 1 – 9, P Exhaust air connection BORA Ecotube Recirculation system (PURU) Cooktop extractor power levels 1 – 9, P Size of exhaust opening (W x H)) 445 x 137 mm... - Page 20 Fig. 3.10 PURU device dimensions top view PURA device dimensions top view 196,5 196,5 Fig. 3.8 Fig. 3.11 PURU device dimensions front view PURA device dimensions front view Fig. 3.9 Fig. 3.12 PURU device dimensions side view PURA device dimensions side view www.bora.com...
-
Page 21: Energy Labelling
Product information according to delegated regulation (EU) no. 65/2014 and regulation (EU) no. 66/2014. Product information according to delegated regulation (EU) no. 65/2014 and regulation (EU) no. 66/2014. no. 66/2014. Manufacturer Manufacturer Manufacturer Manufacturer BORA BORA BORA BORA Model identification Model identification Model identification... -
Page 22: Appliance Description
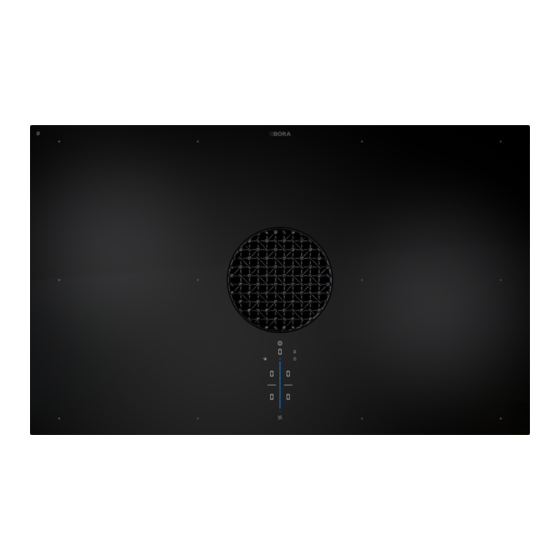
Observe all safety and warning information during operation (see “2 Safety”). Model description Model Long description PUXA X Pure surface induction cooktop with integrated cooktop extractor – exhaust air PUXU X Pure surface induction cooktop with integrated cooktop extractor – recirculation Fig. 5.2... - Page 23 Short-time timer (egg timer) Control lock Power level setting zone plus Cooking zone selection (x 4) Touch slider (power level setting zone) Power level setting zone minus Heat retention function Fan functions [10] Cooking zone timer [11] Cleaning lock www.bora.com...
-
Page 24: Symbols
Power setting Heat retention level (Pure) Minus button Decreasing values Heat retention level 1 Fan button Activating/deactivating (X Pure) the automatic extractor Heat retention level 2 function, cancelling the (X Pure) after-run function Heat retention level 3 Timer button... -
Page 25: Sounds
To prevent odours in recirculation mode, an odour curvature. Due to incorrect hob temperature filter must be used. monitoring, this curvature may cause the For health and hygiene reasons, the activated cookware to overheat. To avoid scratching the charcoal filter must be replaced at the www.bora.com... -
Page 26: Noises
The cooling fan switches on automatically if the cooktop is used intensively. You will hear a whirring sound. The cooling fan may continue to run after the appliance has been switched off. www.bora.com... -
Page 27: Functions And Operation
Functions and operation Functions and operation Function overview Observe all safety and warning information during operation (see “2 Safety”). The X Pure and Pure cooktops come with different Do not operate the integrated cooktop functions: extractor with other cooktops. X Pure... -
Page 28: Operating The System
The operating panel display changes to the previously active and still hot cooking zones. standard display. The display goes out when no more residual If the appliance is switched off, the short-time heat is present. timer will remain active. www.bora.com... -
Page 29: Control Lock
After 5 minutes, the power setting is automatically Long press on the cleaning button switched to power level 9. The cleaning button is dimmed. Activating the fan power setting The operating panel is unlocked. Tap on when power level 9 is active. appears in the display. www.bora.com... -
Page 30: Automatic Extractor Function
Deactivating the fan power setting Switching off the automatic after-run early The fan power setting is deactivated early if another tap the fan button power level is set. BORA expressly recommends use of the cooktop extractor after-run function. 6.5.4 Automatic extractor function 6.5.6... -
Page 31: Permanent Pan Size Recognition
In order to avoid burning food, slight adjustment is needed in by swiping until you reach the required power comparison to conventional cooking systems when level selecting the power level. by tapping on www.bora.com... -
Page 32: Cooking Zone Power Setting
Cooking zone timer set level. This automatic cut-off function automatically switches off the selected cooking zone once a preset time has lapsed. The cooking zone timer can also be used on several cooking zones at the same time (multi-timer). www.bora.com... -
Page 33: Pause Function
Tap a cooking zone with an active timer The cooking session can be paused for a maximum The remaining time is displayed. of 10 minutes. Once 10 minutes have lapsed, the Tap the timer button cooking session is automatically ended. www.bora.com... -
Page 34: Heat Retention Function (Only On Pure)
6.6.10 Variable heat retention Activating the pause function function Tap the pause button (only on X Pure) The pause button lights up, all cooking sessions are paused and an acoustic signal is heard. The cooking zone indicators are dimmed. Depending on the application or food used, it The pause timer is started (max. -
Page 35: Bridging Function (Only On X Pure)
Functions and operation 6.6.11 Bridging function If cookware is only detected on one of the two (only on X Pure) cooking zones, the bridging function is cancelled after ten seconds and the empty cooking zone is With the bridging function two cooking zones can deactivated. -
Page 36: Safety Shut-Down
00:30 00:05 00:05 00:05 Tab. 6.9 Safety shut-down on the different power levels heat retention Safety shut-down level after hrs:min Level 1 Level 2 Level 3 12:00 8:00 4:00 Tab. 6.10 Safety shut-down of the different heat retention levels www.bora.com... -
Page 37: User Menu
0 Reset to factory settings close the menu. Tab. 7.1 User menu overview Closing the user menu Long press on the multi-function display. switch off the appliance by pressing the power button The menu is closed and the appliance is switched off. www.bora.com... -
Page 38: Menu Item 1: Volume Of The Acoustic Signals
Move to another menu item or close the menu. Tap the bottom slider segment Move to another menu item or close the menu. The c hildproofing feature is permanently deactivated. www.bora.com... -
Page 39: Menu Item 3: Showing The Filter Status And Resetting Filter Service Display
Selecting the duration of the automatic after- Move to another menu item or close the menu. run function: Tap the corresponding slider segment Move to another menu item or close the menu. www.bora.com... -
Page 40: Menu Item 5: Touch Zone Reaction Speed
Move to another menu item or close the menu. Ending the LED test The LED test will be automatically ended when there has been no activity for 5 seconds. Long press on the multi-function display. The LED test is ended and the appliance is switched off. www.bora.com... -
Page 41: Menu Item 7: Permanent Pan Size Recognition
Move to another menu item or close the menu. Deactivating permanent pan size recognition Tap the bottom slider segment Move to another menu item or close the menu. www.bora.com... -
Page 42: Menu Item 9: Safety Shut-Down
Move to another menu item or close the menu. The additional function indicators, which were deactivated, flash and fade. is displayed. Move to another menu item or close the menu. The additional functions are permanently deactivated and are not displayed. www.bora.com... -
Page 43: Menu Item 0: Reset To Factory Settings
Menu item 0 enables all settings in the user menu to be reset to the factory settings. Fig. 7.11 Menu item 0: Factory settings Resetting to factory settings Long press on the slider zone After resetting, the appliance is switched off. www.bora.com... -
Page 44: Cleaning And Maintenance
Never use steam cleaners, abrasive sponges, scouring pads or chemically aggressive cleaning agents (e.g. oven cleaner spray). Make sure that the cleaning agent does not contain any sand, soda, acids, lyes or chloride. www.bora.com... -
Page 45: Cleaning The Cooktop Extractor
Removing the components Heavy soiling Remove heavy soiling and marks (limescale Removing the X Pure air inlet nozzle marks, mother-of-pearl-like shiny marks) using cleaning products while the cooktop is still warm. Wipe off any food that boils over with a damp cloth. -
Page 46: Cleaning The Air Inlet Nozzle And Stainless Steel Grease Filter
5. Rinse the air inlet nozzle and stainless steel After 120 minutes the cooktop extractor will grease filter with a rinsing programme at a automatically switch to the automatic after-run maximum of 65°C. function. www.bora.com... -
Page 47: Cleaning The Air Guiding Housing
(filter service display). You can obtain the activated charcoal filter PUAKF from your specialised retailer or by contacting BORA via the website at www.bora.com/filter. Fig. 8.4 Air guiding housing Make sure that the cooktop and cooktop extractor are switched off. - Page 48 Tilt the activated charcoal filter towards you slightly and insert it through the inlet opening. Guide the left end of the filter into the opening in the filter housing. Fig. 8.7 Removing the activated charcoal filter through the inlet opening www.bora.com...
- Page 49 Check that the filter replacement cover is positioned correctly. Insert the stainless steel grease filter and the air inlet nozzle. Reset the filter status indicator (see “7.3 Menu item 3: Showing the filter status and resetting filter service display”). www.bora.com...
-
Page 50: Troubleshooting
Switch the automatic circuit breaker back on. The fuse/automatic circuit breaker Contact the BORA Service Team. trips several times. The power supply is disconnected. Have a specialist electrician inspect the power supply. - Page 51 Troubleshooting Faults and errors not covered: Switch off the appliance. Contact the BORA Service Team (see “12 Warranty, technical service, spare parts, accessories”) and enter the error number displayed and the appliance type. www.bora.com...
-
Page 52: Installation
If cable protection (false floor) is planned beneath the appliance, this must be fitted so it does not obstruct ventilation. Fig. 10.2 Exhaust air installation – correct Make sure that the area below the cooktop has a sufficient air supply. www.bora.com... -
Page 53: Home In Module Puhim (Optional)
The module is to be integrated in the cooktop. 10.3 Tools and aids The BORA Pure Home In module PUHIM is available as an accessory. The following special tools, among others, are required to correctly install the cooktop:... -
Page 54: Minimum Unit Dimensions For X Pure (Puxa, Puxu)
Create the worktop cut-out taking into account the specified cut-out dimensions. Make sure that the cut surfaces of the worktops are properly sealed. Comply with the instructions of the worktop manufacturer. Fig. 10.4 Minimum unit dimensions for X Pure www.bora.com... -
Page 55: Pure Cut-Out Dimensions (Puxa, Puxu)
Installation 10.5.1 X Pure cut-out dimensions (PUXA, PUXU) X Pure flush installation (PUXA, PUXU) 834 ±2 810 ±2 Fig. 10.9 Overlay dimensions for surface mounting 10.5.2 Pure cut-out dimensions (PURA, PURU) Pure flush installation (PURA, PURU) 764 ±2 740 ±2 Fig. -
Page 56: Installing The Appliance In Exhaust Air Mode (Puxa, Pura)
The minimum cross-section of the air ducts must be 176 cm , which equates to a round pipe with a diameter of 150 mm or the BORA Ecotube duct system. As a general rule, with the built-in fan, a length of duct of up to 6 metres with six 90°... -
Page 57: Installation Dimensions
BORA X Pure Installation 10.6.2 Installation dimensions 10.6.3 Preparing the cooktop PUXA Abluft (Zeile 600): PUXA Abluft (Insel): Attaching the sealing tape min. 600 (min. 600) (min. 424) min. 50 min. 50 Fig. 10.15 Sealing tape in the case of surface mounting max. -
Page 58: Inserting The Cooktop
[1] provided. 10.6.4 Inserting the cooktop Fig. 10.19 Inserting height adjustment plates Cooktop Height adjustment plate Fig. 10.20 Height adjustment plates Fig. 10.18 Inserting the cooktop Sealing tape Optional height adjustment plates www.bora.com... -
Page 59: Securing The Cooktop
A return flow aperture ≥500 cm must be duct piece when the seals are compressed. provided in the kitchen units. Use only BORA Ecotube duct parts. Do not use flexible or fabric hoses. www.bora.com... -
Page 60: Installation Variants (A And B) For Recirculation Appliances
[3]. The recirculated air goes back in to the room through the return flow aperture [5]. For installation purposes, this means that: No false floor is necessary below the cooktop. There must be a cut-out in the back panel. www.bora.com... -
Page 61: Preparing Kitchen Units For Installation Variant A (Floor Unit With Continuous Back Panel)
Cross bars on the kitchen unit in the area of the recirculated air, installation variant A worktop cut-out may need to be removed. B O R A L Ü F T U N G S F I B E L www.bora.com... -
Page 62: Preparing Kitchen Units For Installation Variant B (Floor Unit With False Floor Under The Cooktop)
R12,5 floor unit must be shortened depending on the installation situation. (222,5) 003201-100 003201-100 Fig. 10.28 Template for back panel cut-out Position the template on the back panel of the unit with the help of the markings and instructions. www.bora.com... -
Page 63: Installation Dimensions
2 installation clamps must be fitted to each side of the cooktop. Fig. 10.30 Sealing tape in the case of surface Push 2 installation clamps [2] onto each side mounting of the cooktop until they come to a stop in the retaining brackets [1] provided. www.bora.com... -
Page 64: Extending The Telescopic Pull-Out Of The Air Cleaning Box (Pulbta)
This can be used to flexibly bridge the gap between the cooktop and the back panel of the kitchen unit (max. 80 mm). If necessary, the telescopic pull-out can be extended by a further 105 mm using the extension PULBTA (available as an accessory). www.bora.com... -
Page 65: Inserting The Cooktop
Information regarding surface mounting: make sure that the cooktop sealing tape is flat against the worktop. Information regarding flush installation: make sure that the cooktop sealing tape is well sealed all the way round. www.bora.com... -
Page 66: Securing The Cooktop
[3] and closes it off. each other. Secure the telescopic pull-out [1] to the back panel of the unit [3] using the adhesive tape [2] www.bora.com... -
Page 67: Connecting The Power Supply
(e.g. window The end position of the activated charcoal filter contact switch) is possible. is reached when the filter has been fully pushed inside the filter housing. Fig. 10.44 Inserting the filter replacement cover www.bora.com... - Page 68 2.5 mm Two-phase connection 2 x 16 A 2.5 mm Fig. 10.49 Electrical connections of the cooktop One-phase connection 1 x 32 A 4 mm Tab. 10.2 Fuse protection and minimum cross-section Power supply Power supply cover Mounting eyes www.bora.com...
-
Page 69: Initial Operation
Below you will find explanations on how to Menu item B is displayed. use the menu and a description of the most important menu items. www.bora.com... - Page 70 Fig. 10.52 Display menu item C: Power management Select the corresponding operating mode (tap the corresponding segment on the slider ). Confirm and save the setting by moving to the next menu item (tap the multi-function display/ indicator ). www.bora.com...
-
Page 71: Function Test
Provide the user with the accessories and operating and installation instructions, which are to be kept in a safe place. 10.9.2 Function test Carry out a thorough function test on all appliances. In the event of error messages, see the “Troubleshooting” chapter (see “9 Troubleshooting”). www.bora.com... -
Page 72: Decommissioning
Never dispose of your old appliance in the household waste. Take the appliance to a regional collection point for the return and further processing of electrical and electronic components and other materials. www.bora.com... -
Page 73: Warranty, Technical Service, Spare Parts, Accessories
12 Warranty, technical service, spare parts, accessories Observe all safety and warning information BORA will correct defects in BORA products at its (see “2 Safety”). own discretion by repairing or replacing the product. All costs for the correction of defects under the manufacturer’s warranty shall be assumed by BORA. -
Page 74: Warranty Extension
Spare parts Cooktop frame BKR760 Glass ceramic scraper UGS Only use original spare parts for repairs. Home In module PUHIM Repairs may only be carried out by the BORA Window contact switch Service Team. UFKS Air cleaning box PULB Spare parts can be obtained from your BORA... - Page 75 Please accept our apologies in this eventuality. An updated version can be requested from the BORA Service Team. Subject to printing errors and mistakes. © BORA Vertriebs GmbH & Co KG All rights reserved.
Need help?
Do you have a question about the X Pure and is the answer not in the manual?
Questions and answers