bora PKG3 Operating And Installation Instructions
Hide thumbs
Also See for PKG3:
- Installation instructions manual (44 pages) ,
- Operating instructions manual (56 pages)

Related Manuals for bora PKG3


Summary of Contents for bora PKG3
- Page 1 Operating and installation instructions PKG3 BORA Pro gas cooktop PKG3UMIMEN-102 1044866 - 44 www.bora.com...
-
Page 2: Table Of Contents
7.3.1 General operating instructions for cooktops ....31 4.2.2 How gas cooktop PKG3 works ........12 7.3.2 Special operating instructions for gas cooktop PKG3 ... 31 Safety devices ..............13 7.3.3 Setting cooking zone power levels ......... 32 4.3.1 Safety shut-down ............13 7.3.4... -
Page 3: General Information
APAC Pty Ltd and BORA Lüftungstechnik GmbH – hereinafter Information notes point to special features that must be referred to as BORA – does not assume any liability for damage taken into account. arising from disregard for or non-adherence to the documents... -
Page 4: Safety
Only use stove guards and covers that are is described here is classed as unintended. approved by the appliance manufacturer; BORA does not assume any liability for otherwise, there is a risk of accidents. damages caused by improper use or incorrect To choose a suitable stove guard, contact your operation. -
Page 5: Safety Instructions For Installation
LS switch, fuses, automatic circuit appliances (particularly in the case of hard and breakers or contactor. sharp objects). Never use the appliances as work Contact BORA Service. or storage surfaces. Keep hard or sharp objects away from the WARNING! appliance surfaces. - Page 6 Observe the special instructions on changing the gas type and pressure and the specifications for changing the gas nozzles in the nozzle table (see Operating instructions). BORA gas cooktops must only be used with BORA cooktop extractors. www.bora.com...
-
Page 7: Safety Instructions - Operation
Do not touch the appliance while it is still hot. Unattended pans can boil over allowing hot liquids to escape. Keep children away from the hot appliance. Keep an eye on pans when cooking. Try not to let them boil over. www.bora.com... -
Page 8: Safety Instructions - Cleaning And Maintenance
Safety instructions – cleaning and maintenance The appliance must be cleaned at regular intervals. Dirt can lead to damage, restriction of functions, or www.bora.com... -
Page 9: Safety Instructions - Repairs, Servicing And Spare Parts
Do not make any modifications, additions or alterations to the appliance. A damaged power supply cable must be replaced by a suitable power supply cable. This may only be done by an authorised member of the After Sales Service team. www.bora.com... -
Page 10: Technical Data
Technical data Technical data BORA Pro gas cooktop PKG3 Parameter Value Supply voltage 220–240 V Frequency 50/60 Hz Total burner output 5.0 kW Power rating 20 W Fuse protection 1 x 0.5 A 14,5 Gas connection 1/2“ internal thread Fig. 3.2 PKG3 appliance dimensions front view... -
Page 11: Appliance Description
Cooktop appliance description 4.2.1 Display and symbols The power levels and cooking functions of each cooking zone are shown in the control knob display on the corresponding control knob. Fig. 4.2 Control knob operating elements Knob ring Touch surface www.bora.com... -
Page 12: How Gas Cooktop Pkg3 Works
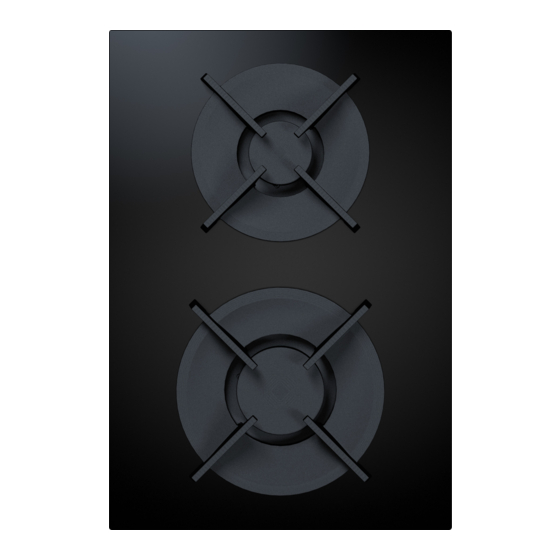
Take special care not to overheat the cookware. Never heat empty cookware. The base can become deformed. Fig. 4.5 Layout of gas cooktop PKG3 and cooking zone Cookware with an uneven base may tip over. A slight dimensions wobble can never be completely ruled out. -
Page 13: Safety Devices
Risk of burns and fire! extractor. Bora shall not be held liable for any such damage. After switching it off, the cooking zone remains hot. -
Page 14: Installation
If there are any missing or damaged parts, please notify the Before connecting the appliance, check that the appliance BORA After Sales Service. settings comply with local connection requirements (gas type Do not under any circumstances install parts which are and pressure). -
Page 15: Assembly Instructions
For correct installation, the drawers of the floor unit must be shortened depending on the installation situation. 5.4.4 Special installation instructions for gas cooktop PKG3 Fig. 5.2 Taking into account the applicable valid regulations, Minimum installation dimensions for standard set-up... -
Page 16: Recirculation When Using The Cooktop Extractor As A Recirculation System
The hose must not come into contact with hot surfaces on the cooktop or other appliances. Positioning of the gas cooktop PKG3 with two cooktop extractors If the gas cooktop is used in a model with two cooktop extractors, it is to be installed at the side. -
Page 17: Cut-Out Dimensions
≥650 mm. 5.5.1 Flush installation A ±2 B ±2 Fig. 5.7 Recirculation design example (kitchen island + PKG3 + PKAS3 + air cleaning unit) Fig. 5.9 Cut-out dimensions for flush installation Gas cooktop PKG3 Cooktop extractor PKAS3 (recirculation) -
Page 18: Surface Mounting
Worktop Fixed front panel 1310 5.6.2 Example bore holes 1681 Tab. 5.3 Cut-out dimensions of the appliance combinations in the case of surface mounting ≥70 ≥40 Fig. 5.15 Drilling pattern for 2 cooktops, 1 cooktop extractor and 2 sockets www.bora.com... -
Page 19: Fitting The Control Knob
The gas must be connected before the cooktop is installed in the worktop. Ventilation This appliance is not connected to a flue gas evacuation device. It must be positioned and connected in accordance with the www.bora.com... -
Page 20: Gas Connection
AS/NZS 5601.1: minimum clearance of the gas burner head from flammable Attach the test point adapter to the gas cooktop connection. surfaces. Check the gas pressure (LPG) as follows: Set the control knob to the 0 position. Close the gas supply. www.bora.com... -
Page 21: Changing The Gas Type
Gaz naturel H The burner nozzles, gas type and pressure may only ενεργοποιημένη: φυσικό αέριο H 20 mbar be changed by a certified engineer or BORA service technician. They also assume responsibility for the proper nastaveno na: Zemní plyn H... - Page 22 Position the burner cap [1] so that it fits perfectly, sitting straight on the burner head [2]. If burner parts are not positioned correctly, the electric igniter will not work. Place the pan support straight on the gas burner so it fits perfectly. www.bora.com...
-
Page 23: Installing The Cooktops
Mounting bracket Washer Screw Secure the appliance using the mounting brackets [1]. Tighten the mounting brackets with the screw [3] using the washer [2] with max. 2 Nm. Verify that the alignment is correct. Fig. 5.26 Inserting the cooktop www.bora.com... -
Page 24: Installation Rotated By 180° (Alternative Installation Variation)
Rear cooking zone (zone 2) Front cooking zone (zone 1) Port on the back of the control knob Rear cooking zone control knob (zone 2) Front cooking zone control knob (zone 1) Connect the control knobs to the appliances. www.bora.com... -
Page 25: Establishing Contact Between The Cooktop Extractor And Cooktops
Secure the main switch/automatic circuit breaker against being switched back on without permission. Make sure the power to the appliance is disconnected. Only connect the cooktop using a permanent connection to a Fig. 5.34 power supply cable. Establishing contact between the cooktop extractor and cooktops www.bora.com... -
Page 26: Basic Configuration
(airflow) – this is normal. engineer or BORA service technician. They also assume Check all the functions of the cooktop extractor and cooktop responsibility for the proper gas installation and are working correctly. -
Page 27: Sealing The Appliances
Explain all safety-related aspects of operation and handling to the user. Affix the supplied nameplate to the back of these instructions. Provide the user with the accessories and all accompanying documents, which are to be kept in a safe place. www.bora.com... -
Page 28: Configuration Menu
The menu can only be called up when the appliances are characteristic curve may only be changed by a certified switched on but are inactive (= power level 0). engineer or BORA service technician. They also assume responsibility for the proper gas installation and commissioning. - Page 29 (does not ignite). The set values for the gas type, pressure and characteristic curve remain unchanged and are not affected by the reset. Setting GPU reset Resetting a locked GPU Tab. 6.5 Resetting a locked GPU Perform a reset if necessary. www.bora.com...
-
Page 30: Functions And Operation
Diagram of the touch commands Switching the appliances off Turn the knob ring anticlockwise to power level 0. Tap command diagram Long press diagram Any active additional functions will be deactivated and the appliance will be switched off. Extra-long press diagram www.bora.com... -
Page 31: Operating The Cooktops
When using the gas burner, you may hear gas escaping from it. The burner flame turns orange as a result of The full range of functions is only available for BORA impurities on the burner and in the ambient air (dust). -
Page 32: Setting Cooking Zone Power Levels
Avoid using a high power level on the cooktop extractor when the gas cooktop is set to a low power level. Function menu on gas cooktop PKG3 If necessary, reduce the power level on the cooktop extractor when you turn on the gas cooktop. -
Page 33: Timer Function/Automatic Cut-Off
The control knob display goes back to the current cooking session. Setting the time and starting the timer Turning clockwise increases the time (starting at 0 minutes). Turning anticlockwise reduces the time. Fig. 7.11 Reducing the active heat retention level www.bora.com... -
Page 34: Automatic Heat Up Function
The system automatically determines the heating time depending on the power level set. PKG3 Power level (continuous cooking Cooking times in min:sec level) Fig. - Page 35 Time lapsed When the heat up time has lapsed, the previously set continuous cooking level will be activated. An acoustic signal is heard. The heat up symbol will no longer be displayed www.bora.com...
-
Page 36: Cleaning And Maintenance
Apply the cleaning agent to the cold cooktop. Spread the cleaning agent using kitchen roll or a clean cloth. Wipe the cooktop clean with a damp cloth. Fig. 8.1 Dry the cooktop with a clean cloth. Gas burner structure www.bora.com... -
Page 37: Cleaning The Gas Burner Parts
Clean the burner parts by hand only. Knob ring Only clean with normal hot water to rinse and a conventional washing-up liquid, using a soft sponge or a normal dishcloth. Never scratch or scrape cooking residues off. Remove the pan support. www.bora.com... -
Page 38: Cleaning The Knob Ring
8.4.2 Cleaning the touch surface and the knob housing Remove the knob ring. Clean the touch surface and the knob housing with a soft, damp cloth. Dry the touch surface and the knob housing carefully. Place the knob ring on the knob housing. www.bora.com... -
Page 39: Troubleshooting
This is normal with brand new appliances. Wait a few operating hours. when operating the new cooktop. If odours continue to form, contact the BORA Service Team. A cooking zone or the entire A cooking zone has been in operation too long. - Page 40 During or after an interruption to the power supply, the cooktops may still be hot. In the case of cooktops PKCH3, PKCB3 and PKG3, after an interruption to the power supply the residual heat is not displayed, even if they were previously in operation and the cooking zones are still hot.
-
Page 41: Decommissioning, Disassembly And Disposal
Never put your old appliance in domestic waste. Take the old appliance to a regional collection point for return and recycling electrical and electronic components and other materials. www.bora.com... -
Page 42: Warranty, Technical Service, Spare Parts, Accessories
In the case of faults you cannot fix yourself, contact your BORA dealer and is valid for 2 years. By registering on www. BORA specialist supplier or the BORA Service Team. -
Page 43: Notes
Notes 12 Notes www.bora.com... - Page 44 Please accept our apologies in this eventuality. An updated version can be requested from the BORA Service Team. Subject to printing errors and mistakes. © BORA Vertriebs GmbH & Co KG All rights reserved.
Need help?
Do you have a question about the PKG3 and is the answer not in the manual?
Questions and answers