Table of Contents
Advertisement
Advertisement
Table of Contents

Related Manuals for Deif XL


Summary of Contents for Deif XL
- Page 1 XL, BW, BRW-2 Illuminated indicators Installation and commissioning guide...
-
Page 2: Table Of Contents
1.1.2 Disclaimer ..............................................1.1.3 Copyright ..............................................1.1.4 Electrostatic discharge ........................................1.2 Package contents ............................................2. XL wiring and installation 2.1 Wiring ................................................. 2.1.1 Analogue input indicators ....................................... 2.1.2 Rudder potentiometer analogue indicator ................................2.1.3 Dimmer setup for analogue indicators ................................. - Page 3 5.2.4 Out of range definition ........................................ 5.3 Commissioning sCAN indicators ....................................5.3.1 Start setup mode ..........................................5.3.2 Synchronise XL indicators over CAN .................................. 5.3.3 Replacing indicators in a calibrated system ..............................5.3.4 Setup indicators without 360° scales ................................5.3.5 Setup indicators with 360° scales ..................................
- Page 4 Package contents The XL/BW/BRW-2 indicators are delivered in a cardboard box. To protect the indicator it is important to store it in the box until mounting. For the XL types, the box also contains a number of fixing clamps. The exact number of clamps depends on the indicator size and the degree of IP protection.
- Page 5 If the indicator is a CANopen input type, a 3-terminal block for illumination input and one CAN cable fixing plate are included. XL with IP66 protection When the indicator is to be mounted for IP66 protection, a blue gasket is included.
-
Page 6: Xl Wiring And Installation
2. XL wiring and installation Wiring 2.1.1 Analogue input indicators Terminal connections Pin number Function Note Supply voltage 24 V Input 1 (Sin) Input 1 and GND used for single input Analogue input On 4 to 20 mA, input 1 is CW and input 2 CCW... - Page 7 Current single input Installation and commissioning guide 4189350024O EN Page 7 of 39...
- Page 8 Analogue SIN/COS input voltage (dual input) Analogue SIN/COS input current (dual input) Installation and commissioning guide 4189350024O EN Page 8 of 39...
-
Page 9: Rudder Potentiometer Analogue Indicator
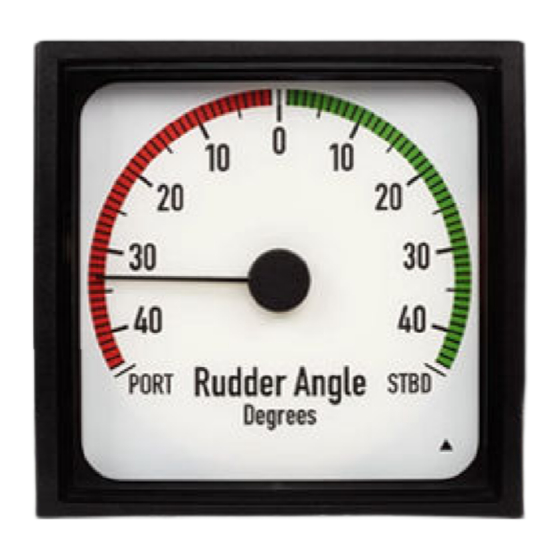
NOTE Only one instrument can be connected in the current loops. 2.1.2 Rudder potentiometer analogue indicator Special input for direct connection to rudder potentiometer. Be aware that this is not standard functionality. Note that: 1. The signal line is identical to the signal on the rudder potentiometer wiper. 2. -
Page 10: Dimmer Setup For Analogue Indicators
2.1.3 Dimmer setup for analogue indicators The figures below illustrate the different ways of arranging a local dimmer on the XL indicators. Method 1 Method 2 Method 1 illustrates a method for dimmer connection that adds a 10 kOhm potentiometer in series with the illumination input (terminal 6). -
Page 11: Dimmer Setup For Dual Canopen Indicators
NOTE The plate shown at the arrow is for fastening the CAN cables with two strips. The strips are not included. Keep the isolation on the cables, so the screens are not mutually connected. CAN ground In general, CAN 1 GND and CAN 2 GND should not be connected. In case of noisy environments the cable screen from CAN cable 1 and 2 can be connected to input CAN 1 GND and to input CAN 2 GND on the indicator respectively. -
Page 12: Scan Input Indicators
2.1.6 sCAN input indicators Pin number Function Note Supply voltage Consumption max. 150 mA 24 V CAN 1 H input CAN 1 L input CAN 1 line (sCAN line) CAN 1 GND CAN connection Not used Used for setting of min/zero/max with Switch/button external switch (Pin 7-8). - Page 13 Pin number Function Note Dimmer input. Dimmer range 7 to 30 V DC Illumination analogue dimmer Illumination GND Consumption max. 30 mA Illumination + Optional calibration switch and resistor not shown, see Commissioning for details. NOTE The plate shown at the arrow is for fastening the CAN cable with a strip. The strip is not included. Installation and commissioning guide 4189350024O EN Page 13 of 39...
-
Page 14: Dimmer Setup For Scan Indicators
NOTE In general, CAN 1 GND should not be connected. In case of noisy environments, try to connect the cable screen to CAN 1 GND. Please also see Commissioning. 2.1.7 Dimmer setup for sCAN indicators The illumination can only be controlled from the dimmer line on terminals 10 and 11. A dimmer potentiometer (R1) can control one or several indicators, like the analogue types. -
Page 15: Dimensions And Panel Cutout
Dimensions and panel cutout 2.2.1 XL dimensions 96.0 (3.78) 5.4 (0.27) XL dimensions in millimeters (inches) Product XL72 80.5 (3.17) 77.0 (3.03) XL96 105.5 (4.15) 102.0 (4.02) XL144 152.0 (5.99) 148.0 (5.83) XL192 200.0 (7.88) 196.0 (7.72) 2.2.2 XL panel cutout... -
Page 16: Mounting Xl Indicators
186.5 (7.343) -0.0/+1.1 (-0.0/+0.043) Mounting XL indicators Mounting follows the standard DIN mounting for indicators. Use the fixing clamps to mount the indicator from the rear. Indicators with IP52 protection use two clamps for size 72 and 96 and four clamps for size 144 and 192. If the indicator is mounted according to IP66, use the gasket and all the clamps supplied, so the pressure on the gasket becomes uniform. -
Page 17: Bw Wiring And Installation
0.8 Nm (±0.2). The included (black) gasket/frame is mounted in the groove on the indicator frame with the rubber rim side into the groove. More information See XL wiring and installation, Wiring for the wiring diagrams that can be used for BW. 3.1.1 Dimmer wiring In addition to the PG glands, the bulkhead box is equipped with a potentiometer. -
Page 18: Dimensions And Drilling Template
NOTE The PG glands cannot be changed to another size or type, as they are a vital part of the IP66 protection. If the gauge of the installation cable is different from the above-mentioned, a junction box must be used to accomplish connection to the installation. -
Page 19: Drilling Template
3.2.2 Drilling template 125.0 (4.92) Ø9.0 (Ø0.36) NOTE The drawing is only a guideline and is not to scale. Mounting BW indicators To mount the indicator using the bracket, use two appropriate screws. These screws are not included. The mounting bracket is asymmetrical and can therefore be arranged in two different ways. NOTE The distances between the bracket screw holes on BW144 and BW192 are the same (125 mm). -
Page 20: Brw-2 Wiring And Installation
4. BRW-2 wiring and installation Wiring 4.1.1 Overview BRW-2 is protected from ESD (static electricity), so no special protection from ESD is needed during mounting. Dismount the potentiometer plate (use a standard 4 mm Allen key), and the connection terminals will be visible. Be careful not to damage the gasket when the potentiometer plate is dismounted from the housing. -
Page 21: Canopen Input Terminal Connections
4.1.3 CANopen input terminal connections Pin no. Function Note CAN 1 GND L input CAN 2 L input CAN 2 line/or for external switch for calibrating sCAN (see user manual) H input CAN 2 H input CAN connection CAN 1 GND L input CAN 1 L input CAN 1 line (sCAN line) - Page 22 Built-in dimmer: Blank front plate: If version without built-in dimmer is used, an external dimmer can be connected by using X4 (terminal 9-10-11). Installation and commissioning guide 4189350024O EN Page 22 of 39...
-
Page 23: Dimensions And Drilling Template
Dimensions and drilling template 4.2.1 BRW-2 142.0 (5.59) 240.0 (9.45) 117.0 (4.61) 150.0 (5.90) 12.0 (0.47) 4 × Ø7.0 (Ø0.27) NOTE There are three cable glands (PG 21, cable gauge 13 to 18 mm) on the bottom of the unit. If BRW-2 is ordered without an internal dimmer, a separate IP66 dimmer box can be ordered. -
Page 24: Brw-2
4.2.2 Drilling template 4 × Ø7.0 (Ø0.27) 150.0 (5.90) NOTE The drawing is only a guideline and is not to scale. Replacement of XL192 indicator in BRW-2 4.3.1 Overview This product is only relevant for replacement of existing BRW-1 products. Standard voltage for supply and illumination is 24 V DC. -
Page 25: Replacement Instructions
Tor replace the indicator: 1. Dismount the top frame by removing the four screws from the frame. 2. Take out the XL instrument (and note the measuring range on the product label). 3. Disconnect the mounted cables. 4. Mount the new XL instrument. - Page 26 Installation and commissioning guide 4189350024O EN Page 26 of 39...
-
Page 27: Commissioning
Commissioning analogue indicators The XL and BW/BRW-2 indicators are equipped with an amber LED indicator located in the corner of the scale. After power-up, the LED flashes once per second, and after two seconds the LED turns off. If there is an internal error (for example, the microprocessor stops) the LED continues flashing. -
Page 28: Adjustment Functionality
Commissioning sCAN indicators The XL and BW/BRW-2 indicators are equipped with an amber LED indicator located in the corner of the scale. After power-up, the LED is flashing once every second until a valid CAN signal is present. Then the LED turns off. -
Page 29: Start Setup Mode
5.3.2 Synchronise XL indicators over CAN XL indicators using the same CAN-ID (that is listening for data coming from this CAN ID) will automatically be synchronised with the XL where the set-up process is performed. 5.3.3 Replacing indicators in a calibrated system When an indicator is replaced in a calibrated system, the system has to be recalibrated. - Page 30 If no new value was stored (switch still closed), wait until >20 seconds. Then the calibration sequence will be terminated without storing a new setting and the indicator pointer will move back to the scale position given by the present sensor/ input value (normal mode).
-
Page 31: Setup Indicators With 360° Scales
The default setup of the CANopen is Baud rate 125 kbit/s, alternatively the Baud rate can be changed to 250 kbit/s. For further information regarding the CAN communication, please see the CAN specification manual at www.deif.com. Installation and commissioning guide 4189350024O EN... -
Page 32: Termination Of The Canopen Line
5.4.1 Termination of the CANopen line To accomplish safe communication over the CANopen line, termination of the cable is very important (see the drawing below). The applied cable must be of the type twisted pair with screen, e.g. 2x2x0, 50 mm2, e.g. LIYCY-P from Solar. The maximum length at Baud rate 125 kbit/s is 500 m, and 250 m at Baud rate 250 kbit/s. -
Page 33: Error Handling
Power-down Moves to random position External PSU supervision is recommended (power off) (not locked) Internal error Continuous flashing Random Unit must be returned to DEIF for service (watch dog) 5.5.2 Analogue 360° indicators Indicator status Error LED Pointer Remark Random,... -
Page 34: Can 240° Indicators
(power off) (not locked) Recheck that this is not a CAN error Internal error Continuous flashing Random (watch dog) Unit must be returned to DEIF for service 5.5.4 CAN 360° indicators Indicator status Error LED Pointer Remark Random, then moving to... -
Page 35: Appendix A - Pointer Position Examples
6. Appendix A - Pointer position examples The pointer positions of the indicators at different inputs depend on the configuration of the indicator. The pointer positions in the example are for an analogue pitch indicator with a range of 4 to 20 mA. The pointer rotates in a clockwise direction when the indicator receives a positive input. -
Page 36: Appendix B: Pointer Positions Based On Input
When used in a system with TRI-2, XL must be CCW, or TRI-2 must be 20 to 4 mA and XL CW. XL 4 to 20 mA can be changed from CW to CCW by the customer, and RT-2 can also be changed from CW to CCW during installation. -
Page 37: Standard Azimuth Indicators
FWD design: AFT design: Input type Input 1 Input 2: Pointer position (scale) EM=6 EM=12 Pointer CCW1 Pointer CCW* 4 to 20 mA 20 mA 0 to 10 V 10 V -10 to 0 to 10 V 10 V * Note: Make sure that the pointer rotation matches other indicators/transmitters in the system (TRI-2, RT-2, etc.). Standard azimuth indicators FWD design: AFT design: EM=6**... -
Page 38: Analogue Sin/Cos Azimuth Indicators
Analogue SIN/COS azimuth indicators FWD design: AFT design: EM=6** Input type Input 1 Input 2 Pointer position (scale) EM=12** Pointer CW* Pointer CW* 4 to 20 mA 12 mA 4 mA 0 to 10 V 0 (A) -10 to 0 to 10 V -10 V 4 to 20 mA 4 mA... - Page 39 Installation and commissioning guide 4189350024O EN Page 39 of 39...
Need help?
Do you have a question about the XL and is the answer not in the manual?
Questions and answers