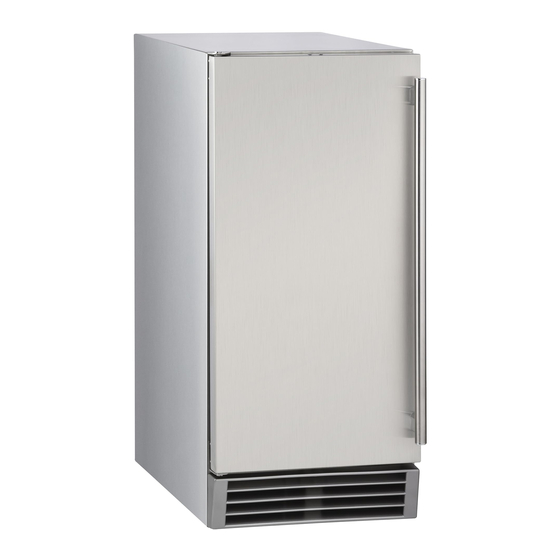
Maxx Ice MIM50P User Manual
Automatic undercounter ice maker
Hide thumbs
Also See for MIM50P:
- Service, installation, and instruction manual (60 pages) ,
- Service, installation, and instruction manual (22 pages)
Table of Contents
Advertisement
Available languages
Available languages
Advertisement
Chapters
Table of Contents

Subscribe to Our Youtube Channel
Related Manuals for Maxx Ice MIM50P


Summary of Contents for Maxx Ice MIM50P
- Page 1 Machine à glaçon automatique User’s Manual (pages 1 - 28) Mode d’emploi (pages 29 à 56) Be sure ice maker is standing upright 24 hours prior to plug-in. Assurez-vous que la machine à glaçons est debout 24 heures avant d'être branchée. Model/Modèle: MIM50P...
-
Page 2: Table Of Contents
TABLE OF CONTENTS Page ICE MAKER SAFETY ....................2 IMPORTANT SAFEGUARDS ..................3 - 5 TECHNICAL INFORMATION ..................5 INTRODUCTION ......................6 COMPONENT LOCATIONS ...................6 - 7 ICE MAKER INSTALLATION ................7 - 15 Unpacking ......................7 - 8 Location requirements ..................8 - 9 Electrical requirements ..................9 - 10 Leveling the ice maker .................. -
Page 3: Ice Maker Safety
ICE MAKER SAFETY Your safety and the safety of others are very important We have provided many important safety messages in this manual and on your appliance. Always read and obey all safety messages. This is the Safety Alert Symbol. This symbol alerts you to potential hazards that can injure or kill you and others. -
Page 4: Important Safeguards
IMPORTANT SAFEGUARDS Before the ice maker is used, it must be properly positioned and installed as described in this manual, so read the manual carefully. MAXX ICE strongly recommends that you have a professional install your new machine. The warranty may be affected or voided by an incorrect installation. To reduce the... - Page 5 ordinances, is required. Do not kink or pinch the power supply cord between the ice maker and cabinet. The fuse (or circuit breaker) size should be 15 amperes. It is important for the ice maker to be leveled in order to work properly. Otherwise water may not flow properly through the evaporator (ice mold).
-
Page 6: Technical Information
Because of potential safety hazards under certain conditions, it is strongly recommended that you do not use an extension cord with this ice maker. TECHNICAL INFORMATION Model: MIM50P Electrical power: 115V AC ~ 60Hz Power consumption: 12.2 kWh/100 lbs of ice Ice-making /-harvest rated current: 3.0A/4.0A... -
Page 7: Introduction
Asbury Foodservice assumes no liability or responsibility of any kind for products manufactured by Maxx Ice that have been altered in any way, including the use of any parts and/or other components not specifically approved by Asbury Foodservice or Asbury Service Warranty &... -
Page 8: Ice Maker Installation
Ice scoop Power cord Water inlet Drain outlet Water supply hose Drain hose ICE MAKER INSTALLATION Unpacking Excessive Weight Hazard Use two or more people to move and install ice maker. Failure to do so can result in back or other injury. Remove packaging materials. -
Page 9: Location Requirements
Cleaning before use After you remove all of the packaging materials, clean the inside of your ice maker before using it. See "Interior cleaning" in the Cleaning and Maintenance section. Location Requirements INSTALLATION CLEARANCES: SIDE VIEW TOP VIEW 4” 1” Top of unit Rear of unit 1”... -
Page 10: Electrical Requirements
within the range of normal room temperatures. Operating temperature should be Normal operating water temperature should be between 41°F (5°C) and 90°F (32°C). Operation of the ice maker for extended periods out- side of these normal temperature ranges may affect production capacity. ... -
Page 11: Leveling The Ice Maker
Before you move your ice maker into its final location, it is important to make sure you have the proper electrical connection: A standard electrical supply (115V AC only, 60Hz, 15A), properly grounded in accordance with the National Electrical Code and local codes and ordinances, is required. The ice maker should always be plugged into its own individual electrical outlet. -
Page 12: Reversing The Door Swing
Reversing the Door Swing Tools needed: flathead screwdriver, Phillips screwdriver IMPORTANT: Before you begin, unplug the ice maker or disconnect power. To remove door from hinges: 1. Using a flathead screwdriver, separate the axis from Hinge 1. Set aside. 2. Open the door about 20°around the axis of Bottom Hinge 2, then lift the door off Bottom Hinge 2 and set door aside. -
Page 13: Water Supply
Water Supply The water supply should be ready at the point of installation. The water supply pressure should be a minimum of 15 psig with a static pressure not more than 80 psig. (A wall outlet directly behind the ice machine will make installation easier.) IMPORTANT: 1. -
Page 14: Drain
Drain You must connect the drain line before using the ice maker. Follow the steps below. There are two types of ice machine modes, one that drains by gravity and one that has an internal drain pump. This unit can pump out water up to a rise of 1.5m (59”) or over a horizontal length of 1.5m (59”). - Page 15 Connecting the drain line: NOTE: If there is a drain line near the ice maker, the best choice is to drain water to the drain line through the drain water hose provided with ice maker. 1. Locate the floor drain near the ice maker. The distance should be less than 5 feet since the length of the long drain water hose provided with the ice maker is about 5 feet.
-
Page 16: Installation Types
Installation Types This ice maker has been designed for Mobile (free-standing) installation. However, it can also be Enclosed (as under a cabinet) or Built-in (sealed to the floor). In any case, there must be adequate air space around the unit for ventilation. Mobile installation: A mobile installation will allow you to install the ice maker free-standing in any place you desire provided you have access to a water supply. -
Page 17: Operation
OPERATION Final Check List before Operation 1. Have all packing materials and tape been removed from the interior and exterior of the ice maker? 2. Did you clean the ice storage bin? 3. Have the installation instructions been followed, including connecting the machine to water and electricity? 4. -
Page 18: How The Machine Makes Ice
ice storage bin. 4. When the ice storage bin is full, the sheet of cubes will not fall completely and will hold the bin-full probe open. The machine stops making ice automatically. 5. The unit will start making ice again after the ice cubes are removed. Then the bin-full probe swings back to operating position. -
Page 19: How The Machine Uses The Water
How the machine uses the water The ice maker begins with a fixed charge of water that is contained in the water trough. As the water flows to the freezing evaporator surface, the portion of water that does not contain mineral impurities freezes and sticks to the ice cube molds. The water containing impurities falls back into the water trough. -
Page 20: Schematic Diagram
Also check that none of the water lines are kinked. problem remains, contact Maxx Ice Customer If water level switch 2 closes, transmitting a low-voltage Service. current to the PC board, the PC board activates the buzzer alarm, informing you that the drain pump, water level switch or drain tube may be malfunctioning. -
Page 21: Normal Sounds
Normal Sounds Your new ice maker may make sounds that are not familiar to you. Most of the sounds are normal. Hard surfaces like the floor and walls can make the sounds seem louder than they actually are. The following list describes the sounds that might be new to you and what may be causing them. -
Page 22: Exterior Cleaning
Periodic cleaning and proper maintenance will ensure efficiency, top performance, and long life. The maintenance intervals listed are based on normal conditions. You may want to shorten the intervals if you have pets, or there are other special considerations. What shouldn’t be done Never keep anything in the ice storage bin that is not ice: objects like wine and beer bottles are not only unsanitary, but the labels may slip off and plug up the drain. -
Page 23: Condenser Cleaning
2. Open the door and take out the removable ice storage bin. With a clean cloth, wipe down the interior of unit and ice bin with a sanitizing solution made of 1 ounce of household bleach or chlorine and 2 gallons of hot (95ºF – 115ºF) water. 3. -
Page 24: Water Distribution Tube Cleaning
Water distribution tube cleaning When you find the ice cubes are incompletely formed or the output is low, the water distribution tube may be blocked. Turn off the power button, gently take out the water distribution tube, locate the holes in the distribution tube and use a pointed object such as a toothpick to dredge the holes. - Page 25 The ice machine cleaner contains acids. DO NOT use or mix with any other solvent-based cleaner products. Use rubber gloves to protect hands. Carefully read the material safety instructions on the container of the ice machine cleaner. Discard the first batch of ice produced after cleaning. 6.
-
Page 26: Control Panel
Control panel: Description of LEDs and buttons: Bin Full (Red) LED Bin full indicator light When this is lit, the ice storage bin is full of ice or there is something blocking the bin-full probe. The unit will stop working. When ice cubes are removed from the ice storage bin, freeing the bin-full probe, the red LED will remain flashing for 3 minutes, then the unit will restart and return to the ice making mode. -
Page 27: Major Functions
2. While in the Ice Size Adjustment mode, press the “Clean” (-) button or the “Mode” (+) button for the desired ice size. Smaller ice setting: By pressing the “Clean” (-) button, you can decrease the size of the ice cubes. The “ICE” LED (green) will flash as you lower the ice size and will finally be blinking at the setting of smallest ice size. -
Page 28: Troubleshooting
TROUBLESHOOTING Before Calling for Service If the unit appears to be malfunctioning, read through the OPERATION section of this manual first. If the problem persists, check the Troubleshooting Guide on the following pages. Some of the problems mentioned in the Guide can be solved easily without a service call. - Page 29 Check if the water supply pressure is below 15 psig. Cubes are partially Not enough water in the formed or are white Check water supply or filter may be water trough. on the bottom. restricted. Check for a water leak at the water trough. The feet are not leveled and Level and lock the feet.
-
Page 30: French Version Of This Manual
TABLE DES MATIÈRES Page SECURITÉ DE LA MACHINE À GLAÇONS ............30 MESURES DE SECURITÉ IMPORTANTES .............30 - 32 INFORMATIONS TECHNIQUES ................33 INTRODUCTION ......................34 EMPLACEMENTS DES COMPOSANTS ............34 - 35 INSTALLATION DE LA MACHINE À GLAÇONS ..........35 - 43 Déballage ......................35 - 36 Exigences d'emplacement ................36 - 37 Exigences électriques ..................37 - 38... -
Page 31: Securité De La Machine À Glaçons
SECURITÉ DE LA MACHINE À GLAÇONS Votre sécurité et celle des autres sont très importantes Nous avons fourni de nombreux messages de sécurité importants dans ce manuel et sur votre appareil. Toujours lire et respecter les consignes de sécurité. C'est le symbole d'alerte de sécurité. Ce symbole vous signale les dangers potentiels qui peuvent blesser ou tuer vous et d'autres. - Page 32 Avant la machine à glaçons est utilisée, elle doit être correctement positionnée et installée comme décrit dans ce manuel, donc lire attentivement le manuel. MAXX ICE recommande fortement que vous avez un professionnel installer votre nouvelle machine. La garantie peut être affectée ou annulée par une mauvaise installation. Pour réduire le risque d'incendie, d'électrocution ou de blessure lors de l'utilisation de la machine à...
- Page 33 Assurez-vous que les tuyaux ne sont pas pincés, pliés ou endommagés lors de l'installation. Vérifier les fuites après la ligne d'eau est connectée. Bien que l'appareil a été testé et nettoyé à l'usine, du fait de transit et le stockage à long terme, le premier lot de cubes doit être éliminé.
-
Page 34: Informations Techniques
INFORMATIONS TECHNIQUES Modèle : MIM50P Alimentation électrique : 115V CA ~ 60Hz Consommation d'énergie : 12.2 kWh / 100 lb (45kg) de glace Courant nominal de faire / récolter la glace : 3.0A/4.0A Réfrigérant : R134a, 110 g Pression du côté haut / bas :... -
Page 35: Introduction
INTRODUCTION La machine à glaçons Maxx Ice MIM50P produit des glaçons de haute qualité, durs et parfaitement transparents. Elle convient parfaitement, autant aux propriétaires de maison comme à la clientèle hôtelière. Un bac isolé pour la récolte des glaçons est intégré. De plus, vous avez la possibilité... -
Page 36: Installation De La Machine À Glaçons
Ice scoop Pelle de glace Cordon d’alimentation Power cord Entrée d’eau Water inlet Drain outlet ortie de vidange Water supply hose Drain hose ortie de vidange uyau d'alimentation en eau INSTALLATION DU MACHINE À GLAÇONS Déballage AVERTISSEMENT Risque du poids excessif Utilisez deux personnes ou plus pour déplacer et installer la machine à... -
Page 37: Exigences D'emplacement
Nettoyage avant utilisation Après avoir enlevé tous les matériaux d'emballage, nettoyer l'intérieur de votre machine à glaçons avant de l'utiliser. Voir « Nettoyage intérieur » dans la section Nettoyage et entretien. Exigences d'emplacement DISTANCES D'INSTALLATION : VUE DE CÔTÉ VUE DU HAUT 2,5 cm 10,2 cm Haut de l'unité... -
Page 38: Exigences Électriques
AVERTISSEMENT Température de fonctionnement doit se situer dans la plage des températures ambiantes normales. La température de fonctionnement normale de l'eau doit se situer entre 41 ° F (5 ° C) et 90 ° F (32 ° C). Le fonctionnement de la machine à glaçons pendant de longues périodes en dehors de cette plage de température normale peut affecter la capacité... -
Page 39: Nivellement De La Machine À Glaçons
Avant de déplacer la machine à glaçons à son emplacement final, il est important que vous vous assuriez que la connexion électrique soit appropriée: Une alimentation électrique standard (115V CA uniquement, 60Hz, 15A), mise à la terre conformément au Code national de l'électricité et les codes et règlements locaux, est nécessaire. La machine à... -
Page 40: Pour Inverser L'ouverture De La Porte
Pour inverser l'ouverture de la porte Outils nécessaires : tournevis, tournevis cruciforme IMPORTANT: Avant de commencer, débranchez la machine à glaçons ou couper le courant. Pour enlever la porte des charnières : 1. À l'aide d'un tournevis plat, séparer l'axe de la charnière 1. Mettre de côté. 2. -
Page 41: Alimentation En Eau
Alimentation en eau L'alimentation en eau doit être prête au point d'installation. La pression de l'alimentation en eau doit être un minimum de 15 psig avec une pression statique pas plus de 80 psig. (Une prise murale directement derrière la machine à glace facilite l'installation.) IMPORTANT : 1. -
Page 42: Pour Vidanger
Pour vidanger Vous devez connecter la ligne de vidange avant d'utiliser la machine à glaçons. Suivez les étapes ci-dessous. Il existe deux types de modes de la machine à glace, une qui se draine par gravité et une qui présente une pompe de drainage interne. Cette unité... - Page 43 Connexion de la ligne de drain : NOTE : S'il y a une ligne de drain près de la machine à glaçons, le meilleur choix est de drainer l'eau à la ligne d'évacuation à travers le tuyau de vidange fourni avec la machine à...
-
Page 44: Types D'installation
Types d'installation Cette machine à glaçons a été conçue pour installation mobile (position libre). Cependant, elle peut également être close (comme sous une armoire) ou intégrée (fixée à l'étage). Dans tous les cas, il doit y avoir un espace d'air suffisant autour de l'unité pour la ventilation. -
Page 45: Fonctionnement
FONCTIONNEMENT Liste de vérification finale avant l'opération 1. Est-ce que tous les matériaux d'emballage ont été retirés de l'intérieur et l'extérieur de la machine à glaçons? 2. Avez-vous nettoyé le bac de stockage de glace? 3. Est-ce que les instructions d'installation ont été suivies, y compris la connexion de la machine à... -
Page 46: Comment La Machine Fait De La Glace
3. Lorsque le lot de glace a été entièrement formé, la glace sera automatiquement récoltée dans le bac de stockage. 4. Lorsque le bac de stockage de glace est plein, la plaque de cubes ne tombera pas complètement et tiendra ouverte la sonde de bin-plein. La machine cesse de faire de la glace automatiquement. -
Page 47: Comment La Machine Utilise De L'eau
Comment la machine utilise de l'eau La machine à glaçons commence par une charge fixe de l'eau qui est contenue dans le bac à eau. Comme l'eau coule à la surface de l'évaporateur de congélation, la partie de l'eau qui ne contient pas d'impuretés minérales gèle et se colle à... -
Page 48: Diagramme Schématique
à basse tension à la carte PC, la persiste, contactez le service à carte PC active le buzzer, vous informant que la pompe de la clientèle à Maxx Ice. vidange, le commutateur de niveau d'eau ou le tuyau de vidange peut être défectueux. -
Page 49: Sons Normaux
Sons normaux Votre nouvelle machine à glaçons peut faire des sons qui ne sont pas familiers. La plupart des sons sont normaux. Les surfaces dures comme le plancher et les murs peuvent faire les sons sembler plus fort que ce qu'ils sont réellement. La liste suivante décrit les sons qui pourraient être nouveau pour vous et ce qui peut être les faisant. -
Page 50: Nettoyage Extérieur
Un nettoyage périodique et un entretien adéquat assureront l'efficacité, les performances optimales et une longue vie. Les intervalles d'entretien énumérés sont basés sur des conditions normales. Vous voudrez peut-être raccourcir les intervalles si vous avez des animaux, ou il y a d'autres considérations spéciales. Ce que ne doit pas être fait Ne gardez jamais quoi que ce soit dans le bac de stockage de glace qui n'est pas de la glace: des objets comme des bouteilles de vin et de bière sont non seulement insalubres,... -
Page 51: Nettoyage Du Condenseur
essuyer l'intérieur de l'unité et le bac à glace avec une solution désinfectante faite de 28 ml d'eau de Javel ou du chlore et 8 litres d'eau chaude (95ºF à 115ºF). Retirez le tuyau de vidange de la cuve d'eau pour évacuer toute l'eau 4. -
Page 52: Nettoyage Des Tubes De Distribution D'eau
Nettoyage des tubes de distribution d'eau Lorsque vous trouvez que les cubes de glace sont incomplètement formés ou le rendement est faible, le tube de distribution d'eau peut être bloqué. Éteignez le bouton d'alimentation, doucement retirer le tube de distribution d'eau, localiser les trous dans le tube de distribution et utiliser un objet pointu comme un cure-dent pour draguer les trous. - Page 53 AVERTISSEMENT La solution de nettoyage de la machine à glace contient des acides. NE PAS utiliser ou mélanger avec d'autres produits de nettoyage à base de solvant. Utiliser des gants en caoutchouc pour protéger les mains. Lisez attentivement les consignes de sécurité...
-
Page 54: Panneau De Contrôle
Panneau de contrôle : PANNEAU DE CONTRÔLE Description des voyants et boutons : Voyant BIN FULL (rouge) Voyant qui indique que le bac à stockage est plein Lorsque cela est allumé, le bac à stockage de glace est plein de glace ou il y a quelque chose bloquant la sonde bac-plein. -
Page 55: Guide De Réglage De La Taille De La Glace
Guide pour l'ajustement de la taille des glaçons : 1. Appuyez et maintenez enfoncé le bouton ADJUST pendant au moins 3 secondes. L'unité entrera en mode Réglage de la taille des glaçons. Le voyant HARVEST (jaune) clignote en continu pendant le réglage de la taille de la glace. Relâchez le bouton lorsque le voyant clignote en continu pour ajuster la taille des glaçons. -
Page 56: Dépannage
DÉPANNAGE Avant d'appeler pour de service Si l'appareil semble défectueux, lisez la section FONCTIONNEMENT de ce manuel en premier. Si le problème persiste, consultez le Guide de dépannage sur les pages suivantes. Certains des problèmes mentionnés dans le Guide peuvent être résolus facilement sans un appel de service. - Page 57 Vérifier si la pression d'alimentation en eau Les cubes sont est inférieure à 15 psig. partiellement Pas assez d'eau dans le bac à Vérifier l'alimentation en eau ou le filtre formés ou sont en eau. peut être restreint. blanc sur le fond. Vérifier une fuite d'eau au bac d'eau.
Need help?
Do you have a question about the MIM50P and is the answer not in the manual?
Questions and answers