
Related Manuals for Eneo SPD-62V2810P0A


Summary of Contents for Eneo SPD-62V2810P0A
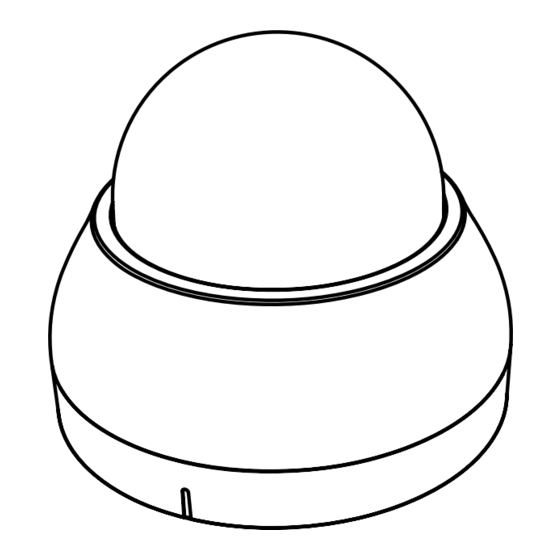
- Page 1 Quick Installation Guide 1/3” HDcctv Dome, Fixed, Day&Night, 1920x1080, 12V, 2.8-10mm, Infrared, Indoor SPD-62V2810P0A...
-
Page 2: Table Of Contents
Table of content Notes on safety ......................3 Parts supplied .......................3 Part names ........................4 Installation instructions ....................5 Pan & Tilt adjustments ..............................6 Zoom & Focus adjustments ............................7 Power supply connections .............................8 Operating instructions ....................9 Using OSD controller................................9 Description of the joystick operation ......................9 Description of the D-ZOOM adjustment ....................9 Set the video format according to system, EX-SDI or HD-SDI ................ -
Page 3: Notes On Safety
Notes on safety Please also pay attention to the enclosed safety instructions, and carefully read through this instruction guide before initial operation. Important points of warning are marked with a caution symbol. Important points of advice are marked with a notice symbol. Parts supplied •... -
Page 4: Part Names
Part names Option: Tilted Easy Adaptor Power cable Easy Adaptor flat type Dome base 3-Axis gimbal Video format switch Focus / Zoom Lens Dome cover Bubble shield Bubble Light sensor OSD control joy stick IR LEDs Video Sub-out connector... -
Page 5: Installation Instructions
Installation instructions CAUTION: The camera’s base should be attached to a structural object, such as concrete, hard wood, wall stud or ceiling rafter that supports the weight of the camera. If necessary use appro- priate mounting material (e.g. anchors) instead of the material enclosed with the camera. -
Page 6: Pan & Tilt Adjustments
Detach the dome camera from the Easy Adaptor Push the hook on the dome base and swing the dome base to counterclock wise. Then detach the dome camera from the installed Easy Adaptor. Open the dome cover Put the driver in the dome cover gap and get down until the dome cover open. Pan &... -
Page 7: Zoom & Focus Adjustments
Extended viewing angle Tilted Easy Adaptor (Option) Zoom & Focus adjustments Use the focus driver supplied. • Turn the Focus gear until the sharpest focus is made. • Adjust the zoom for the proper viewing angle. -
Page 8: Power Supply Connections
CAUTION: Extreme care should be taken NOT to scratch the bubble dome surface while the camera installing or adjusting. Extreme care should be taken NOT to apply force to IR LEDs. Care should be taken the cable is NOT to be damaged, kinked or exposed in the hazardous area. -
Page 9: Operating Instructions
Operating instructions Using OSD controller Setup menu can be accessed and controlled by OSD control joy stick on the gimbal of camera unit. Five commands are available with the joy stick. OSD control Joy Stick IR-LEDs CAUTION: Extreme care should be taken NOT to apply force to the IR LEDs. -
Page 10: Set The Video Format According To System, Ex-Sdi Or Hd-Sdi
Set the video format according to system, EX-SDI or HD-SDI To select the camera’s output video format (EX-SDI or HD-SDI), use the Video format Switch on the side of the camera (see also “Part names” for location of the switch). Only the switch setting. -
Page 11: Direct Control Menu
SAVE & EXIT – Exits the menu after saving the parameters. EXIT – Exits EXIT the menu without saving the menu. Further information The manual is available from the eneo web site at www.eneo-security.com or from the CD supplied with this product. - Page 12 Table of content Sicherheitshinweise ....................13 Lieferumfang .......................13 Bezeichnungen von Gerätekomponenten ...............14 Installationsanweisungen ..................15 Einstellung von Schwenkung und Neigung ......................16 Zoom- und Fokuseinstellung ............................ 17 Stromversorgungsanschlüsse ............................ 18 Betriebsanleitung .......................19 Bildschirmmenü-Steuerung verwenden ....................... 19 Beschreibung der Joystick-Bedienung ..................... 19 Beschreibung der D-Zoom-Einstellung ....................19 Stellen Sie das Videoformat gemäß...
-
Page 13: Sicherheitshinweise
Sicherheitshinweise Bitte beachten Sie auch die beiliegenden Sicherheitshinweise und lesen Sie diese Anlei- tung vor Inbetriebnahme sorgfältig durch. Wichtige Warnhinweise sind mit einem Achtung-Symbol gekennzeichnet. Wichtige Hinweise sind mit einem Hinweis-Symbol gekennzeichnet. Lieferumfang • Dome-Kamera • Betriebsanleitung • Bohrschablone • Einfacher Adapter •... -
Page 14: Bezeichnungen Von Gerätekomponenten
Bezeichnungen von Gerätekomponenten Option: Keilförmiger einfa- cher Adapter Netzkabel Einfacher Adapter flach Dome-Basis 3-Achsen-Aufhängering Videoformat-Schalter Fokus und Zoom Objektiv Dome-Abdeckung Sonnenschutzdach für Kuppel Kuppel Lichtsensor Joystick zur Bildschirmmenü-Steuerung IR-LEDs Video Sub-out Anschluss... -
Page 15: Installationsanweisungen
Installationsanweisungen ACHTUNG: Die Kamerahalterung sollte an einem Bauelement wie etwa Beton, Hartholz, einem Wandständer oder Deckenbal- ken befestigt werden, welches das Gewicht der Kamera trägt. Verwenden Sie, falls erforderlich, geeignetes Befestigungsmateri- al (z.B. Dübel) anstelle des mitgelieferten Materials. 1. Bohren Sie drei Löcher zur Montage an der Decke oder an der Wand. 2. -
Page 16: Einstellung Von Schwenkung Und Neigung
Trennen der Dome-Kamera vom einfachen Adapter Drücken Sie auf den Haken auf der Dome-Basis und drehen Sie die Dome-Basis gegen den Uhrzeigersinn. Trennen Sie anschließend die Dome-Kamera vom installierten einfa- chen Adapter. Setzen Sie den Schraubendreher in die Spalte der Kuppel-Abdeckung und drücken Sie Einstellung von Schwenkung und Neigung 1. -
Page 17: Zoom- Und Fokuseinstellung
Erweiterter Betrachtungswinkel Keilförmiger einfacher Adapter (Option) Zoom- und Fokuseinstellung Verwenden Sie den mitgelieferten Schraubendreher. • Drehen Sie den Fokusring bis der schärfste Fokus erreicht ist. • Stellen Sie den Zoom für den richtigen Betrachtungswinkel ein. -
Page 18: Stromversorgungsanschlüsse
ACHTUNG: Achten Sie besonders darauf, die Abdeckkuppel der Dome- Kamera während der Installation oder der Einstellung NICHT zu verkratzen. Achten Sie besonders darauf, die IR-LEDs nicht zu beschädigen. Es muss sorgfältig darauf geachtet werden, das Kabel NICHT zu beschädigen, zu knicken oder Gefahrenbereichen auszusetzen. Setzen Sie die Kamera nie direkt einer starken Lichtquelle wie der Sonne oder einem Scheinwerfer aus. -
Page 19: Betriebsanleitung
Betriebsanleitung Bildschirmmenü-Steuerung verwenden Zugriff und Steuerung des Konfigurationsmenüs können über den Joystick zur Bild- schirmmenü-Steuerung an der Kamera und einen Service Monitor erfolgen. Fünf Befehle stehen mit dem Joystick zur Verfügung. Joystick zur Bildschirmmenü-Steuerung IR-LEDs ACHTUNG: Achten Sie besonders darauf, die IR-LEDs nicht zu beschädigen. -
Page 20: Stellen Sie Das Videoformat Gemäß Dem System Ein, Ex-Sdi Oder Hd-Sdi
Stellen Sie das Videoformat gemäß dem System ein, EX-SDI oder HD-SDI. Um das Ausgabe-Videoformat der Kamera auszuwählen (EX-SDI oder HD-SDI), verwen- den Sie den Videoformat-Schalter an der Seite der Kamera (siehe auch „Bezeichnungen von Gerätekomponenten“ für die genaue Position des Schalters). Nur ein Format kann zu einem gegebenen Zeitpunkt verwendet werden. -
Page 21: Steuerungsmenü
LANGUAGE (Sprache), FACTORY DEFAULT (Werkseinstellungen). SAVE & EXIT – Menü nach Speicherung der Parameter verlassen. EXIT – EXIT Verlassen des Menüs ohne zu speichern. Weitere Informationen Das Benutzerhandbuch ist auf der eneo Webseite unter www.eneo-security.com oder auf der mitgelieferten CD verfügbar. - Page 22 Table of content Consignes de sécurité ....................23 Matériel livré ........................23 Noms des pièces ......................24 Instructions d'installation ...................25 Réglages Panoramique/Inclinaisons ........................26 Ajustement du zoom et de la mise au point ......................27 Connexions d'alimentation ............................28 Mode d'emploi ......................29 Utilisation d'une commande OSD ..........................29 Description du fonctionnement de la manette de contrôle ...............
-
Page 23: Consignes De Sécurité
Consignes de sécurité Respectez les consignes de sécurité ci-après et lisez attentivement cette notice avant toute utilisation. Les mises en garde importantes sont précédées d´un symbole d´avertissement. Les points importants sont précédés d´un symbole de notice. Matériel livré • Caméra dôme •... -
Page 24: Noms Des Pièces
Noms des pièces Option : Easy Adaptor incliné Câble d'alimentation Easy Adaptor type plat Base du dôme Cardan sur 3 axes Commutateur de format vidéo Focus / Zoom Objectif Couvercle du dôme Dôme à coupole Coupole Capteur de lumière Manette de commande OSD LED IR Connecteur sous-sortie vidéo... -
Page 25: Instructions D'installation
Instructions d'installation ATTENTION : solide, comme du bois dur, un mur, pilier ou poutre au plafond apte à supporter le poids de la caméra dôme. Si nécessaire, matériel fourni avec la caméra. 1. Percer trois trous pour le montage au plafond ou sur le mur. montage. -
Page 26: Réglages Panoramique/Inclinaisons
Démonter la caméra dôme de l'Easy Adaptor Pousser le crochet de la base et pivoter la base du dôme dans le sens inverse des aiguilles de la montre. Ensuite, la caméra dôme peut être retirée de l'Easy Adaptor installé. Ouvrir le cache de l’objectif. Insérer le tourne-vis dans l'ouverture du couvercle du dôme et abaisser jusqu'à... -
Page 27: Ajustement Du Zoom Et De La Mise Au Point
Angle de vision étendue de la caméra. Easy Adaptor incliné (option) Ajustement du zoom et de la mise au point Utiliser le tourne-vis de mise au point fourni. • Tourner le réglage de la mise au point pour obtenir la mise au point la plus nette. •... -
Page 28: Connexions D'alimentation
ATTENTION : Il faudra veiller à ne pas érafler la surface de la coupole lors de l'installation ou le réglage de la caméra. Il faudra veiller à ne pas appliquer de la force aux LED IR. Veillez à ne PAS endommager, déformer ou exposer le câble dans une zone dangereuse. -
Page 29: Mode D'emploi
Mode d'emploi Utilisation d'une commande OSD Le menu de configuration peut être consulté et contrôlé soit en utilisant la manette de contrôle de l'affichage à l'écran situé sur le côté de la caméra. Cinq fonctions de com- mande sont disponibles avec la manette. Manette de commande OSD LED IR ATTENTION : ll faudra veiller à... -
Page 30: Régler Le Format Vidéo En Fonction Du Système Ex-Sdi Ou Hd-Sdi
Régler le format vidéo en fonction du système EX-SDI ou HD-SDI Pour sélectionner le format vidéo de la sortie de la caméra (EX-SDI ou HD-SDI), utiliser le commutateur vidéo format vidéo sur le côté de la caméra (voir également “Noms des pièces”... -
Page 31: Menu De Contrôle Direct
SAVE & EXIT – Quitter le menu après avoir enregistré les paramètres. EXIT EXIT – Quitter le menu sans sauvegarder. Complément d'information Le manuel complet est proposé sur le site Web d’eneo www.eneo-security.com ou sur le CD accompagnant ce produit. - Page 32 VIDEOR E. Hartig GmbH Exclusive distribution through specialised trade channels only. VIDEOR E. Hartig GmbH Carl-Zeiss-Straße 8 63322 Rödermark/Germany Tel. +49 (0) 6074 / 888-0 Technical changes reserved Fax +49 (0) 6074 / 888-100 www.videor.com...
Need help?
Do you have a question about the SPD-62V2810P0A and is the answer not in the manual?
Questions and answers