
Related Manuals for Eneo VKCD-12100F2812IR


Summary of Contents for Eneo VKCD-12100F2812IR
- Page 1 Installations- und Betriebsanleitung 1/3” Tag/Nacht-Domekamera, Fix VKCD-12100F2812IR Installation and Operating Instructions 1/3” Day/Night Dome Camera, Fixed VKCD-12100F2812IR...
-
Page 2: Table Of Contents
6.1.13 CAMERA ID (Kamera-Identifikation) .....................19 6.1.14 SYNC (Synchronisation) ......................20 6.1.15 CAMERA RESET (Kamera zurücksetzen) ..................20 6.1.16 EXIT / SAVE ALL (Verlassen / Alle Speichern) ................20 Technische Daten ..............................21 Maßzeichnungen ...............................42 Betriebsanleitung www.videor.com Installation and Operating Instructions ⇒ www.eneo-security.com Mode d’emploi Instrukcja instalacji i obsługi... - Page 3 Contents Safety Instructions .............................23 General Description ............................24 Main Features............................24 Supplied Items............................24 Installation ................................25 Camera Adjustment ............................26 Menu Tree Summary ............................26 OSD MENU CONTROL ............................28 SETUP MENU ............................28 6.1.1 LANGUAGE ..........................28 6.1.2 LENS ............................29 6.1.3 SHUTTER / AGC ..........................30 6.1.4 WHITE BAL ..........................31 6.1.5 DAY/NIGHT..........................32 6.1.6...
-
Page 4: Sicherheitshinweise
1. Sicherheitshinweise • Bevor Sie das System anschließen und in Betrieb nehmen, lesen Sie zuerst diese Sicherheitshinweise und die Betriebsanleitung. • Bewahren Sie die Betriebsanleitung sorgfältig zur späteren Verwendung auf. • Die Kameras gegen Eindringen von Wasser und Feuchtigkeit schützen, Wasser kann die Geräte dauerhaft schädigen. -
Page 5: Allgemeine Beschreibung
2. Allgemeine Beschreibung 2.1 Hauptmerkmale • Für Decken- und Wand-Aufbaumontage • Vandalismusgeschützte Ausführung • Varifokal-Objektiv F1,4/2,8-12mm • Zoom/Fokus Einstellung von außen zugänglich • Digitale Wide Dynamic Range (D-WDR) • Empfindlichkeit: 0,1Lux bei F1,2 (Farbe) • Gegenlichtkompensation (BLC, HLC) • 2D DNR leistungsstarke Rauschunterdrückung •... -
Page 6: Installation
3. Installation Videoanschluss Spannungsversor- gungsanschluss Pan 360° Typ A Type B 3-Achsen Drehung Zoom Einstellung Focus Einstellung Einstellung Einstell-Werkzeug 1) Nehmen Sie den Dome ab und verwenden Sie die Basis als Bohrschablone. Befestigen Sie die Basis mit den Dübeln (A) und Schrauben (B). 2) Nach der sicheren Befestigung der Basis die übrigen Teile wieder montieren. -
Page 7: Kamera-Einstellung
4. Kamera-Einstellung Joystick zur Bedienung des OSD-Me- nüs. Das Drücken des Joystick dient als ENTER-Funktion (Menüaufruf und Eingabetaste). 5. Menübaum - Zusammenfassung LANGUAGE LENS AUTO TYPE, MODE, SPEED MANUAL SHUTTER/AGC AUTO MODE, BRIGHTNESS MANUAL MODE, SHUTTER, AGC EZOOM ZOOM, PAN, TILT WHITE BAL SPEED, DELAY CNT, ATW FRAME, ENVIRONMENT PUSH... - Page 8 BACKLIGHT OFF, BLC, HLC SHADOW REDUCTION LUMINANCE, CONTRAST (D-WDR) PRIVACY AREA SEL TOP, BOTTOM, LEFT, RIGHT COLOR TRANSP MOSAIC MOTION DET DETECT SENSE BLOCK DISP MOTION AREA AREA SEL TOP, BOTTOM, LEFT, RIGHT CAMERA ID SYNC PHASE CAMERA RESET EXIT EXIT SAVE ALL...
-
Page 9: Bedienung Des Osd-Menüs
6. Bedienung des OSD-Menüs Drücken Sie die Joystick-Taste, um das Einstellungsmenü aufzurufen. • Das Hauptmenü der Einstellungen wird auf dem Bildschirm angezeigt. 6.1 SETUP MENU (Einstellung) Wählen Sie eine Funktion durch Bewegen des Joysticks nach oben oder unten aus und bewegen Sie ihn nach rechts oder links, um den Wert zu ändern;... -
Page 10: Lens (Objektiv)
6.1.2 LENS (Objektiv) Ändert die Einstellungen des internen Objektivs. • LENS MANUAL, AUTO • TYPE • MODE (Modus): AUTO, CLOSE, OPEN – AUTO: Die verstellbare Blende wird automatisch gesteuert. – CLOSE (Schließen): Die mechanische Blende wird in die geschlossene Position gestellt. -
Page 11: Shutter / Agc (Automatische Verstärkungsregelung)
6.1.3 SHUTTER / AGC (Automatische Verstärkungsregelung) Der Shutter hat zwei Modi, AUTO oder MANUAL. • AUTO SETUP HIGH LUMINANCE (Automatische Einstellung Hohe Luminanz) MODE (Modus): SHUT BRIGHTNESS (Helligkeit): 000-255 Hohe und mittlere Beleuchtungsstärke • AUTO SETUP LOW LUMINANCE (Automatische Einstellung Niedrige Luminanz) MODE (Modus): AGC/OFF Auswahl der automatischen Belichtungssteuerung für mittlere und hohe Helligkeit... -
Page 12: White Bal (Weißabgleich)
6.1.4 WHITE BAL (Weißabgleich) Der Weißabgleich kann auf folgende Parameter eingestellt werden: ATW / PUSH / USER1 / USER2 / ANTI CR / MANUAL / PUSH LOCK • ATW (Automatischer Weißabgleich) SPEED (Geschwindigkeit): 000-255 Der AE-Wert für den ATW. Werkeinstellung ist 239 DELAY CNT (Verzögerungszeit): 000-255 Zeitverzögerungsparameter für die ATW-Veränderung. -
Page 13: Day/Night (Tag/Nacht)
• USER2 Benutzerdefinierte Einstellung der Blau- und Rotverstärkung. B-GAIN (Blau-Verstärkung): 000-255 Blauverstärkungseinstellung für den Weißabgleich R-GAIN (Rot-Verstärkung): 000-255 Rotverstärkungseinstellung für den Weißabgleich • ANTI CR Aktiviert die Unterdrückung unbeabsichtigter Farbwechsel. • MANUAL ATW LEVEL: 000-255 Einstellung der Rot- und Blauverstärkungswerte für den manuellen Weißabgleich Der tatsächliche Wertebereich ist auf den Bereich von niedriger Farbtemperatur (ca. - Page 14 Tag/Nacht-Modus, Einstellungsmöglichkeiten: COLOR (Farbe) / AUTO (Automatik). Mit AUTO ist die Feineinstellung des Tag/Nacht-Übergangs und umgekehrt möglich. Mit der Einstellung COLOR wird allein der Farbmodus aktiviert. • BURST (Color-Burst-Signal): Mit ON / OFF wird ausgewählt, ob das Color-Burst-Signal auch im Schwarz/Weiß-Modus (Nacht-Modus) ausgegeben wird.
-
Page 15: Pict Adjust (Bildeinstellung)
6.1.6 PICT ADJUST (Bildeinstellung) Einstellungen für Bild und Anzeige • MIRROR (Spiegeln): ON / OFF Ausgegebenes Bild horizontal spiegeln • BRIGHTNESS (Helligkeit): 000-255 Bildschirm-Helligkeit • CONTRAST: (KONTRAST) 000-255 Bildschirm-Kontrast • SHARPNESS (BILDSCHÄRFE): 000-255 Bildschärfe • HUE (SÄTTIGUNG): 000-255 Einstellung des Farbton-Wertes •... -
Page 16: Next (Nächste)
6.1.8 NEXT (Nächste) Wählen Sie im Hauptmenü NEXT , um zu weiteren Einstellungsmenüs zu gelangen. 6.1.9 BACKLIGHT (Gegenlicht) • OFF / BLC / HLC Gegenlichtkompensation OFF Gegenlichtkompensation ON Spitzlichtaustastung ON... -
Page 17: Shadow Reduction (Schattenreduktion) - (D-Wdr)
6.1.10 SHADOW REDUCTION (Schattenreduktion) – (D-WDR) OFF / ON Mit dieser Funktion werden dunklere Bereiche um das Objekt kompensiert, um ein natürlich scharfes Bild zu liefern und den Kontrast in hellen/dunklen Bereichen zu verbessern. • LUMINANCE (Luminanz) Einstellung der Stärke der Luminanzkompression (MID / HIGH / LOW) •... -
Page 18: Motion Det (Bewegungserkennung)
• RIGHT (rechts): Position der rechten Seite des Bereichsrechtecks, ausgewählt in den AREA SEL Parametern. • COLOR (Farbe): Zur Einstellung der Maskierungsfarbe • TRANSP (Transparenz): Einstellung der Masken-Transparenz • MOSAIC (Mosaik): ON/OFF. Zeigt den Maskenbereich als Mosaik 6.1.12 MOTION DET (Bewegungserkennung) OFF / ON Bewegungsdetektorbereich des Bildschirms, unterteilt in rechteckige Blöcke. -
Page 19: Camera Id (Kamera-Identifikation)
RIGHT (rechts): Position der rechten Seite des Bereichsrechtecks, ausgewählt in den AREA SEL Parametern. 6.1.13 CAMERA ID (Kamera-Identifikation) OFF / ON Die Kamera ID ist ein einstellbarer Name für den Standort bzw. das Blickfeld, der auf dem Bildschirm angezeigt werden kann. Mit den Tasten nach oben/unten/links/rechts das gewünschte Zeichen auswählen. -
Page 20: Sync (Synchronisation)
6.1.14 SYNC (Synchronisation) INT / LL Angezeigte Videosynchronisation: INT (intern) oder LL (Netzsynchronisation) Hinweis: INT wird bei einem Modell angezeigt, das nur mit Gleichstrom (DC) versorgt wird. Die Einstellung LL wird bei einem Kameramodell angezeigt, das mit Wechselstrom (AC) versorgt wird. •... -
Page 21: Technische Daten
7. Technische Daten VKCD-12100F2812IR Art.-Nr. 209533 Serie eneo Dome Fix System True Day&Night Videonorm CCIR/PAL Chipgröße 1/3” Aufnahmesensor CCD, Sony Effio E (960H) Enhanced Horizontale Auflösung 700 TVL Signal-/Rauschabstand 52dB Lichtempfindlichkeit 0,1Lux, (Farbe); 0,03Lux (SW) bei F1,2, 50 IRE Automatische Verstärkungsregelung (AGC) - Page 22 Betriebsspannung 12VDC (+/-10%) Leistungsaufnahme Temperaturbereich (Betrieb) -10°C ~ +50°C Schutzart IP66 Vandalismusgeschützt Abmessungen Siehe Maßzeichnungen Gewicht 800g Lieferumfang Betriebsanleitung, Schraubensatz Zertifizierungen Optionales Zubehör Das aktuelle optionale Zubehör finden Sie auf unseren Homepages: www.videor.com und www.eneo-security.com 8. Maßzeichnungen Siehe Seite 42...
-
Page 23: Safety Instructions
1. Safety Instructions • Read these safety instructions and the operation manual first before you install and commission the camera. • Keep the manual in a safe place for later reference. • Protect your camera from contamination with water and humidity to prevent it from permanent damage. Never switch the camera on when it gets wet. -
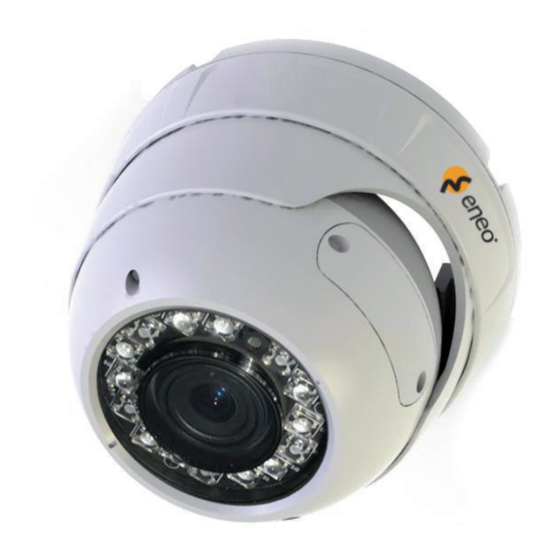
Page 24: General Description
2. General Description 2.1 Main Features • For wall and ceiling flush and surface mount • Vandal and tamper-resistant • Integrated F1.4/2.8-12mm varifocal • Externally adjustable focus & zoom • Digital wide dynamic range (D-WDR) • Sensitivity of 0.1Lux at F1.2 (colour) •... -
Page 25: Installation
3. Installation Video connector Power connector Type A Pan 360° Type B Three axis rotate Zoom OSD Adjust adjustment Focus adjustment Adjust wrench 1) Remove dome dome and use as drill template. Attach using plugs (A) and screws (B) 2) Once base is firmly drilled into place, re-assemble parts. 3) Attach power and video. -
Page 26: Camera Adjustment
4. Camera Adjustment OSD function joystick. Pressing down on joystick acts as ENTER function. 5. Menu Tree Summary LANGUAGE LENS AUTO TYPE, MODE, SPEED MANUAL SHUTTER/AGC AUTO MODE, BRIGHTNESS MANUAL MODE, SHUTTER, AGC EZOOM ZOOM, PAN, TILT WHITE BAL SPEED, DELAY CNT, ATW FRAME, ENVIRONMENT PUSH USER1 B-GAIN, R-GAIN... - Page 27 BACKLIGHT OFF, BLC, HLC SHADOW REDUCTION LUMINANCE, CONTRAST (D-WDR) PRIVACY AREA SEL TOP, BOTTOM, LEFT, RIGHT COLOR TRANSP MOSAIC MOTION DET DETECT SENSE BLOCK DISP MOTION AREA AREA SEL TOP, BOTTOM, LEFT, RIGHT CAMERA ID SYNC PHASE CAMERA RESET EXIT EXIT SAVE ALL...
-
Page 28: Osd Menu Control
6. OSD MENU CONTROL Press down on the function joystick to access the setup menu. • Main setup menu is displayed on the monitor screen. 6.1 SETUP MENU Select a function by moving the joystick up and down and move left or right to change setting value and press joystick to confirm selection. -
Page 29: Lens
6.1.2 LENS Changes the settings of the internal lens. • LENS MANUAL, AUTO • TYPE • MODE AUTO, CLOSE, OPEN – AUTO: The mechanical iris is controlled automatically. – CLOSE: The mechanical iris is set to the closed position. – OPEN: The mechanical iris is set to the open position. Default setting is Auto. -
Page 30: Shutter / Agc
6.1.3 SHUTTER / AGC Shutter has two options either AUTO or MANUAL. • AUTO SETUP HIGH LUMINANCE MODE: SHUT BRIGHTNESS: 000-255 High and medium brightness • AUTO SETUP LOW LUMINANCE MODE: AGC/OFF Specifies the AE control for medium and high brightness BRIGHTNESS: x0.25 / x0.50 / x0.75 / x1.00 Specifies low brightness reference... -
Page 31: White Bal
6.1.4 WHITE BAL White Balance can be set to following: ATW / PUSH / USER1 / USER2 / ANTI CR / MANUAL / PUSH LOCK • ATW SPEED: 000-255 Specifies the AE control for ATW Default setting is 239 DELAY CNT: 000-255 Set the time based of ATW change. -
Page 32: Day/Night
• USER2 User defined gain adjustment on B and R B-GAIN: 000-255 B Gain adjustment for WB R-GAIN: 000-255 R Gain adjustment for WB • ANTI CR Activates colour rolling suppression. • MANUAL ATW LEVEL: 000-255 Specifies the R and B gain values for manual WB The actual variable range is limited to the range from the low colour temperature (approx. - Page 33 Day night mode, can be set to COLOR or AUTO. AUTO allows fine settings of the transition time from day-night, and vice-versa. COLOR setting retails colour only. • BURST: ON / OFF Selects whether to output the burst signal when night mode has been identified. •...
-
Page 34: Pict Adjust
6.1.6 PICT ADJUST Picture and display control settings • MIRROR: ON / OFF Horizontally flip the display output • BRIGHTNESS: 000-255 Screen brightness • CONTRAST: 000-255 Screen contrast • SHARPNESS: 000-255 Screen sharpness • HUE: 000-255 Adjust the hue • GAIN: 000-255 Adjust the gain 6.1.7 2DNR (Digital Noise Reduction) -
Page 35: Next
6.1.8 NEXT From the main setup menu select NEXT to enter addition setup menus. 6.1.9 BACKLIGHT • OFF / BLC / HLC Backlight compensation OFF Backlight compensation ON Highlight compensation ON... -
Page 36: Shadow Reduction (D-Wdr)
6.1.10 SHADOW REDUCTION (D-WDR) OFF / ON This function compensates for darker areas surrounding the object to provide naturally sharp picture and improves contrast in bright/dark areas. • LUMINANCE Sets the extend of the luminance compression (MID / HIGH / LOW) •... -
Page 37: Motion Det
• TRANSP: Sets the transparency ratio of the mask frames • MOSAIC: Sets the mask frame mosaic to ON or OFF 6.1.12 MOTION DET OFF / ON Motion Detection is defined by rectangular areas. This gives a visual identification of motion areas. •... -
Page 38: Camera Id
6.1.13 CAMERA ID OFF / ON Camera ID shows a name on the screen as chosen. Use Up / Down / Left / Right to move around. CHR1/2 changes the selection fonts to alternative selection, CLR will clear info. POS allows position change. 6.1.14 SYNC INT / LL Video synchronization displayed INT(Internal) or LL (Line Lock) -
Page 39: Camera Reset
6.1.15 CAMERA RESET This will reset all settings for all menus to manufacturer defaults. This allows you to return to shipped settings from the manufacturer. 6.1.16 EXIT / SAVE ALL • EXIT Exit OSD menu • SAVE ALL Saves the settings to camera... -
Page 40: Specifications
7. Specifications Type VKCD-12100F2812IR Art. No. 209533 Series eneo Dome Fix System True Day&Night Video standard CCIR/PAL Sensor size 1/3” Imager CCD, Sony Effio E (960H) Enhanced Horizontal resolution 700 TVL Signal-to-noise ratio 52dB Sensitivity 0.1 Lux, (coulor), 0.03Lux (B&W) at F1.2 (measured), 50 IRE... - Page 41 Power consumption Temperature range (operation) -10°C ~ +50°C Protection rating IP66 Vandalism resistant Dimensions See drawings Weight 800g Parts supplied manual, screw set Certificates Optional Accessories The optional accessories currently available can be found on our Homepages: www.videor.com and www.eneo-security.com...
-
Page 42: Maßzeichnungen
8. Maßzeichnungen / Dimensional Drawings Maße/Dimensions: mm... - Page 44 ® ist eine eingetragene Marke der Videor E. Hartig GmbH Vertrieb ausschließlich über den Fachhandel. ® eneo is a registered trademark of Videor E. Hartig GmbH Exclusive distribution through specialised trade channels only. VIDEOR E. Hartig GmbH Carl-Zeiss-Straße 8 · 63322 Rödermark/Germany Technische Änderungen vorbehalten.
Need help?
Do you have a question about the VKCD-12100F2812IR and is the answer not in the manual?
Questions and answers