
Related Manuals for Eneo INP-58M2812M0A


Summary of Contents for Eneo INP-58M2812M0A
- Page 1 Quick Installation Guide Network Dome PTZ, 4x, 3840x2160, Day/Night, WDR, AI INP-58M2812M0A Learn more about eneo IN series on our YouTube channel.
-
Page 2: Table Of Contents
Table of content Components ........................5 Connection ........................6 Installation ...................................7 Ceiling Mount ..................................8 Installation method ..............................9 Quick Network Setup ..............................9 Further information ....................11... - Page 3 Safety instructions General safety instructions • Before switching on and operating the system, first read this safety advice and the operating instructions. • Keep the operating instructions in a safe place for later use. • Installation, commissioning and maintenance of the system may only be carried out by authorised individuals and in accordance with the installation instructions - ensuring that all applicable standards and guidelines are followed.
- Page 4 Class A device note This is a Class A device. This device can cause malfunctions in the living area; in such an event, the operator may need to take appropriate measures to compensate for these. WEEE (Waste Electronical & Electronic Equipment) Correct Disposal of This Product (Applicable in the European Union and other European countries with separate collection systems).
-
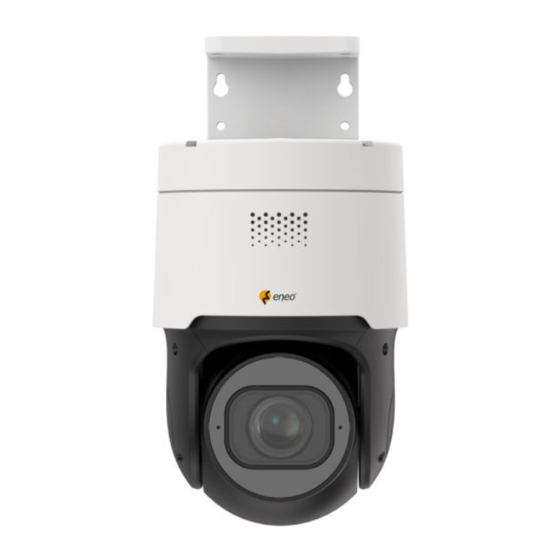
Page 5: Components
Components This system comes with the following components; • Camera • Quick Guide... -
Page 6: Connection
Connection iPhone / iPad Android Phone Internet DC 48V Router PoE Camera Power + Data Out LAN IN PoE Injector PoE Switch Phone PoE Camera PoE NVR Router Attention:There are two connection modes: 1. For non-PoE router, connect the camera by a PoE switch or a PoE injector. 2. -
Page 7: Installation
Installation Wall Mounting template Step 1: Stick the mounting template to the wall, drill 4 screw holes and 1 tail cable hole. Wall Swelling colloidal particles Step 2: Hammer the 4 swelling colloidal particles into the drilled wall holes. Wall Camera bracket Screws Step 3: Align the camera bracket with the 4 swelling colloidal particles screw holes, and... -
Page 8: Ceiling Mount
Ceiling Mount Wall Mounting template Step 1: Stick the mounting template to the wall, drill 4 screw holes and 1 tail cable hole. Wall Swelling colloidal particles Step 2: Hammer the 4 swelling colloidal particles into the drilled wall holes. Wall Camera bracket Screws... -
Page 9: Installation Method
IP addresses. The network camera‘s default IP address is: 192.168.1.10. 5. Right clicking the device name in the eneo Site Manager will bring up the context menu. Use the ‘Open Device Web Site’ option to access the camera. 6. The web viewer login page will open up in your default web browser. - Page 10 The following requirements apply to passwords: • The password should be 8-15 characters, including letters, numbers or special characters. • 8~9 characters: The combination should consist of at least 3 uppercase letters, lowercase letters, numbers or special characters. • 10~15 characters: The combination should consist of at least 2 uppercase letters, lowercase letters, numbers or special characters.
-
Page 11: Further Information
• the product detail pages on the eneo website (www.eneo-security.com), • the eneo download portal (https://datacloud.videor.com/s/eneodownloadpor- tal). In case that previous link is broken, the latest link to the eneo download portal can be found on the respective eneo product page at www.eneo-security.com. - Page 12 Inhalt Komponenten ......................15 Verbindung ........................16 Installation ..................................17 Deckenmontage ................................18 Installationsmethode .............................. 19 Schnelle Netzwerkkonfiguration ..........................19 Weitere Informationen ....................21...
- Page 13 Sicherheitsanweisungen Sicherheitshinweise allgemein • Bevor Sie das System anschließen und in Betrieb nehmen, lesen Sie zuerst diese Sicherheitshinweise und die Betriebsanleitung. • Bewahren Sie die Betriebsanleitung sorgfältig zur späteren Verwendung auf. • Montage, Inbetriebnahme und Wartung des Systems darf nur durch dafür autorisierte Personen vorgenom- men und entsprechend den Installationsanweisungen - unter Beachtung aller mitgeltenden Normen und Richtlinien - durchgeführt werden.
- Page 14 • Bei abgedunkelter Umgebung und direktem Blick in den IR-Scheinwerfer ist ein Sicherheitsabstand von > 1 m zum Scheinwerfer einzuhalten. • Unsichtbare LED Strahlung nicht direkt mit optischen Instrumenten (z.B. Lupe, Vergrößerungsglas oder Mikroskop) betrachten, da sie eine Augengefährdung verursachen kann, LED Klasse 1M. •...
-
Page 15: Komponenten
Komponenten Das System wird mit den folgenden Komponenten geliefert: • Kamera • Kurze Anleitung... -
Page 16: Verbindung
Verbindung iPhone / iPad Android Smartphone Internet DC 48V Router PoE-Kamera Strom + LAN-EINGANG PoE-Injektor Datenausgang oder PoE-Schalter Smartphone PoE-Kamera PoE-Rekorder Router Achtung: Es gibt zwei Verbindungsmodi: 1. Bei Nicht-PoE-Routern schließen Sie die Kamera über einen PoE-Switch oder einen PoE-Injektor an. 2. -
Page 17: Installation
Installation Wand Bohrschablone Schritt 1: Kleben Sie die Montageschablone an die Wand, bohren Sie 4 Schraubenlöcher und 1 Loch für das Kabel. Wand Spreizdübel Schritt 2: Schlagen Sie die 4 Spreizdübel in die gebohrten Schraubenlöcher. Wand Kamera-Halterung Schrauben Schritt 3: Richten Sie die Kamerahalterung an den 4 Schraubenlöchern aus und ziehen Sie die Schrauben an, um sie zu befestigen. -
Page 18: Deckenmontage
Deckenmontage Wand Bohrschablone Schritt 1: Kleben Sie die Montageschablone an die Wand, bohren Sie 4 Schraubenlöcher und 1 Loch für das Kabel. Wand Spreizdübel Schritt 2: Schlagen Sie die 4 Spreizdübel in die gebohrten Schraubenlöcher. Wand Kamera-Halterung Schrauben Schritt 3: Richten Sie die Kamerahalterung an den 4 Schraubenlöchern aus und ziehen Sie die Schrauben an, um sie zu befestigen. -
Page 19: Installationsmethode
Netzwerk hinzu, um Konflikte aufgrund der identischen IP- Adressen zu vermeiden. Die Standard-IP-Adresse der IP-Kamera ist: 192.168.1.10. 5. Klicken Sie mit der rechten Maustaste auf den Gerätenamen im eneo Site Mana- ger, um das Kontextmenü anzuzeigen. Wählen Sie die Option ‘Open Device Web Site’... - Page 20 Für Passwörter gelten die folgenden Anforderungen: • Das Passwort sollte 8-15 Zeichen lang sein, einschließlich Buchstaben, Zahlen oder Sonderzeichen. • 8~9 Zeichen: Die Kombination sollte aus mindestens 3 Großbuchstaben, Klein- buchstaben, Zahlen oder Sonderzeichen bestehen. • 10~15 Zeichen: Die Kombination sollte aus mindestens 2 Großbuchstaben, Klein- buchstaben, Zahlen oder Sonderzeichen bestehen.
-
Page 21: Weitere Informationen
Bitte halten Sie die Firmware stets aktuell, damit Sie die neuesten Funktionen des Geräts nutzen können. Die aktuellsten Firmware-Versionen finden Sie auf unserer Website unter www.eneo-security.com. Das Benutzerhandbuch und weitere Software-Tools sind auf der eneo Website unter www.eneo-security.com verfügbar. Informationen zu kompatiblen Video Management Software-Lösungen finden Sie in der Kategorie Software unter www.eneo-security.com. - Page 24 VIDEOR E. Hartig GmbH Exclusive distribution through specialised trade channels only. VIDEOR E. Hartig GmbH Carl-Zeiss-Straße 8 63322 Rödermark/Germany Tel. +49 (0) 6074 / 888-0 Technical changes reserved Fax +49 (0) 6074 / 888-100 www.videor.com...
Need help?
Do you have a question about the INP-58M2812M0A and is the answer not in the manual?
Questions and answers