Roland V-Drums TD-8 Owner's Manual
Percussion sound module
Hide thumbs
Also See for V-Drums TD-8:
- Service notes (30 pages) ,
- Release note (2 pages) ,
- Turbostart (2 pages)
Table of Contents
Advertisement
Quick Links
OWNER'S MANUAL
Thank you, and congratulations on your choice of the Roland Percussion Sound
Module TD-8.
Before using this unit, carefully read the sections entitled: "USING THE
UNIT SAFELY" (p. 2–3) and "IMPORTANT NOTES" (p. 4). These sections
provide important information concerning the proper operation of the unit.
Additionally, in order to feel assured that you have gained a good grasp of
every feature provided by your new unit, Owner's manual should be read
in its entirety. The manual should be saved and kept on hand as a
convenient reference.
* All product names mentioned in this document are trademarks or registered trademarks of their
respective owners.
Copyright © 1999 ROLAND CORPORATION
All rights reserved. No part of this publication may be reproduced in any form
without the written permission of ROLAND CORPORATION.
Advertisement
Table of Contents

Related Manuals for Roland V-Drums TD-8


Summary of Contents for Roland V-Drums TD-8
- Page 1 OWNER’S MANUAL Thank you, and congratulations on your choice of the Roland Percussion Sound Module TD-8. Before using this unit, carefully read the sections entitled: “USING THE UNIT SAFELY” (p. 2–3) and “IMPORTANT NOTES” (p. 4). These sections provide important information concerning the proper operation of the unit.
- Page 2 Roland. • When using the unit with a rack or stand recom- mended by Roland, the rack or stand must be carefully placed so it is level and sure to remain stable. If not using a rack or stand, you still need to...
- Page 3 012c • Immediately turn the power off, remove the AC adaptor from the outlet, and request servicing by your retailer, the nearest Roland Service Center, or an authorized Roland distributor, as listed on the “Information” page when: • The AC adaptor or the power-supply cord has been damaged;...
-
Page 4: Important Notes
(including padding) that it came in, if possible. Otherwise, you will need to use equivalent packaging materials. • Use a cable from Roland to make the connection. If using some other make of connection cable, please note the following precautions. -
Page 5: Table Of Contents
Using the [INC/+] and [DEC/-] Buttons and the VALUE Dial... 20 Using [FADERS] and [GROUP FADERS]... 21 Choosing pads from the TD-8 front panel... 22 About the Preset Drum Kits... 22 About the Patterns (Accompaniment of Several Measures) ... 22 About the Display in the Upper Part of the Screen ... - Page 6 Contents Performing...44 Playing Sounds ... 44 Choosing Drum Kits ... 44 Adjusting the Volume ... 45 Adjusting the Sensitivity of a Pad ... 46 Listening to Metronome Clicks [CLICK] ... 48 Turning Effects On and Off ... 50 Modifying a Drum Kit...52 Basics of Creating Sounds ...
- Page 7 Adjusting Drum Sounds (V-EDIT) ... 85 Choosing the Shell Depth ... 85 Choosing the Head Typel ... 86 Tuning the Head ... 86 Making the Settings for Muffling (Muting)... 86 Adjusting the Tension of the Snare Strainer ... 87 Making the Settings for Pitch and Decay (EDIT) ... 88 Chapter 3 Making the Settings for the Studio and Mixer ...89 Making the Settings for the Studio (AMBIENCE) ...
- Page 8 Contents Making the Settings for the Percussion Set... 104 How to Use a Percussion Set ... 104 Choosing a Percussion Set ... 104 Adjusting the Volume and Ambience (AMBIENCE SEND LEVEL)... 104 Copying Percussion Sets ... 104 Choosing a Percussion Instrument... 105 Making the Settings for Each Instrument ...
- Page 9 Specifying the Pad Type (TRIGGER TYPE)... 128 Setting the Pad Sensitivity (BASIC TRIGGER PARAMETERS) ... 129 Fine-tuning the Trigger Parameter Settings (ADVANCED TRIGGER PARAMETERS)... 131 Using the TD-8 with Acoustic Drums (Acoustic Drum Trigger) ... 134 Specifying a Trigger Type... 134 Setting the Trigger Parameters... 134 Adjusting the Contrast of the Display...
- Page 10 Contents Using the TD-8 As a General MIDI Sound Module ... 159 Switching to the GM Mode... 159 To Prevent Switching to GM Mode... 160 Playing Along with a GM Score... 160 MIDI Messages for Precise Expressiveness in Performances ... 161 Messages for Hi-Hat Control...
-
Page 11: How To Use This Manual
This owner’s manual is organized as follows. Quick Start This section is intended for those using the TD-8 for the first time, and explains how to use various functions in a simple way. Please read Quick Start and follow along by actually operating the TD- 8. -
Page 12: Features
Features Offers Variable Drum Modeling Sound Generation Simulates the sound-making process of acoustic drums—The V-Edit Feature (p. 56, p. 85) This makes it possible to create sounds in a manner that is completely analogous to what is done with acoustic drums. For example, you start by choosing the desired head, then you tune it, and then muffling (muting) can be applied. - Page 13 (PD-5, PD-7, PD-9, PD-100, and PD-120), kick trigger units (KD-5, KD-7, and KD-120), and hi- hat control pedal (FD-7) with the TD-8. You can use up to 12 pads at the same time. A Sequencer That’s Easy to Operate A rich array of preset patterns (p.
-
Page 14: Panel Descriptions
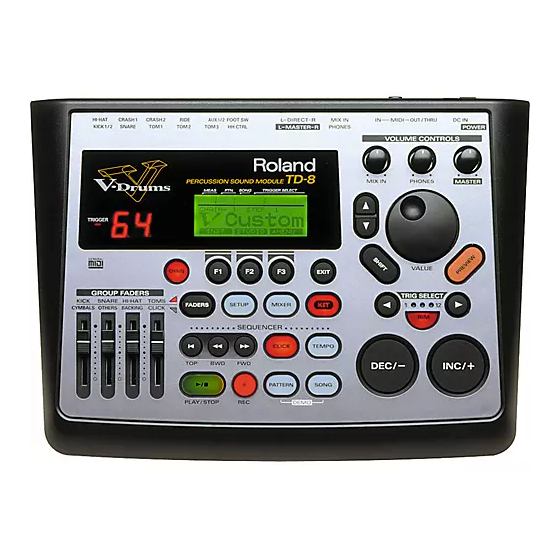
Panel Descriptions Front Panel fig.001 Trigger Indicator • This will light when you strike the pads which connect to trigger input jacks. It allows you to check whether the pad has been connected correctly. • This is lit when MIDI messages are received through the MIDI IN connector (MIDI indicator). -
Page 15: Shift Button
Used to audition an INST (instrument). By using TRIG SELECT buttons to select a pad, you can play and edit sound even if no pads are connected to the TD-8 (p. 22). In addition, when making part settings, you can also listen to the tones used for the backing parts (p. -
Page 16: Rear Panel
8, and are for connection to external audio devices or amps. While we recommend the use of stereo in order to get the most out of the TD-8’s sound performance, if using monaural sound, plug the cable into the MASTER L (MONO) jack only. -
Page 17: Power Switch
MASTER OUTPUT jacks and the PHONES jack. MIDI Connector (IN, OUT/THRU) Use these connectors when playing sounds from the TD-8’s sound generator with an external MIDI sequencer and when loading saved settings data (bulk data) (p. 149). POWER Switch This switch turns the power on/off (p. -
Page 18: Button Operation And Displays
Operations common to all aspects of operating the TD-8. Saving your settings For operations within the TD-8, there is no procedure for “saving settings.” When you modify the value of a setting, the new value is automatically saved as soon as you make the change. If you need to return to the factory settings, you can re-initialize the TD-8 or re-initialize a single patch. -
Page 19: Using The Pop-Up Menus
When the function of these function buttons are shown in the display as follows, the functions will change while you press [SHIFT]. fig.006 Press [SHIFT] 1. Press [SHIFT] + [F1 (PART 2)]. appears in the text, then carry out the operation below. 1. -
Page 20: Using The [Inc/+] And [Dec/-] Buttons And The Value Dial
Button Operation and Displays 3. Press [INC/+] or [DEC/-], rotate VALUE dial, or press CURSOR [ or [ ] to select “FX SW” fig.009 4. Press [F3]. The “FX SW” screen appears. fig.010 Using the [INC/+] and [DEC/-] Buttons and the VALUE Dial [INC/+] and [DEC/-] and the VALUE dial are both used to modify the values of settings. -
Page 21: Using [Faders] And [Group Faders]
Using [FADERS] and [GROUP FADERS] The indicator lights to the left of [FADERS] shows what is being set with the [GROUP FADERS]. fig.012 • When the upper indicator is lit: fig.013 You can adjust the volume of following trigger inputs. [KICK] [SNARE] 1/2 (KICK1/2) -
Page 22: Choosing Pads From The Td-8 Front Panel
The [TRIG SELECT] button is used to select the trigger input number (pad) to be edited with the TD-8. Even with no pad connected, you can still select the trigger input number and edit by pressing this button. When you press the [ ] button, the next lower-numbered trigger will be selected. -
Page 23: About The Display In The Upper Part Of The Screen
About the Display in the Upper Part of the Screen You can check the following at any time in the upper part of the screen. Checking the Selected Pad The currently selected pad is continuously indicated in the upper part of the screen. -
Page 25: Quick Start
Quick Start... -
Page 26: Before You Begin Playing
Narrow Attach the TD-8 to the drum stand (MDS-7U, MDS-8, or MDS-10). For details on assembling the drum stand and attaching the TD-8, refer to the owner’s manual for the drum stand. The TD-8 can be restored to factory settings. Refer to "Restoring Settings to Their... -
Page 27: Connecting Pads And Pedals
Using the provided cables, connect your pads, hi-hat control pedal, and kick trigger units as shown in the diagram. Use the TRIGGER INPUT jack number on the TD-8’s rear panel matching the number in the figure to connect the cable. - Page 28 Before You Begin Playing If you are using the PD-7, PD-9, or KD-7, move the pad’s polarity switch to the “-(Roland)” position. For more detailed information regarding the polarity switch, refer to your PD-7, PD-9, or KD-7 owner’s manual. fig.Q1-003...
-
Page 29: Connecting Your Audio System Or Amp
Before You Begin Playing Audio cable Speakers with built-in amp, etc. Stereo set, etc. AC adaptor jack Be sure that the TD-8’s MASTER L (MONO) and R jacks are connected to the respective L and R jacks on your audio system or amp. -
Page 30: Turning On The Power
Before You Begin Playing Turning on the Power <941> Once the connections have been completed (p. 27–p. 29,) turn on power to your various devices in the order specified. By turning on devices in the wrong order, you risk causing malfunction and/or damage to speakers and other devices. -
Page 31: Turning Off The Power
• Has a mistake been made in switching the external amp’s input? • Is [MASTER] turned completely to the left? Turning Off the Power Completely turn down the volume of the TD-8 and any connected external devices. Turn off the power to all external devices. -
Page 32: Listening To The Demo Song
“LOOP” (repeating) until [PLAY/STOP] is pressed once more. The drums played on the demo songs (except “ANALOG”) were played in real time into a sequencer with the TD-8 system and not programmed on a keyboard or quantized afterwards. fig.Q1-010... - Page 33 Maynard Ferguson, Dizzy Gillespie, T-Lavitz and the Temptations. His contributions to Roland Corporation include factory preset patches and demo songs for many Roland and BOSS products, as well as numerous clinics and demonstrations throughout the world.
-
Page 34: Specifying Pads And Performing
Specifying Pads and Performing Specifying the Types of Pads to Be Connected In order for the TD-8 to accurately receive trigger signals from each pad, you must specify the “trigger type” of each pad connected to the TRIGGER INPUTS. Making Roland Drum System “V-Custom Kit”... - Page 35 Press CURSOR [ ] to move the cursor to the BANK number. Press [INC/+] or [DEC/-] or rotate the VALUE dial to select “1.” fig.Q2-005 If the setting differs from that in the following figure, set the pad using the procedure described in “Specifying Pads Individually” (p. 36). “V-Custom Kit”...
-
Page 36: Specifying Pads Individually
Specifying Pads and Performing Specifying Pads Individually You can make the following settings for each pad, one pad at a time. fig.Q2-008 Press [SETUP]. [SETUP] lights, and the “SETUP” screen appears. fig.Q2-009 Press [F1 (TRIG)]. The “TRIGGER” screen appears. fig.Q2-010 This screen shows a list of the pads specified for each TRIGGER INPUT. - Page 37 Press CURSOR [ ] to move the cursor to the BANK number. fig.Q2-011 Press [INC/+] or [DEC/-] or rotate the VALUE dial to select the BANK number. Press CURSOR [ ] to move the cursor to TRIGGER TYPE. fig.Q2-012 Strike the pad to be set. The cursor moves to the setting value of the pad being struck.
-
Page 38: Setting Head Tension
Specifying Pads and Performing Setting Head Tension When connecting the PD-80, PD-80R, PD-100, or PD-120 to TRIGGER INPUT 3 (SNARE), adjustments are required for accurate detection of the point where the pad is struck. The tension of the head may change when the pad has been used for a length of time. - Page 39 Check to make sure that the TRIGGER TYPE (pad name) for TRIGGER INPUT 3 (SNARE) is either “8 A” (PD-80), “8RA” (PD- 80R), “10A” (PD-100), or “12A” (PD-120). fig.Q2-015.e Press [F3 (H.ADJ)]. The “HEAD TENSION” screen appears. fig.Q2-018 Strike the TRIGGER INPUT 3 (SNARE) pad. The TRIGGER INPUT 3 (SNARE) settings screen appears.
-
Page 40: Checking The Settings
“SCAN TIME” setting, select the “TRIGGER TYPE” again (p. 128). • You cannot adjust the head tension when the TD-8 is set to the brush play (BRUSH SWITCH=ON; p. 80). For details on adjusting the head tension, refer to the PD-80, PD-80R, PD-100, or PD-120 owner’s manual. -
Page 41: Playing The Pads
This section introduces various functions used in performing on the pads. Some of these playing techniques and functions are unique to the TD-8, so please be sure to read this section in order take full advantage of the TD-8’s capabilities. -
Page 42: Cross Stick
Specifying Pads and Performing Cross Stick The sound from a simulated cross stick is available with the PD-80R and PD-120. By selecting specific instrument sounds, you can get the two distinct sounds, rim shot and cross stick. fig.Q2-023a.e When using the PD-80R or PD-120 to play the cross stick sound, be sure that you only strike the rim (outer edge) of the pad. -
Page 43: Playing With Brushes
Playing with Brushes With the TD-8, you can “swish” or “sweep” using brushes with the PD-80, PD-80R, PD-100, or PD-120 connected to TRIGGER INPUT 3 (SNARE). Use ONLY nylon brushes. Not only can metal brushes damage the head, but the brush tips present a great danger of piercing and snagging the fine mesh of the head itself. -
Page 44: Performing
Press [KIT]. The “DRUM KIT” screen appears. fig.Q3-002 Each of the TD-8’s drum kits is comprised of: instrument assignments for each pad, room settings, and mixer settings. Press [INC/+] or [DEC/-] or rotate the VALUE dial to select a kit. -
Page 45: Adjusting The Volume
Adjusting the Volume Adjusting the Volume Balance with the GROUP FADERS fig.Q3-003 Volume levels for the kick drum, snare drum, hi-hat, toms, and cymbals are adjusted with the [GROUP FADERS] sliders [KICK], [SNARE], [HI-HAT], [TOMS], and [CYMBALS], respectively. Percussion parts are adjusted with [OTHERS]. -
Page 46: Adjusting The Sensitivity Of A Pad
Adjusting the Sensitivity of a Pad You may wish to adjust the sensitivity of the pads to accommodate your personal taste and style of performing. Adjusting the TD-8’s sensitivity allows you to change the correlation between your playing velocity (strength) and the response and volume of the sound. - Page 47 Press CURSOR [ ] to move the cursor to “SENSITIVITY.” fig.Q3-008 Strike a pad to select the one whose sensitivity is to be adjusted. The setting screen for the struck pad appears. Press [INC/+] or [DEC/-] or rotate the VALUE dial to adjust the sensitivity.
-
Page 48: Listening To Metronome Clicks [Click]
Performing Listening to Metronome Clicks [CLICK] You can switch the click sound on and off by pressing [CLICK]. fig.Q3-009.e Click is sounded Using Headphones to Hear the Click Sound You can make settings so that the click is heard only through headphones and is not output from the MASTER OUTPUT jacks. - Page 49 Press [F2 (INST)]. The “CLICK INST” screen appears. fig.Q3-012 Press CURSOR [ ] to move the cursor to “OUTPUT.” Press [INC/+] or [DEC/-] or rotate the VALUE dial to select “PHONES.” fig.Q3-013 Press [KIT]. The “DRUM KIT” screen appears. fig.Q3-013a To stop the click sound, press [CLICK].
-
Page 50: Turning Effects On And Off
Performing Turning Effects On and Off fig.Q3-014 Press [KIT]. The “DRUM KIT” screen appears. fig.Q3-015 Press [F3 ( MENU)]. A pop-up menu appears. fig.Q3-016 Press [INC/+] or [DEC/-], rotate the VALUE dial, or press CURSOR ] or [ ] to select “FX SW.” fig.Q3-017 2, 4 1, 6... - Page 51 Press [F3] to confirm your choice. The “FX SW” screen appears. fig.Q3-018 Press [F1] or [F3] to switch the effects on and off. [F1] and [F3] act as effects on and off switches. Press [F1] to turn the ambience on and off; turn the equalizer on and off with [F3]. AMB (Ambience): The size of the room and the type of walls can be adjusted to modify the sound.
-
Page 52: Modifying A Drum Kit
This method creates different drum sounds by modeling the important elements or “character” that make up drum sounds. The concept of the TD-8 focuses on these three major aspects. Actual operation of the unit also follows this concept, with screens for instrument,... - Page 53 Here in this section, listen to the actual sounds created as you modify the sound. fig.Q4-003 Follow the procedures described in “Choosing Drum Kits” (p. 44) to select the drum kit. Here, select the Drum Kit 1, “V Custom.” The “DRUM KIT” screen appears. fig.Q4-002 Strike the pad to listen to the sound of the drum kit.
-
Page 54: Choosing An Drum Instrument
Modifying a Drum Kit Choosing an Drum Instrument fig.Q4-009 Follow the procedures described in “Choosing Drum Kits” (p. 44) to select the drum kit to be edited. Here, select the Drum Kit 1, “V Custom.” The “DRUM KIT” screen appears. fig.Q4-010 Press [F1 (INST)]. - Page 55 Press [INC/+] or [DEC/-] or rotate the VALUE dial to select the instrument. Here, use “MEDIUM4S” for the snare. fig.Q4-016 Press [KIT]. The “DRUM KIT” screen appears. fig.Q4-016a About the Material Used for the snare’s Shell (V-SNARE only) The shell (drum body) material of the instrument being used for the snare is indicated by an icon at the right of the screen.
-
Page 56: Editing Drum Sounds (V-Edit)
Modifying a Drum Kit Editing Drum Sounds (V-EDIT) With the TD-8, the simple process of selecting an instrument, selecting the depth, tuning the head, etc. makes trying out many different sounds very easy. Choosing the Shell Depth Here, select the shell depth for the snare drum. - Page 57 Strike the pad being used for the snare. The snare settings screen appears. fig.Q4-025 Press [F2 (EDIT)]. Press [F1 (SHELL)]. The “SHELL” screen appears. fig.Q4-026 Press CURSOR [ ] to move the cursor to “DEPTH.” Press [INC/+] or [DEC/-] or rotate the VALUE dial to select the shell depth.
-
Page 58: Modifying The Head Type And Tuning
Modifying a Drum Kit Modifying the Head Type and Tuning Now let’s adjust the snare drum head type and tuning. fig.Q4-029 2, 5 Follow the procedures described in “Choosing Drum Kits” (p. 44) to select the drum kit to be edited. Here, select the Drum Kit 1, “V Custom.”... - Page 59 Press [F1 (SHELL)]. The “SHELL” screen appears. fig.Q4-034 Press CURSOR [ ] or [ Press [INC/+] or [DEC/-] or rotate the VALUE dial to select the head type. Here, change this from “CLEAR” to “COATED” and compare the difference in sound. fig.Q4-036 This completes selection of the head material.
-
Page 60: Adjusting The Muffling (Muting) And Strainer Tension
Modifying a Drum Kit Adjusting the Muffling (Muting) and Strainer Tension You can add muffling to the snare drum or adjust the tension of the snare strainer to reduce unwanted overtones or resonances, creating a tighter sound. You can also get the sound of the drum with the strainer completely off (where the snare does not come into contact with the lower head). - Page 61 Press [F2 (MUFFLE)]. The “MUFFLE” screen appears. fig.Q4-044 Press CURSOR [ ] to move the cursor to “MUFFLING.” Press [INC/+] or [DEC/-] or rotate the VALUE dial to select the type of muffling. Here, select “DOUGHNUTS2.” The shell resonance is reduced, resulting in a more closed sound.
-
Page 62: Determine The "Location" Where The Drums Are To Be Played (Ambience)
Modifying a Drum Kit Determine the “Location” Where the Drums are to be Played (AMBIENCE) You can choose different environments where you play the drums. Here, let’s try editing the Ambience setting. First, follow the procedures described in “Turning Effects On and Off”... - Page 63 Press CURSOR [ ] to move the cursor to “TYPE.” Press [INC/+] or [DEC/-] or rotate the VALUE dial to select the studio type. Here, select “STADIUM” and compare the difference in sound. fig.Q4-059 Press [KIT]. The “DRUM KIT” screen appears. fig.Q4-059a Modifying a Drum Kit These settings can be made...
-
Page 64: Adjusting The Volume Balance Of The Instruments [Mixer]
Modifying a Drum Kit Adjusting the Volume Balance of the Instruments [MIXER] fig.Q4-060 Follow the procedures described in “Choosing Drum Kits” (p. 44) to select the drum kit to be edited. Here, select the Drum Kit 1, “V Custom.” The “DRUM KIT” screen appears. fig.Q4-059a Set each of the [GROUP FADERS] sliders [KICK], [SNARE], [HI- HAT], [TOMS], [CYMBALS], and [OTHERS] to the same volume. - Page 65 Strike the pad being used for the snare. The snare settings screen appears. fig.Q4-062 Press CURSOR [ ] to move the cursor to “LEVEL.” Press [INC/+] or [DEC/-] or rotate the VALUE dial to adjust the volume. Press [KIT]. The “DRUM KIT” screen appears. fig.Q4-063a Modifying a Drum Kit You can also select the pad...
-
Page 66: Adjusting The Tone (Master Equalizer)
If you want to change the overall sound, perhaps make it “just a bit brighter” or “a little lighter,” etc., you can use the equalizer to make such adjustments. The TD-8 features a 2-band (high and low) equalizer for each drum kit. - Page 67 Press [F1 (EQ)]. The “MASTER EQ” screen appears. fig.Q4-073 Press CURSOR [ ] to move the cursor to “HIGH GAIN.” Press [INC/+] or [DEC/-] or rotate the VALUE dial to change the value. Here, set this to “+10” and compare the difference in sound. fig.Q4-075 Press [KIT].
-
Page 68: Playing Along With Accompaniment
Playing Along with Accompaniment The TD-8 features a sequencer that can record and play back accompaniment tracks and drum performances. This sequencer contains built-in pattern performances (Preset patterns), allowing you to listen to backing accompaniment while you practice playing the drums. - Page 69 Press [INC/+] or [DEC/-] or rotate the VALUE dial to select the category. Press CURSOR [ ] to move the cursor to PATTERN NAME. Press [INC/+] or [DEC/-] or rotate the VALUE dial to select the pattern. Press [PLAY/STOP]. [PLAY/STOP] lights, and playback of the pattern begins. fig.Q5-004 Press [PLAY/STOP] to stop playback of the pattern.
-
Page 70: Playing Back Songs
Playing Along with Accompaniment Playing Back Songs A number of patterns played in sequence is referred to as a “song.” When a song is played back, the patterns are automatically switched as the song progresses. fig.Q5-011 3, 4 Press [SONG]. [SONG] lights, and the “SONG”... -
Page 71: Adjusting The Volume Of The Accompaniment And Click Sound
Adjusting the Volume of the Accompaniment and Click Sound Now, listen to some patterns and songs until you find a performance and key that you like, then try playing along with the pattern. Have the click sound play, then adjust the volume balance of the drums, backing parts, and the click sound. fig.Q5-005 2, 5 Follow the procedures described in “Choosing Drum Kits”... -
Page 72: Muting The Drums In Patterns And Songs
Playing Along with Accompaniment Muting the Drums in Patterns and Songs You can mute the drum instruments that are played as part of the percussion in patterns and songs. Percussion instruments other than the drums continue to play without change, allowing you to practice performing the drums yourself. - Page 73 Press [F2] to confirm your choice. The “PART MUTE” screen appears. fig.Q5-008 Press [F2 (DRM/PC)]. “DRM/PC” icon is indicated as shown in the figure below, and the drum sounds are muted. fig.Q5-009 Again, press [F2 (DRM/PC)]. The “DRM/PC” icon is cleared as shown below, percussion part sounds are muted.
-
Page 74: Using The Pads To Play Patterns
Using the Pads to Play Patterns In addition to using the pads for conventional drumming, you can also set the pads so that striking a pad will play back a programmed pattern (pad patterns). This function, whereby you can play back the sounds contained in a pattern each time a pad is struck, provides the kind of individualized performances available only with electronic drums. -
Page 75: Playing Along With General Midi Scores
Playing Along with General MIDI Scores The TD-8 features GM mode, allowing it to play back GM scores (music data for GM sound generators) from an External Sequencer. The TD-8 has a function that lets you mute only the drum sounds in GM mode, making this a very useful feature. -
Page 77: Advanced Use
Advanced Use... -
Page 78: Chapter 1 Making The Settings For The Drum Kit
Chapter 1 Making the Settings for the Drum Kit Choosing a Drum Kit 1. Press [KIT]. [KIT] lights, and the “DRUM KIT” screen appears. 2. Press [INC/+] or [DEC/-] or rotate the VALUE dial to select the drum kit. The selected drum kit number is indicated at all times in the LED display at the left of the screen. -
Page 79: Naming The Drum Kit [Name]
Naming the Drum Kit [NAME] Each kit can be given a name of up to 8 characters. fig.02-002 Press [SHIFT] 1. Press [KIT], then [F3 ( MENU)]. [KIT] lights, and a pop-up menu appears. 2. Press [INC/+] or [DEC/-], rotate the VALUE dial, or press CURSOR [ ] or [ ] to move the cursor to... -
Page 80: Playing With Brushes
• Either 233 “BRUSH1 S,” 234 “BRUSH2 S,” 235 “BRUSH3 S,” 239 “BRSHTMBS” must be selected for the instrument. About Brush Trigger Settings Turning the Brush switch on switches the TD-8 to Brush trigger settings. fig.02-004a.e BRUSH SWITCH: ON Brush Trigger Settings... -
Page 81: Adjusting The Pedal Hi-Hat Volume (Pedal Hi-Hat Volume)
Adjusting the Pedal Hi-Hat Volume (PEDAL HI-HAT VOLUME) For each kit, you can adjust the volume of the pedal hi-hat that pertains when the hi-hat control pedal is pressed. The higher the value is set, the greater the volume. With a setting of “0,”... -
Page 82: Chapter 2 Making The Settings For Drum Instruments
• TRIGGER INPUT 2 (KICK2) and 12 (AUX2) can be used only when two pads are connected to TRIGGER INPUT 1/2 (KICK1/2) or 11/12 (AUX2), respectively (p. 27). The following is displayed when independent rim and head settings can be made. TD-8 display screen fig.01-003 fig.01-003b Owner’s Manual fig.hr... -
Page 83: Preventing The Settings Screen From Being Switched (Edit Lock)
[RIM] either stays lit or goes out. Chapter 2 Making the Settings for Drum Instruments Choosing an Instrument On the TD-8, each sound is referred to as an instrument (INST). fig.03-001 1. Press [KIT], then [F1 (INST)]. [KIT] lights, and the “INST” screen appears. -
Page 84: Choosing With List Display
Chapter 2 Making the Settings for Drum Instruments Choosing with List Display Here you can choose the sound from the list of all instruments. fig.03-002 1. First press [KIT], then [F1 (INST)], and then [F1 (LIST)]. [KIT] lights, and the “INST LIST” screen appears. 2. -
Page 85: Adjusting Drum Sounds (V-Edit)
Adjusting Drum Sounds (V-EDIT) V-EDIT and EDIT Methods used for editing kicks, snares, and toms differ according to the type of instrument. V-EDIT This allows you to select a head type, change the shell depth, add muffling, or in the case of the snare drum, you can turn the snares off. -
Page 86: Choosing The Head Typel
Chapter 2 Making the Settings for Drum Instruments Choosing the Head Typel Changing the type of drum head will affect the attack and tone. You can choose from three type of heads: CLEAR, COATED, and PINSTRIPE (PinStripe fig.03-005 Instrument group names that can be edited V-KICK, V-SNARE, V-TOM 1. -
Page 87: Adjusting The Tension Of The Snare Strainer
3. Press CURSOR [ ] to move the cursor to “TUNING.” 4. Press [INC/+] or [DEC/-] or rotate the VALUE dial to make the setting. 5. Press [KIT]. The “DRUM KIT” screen appears. MUFFLING: V-KICK: OFF, TAPE1, TAPE2, BLANKET, WEIGHT V-SNARE: OFF, TAPE1, TAPE2, DOUGHNUTS1, DOUGHNUTS2 V-TOM:... -
Page 88: Making The Settings For Pitch And Decay (Edit)
Chapter 2 Making the Settings for Drum Instruments Making the Settings for Pitch and Decay (EDIT) For instruments other than the V-KICK, V-SNARE, or V- TOM, only pitch and decay can be adjusted. fig.03-009 1. Press [KIT], then [F1 (INST)]. [KIT] lights, and the “INST”... -
Page 89: Chapter 3 Making The Settings For The Studio And Mixer
Determine the “Location” Where the Drums are to be Played (STUDIO) You can select one of some “ambiences” built into the TD-8. Before you make detailed settings, use this setting to select the basic type of acoustic environment in which you will be playing. -
Page 90: Adjusting The Amount Of Ambience For Each Instrument (Ambience Send Level)
Chapter 3 Making the Settings for the Studio and Mixer Adjusting the Amount of Ambience for Each Instrument (AMBIENCE SEND LEVEL) Head settings fig.04-005 Rim settings fig.04-005a 1. First press [KIT], then [F2 (STUDIO)], and then [F2 (AMBSND)]. [KIT] lights, and the “AMBIENCE SEND LEVEL” screen appears. -
Page 91: Adjusting The Sound (Master Equalizer)
Adjusting the Sound (MASTER EQUALIZER) A two-band equalizer (for high and low frequency ranges) is used to adjust the sound of each drum kit. fig.04-006 1. First press [KIT], then [F2 (STUDIO)], and then [F1 (EQ)]. [KIT] lights, and the “EQ” screen appears. 2. -
Page 92: Making The Settings For The Mixer [Mixer]
Chapter 3 Making the Settings for the Studio and Mixer Making the Settings for the Mixer [MIXER] Use a 12-channel mixing console to put the finishing touches on the sound. Press [MIXER] to display the setting screen. fig.04-007 Screen Summary The following, from left to right, is indicated on the screen. -
Page 93: Adjusting The Panning (Stereo Position)
Adjusting the Panning (Stereo Position) Set the pan (localization) for each of the pads. fig.04-009 1. Press [MIXER]. [MIXER] lights, and the “MIXER” screen appears. 2. Press CURSOR [ ] or [ ] to move the cursor to “PAN.” 3. Strike a pad. The cursor moves to the knob for the pad that was struck. -
Page 94: Chapter 4 Playing While Listening To Metronome Clicks
Chapter 4 Playing While Listening to Metronome Clicks Switching the Click On/Off and Setting the Volume Press [CLICK] to toggle the metronome click on/off. To adjust the volume, move the [GROUP FADERS] slider [CLICK]. fig.05-001a.e Click is sounded Click is not sounded Setting the Tempo While playback of a pattern or song is halted, you can use the click as a metronome. -
Page 95: Setting How The Sound Plays (Interval)
Setting How the Sound Plays (Interval) fig.05-003 1. Press [CLICK], then [F1 (INTRVL)]. [CLICK] lights, and the “CLICK INTERVAL” screen appears. 2. Press CURSOR [ ] or [ ] to move the cursor to “INTERVAL.” 3. Press [INC/+] or [DEC/-] or rotate the VALUE dial to make the setting. -
Page 96: Chapter 5 Playing Along With Patterns
Chapter 5 Playing Along with Patterns The TD-8’s sequencer organizes music into six parts. The Drum Kit part is used to record/play back what is played on the pads. Additionally, Part 1, Part 2, Part 3, and Part 4 are the four backing instrument parts (backing parts), and there is another Percussion part. -
Page 97: Using Preset Patterns
The sounds, phrases and patterns contained in this product are sound recordings protected by copyright. Roland hereby grants to purchasers of this product the permission to utilize the sound recordings contained in this product for the creation and recording of original musical works;... -
Page 98: About The "Pattern" Screen
Chapter 5 Playing Along with Patterns About the “PATTERN” Screen fig.06-003 Pattern Number Currently selected pattern number. Measure Number Playback begins from the measure indicated here when [PLAY/STOP] is pressed. Pattern Category Shows the category of the currently selected pattern. Pattern Number and Name Shows the number and name of the currently selected pattern. -
Page 99: Choosing From The Category
Choosing from the Category Selecting the Category in the “PATTERN” Screen fig.06-005 1. Press [PATTERN]. [PATTERN] lights, and the “PATTERN” screen appears. 2. Press CURSOR [ ] to move the cursor to “CATEG.” 3. Press [INC/+] or [DEC/-] or rotate the VALUE dial to select the category. -
Page 100: Setting The Tempo
Chapter 5 Playing Along with Patterns Setting the Tempo Setting the tempo for each pattern When a pattern is selected, the tempo you specify here will be set automatically. Just as is described in the following section, “Temporarily Changing the Tempo of a Pattern During Playback [TEMPO],”... -
Page 101: Settings Example
5. Press CURSOR [ ] to move the cursor to “PLAY TYPE.” 6. Press [INC/+] or [DEC/-] or rotate the VALUE dial to make the setting. 7. Press [PATTERN]. The “PATTERN” screen appears. PLAY TYPE: LOOP, 1SHOT, TAP For more on “QUICK PLAY,” “RESET TIME,” and “TAP EXC SW,”... -
Page 102: Transposing A Pattern (Transpose)
Chapter 5 Playing Along with Patterns Transposing a Pattern (TRANSPOSE) This transposes the key of the pattern. You can set this in the range from -24 (down two octaves) to +24 (up two octaves). fig.06-011 fig.06-012 1. Press [PATTERN], then [F3 ( MENU)]. -
Page 103: Adjusting The Volume, Ambience Send Level, Pan (Placement), And Bend Range
3. Press [INC/+] or [DEC/-] or rotate the VALUE dial to choose the instrument number. 4. Press CURSOR [ ] to move the cursor to instrument name. 5. Press [INC/+] or [DEC/-] or rotate the VALUE dial to choose the instrument name. You can confirm the sound of the selected instrument by pressing [PREVIEW]. -
Page 104: Making The Settings For The Percussion Set
User percussion set settings are altered, the changes are saved automatically. User Percussion Set Use these sets when copying Preset percussion sets and creating new percussion sets. The TD-8 features two User percussion sets. Choosing a Percussion Set Percussion sets cannot be changed in User patterns in which Pattern Lock (p. -
Page 105: Choosing A Percussion Instrument
When data is imported to the TD-8 from an external sequencer (p. 112), the part selected here is recorded. -
Page 106: Muting A Specific Part (Part Mute)
Chapter 5 Playing Along with Patterns 1. Follow the procedures described in “Choosing a Percussion Instrument” (p. 105) to select the instrument to be changed. 2. Press [F3 (EDIT)]. 3. Press CURSOR [ ] or [ ] to move the cursor to the parameter to be set. -
Page 107: Muting A Percussion Part
Muting a Percussion Part There are two types of percussion instruments, drum instruments and percussion instruments. When muting the percussion part, you can choose whether to mute only the drum sounds (with the percussion instrument continuing to sound), or to mute all instruments in the percussion part. Preset pattern (except for Preset Pattern 1) drum sounds are recorded to the percussion parts. -
Page 108: Checking A Part Mute Status In The Pattern Or Song Playback Screen
Hi-Hat Control Pedal is used, and that includes strike position detection rapidly consumes the User memory. For more on how to set the TD-8 so that such performance data is not recorded, refer to “MIDI Messages for Precise Expressiveness in Performances”... - Page 109 If all of the patterns have been used, this can’t be selected. Refer to “Deleting a Pattern [DELETE]” (p. 116) and delete an unwanted pattern before you record. 2. Set the time signature, the number of measures, and the tempo fig.06-034 1.
-
Page 110: Set The Tempo
Chapter 5 Playing Along with Patterns LOOP ALL: The entire pattern will be repeated, and on each pass your performance will be added (“overdubbed”), and mixed with what you did previously. LOOP 1, LOOP 2: This determines the length of the section you are recording, and 1 or 2 measure sections will repeat. -
Page 111: Regularizing The Timing Of Performance Data When Recording (Quantize)
If you have a MIDI keyboard connected, you can use the keyboard to delete notes from the percussion parts and backing parts (Parts 1–4). Use the TD-8 for erasing drum kit parts. 1. Move the cursor to “PART.’ Select either “PERC” or one of the parts from “PART1”... -
Page 112: Adding A Count Sound Before Recording Or Playback (Count In)
Sequencer Data created on another sequencer can be imported via the MIDI IN and recorded on the TD-8’s sequencer. The backing part (Parts 1–4), percussion part, and drum kit part can be imported simultaneously. You will need to make settings for MIDI channels and MIDI synchronization. -
Page 113: Editing A Pattern
Editing a Pattern You can edit user patterns. User patterns in which Pattern Lock (p. 119) set to “ON” cannot be edited. A warning screen appears in the display if you attempt to make such changes in subsequent operations. fig.06-043 For instructions on turning off the Pattern Lock, refer to p. -
Page 114: Copying Part Of A Pattern By Measures
Chapter 5 Playing Along with Patterns Copying Part of a Pattern by Measures You can copy selected measures of a part or pattern. fig.06-047.e DEST • Unlike copying an entire pattern, settings such as instrument and part volume etc. will not be copied; only the performance data will be copied. -
Page 115: Inserting A Blank Measure [Insert]
For more on note numbers and trigger inputs, refer to “NOTE NUMBERS assigned to each TRIGGER INPUTS” (p. 185). For example, to copy all parts from Measure 4 to the end of Measure 6, and then copy this to Measure 1 of the copy destination, specify as shown below. -
Page 116: Deleting A Pattern [Delete]
Chapter 5 Playing Along with Patterns Deleting a Pattern [DELETE] This deletes the pattern performance, beat, measure length, part, and all other settings, creating a empty pattern. fig.06-051a.j fig.06-051b 1. Press [PATTERN], then [F3 ( MENU)]. [PATTERN] lights, and a pop-up menu appears. 2. -
Page 117: Erasing A Pattern [Erase]
MEASURE: ALL, First Measure-Last Measure ALL: This deletes all measures. First Measure: 1–99 This specifies the measure at which deletion begins. Last Measure: 1–99 This specifies the measure at which deletion is to end. For example, to delete the measures from Measure 4 to the end of Measure 6, specify as shown below. -
Page 118: Naming A Pattern [Name]
Chapter 5 Playing Along with Patterns 6. Press [INC/+] or [DEC/-] or rotate the VALUE dial to specify. 7. Press [F3 (EXEC)]. The confirmation screen appears. fig.06-061 8. Again, press [F3 (EXEC)]. Press [F1 (CANCEL)] to cancel the operation. PART: PART1, PART2, PART3, PART4, KIT, PERC, ALL This selects the part from which data is to be erased. -
Page 119: Setting Write Protection For A User Pattern (Pattern Lock)
[SHIFT] + [F3 (SPACE)] The character at the cursor position is replaced by a blank space. The following characters may be used. A–Z, 0–9, !, ”, #, $, %, &, ’, (, ), [, ], *, +, ,, -, ., /, :, ;, , ?, _, Chapter 5 Playing Along with Patterns Setting Write Protection for a... -
Page 120: Chapter 6 Playing Along With Songs
Chapter 6 Playing Along with Songs A set of patterns that are connected in the order of playback is called a “song.” When you play back a song, the patterns will change automatically in sequence, so it will not be necessary for you to select patterns yourself. -
Page 121: Choosing A Song
Choosing a Song 1. Press [SONG]. [SONG] lights, and the “SONG” screen appears. 2. Press [INC/+] or [DEC/-] or rotate the VALUE dial to select the song. About the “SONG” Screen fig.07-002 Song Number Currently selected song number. Pattern Number Pattern number of the currently selected step. -
Page 122: Playing Back A Song
Chapter 6 Playing Along with Songs Playing Back a Song fig.07-004 1. Follow the instructions in “Choosing a Song” (p. 121) to select the song to be played back. 2. Press [PLAY/STOP]. [PLAY/STOP] lights, and playback of the song begins. When you hold down [SHIFT] and press [PLAY/STOP], the song is play back repeatedly (Loop Playback), regardless of the playback method selected in the... -
Page 123: Choosing A Playback Method (Loop, Or One Shot)
4. When you have finished making the settings, press [TEMPO]. The [TEMPO] light goes out, and “TEMPO” screen is removed from the screen. TEMPO: 20–260 Choosing a Playback Method (LOOP, or ONE SHOT) You can select from the following two methods for playing back songs. -
Page 124: Muting A Specific Part (Part Mute)
Chapter 6 Playing Along with Songs Muting a Specific Part (PART MUTE) You can mute the drum instruments that are played as part of the percussion in songs. Allowing you to practice performing the drums yourself. fig.07-005a Press [SHIFT] 1. Press [SONG], then [F2 (MUTE)]. [SONG] lights, and the “PART MUTE”... -
Page 125: Deleting An Unneeded Pattern [Delete]
1. Follow the instructions in “Choosing a Song” (p. 121) to select the song in which the pattern is to be inserted. 2. Press [SONG], then [REC]. [SONG] and [REC] light, and the “SONG REC” screen appears. 3. Press CURSOR [ ] or [ ] to select the step in which the pattern is to be inserted. -
Page 126: Editing A Song
Chapter 6 Playing Along with Songs Editing a Song Copying a Song [COPY] This operation copies a song to a specified location in a different song. If there is already data in the copy-destination song, the song data of the copy destination will be rewritten. In cases where, for example, the number of steps in the copy-source song is greater than the number of steps in the copy-destination song, the number of steps in the... -
Page 127: Naming A Song [Name]
6. Press CURSOR [ ] to move the cursor to “INITIALIZE.” 7. Press [INC/+] or [DEC/-] or rotate the VALUE dial to select the song to be initialized. 8. Press [F3 (EXEC)]. The confirmation screen appears. fig.07-017 9. Again, press [F3 (EXEC)]. Press [F1 (CANCEL)] to cancel the operation. -
Page 128: Chapter 7 Making Global Settings For The Td-8
Specifying the Pad Type (TRIGGER TYPE) So that the TD-8 will be able to accurately receive the signals from the pads or pedals, use the following settings to specify the type of pads that you are using. In addition to the content covered in “Specifying the Types of Pads to Be Connected”... -
Page 129: Setting The Pad Sensitivity (Basic Trigger Parameters)
2 will sound, but signals 1 and 3 will not sound. fig.08-005.e Threshold Level Chapter 7 Making Global Settings for the TD-8 fig.08-006 1. Press [SETUP], then [F1 (TRIG)], and then [F1 (BASIC)]. [SETUP] lights, and the “TRIGGER BASIC” screen appears. - Page 130 Chapter 7 Making Global Settings for the TD-8 CURVE: LINEAR, EXP1, EXP2, LOG1, LOG2, SPLINE, LOUD1, LOUD2 LINEAR: This is the normal setting and most natural correspondence between velocity and volume change. fig.08-008.e Loudness Striking force LINEAR EXP1, EXP2: Compared to Linear, a wider volume change will occur for stronger hits.
-
Page 131: Fine-Tuning The Trigger Parameter Settings (Advanced Trigger Parameters)
INPUT 3 (SNARE) is set to “8 A,” “8RA,” “10A,” or “12A.” • You cannot make the head tension adjustment when the TD-8 is set to the brush play (BRUSH SWITCH=ON; p. 80). • The head tension adjustment does not work correctly when the "SCAN TIME"... - Page 132 Chapter 7 Making Global Settings for the TD-8 RETRIGCANCL (Retrigger Cancel) fig.08-015 Retrigger Sometimes in the case of a snare drum or other drum to which an acoustic drum trigger is attached, sound will occur at point “A” (as desired) but will also occur again at point “B”...
- Page 133 With a setting of “OFF,” crosstalk prevention does no function. Chapter 7 Making Global Settings for the TD-8 CROSS STICK (Cross Stick Sensitivity) When a PD-80R or PD-120 is used for TRIGGER INPUT 3 (SNARE), you can then adjust the Cross Stick Sensitivity.
-
Page 134: Using The Td-8 With Acoustic Drums (Acoustic Drum Trigger)
If notes are unintentionally sounded even after you have adjusted the “CROSSTALK” setting, adjust the “THRESHOLD.” If this parameter is raised excessively, playing softly may NOT trigger the TD-8, so keep the value as low as possible. 11. Set the “CURVE.”... -
Page 135: Adjusting The Contrast Of The Display
Adjusting the Contrast of the Display The display contrast is strongly influenced by the location of the TD-8 and the lighting of the room it’s in. Adjust this parameter when needed. fig.08-020 (LCD CONTRAST) 1. Press [SETUP], then [F3 ( MENU)]. -
Page 136: Checking The Remaining Amount Of Memory
SONG: 0–50/50 (Units) Numerator: Number of songs used Denominator: Total number of songs (50) The TD-8 was programmed with 50 songs when shipped from the factory. If the original settings are restored (Factory Reset; p. 172), “50/50” is displayed for “SONG.”... -
Page 137: Choosing The Output Destination
You can make the selection by pressing CURSOR [ or [ ] and [TRIG SELECT]. Chapter 7 Making Global Settings for the TD-8 • The rim cannot be selected for TRIGGER INPUT 1 (KICK 1), 2 (KICK 2), 11 (AUX 1), or 12 (AUX 2). -
Page 138: Chapter 8 Helpful Features
Changing Kits in the Desired Sequence (DRUM KIT CHAIN) This allows you to step through the drum kits of your choice and in the order you want. The TD-8 lets you create and store 16 different chains of up to 32 steps each. fig.09-001.e... -
Page 139: Playing With A Drum Kit Chain
Playing with a Drum kit Chain fig.09-003a 1. Press [CHAIN]. [CHAIN] lights, and Drum Kit Chain is switched on. 2. Press [CURSOR] [ ] or [ ] to select the chain number to be used. 3. Press [INC/+] or [DEC/-] or rotate the VALUE dial to call up the kits to be used in each selected step in the chain. - Page 140 Chapter 8 Helpful Features 5. Strike a pad. The setting screen for the pad appears. 6. Press CURSOR [ ] to move the cursor to “PATTERN.” You can select the pattern category. Press CURSOR [ to move the cursor to “CATEGORY” and make the selection.
-
Page 141: Changing An Instrument's Pitch With The Hi-Hat Control Pedal (Pitch Control)
Playing Back Patterns with the Velocity Changing in Response to the Strength with Which the Pad is Struck fig.09-004b 1. Confirm that [CHAIN] is not lit. This function cannot be set when the Drum Kit Chain function (p. 138) is on. 2. -
Page 142: Using A Pad To Perform Button Operations (Pad Switch)
Chapter 8 Helpful Features 9. Press [KIT]. The “DRUM KIT” screen appears. PITCH CTRL ASSIGN: OFF, ON OFF: Pitch Control is not active. Pitch Control is active. Setting the Range of Pitch Change (PEDAL PITCH CTRL RANGE) The degree to which the pitch is to change when the hi-hat control pedal is pressed is set in semitone (half-step) increments from -24 (down two octaves) to +24 (up two octaves). - Page 143 11. Press [KIT]. The “DRUM KIT” screen appears. 12. The selected pad functions as a switch when struck. Function Function for the Name pad connected to AUX1 (white plug) (Turn off Pad Switch) KIT SELECT KIT# INC (Call up the next kit) SEQ SELECT SEQ# INC...
-
Page 144: Using A Foot Switch To Perform Button Operations (Foot Switch)
Chapter 8 Helpful Features Using a Foot Switch to Perform Button Operations (FOOT SWITCH) You can use two foot switches (BOSS FS-5U, optional) connected with special cables (PCS-31, optional) to switch drum kits and play back patterns and songs. fig.09-007 Foot switch FS-5U x 2 (PCS-31) o (red plug) -
Page 145: Copying Various Settings
7. Press [INC/+] or [DEC/-] or rotate the VALUE dial to make the setting. “PRESET” refers to the Preset drum kits (the drum kits loaded when the TD-8 was shipped); “USER” refers to drum kits that can be edited. When restoring an edited drum kit to its factory settings, select a Preset drum kit as the copy source. -
Page 146: Copying A Drum-Kit Instrument (Instrument Copy)
7. Press [INC/+] or [DEC/-] or rotate the VALUE dial to make the setting. “PRESET” refers to the Preset drum kits (the drum kits loaded when the TD-8 was shipped); “USER” refers to drum kits that can be edited. When restoring an edited drum kit to its factory settings, select a Preset drum kit as the copy source. -
Page 147: Copying Mixer Settings (Mixer Copy)
7. Press [INC/+] or [DEC/-] or rotate the VALUE dial to make the setting. “PRESET” refers to the Preset drum kits (the drum kits loaded when the TD-8 was shipped); “USER” refers to drum kits that can be edited. When restoring an edited drum kit to its factory settings, select a Preset drum kit as the copy source. -
Page 148: Making Settings For The Preview Button
The volume alternates in this order: “VELOCITY 1,” “VELOCITY 2,” and “VELOCITY 3.” By pressing [PREVIEW] ONLY Plays at the velocity in force the last time [SHIFT] and [PREVIEW] were pressed. When power to the TD-8 is turned on, Preview plays at the volume of “VELOCITY 2.”... -
Page 149: Chapter 9 Features Using Midi
(Bulk dump) Use the pads to play external instruments You can layer sounds on the TD-8 as well as play sounds from MIDI sound modules and samplers (p. 151). Use the TD-8 as a sound module... -
Page 150: Returning Saved Data To The Td-8
Setting the Device ID The setting described here is necessary only when you wish to transmit separate data to two or more TD-8 units at the same time. Do not change this setting in any other case. If you lose track of the Device ID setting that was used when saving data via a bulk dump, it will no longer be possible to reload the bulk data that was saved. -
Page 151: Sounding An External Midi Sound Module By Playing A Pad
Suppose that when data was saved via bulk dump, the TD- 8’s Device ID was set to “17.” When re-transmitting this data back to the TD-8, it won’t receive if the Device ID is set to something other than “17.”... -
Page 152: Note Number
Chapter 9 Features Using MIDI 4. Press [INC/+] or [DEC/-] or rotate the VALUE dial to select the note number. NOTE NUMBER: 0 (C -1) –127 (G 9) For information on factory-set program change settings, refer to “NOTE NUMBERS assigned to each TRIGGER INPUTS” (p. -
Page 153: Setting The Gate Time
This section explains how you can use the Roland SPD-20(a MIDI controller) together with the TD-8’s pads to play internal sounds and an external sound module. 1. Connect the SPD-20, TD-8, and external sound module, etc. fig.10-009.e Pad or pedal... -
Page 154: Making Global Midi Settings For The Td-8
Making Global MIDI Settings for the TD-8 Setting the MIDI Channel for a Part For each part, you can specify the channel on which the TD-8 will receive and transmit MIDI messages. fig.10-011 1. Press [SETUP], and then [F2 (MIDI)]. -
Page 155: Switching Off Local Control
MIDI sequencer. The performance data from the pad, rather than being sent directly to the sound module section (Local Control Off), is first sent to the external sequencer, and then on to the TD-8’s sound module. fig.10-012.e... -
Page 156: Reducing Data Sent From The Fd-7 (Pedal Data Thin)
• If you are playing back music data for GM sound modules on the TD-8, refer to “Using the TD-8 As a General MIDI Sound Module” (p. 159). Use a MIDI cable to connect the TD-8’s MIDI IN to the MIDI OUT connector of an external sequencer, keyboard, etc. fig.10-017.e... -
Page 157: Setting Up The Correspondence Between Pads And Received Note Numbers
Setting Up the Correspondence between Pads and Received Note Numbers Refer to “Specifying the Note Numbers the Pads Send” (p. 151). Changing the Kit Numbers Called Up with Program Change Messages You can freely select the correspondence between Program Change numbers and the drum kits that are called up. fig.10-018 1. -
Page 158: Changing The Percussion Set Numbers Called Up With Program Change Messages
Send the Program Change (PC) and Control Change Bank Select (CC0#, CC32#) from the external MIDI device to the TD-8. For instructions on how to send Bank Select and Program Change from an external MIDI device, refer to the owner’s manual for the external MIDI device. -
Page 159: Using The Td-8 As A General Midi Sound Module
GM System ON message is received When the TD-8 is switched to GM mode, percussion sets for use with the GM system are assigned to Part 10, and all other parts are assigned to PIANO 1. This setting cannot be changed in the TD-8. -
Page 160: To Prevent Switching To Gm Mode
When a “GM System ON message” is received, the TD-8 switches to GM mode. Playing Along with a GM Score Playing Back GM Scores 1. Use a MIDI cable to connect the TD-8’s MIDI IN connector to the MIDI OUT connector of the external sequencer. fig.10-021.e... -
Page 161: Midi Messages For Precise Expressiveness In Performances
MIDI Messages for Precise Expressiveness in Performances Messages for Hi-Hat Control The TD-8’s hi-hat controller also transmits the depth to which the pedal is pressed, using control change messages. By default (factory preset), control change 4 is used. Reception/transmission to/from an external MIDI sequencer will use this number. -
Page 162: Messages For Positional Sensing
In this case, the TD-8 will be the slave and an external sequencer will be master. Use a MIDI cable to connect the MIDI IN of the TD-8 to the MIDI OUT connector of the external device. fig.10-025.e... - Page 163 Synchronizing to the TD-8 In this case, the TD-8 will be the master and an external sequencer will be slave. Use a MIDI cable to connect the MIDI OUT of the TD-8 to the MIDI IN connector of the external device. fig.10-027.e...
-
Page 165: Appendices
Appendices... -
Page 166: Troubleshooting
If playing rim shots on the PD-80R or PD-120, is the pad connected to TRIGGER INPUT 3 (SNARE)? Has the TD-8 been set to not output sounds ? Check the following points. • If you are using brushes, have you selected a special... - Page 167 TD-8’s warm up. Precautions When Turning On the Power When the TD-8 is turned on, it carries out a check of the pads. If you strike a pad or press the pedal anytime during this process, the pads cannot be checked properly, resulting in incorrect functioning of the pads.
-
Page 168: Pad And Pedal Issues
([SETUP] (TRIG)] [F1 (BASIC)]) If you are having difficulty getting good sound using pads from a manufacturer other than Roland, refer to “Setting the Pad Sensitivity (BASIC TRIGGER PARAMETERS)” (p. 129) in “Advanced Use,” then change the trigger parameter settings. -
Page 169: Sequencer-Related Problems
System exclusive data is data unique to individual devices, so verify all settings. In GM mode, No Sound of a Specific Part in a Performance • Is the TD-8 set not to receive MIDI messages? ([SHIFT] + [MIXER]) press CURSOR [ ] or [ ] to select the part and switch the ON/OFF setting (p. -
Page 170: Click Issues
Troubleshooting Sound of Pattern or Song is Different • Have any part settings been changed? ([PATTERN] [F2 ( PART)] [SETUP]) Refer to p. 102 and make the necessary part settings. You can change percussion set instrument settings can be changed, even when the Pattern Lock (p. 119) is set to “ON.” Playback Stops Immediately After Beginning •... -
Page 171: Display-Related Problems
• Is the instrument’s settings screen locked (Edit Lock)? Use [TRIG SELECT] to select another pad. Edit Lock (p. 83) can only be released from the TD-8. Trigger indicators light on their Own • Is a monitor speaker or the like sounding at a high... -
Page 172: Restoring Settings To Their Default Values
Factory Values (Factory Reset) This restores all pad and instrument settings as well as song and pattern data stored in the TD-8 to the settings in effect when the unit was shipped from the factory. All data and settings stored in the TD-8 are lost in carrying out this operation. -
Page 173: How To Use The Acoustic Drum Trigger
When the drum is struck, the TD-8 sounds. If poor quality sound is produced, reposition the drum trigger, and referring to “Using the TD-8 with Acoustic Drums (Acoustic Drum Trigger)” (p. 134), make any necessary adjustments. • So that the acoustic drum trigger does not pick up extraneous vibrations, do not allow it’s cable to contact the rim or shell... -
Page 174: Messages And Error Messages
Error Messages If the TD-8 is not able to operate correctly or if an incorrect operation was performed, a message window will appear in the screen. Read following and take the appropriate action. System and Battery Error Messages SYSTEM ERROR! fig.e-02... - Page 175 99 MEASURE MAXIMUM fig.e-09 The maximum number of measures that can be recorded to one pattern has been exceeded; no further recording or editing that adds measures can be carried out. Delete unneeded measures from the pattern being recorded or edited (p. 116). NOT ENOUGH MEMORY! fig.e-10 Pattern recording or editing could not be carried out...
-
Page 176: About Midi
MIDI keyboard Sound Module When used as a sound module, the TD-8 can receive on up to six of the sixteen MIDI channels (16 channels in GM mode). Sound modules like the TD-8 which can receive multiple MIDI channels simultaneously to play different sounds on each channel are called “multi-timbral sound modules.”... - Page 177 10 priority (p. 154). When using the TD-8 as a GM sound module, the internal sequencer is disabled. Channel 10 Priority (p. 154)
-
Page 179: Preset Drum Kit List
Preset Drum Kit List No. Drum Kit Name Remark V Custom JazzFunk HardRock Sizzle HomeBoy 1ManBand Tekno Pop Xstk *Cross stick Brushes *Brush Voices 11 CongaKit 12 Orch Set 13 Electro LowFi 15 Guitars 16 Drum’nBs 18 TuchDown "Scat" 20 DrumSolo TR-808 TR-909 23 Haunted... -
Page 180: Drum Instrument List
Drum Instrument List NO. NAME REMARK V-KICK DBLHEADK SHARP ACOUS MEAT R8 LOW K R8 DRY K WDBEATRK OPEN VINTAGEK 26"DEEPK THICKHDK ROUND MEDIUM K BIGROOMK BIGLOW K KICK STUDIO1K STUDIO2K STUDIO3K STUDIO4K STUDIO5K STUDIO6K STUDIO7K STUDIO8K BUZZ 1 K BUZZ 2 K BUZZ 3 K BUZZ 4 K... - Page 181 MED8 JAZZ1 T4 FAT3 JAZZ2 T1 FAT3 JAZZ2 T2 FAT4 JAZZ2 T3 FAT4 JAZZ2 T4 DYNAMICS BUZZ1 T1 DYNMC RS BUZZ1 T2 ROLL BUZZ1 T3 BUZZ BUZZ1 T4 DOPIN1 S BUZZ2 T1 DOPIN2 S BUZZ2 T2 REGGAE S BUZZ2 T3 CRUDDY S BUZZ2 T4 DANCE1 S...
- Page 182 Drum Instrument List NO. NAME REMARK 14" 14"EG HH 15" 15"EG HH BRUSH1HH BRUSH2HH SIZZLEHH SIZLE2HH VOICE HH HANDC HH TAMBRNHH MARACSHH TR808 HH TR909 HH CR78 MTL808HH MTL909HH MTL78 HH LOFI1 HH LOFI2 HH CRASH MED14 CR MED16 CR MED18 CR QUIK16CR QUIK18CR...
- Page 183 LOFI HIT PIZICATO HI-Q TEKNOHIT HOO... FUNKHIT1 DAODRILL FUNKHIT2 SCRAPE FUNKHIT3 MARTIAN VOICE COROCORO COROBEND LADY AHH BURT AOOUU! BOING 1 HOOH! BOING 2 HAA! TEKNOBRD SAYYEAH! NANTOKA! YEAH ELECBIRD AHHH MTLBEND1 HAAA MTLBEND2 ACHAA! MTLNOISE NOPE! MTLPHASE LASER MYSTERY BAPDATVS TIMETRIP DOOT...
-
Page 184: Preset Percussion Set List
Preset Percussion Set List 1. STNDRD1 2. STNDRD2 PC65 PC66 VOICES Note No. BS SLIDE GTSCRACH GT SLIDE CUTGTDWN CUTGTUP WAHGTDW1 WAHGTUP1 WAHGTDW2 WAHGTUP2 HI-Q MTL SLAP SCRACH 3 SCRACH 2 STICKS CLICK METROCLK METROBEL STD1 2 K STD2 2 K STD1 1 K STD2 1 K CRSSTK 3... -
Page 185: Drum Kit
7. JAZZ 8. BRUSH PC71 PC72 Note No. BS SLIDE GTSCRACH GT SLIDE CUTGTDWN CUTGTUP WAHGTDW1 WAHGTUP1 WAHGTDW2 WAHGTUP2 HI-Q MTL SLAP SCRACH 3 SCRACH 2 STICKS CLICK METROCLK METROBEL JAZZ 4 K STD2 2 K JAZZ 3 K BRUSH CRSSTK 3 JAZZ 2 S BRSH TAP... -
Page 186: Backing Instrument List
Backing Instrument List CC0 INST NAME VOICES PIANO PIANO 1 PIANO 1W PIANO 1D PIANO 2 PIANO 2W PIANO 3 PIANO 3W HONKY-TONK HONKY-TONK W E. PIANO E.PIANO 1 DETUNED EP 1 60’S E.PIANO FM+SA EP HARD RHODES E.PIANO 2 BRIGHT FM EP CLAVI HARPSICHORD... - Page 187 * To switch instruments from the external MIDI device, send “0” on the CC32# (Control Change Bank Select) from the external MIDI device to the TD-8. * The value of the CC32# (Control Change Bank Select) that the TD-8 transmits is always “0.” BASS & LEAD BIG &...
-
Page 188: Preset Pattern List
Preset Pattern List No. Name Len Tempo Type DRUMS DRUMS 4/4 8 LOOP ROCK BRIT_R-I 4/4 4 LOOP BRIT_R-A BRIT_R-1 BRIT_R-B BRIT_R-2 BRIT_R-E HARD_R-I LOOP HARD_R-A HARD_R-1 HARD_R-B HARD_R-2 HARD_R-E BOOGIE-I 4/4 10 LOOP BOOGIE-A BOOGIE-1 BOOGIE-B BOOGIE-2 BOOGIE-E CYBER1-I 4/4 4 LOOP CYBER1-A CYBER1-1... - Page 189 188 RBGRV1-I 4/4 4 LOOP 189 RBGRV1-A 190 RBGRV1-1 191 RBGRV1-B 192 RBGRV1-2 193 RBGRV1-E 194 RBGRV2-I 4/4 4 LOOP 195 RBGRV2-A 196 RBGRV2-1 197 RBGRV2-B 198 RBGRV2-2 199 RBGRV2-E 200 RBGRV3-I 4/4 4 LOOP 201 RBGRV3-A 202 RBGRV3-1 203 RBGRV3-B 204 RBGRV3-2 205 RBGRV3-E BLUES...
- Page 190 Preset Pattern List No. Name Len Tempo Type FUSION 374 ACID_F-I 4/4 1 LOOP 375 ACID_F-A 376 ACID_F-1 377 ACID_F-B 378 ACID_F-2 379 ACID_F-E 380 SLOW_F-I 4/4 2 LOOP 381 SLOW_F-A 382 SLOW_F-1 383 SLOW_F-B 384 SLOW_F-2 385 SLOW_F-E 386 M’SHFL-I 4/4 4 LOOP 387 M’SHFL-A 388 M’SHFL-1...
- Page 191 566 REGG3 -I 4/4 1 LOOP 567 REGG3 -A 568 REGG3 -1 569 REGG3 -B 570 REGG3 -2 571 REGG3 -E 572 REGG4 -I 4/4 4 LOOP 573 REGG4 -A 574 REGG4 -1 575 REGG4 -B 576 REGG4 -2 577 REGG4 -E 578 SKA -I 4/4 6 LOOP...
-
Page 192: Parameter List
Parameter List Kit Parameters Parameter KIT (p. 44, p. 78) Drum kit NAME (p. 79) Drum kit name BRUSH (p. 80) Brush switch PEDAL HI-HAT VOLUME (p. 81) Pedal hi-hat volume PEDAL PITCH CTRL RANGE (p. 141) Pedal pitch control range CHAIN (p. - Page 193 COPY Parameter COPY (p. 145) Copy mode SRC KIT (p. 145) Source drum kit DST KIT (p. 145) Destination drum kit Refer to “Preset Drum Kit List” (p. 179). INST (INSTRUMENT) Parameter TRIGGER INPUT (p. 146) Trigger input SRC KIT (p. 146) Source drum kit DST KIT (p.
-
Page 194: Trigger Input
Parameter List V-TOM Parameter DEPTH (p. 85) Shell depth HEAD TYPE (p. 86) Head type TUNING (p. 86) Head tuning MUFFLING (p. 86) Muffling ® PinStripe is a registered trademark of Remo Inc., U.S.A. OTHERS Parameter PITCH (p. 88) Pitch DECAY (p. - Page 195 EDIT COPY Parameter SOURCE (p. 113) Source pattern DEST (p. 113) Destination pattern SOURCE PART (p. 113) Source part SOURCE MEAS (p. 113) Source measure DEST PART (p. 113) Destination part DEST MEAS (p. 113) Destination measure Refer to “Preset Pattern List” (p. 188). ALL, KIT, PARC, PART1, PART2, PART3, PART4 This setting cannot be made in GM mode.
-
Page 196: Pattern Recording
Parameter List PART Parameter PART MUTE (p. 72, p. 106, p. 124) Part mute This setting cannot be made in GM mode. PERC (PERCUSSION PART) Parameter PERC SET (p. 104) Percussion set LEVEL (p. 104) Level AMB LEVEL (p. 104) Ambience level COPY (p. -
Page 197: Song Parameters
Song Parameters Parameter SONG (p. 121) Song NAME (p. 127) Song name TEMPO (p. 122) Song tempo PLAY TYPE (p. 123) Play type A–Z, 0–9, !, ”, #, $, %, &, ’, (, ), [, ], *, +, ,, -, ., /, :, ;, This setting cannot be made in GM mode. - Page 198 Parameter List ADVNCD (ADVANCED TRIGGER PARAMETERS) Parameter SCAN TIME (p. 131) Scan time RETRIGCANCL (p. 132) Retrigger cancel MASK TIME (p. 132) Mask time CROSSTALK (p. 133) Crosstalk cancel CROSS STICK (p. 133) Cross stick sensitivity OFF, 20, 25, 30, 35, 40, 45, 50, 55, 60, 65, 70, 75, 80 MIDI Parameter TX/RX CHANNEL (p.
-
Page 199: Click Parameters
Click Parameters Parameter TIME SIGNATURE (p. 94) Time signature INTERVAL (p. 95) Interval INST (p. 95) Click instrument PAN (p. 95) OUTPUT (p. 95) Output VOICE, CLICK, BEEP, METRONOME, CLAVES, WOOD BLOCK, STICKS, CROSS STICK, TRIANGLE, COWBELL, CONGA, TALKING DRUM, MARACAS, CABASA, CUICA, AGOGO, TAMBOURINE, SNAPS, 909 SNARE, 808 COWBELL This setting cannot be made in GM mode. -
Page 200: Midi Implementation
= The value of the parameter specified by RPN. * Only the channel assigned to the backing part can be received. * Not recorded in the sequencer. On the normal mode of TD-8, RPN can be used to modify the following parameters. Data entry MSB LSB... -
Page 201: Channel Mode Messages
Refer to “ Examples of actual MIDI message” <Example 4> (p. 212). On the normal mode of TD-8, RPN can be used to modify the following parameters. Regarding the value of each parameter, refer to Data Entry (Controller number 6). -
Page 202: System Exclusive Message
Data transmission TD-8 can transmit and receive the various parameters using System Exclusive messages. The exclusive message of TD-8’s data has a model ID of 00H 20H and a device ID of 10H (17). Device ID can be changed in TD-8. -
Page 203: Polyphonic Key Pressure
ID number (Roland) Device ID (dev: 00H - 1FH (1-32) Initial value is 10H (17)) 00H 20H Model ID (TD-8) Command ID (RQ1) Address MSB: upper byte of the starting address of the requested data Address 2nd: 2nd byte of the starting address of the requested data... - Page 204 00H - 7FH (0 - 127) 0-63 = OFF 64-127 = ON * Only the channel assigned to the backing part are sent. * Transmitted only when the TD-8 is in play for Pattern in which Hold 1 is recorded. Effect 1 (Reverb Send Level) (Controller number 91)
-
Page 205: System Exclusive Messages
= The value of the parameter specified by RPN. mm = upper byte (MSB), ll = lower byte (LSB) * In the rhythm part (ch.10), ignored this message. On the GM mode of TD-8, RPN can be used to modify the following parameters. MSB LSB 00H 00H... - Page 206 * Regarding the RPN please refer to p. 201. On the GM mode of TD-8, RPN can be used to modify the following parameters. Regarding the value of each parameter, refer to Data Entry (Controller number 6, 38).
- Page 207 “OFF”.(Initial Value is ON) * There must be an interval of at least 50ms between this message and the next. Turn General MIDI System Off When a “GM System Off” is received, the TD-8 is switched to normal mode. Status Data byte...
- Page 208 All the numbers of address, size, Data, and Default Value are indicated in 7-bit Hexadecimal-form. Addresses marked at “#” cannot be used as starting addresses. Parameter Address Block TD-8 (Model ID = 00H 20H) +-----------------------------------------------------------------------+ | Start address | Description...
- Page 209 00 41 | 0aaa aaaa | PROGRAM CHANGE (DRUM KIT 64) 0 - 127 |-------------+-----------+---------------------------------------------| 00 42 | 0aaa aaaa | PROGRAM CHANGE (PRESET PERCUSSION SET 1) 00 4D | 0aaa aaaa | PROGRAM CHANGE (USER PERCUSSION SET 2) |-------------+---------------------------------------------------------| Total size | 00 00 00 4E +-----------------------------------------------------------------------+ *1-1-6 OUTPUT ASSIGN...
- Page 210 MIDI Implementation |-------------+-----------+------+--------------------------------------| 1B | 00aa aaaa | RIM | DECAY |-------------+-----------+------+--------------------------------------| 1C | 0000 aaaa | RIM | PLAY PATTERN NUMBER 1D | 0000 bbbb | | [nibbled] 1E | 0000 cccc | 1F | 0000 dddd | |-------------+-----------+------+--------------------------------------| 20 | 0aaa aaaa | RIM | MIDI GATE TIME 21 | 0aaa aaaa | RIM...
-
Page 211: Supplementary Material
Bulk Dump Bulk Dump allows you to transmit a large amount of data at once, and is convenient for storing settings for the entire unit on a computer or sequencer. For Bulk Dump Request, you must use the Address and Size listed in the following Bulk Dump Request. -
Page 212: About Tuning
Example of an Exclusive message and calculating a Checksum Roland Exclusive messages (RQ1, DT1) are transmitted with a checksum at the end (before F7) to make sure that the message was correctly received. The value of the checksum is determined by the address and data (or size) of the transmitted exclusive message. -
Page 213: Midi Implementation Chart
PERCUSSION SOUND MODULE MIDI Implementation Chart Model TD-8 Function... Basic Default 1–16, OFF Channel Changed 1–16, OFF Default MODE 3 Mode Messages Altered ************** Note 0–127 Number : 0–127 True Voice Note On O 9nH, v = 1–127 Velocity Note Off... - Page 214 PERCUSSION SOUND MODULE Model TD-8 Function... Basic Default Channel Changed Default Mode Messages Altered Note Number : True Voice Note On Velocity Note Off After Key's Touch Channel's Pitch Bend 0, 32 Control Change 100, 101 Program : True Number...
- Page 215 PERCUSSION SOUND MODULE MIDI Implementation Chart Model TD-8 Function... Basic Default Channel Changed Default Mode Messages Altered ************** Note Number : ************** True Voice Note On Velocity Note Off After Key's Touch Channel's Pitch Bend 0, 32 Control Change 100, 101...
-
Page 216: Specifications
Specifications TD-8: Percussion Sound Module (Conforms to General MIDI System) Sound Generator Variable Drum Modeling Maximum Polyphony 64 Voices Instruments Drum Instruments: 1,024 Backing Instruments: 262 Drum Kits Drum Kit Chains 16 chains (32 steps per chain) Effect Types Ambience, 2-Band Master Equalizer... -
Page 217: Block Diagram
Block Diagram DIRECT DIRECT MASTER MASTER... -
Page 218: Index
Index Numerics 1SHOT ...100, 123 AC adaptor jack ...29 Acoustic drum trigger ...134, 173 Attach ...173 Trigger parameter ...134 Trigger type ...134 AMB ...51 AMB GROUP SEND LEVEL ...90 AMB LEVEL ...89, 103–104, 106 Ambience ...51, 62, 89 Ambience group send level ...90 Ambience send level ...90 Level ...89 Room size ...89... - Page 219 Synchronize ...162 Factory reset ...172 FADERS ...21 Foot switch ...144 Function button ...18 GATE TIME ...153 General MIDI sound module GM mode ...159 GM system ON message ...159 Parameter list ...199 Playback GM scores ...160 Reception of MIDI messages ...161 RX GM ON ...160...
- Page 220 Index General MIDI sound module ...159 GM mode ...159 Local control ...155 MIDI channel ...109, 154, 176 MIDI connector ...176 MIDI implementation ...200 Multi-timbral sound module ...176 Note number ...151 Pedal CC ...161 Pedal data thin ...156 Program change ...155 Soft through ...153...
- Page 221 Quick play ...101 Realtime recording ...108 Remaining amount of memory ...136 Reset time ...101 Rewind ...69, 99 Stop ...68, 99 Tap exclusive switch ...101 Tempo ...100, 109 Time signature ...109 Transpose ...102 User pattern ...96 Pattern edit Copy ...113 Delete ...116 Erase ...117 Insert measure ...115 PATTERN LOCK ...119...
- Page 222 Index Play type ...123 Playback ...70 Remaining amount of memory ...136 Rewind ...122 Stop ...70, 122 Tempo ...122 Song create Delete ...125 Insert ...124 Transpose ...125 Song edit Copy ...126 Initialize ...126 Song name ...127 “SONG” screen ...121 SONG TEMPO ...122 SOURCE ...113, 126 SOURCE MEAS ...114 SOURCE PART ...114...
- Page 223 Apparatus containing Lithium batteries ADVARSEL! Lithiumbatteri - Eksplosionsfare ved fejlagtig håndtering. Udskiftning må kun ske med batteri af samme fabrikat og type. Levér det brugte batteri tilbage til leverandøren. ADVARSEL Eksplosjonsfare ved feilaktig skifte av batteri. Benytt samme batteritype eller en tilsvarende type anbefalt av apparatfabrikanten.
- Page 224 Information When you need repair service, call your nearest Roland Service Center or authorized Roland distributor in your country as shown below. SINGAPORE AFRICA AFRICA Swee Lee Company 150 Sims Drive, EGYPT SINGAPORE 387381 TEL: 6846-3676 Al Fanny Trading Office...
Need help?
Do you have a question about the V-Drums TD-8 and is the answer not in the manual?
Questions and answers