Table of Contents
Advertisement
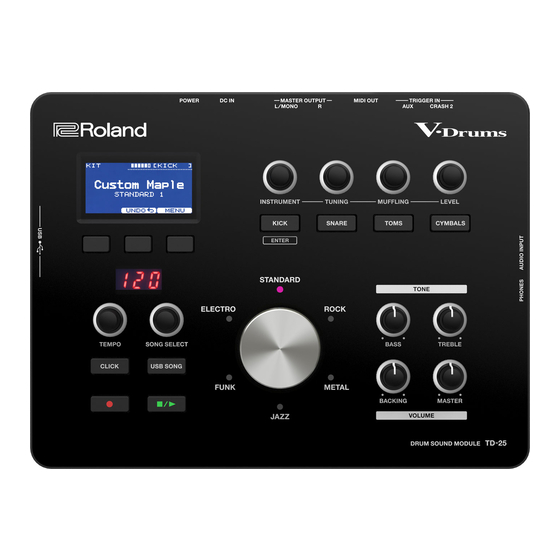
TD-25
V-Drums Sound Module
Owner's Manual (this document)
Read this first. It explains the basic things you need to know in order to use
the TD-25.
PDF Manual (download from the Web)
5 Parameter Guide
This explains all parameters of the TD-25.
5 Sound List
This is a list of the sounds built into the TD-25.
Copyright © 2015 ROLAND CORPORATION
Before using this unit, carefully read "USING THE UNIT SAFELY" and "IMPORTANT NOTES" (leaflet "USING THE UNIT SAFELY" and Owner's Manual (p. 16)). After reading, keep the document(s) including those sections where it will be available for immediate reference.
To obtain the PDF manual
1.
Enter the following URL in your computer.
http://www.roland.com/manuals/
I
2.
Choose "TD-25" as the product name.
Contents
. . . . . . . . . . . . . . . . . . . . . . . . . . . . . . . . . . . . 2
Top Panel . . . . . . . . . . . . . . . . . . . . . . . . . . . . . . . . . . . . . . . . . . . 2
. . . . . . . . . . . . . . . . . . . . . . . . . . . 3
Rear Panel . . . . . . . . . . . . . . . . . . . . . . . . . . . . . . . . . . . . . . . . . . 3
Turning the Power On/Off . . . . . . . . . . . . . . . . . . . . . . . . . . . . 3
. . . . . . . . . . . . . . . . . . . . . . . 4
. . . . . . . . . . . . . . . . . . . . . . . . . . . . . . . . . . . . . 5
Selecting a Drum Kit . . . . . . . . . . . . . . . . . . . . . . . . . . . . . . . . . 5
Checking the Sounds . . . . . . . . . . . . . . . . . . . . . . . . . . . . . . . . 5
. . . . . . . . . . . . . . . . . . . . . . . . . . . . . . . . . . . . . . . . 6
Changing the Sounds (Instrument) . . . . . . . . . . . . . . . . . . . . 6
Adjusting the Instrument . . . . . . . . . . . . . . . . . . . . . . . . . . . . . 6
Canceling the Changes (Undo) . . . . . . . . . . . . . . . . . . . . . . . . 6
. . . . . . . . . . . . . . . . . . . . . . . . . . . . . . . . . . 7
. . . . . . . . . . . . . . . . . . . . . . . . . . . . 7
. . . . . . . . . . . . . . . . . . . . . . . . . . 8
. . . . . . . . . . . . . . . . . . . . . . . . . . . . . . . . . . . . . . . . 8
. . . . . . . . . . . . . . . . . 9
. . . . . . . . . . . . . . . . . . . . 9
. . . . . . . . . . . . . . . . . . . . . . . . . . . . . . . . . 10
Kit Edit . . . . . . . . . . . . . . . . . . . . . . . . . . . . . . . . . . . . . . . . . . . . . 10
Setup . . . . . . . . . . . . . . . . . . . . . . . . . . . . . . . . . . . . . . . . . . . . . . 10
. . . . . . . . . . . . . . . . . . . . . . . . . . . . . . . . . . . 11
Changing the Type of Pad . . . . . . . . . . . . . . . . . . . . . . . . . . . . 11
Adjusting the Sensitivity of the Pad . . . . . . . . . . . . . . . . . . . . 11
. . . . . . . . . . . . . . . . . . . . . . . . . . . . . . . . . 11
. . . . . . . . . . . . . . . . . . . . . . . . . . . . . . . . . . . . . . . 12
. . . . . . . . . . . . . . . . . . . . . . . . . . . . . . . . . . . . . 12
. . . . . . . . . . . . . . . . . . . . . . . . . . . . . . . . . . . . . 13
. . . . . . . . . . . . . . . . . . . . . . . . . . 13
. . . . . . . . . . . . . . . . . . . . . . . . 14
. . . . . . . . . . . . . . . . . . . . . . . . . 14
. . . . . . . . . . . . . . . . . . . . . . . . . . . . . . . . . . . . . . 15
. . . . . . . . . . . . . . . . . . . . . . . . . . . . . . . . . . . . 15
. . . . . . . . . . . . . . . . . . . . . . . . . . . . . . . 16
. . . . . . . . . . . . . . . . . . . . . . . . . . . . . . . . . . . . 16
Advertisement
Table of Contents

Related Manuals for Roland TD-25


Summary of Contents for Roland TD-25
-
Page 1: Table Of Contents
IMPORTANT NOTES This is a list of the sounds built into the TD-25........16 Copyright ©... -
Page 2: Panel Descriptions
Panel Descriptions Top Panel Display [POWER] switch Sound modify This shows various information. Turns the power on/off. These knobs change the instrument and adjust the tuning, muffling, and level. &p. 3 &p. 6 When you turn on the power, the KIT screen appears. -
Page 3: Connecting Your Equipment
Off function). If you do not want the power to be turned off will still be output from the MASTER this jack will be output to the MASTER * Use USB flash drive sold by Roland. We cannot guarantee operation if other automatically, disengage the Auto Off function (p. 14). OUTPUT jacks. -
Page 4: About Performance Techniques
* If you choke an area where there is no sensor, the sound does not stop. Playing with brushes (snare drum only) With the TD-25, you can “swish” or “sweep” using brushes with the mesh head pad connected to TRIGGER INPUT “SNR. ” If you’re using brushes, select an instrument that supports brushes. -
Page 5: Playing The Drums
Playing the Drums KIT Screen Checking the Sounds When you turn on the power, the KIT screen appears in the display. In the KIT screen, press the [KICK] (ENTER), [SNARE], [TOMS], or [CYMBALS] buttons. Strength of the The pad affected by the The display shows the instrument name. -
Page 6: Editing Sounds
Editing Sounds Changing the Sounds (Instrument) Adjusting the Instrument The sound that you hear when you strike a pad is called an instrument. Here’s how to adjust the tuning, muffling, and level of an instrument. You can change each pad’s instrument. In the KIT screen, strike the pad whose instrument you want to adjust. -
Page 7: Playing With The Click
Playing with the Click Using Time Check Function Turning the click on/off This function lets you practice playing accurately along with the click. In the KIT screen, press the [CLICK] button to sound the click. Press the [CLICK] button. The click sounds. Press the [F1] (T. -
Page 8: Recording Your Performance
Copy the audio file to the top level (root) of your USB flash drive. Press the [q/p] button once again to stop recording. * The TD-25 can recognize up to 100 audio files. * The audio file is not recognized if you place it inside a folder. -
Page 9: Record Your Performance With A Song
Connecting to Your Computer/iPad Here’s how you can play the drums along with a song and record your performance. You can connect the TD-25 to your computer or iPad, and use it with an app such as V-Drums Friend Jam or V-Drums Tutor. -
Page 10: Edit Menu Operations
TD-25. In the KIT screen, press the [F3] button. In Setup you can make settings that apply to the entire TD-25. The EDIT MENU screen appears. * For details on setting parameters, refer to “Parameter Guide” (PDF). -
Page 11: Optimizing The Pads
* Set the HI-HAT type to “VH-11” as described in “Changing the Type of Pad” (p. 11). You can select the type of pad you’re using (Pad Type) so the TD-25 will accurately receive the signal from Move the hi-hat cymbal away from the the pad. -
Page 12: Saving A Backup
All settings of the TD-25 can be saved on a USB flash drive. Here’s how to load a backup from a USB flash drive into the TD-25. * Before using a USB flash drive for the first time, you must format it on the TD-25 (p. 13). NOTE Connect the USB flash drive to the TD-25. -
Page 13: Deleting A Backup
NOTE When you execute the format operation, all data on the USB flash drive will be erased. Connect the USB flash drive to the TD-25. Connect the USB flash drive to the TD-25. In the SETUP screen (p. 10), select “Delete Backup.”... -
Page 14: Changing The Auto-Off Setting
In the SETUP screen (p. 10), select “Options.” All data and settings in the TD-25 will be lost. If the TD-25 contains any data or settings that you want to keep, you must save them to a USB flash drive before you proceed (p. 12). -
Page 15: Troubleshooting
WAV file Playback may be unable to keep up if you raise the * Use USB Flash Memory sold by Roland. We cannot guarantee operation if other products are used. playback speed or change the pitch of a high bit-rate of —... -
Page 16: Using The Unit Safely
To protect cord’s plug should be one that is within easy reach and readily data, audio loops and image data) is reserved by Roland yourself against the irretrievable loss of data, try to make a accessible.
Need help?
Do you have a question about the TD-25 and is the answer not in the manual?
Questions and answers