Table of Contents
Advertisement
Quick Links
Before using this unit, carefully read the sections entitled: "USING THE
UNIT SAFELY" and "IMPORTANT NOTES" (p. 3; p. 5). These sections
provide important information concerning the proper operation of the unit.
Additionally, in order to feel assured that you have gained a good grasp of
every feature provided by your new unit, Owner's manual should be read in its
entirety. The manual should be saved and kept on hand as a convenient
reference.
All rights reserved. No part of this publication may be reproduced in any form without the written permission of
ROLAND CORPORATION.
Owner's Manual
Copyright © 1999 ROLAND CORPORATION
Advertisement
Table of Contents

Related Manuals for Roland SC-8820


Summary of Contents for Roland SC-8820
- Page 1 The manual should be saved and kept on hand as a convenient reference. Copyright © 1999 ROLAND CORPORATION All rights reserved. No part of this publication may be reproduced in any form without the written permission of ROLAND CORPORATION.
- Page 3 • Do not attempt to repair the unit, or replace parts within it (except when this manual provides specific instructions directing you to do so). Refer all servicing to your retailer, the nearest Roland Service Center, or an authorized Roland distributor, as listed on the "Information" page.
- Page 4 012c • Immediately turn the power off, remove the AC adaptor from the outlet, and request servicing by your retailer, the nearest Roland Service Center, or an authorized Roland distributor, as listed on the "Information" page when: • The AC adaptor or the power-supply cord has been damaged;...
-
Page 5: Important Notes
(including padding) that it came in, if possible. Otherwise, you will need to use equivalent packaging materials. • Use a cable from Roland to make the connection. If using some other make of connection cable, please note the following precautions. -
Page 6: Main Features
*1 The performance may differ slightly depending on the data. *2 Although the arrangement of sounds in the SC-8850 map and the SC-8820 map are identical, differences in the waveform data that is used, the number of voices used by each sound, and the maximum polyphony of each device may mean that the reproduction may not be perfect. - Page 7 You will need a few other things The SC-8820 has only the minimum buttons and controls required for operation. This means that in order to perform operations such as selecting sounds, you will need to connect a computer or keyboard that has a MIDI interface.
-
Page 8: Table Of Contents
Troubleshooting... 89 About MIDI ... 95 What’s MIDI? ... 95 What is General MIDI 2? ... 96 MIDI Messages That Can Be Received by the SC-8820 ...98 Computer Cable Wiring Diagrams... 106 Instrument List ... 107 Drum Set List... 127 GM 2 Instrument List ... -
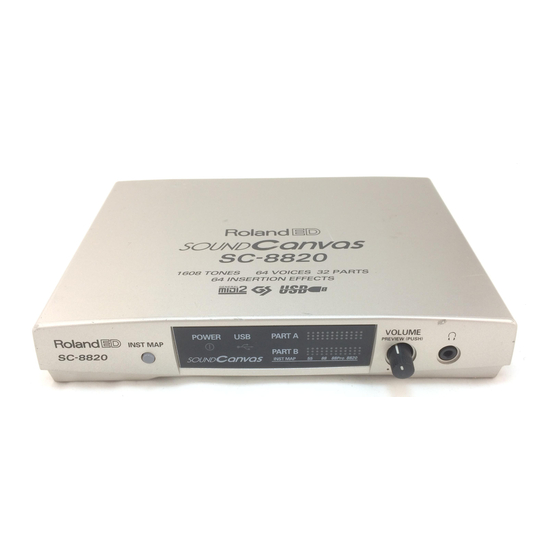
Page 9: Panel Descriptions
Turn the power off before changing the setting of this switch. If you wish to use the MIDI connectors, set this switch to MIDI. When operating on bus power supply, the SC-8820 will operate with the USB setting regardless of the position of the computer switch. -
Page 10: Connecting To Your Computer/Midi Keyboard
Connecting to Your Computer/MIDI Keyboard Connecting to a Computer There are three ways to connect the SC-8820 to your computer; using the USB con- nectors, the MIDI connectors or the Serial connector. You can use up to 32 parts if you use the USB connectors or the Serial connectors, and up to 16 parts if you use the MIDI connectors. - Page 11 Turn off the power of the SC-8820 and set the COMPUTER switch to [USB]. fig.1-1 * When operating on bus power supply, the SC-8820 will operate with the USB setting regardless of the position of the computer switch. Connect the USB cable to the USB connector or USB port of your computer.
-
Page 12: Connecting To A Computer Via The Serial Connector
MIDI keyboard (PC-180, PC-160 etc.) Serial connector Turn off the power of the SC-8820, then set the COMPUTER switch, which is located on the back of the SC-8820. fig.1-5e Apple Macintosh Series Select the “Mac” position if you are using an Apple Macintosh computer, or select the “PC”... -
Page 13: Connecting To A Computer Via The Midi Connectors
* Set the COMPUTER switch located on the back of the SC-8820 to [MIDI]. If you use MIDI cables, the SC-8820 will be limited to a maximum of 16 parts. If you wish to perform using more than 17 parts, use either a USB cable or a computer cable. -
Page 14: How Midi Messages Are Exchanged With A Computer
GM/GS Sound generator Part group B Part B1 - B16 GM/GS Sound generator SC-8820 The number of sound generator Parts that can be controlled using the USB connector or the Serial connector will depend on the software you are using. -
Page 15: Do You Hear Sound
Do You Hear Sound? If the SC-8820 is connected to your computer but you do not hear any sound, this may be due to a variety of reasons. A flow chart has been provided to help you de- termine the problem. -
Page 16: Connecting To Headphones
Audio (Sound Card, CD player etc) OUT PUT Stereo Headphones SC-8820 INPUT Even with headphones connected, the output from the audio output jacks will not be muted. -
Page 17: Connecting To A Midi Keyboard
COMPUTER switch. Be sure to match the L/R Output jacks of the SC-8820 with the L/R input jacks on your audio equipment. If you get them reversed, the sounds you play will be... -
Page 18: Turning The Power On/Off
Once the connections have been completed, turn on power to your various devices in the order specified. Here we will explain how to connect the SC-8820 to an audio reproduction system (stereo set or amplified speakers). If you are using headphones, you may skip the ex- planations regarding operation of your audio reproduction system. -
Page 19: Connecting Another Midi Sound Source To The Sc-8820
SC-8820 Making Connections Use a MIDI cable (sold separately) to connect the SC-8820’s MIDI OUT connector to the MIDI IN connector of the other MIDI sound source. When the COMPUTER switch is set to [SERIAL (PC, Mac)] or [USB] fig.1-10e... -
Page 20: Parts And Sounds
Parts and Sounds The SC-8820 is able to produce 32 different sounds at once. (Used with the USB con- nector and the Serial connector only.) An instrument such as the SC-8820, which can simultaneously produce many sounds from a single unit is called a multitimbral sound generator. -
Page 21: Selecting Basic Sounds (Normal Part)
Selecting Basic Sounds (Normal Part) How to Use the Instrument List Sounds (Instruments) contained in the SC-8820 are in the Instrument List (p.107). Each sound (Instrument) of the SC-8820 has two numbers; an Instrument number and a Variation number. Sounds with Variation number 000 are Capitals, and the sounds with numbers other than 000 are Variations. -
Page 22: Using Midi Messages To Select Instruments From Other Devices Or Sequencing Software
You can specify sounds by inputting the Variation number and the Instrument number (p.21) into your sequencing program, but depending on your software the way in which numbers are displayed may differ, so be aware of this. On the SC-8820, Variation numbers begin with 0, and Instrument numbers begin with 1. - Page 23 Bank Select LSB The SC-8820 processes the lower part of the Bank Select message (LSB) as follows (p.99). Least significant byte (LSB) The INST MAP settings shown on the panel of the SC-8820 will be used. Press the INST MAP button on the panel. When the Inst Map indicator lights to indicate “55,”...
-
Page 24: Selecting Drum Sets (Drum Part)
Each drum sound (Drum Instrument) is assigned to a different note of the Drum set. The Drum Sets of the SC-8820 are listed in the Drum Set List (p.127), which gives the number and name of each sound in each Drum set. -
Page 25: Using Midi Messages To Select Drum Sets From Other Devices Or Sequencing Software
Drum Set name and Drum Set number (Program number) STANDARD 1 ROOM How to change the drum set of a part using MIDI messages <Example> Setting the sound of Part 10 to the SC-8820 map 013 ROOM L/R MIDI CH = 10 CC#00 Selects Variation number 000... -
Page 26: Legato-Enabled Sounds
How the Number of Simultaneous Notes and Voices Are Related On the SC-8820, the sounds are made up of voices, the smallest unit of sound gen- eration. There is a limit to how many of these Voices can sound at once, and in the case of the SC-8820, up to 64 simultaneous voices can be used. -
Page 27: Parameters
(If you are listening to the SC-8820 in mono, pan settings will have no effect.) As the - (minus) value decreases the sound will be placed further left, and as the + (plus) value increases the sound will be placed further right. - Page 28 Parameters Rx. CHANNEL (MIDI channel) Specify the MIDI channel that will be assigned to each part. Parts that are set to OFF will ignore all MIDI messages other than system exclusive messages, meaning that they will not produce sound. USE FOR RHYTHM PART For Parts that are playing conventional instrument sounds, select Normal (Normal mode).
- Page 29 VELOCITY SENSE DEPTH VELOCITY SENSE OFFSET The force with which you play a note on MIDI keyboard is transmitted as MIDI Ve- locity data. Strongly played notes will have a higher velocity value. The Velocity Sense Depth and Velocity Sense Offset parameters determine the relation between the force of the keyboard playing and the loudness of the sound that results.
- Page 30 Parameters KEYBOARD RANGE LOW (Keyboard Range Low) KEYBOARD RANGE HIGH (Keyboard Range High) The Key Range parameters determine the pitch range over which the instrument will be sounded. Keyboard Range Low (the lowest note) and Keyboard Range High (the highest note) will determine the range of notes that will sound. These values are dis- played as key names.
- Page 31 < Equal Temperament > This tuning divides the octave into 12 equal parts, and is the most widely used meth- od of temperament used in Western music. The default setting of the SC-8820’s Scale Tune function is Equal Temperament. < Just Intonation (Tonic of C) >...
- Page 32 Parameters CAf ~ (Channel aftertouch ~) Some MIDI keyboards transmit messages known as aftertouch when pressure is ap- plied to the keyboard after playing a note. Channel aftertouch (also known as channel pressure) transmits only one data value even if two or more notes are being pressed. When a sound generator receives this message, it can modify the sound in various ways.
-
Page 33: Part Parameters For Sound Editing
Part Parameters for Sound Editing On the SC-8820, you can modify the values of a variety of parameters in order to cre- ate the sound most suitable for your playing. Sound parameters affect the volume, timbre and pitch of the sound. - Page 34 By modifying the filter settings, you can control the timbre (tone) of the sound. The type of filters in the SC-8820 are called Low Pass Filters, and allow only frequencies lower than a specified frequency to pass. This frequency is called the Cutoff Frequen- cy.
- Page 35 Envelope The volume of an instrument changes with time, from the moment the note begins to sound to when it disappears. This change can be indicated on a graph as shown in the following diagram. This shape is unique to each instrument, and is an impor- tant element in how we distinguish sounds we hear.
-
Page 36: Parameters Common To All Parts
Master Pan sets the stereo position of the sound for all Parts. (If you are listening to the SC-8820 in mono, pan settings will have no effect.) As the - (minus) value de- creases the sound will be placed further left, and as the + (plus) value increases the sound will be placed further right. - Page 37 How to change the level of a part using MIDI messages <Example> Setting the level of Part 1 to 110 MIDI CH = CC#07 How to change the pan of a part using MIDI messages <Example> Setting the pan of Part 2 to L30 MIDI CH = CC#10 Since L63 is far left, 0 is center, and R63 is far right, it is calculated like this: 64 - 30 = 34...
- Page 38 Parameters To change a Normal Part to a Drum Part using MIDI messages, transmit the follow- ing System Exclusive Message. fig.5-2ae address F0 41 10 42 12 [ 40 1x 15 ] [ Address: 40 1x 15 (USE FOR RHYTHM PART) Part Number Data: 00–02...
-
Page 39: Effects
The effects of the SC-8820 can be categorized into System effects (p.40) and Inser- tion effects (p.47). As System effects, the SC-8820 provides 8 types of reverb to add reverberation to the sound, 8 types of chorus to add depth, 10 types of delay to add echo-like effects, and a 2-band equalizer to modify the tonal character by boosting or cutting the frequency ranges of the sound. -
Page 40: System Effects
Effects System Effects The System effects of the SC-8820 include 8 types of reverb and chorus, and 10 types of delay. In addition, for each of these effects you can specify parameter values such as character, depth, rate, and time. For these effects, you can set the overall level for all Parts and also individual levels for each Part. - Page 41 REVERB TIME (Reverb Time) This parameter sets the time over which the reverberation will continue. Higher val- ues result in longer reverberation. REVERB DELAY FEEDBACK (Reverb Delay Feedback) This parameter is used when the Reverb Character is set to 6 or 7, or the Reverb Type is set to Delay or Panning Delay (Rev Charac.6, 7).
-
Page 42: Chorus Parameters And Their Functions
Effects Chorus Parameters and Their Functions CHORUS MACRO (Chorus Macro) You can choose from 8 types of chorus. Chorus1 Chorus2 Chorus3 These are conventional chorus effects that add spaciousness and depth to the sound. Feedback Chorus This is a chorus with a flanger-like effect and a soft sound. Flanger This is an effect sounding somewhat like a jet airplane taking off and landing. - Page 43 About Chorus Macro When you change the Chorus Macro, the eight chorus parameters will be automatically ad- justed to the optimal values. Rather than individually adjusting each chorus parameter, it is easier to first set the Chorus Macro (listed in the MIDI implementation as p.175), and then modify only those parameters that you wish to modify.
-
Page 44: Delay Parameters And Their Functions
DELAY TIME CENTER (Delay Time Center) The delay effect of the SC-8820 allow you to set three delay times; center, left and right (when listening in stereo). Delay Time Center sets the delay time of the delay located at the center. - Page 45 DELAY SEND LEVEL TO REVERB (Delay Send Level To Reverb) This parameter sets the amount of delay sound that is sent to the reverb. Higher val- ues result in more sound being sent. About Delay Macro When you change the Delay Macro, the above-listed ten Delay parameters will be automat- ically adjusted to the optimal values.
-
Page 46: Equalizer Parameters
Effects Equalizer Parameters EQ LOW FREQ (Equalizer Low Frequency) EQ LOW GAIN (Equalizer Low Gain) EQ HIGH FREQ (Equalizer High Frequency) These parameters set the cutoff frequencies of the ranges boosted or cut by the equal- izer. EQ HIGH GAIN (Equalizer High Gain) Specify the amount of boost or cut (gain) for the high frequency range (high) and the low frequency range (low). -
Page 47: Insertion Effects
Insertion Effects Insertion effects provide 64 effect types. Since appropriate parameters are provided for each effects, you can make fine adjustments to the sound for professional-level control. * For details on System effects and Insertion effects, and on the effect structure of the SC-88ST Pro, refer to p.39 Insertion effects can be applied independently to an individual Part. -
Page 48: Insertion Effect Types
Effects Insertion Effect Types Effect types can be broadly grouped into the following categories. Effects that modify the tone color Effects that distort the sound (distortion type) Effects that modulate the sound (modulation type) Effects that affect the level (compressor type) Effects that broaden the sound (chorus type) Effects that reverberate the sound... - Page 49 00: Thru No effect will be applied. When a GM1 System On, GM2 System On or GS Reset messages (p.102) is received, 00 Thru will be selected for Insertion Effect. Effects that modify the tone color (filter type) 01: Stereo-EQ (Stereo Equalizer) This is a four-band stereo equalizer (low, mid x 2, high).
- Page 50 Effects 03: Enhancer The Enhancer controls the overtone structure of the high frequencies, adding sparkle and tightness to the sound. fig.9-3 Enhancer Enhancer +Sens (Sensitivity) Adjusts the sensitivity of the enhancer. #Mix (Mix Level) Adjusts the proportion by which the overtones generated by the enhancer are combined with the direct sound.
- Page 51 Amp Sw (Amp Switch) Turns the Amp Type on/off. Low Gain Adjusts the gain of the low frequency range. Hi Gain (High Gain) Adjusts the gain of the high frequency range. #Pan (Output Pan) L63–0–R63 [19 (40 03 15)] Adjusts the stereo location of the output sound. L63 is far left, 0 is center, and R63 is far right.
- Page 52 Effects 09: Rotary The Rotary effect simulates the sound of a classic rotary speakers. Since the movement of the high range and low range rotors can be set independently, the unique modulation characteristics of these speakers can be simulated quite reliably. This effect is most suitable for electric organ. fig.9-9 Rotary Low Slow (Low Frequency Slow Rate)
- Page 53 11: Step Flanger The Step Flanger is an effect in which the flanger pitch changes in steps. fig.9-11 Flanger Balance Flanger Pre Dly (Pre Delay Time) Adjusts the time delay from when the direct sound begins until the processed sound is heard. Rate 0.05–10.0 [2 (40 03 04)] Adjusts the rate of modulation.
- Page 54 Effects 13: Auto Pan The Auto Pan effect cyclically modulates the stereo location of the sound. fig.9-14 Auto Pan Auto Pan Mod Wave (Modulation Wave) Tri/Sqr/Sin/Saw1/Saw2 [1 (40 03 03)] Selects the type of modulation. Tri: The sound will be modulated like a triangle wave.
- Page 55 Effects that broaden the sound (chorus type) 16: Hexa Chorus Hexa-chorus uses a six-phase chorus (six layers of chorused sound) to give richness and spatial spread to the sound. fig.9-17 Hexa Balance Chorus Pre Dly (Pre Delay Time) Adjusts the time delay from when the direct sound begins until the processed sound is heard.
- Page 56 Effects 18: Stereo Chorus This is a stereo chorus. A filter is provided so that you can adjust the timbre of the chorus sound. fig.9-19 Chorus Chorus Pre Filter (Pre Filter Type) Off/LPF/HPF [1 (40 03 03)] Selects the type of filter. Off: a filter will not be used LPF:...
- Page 57 Out (Output Mode) Speaker/Phones [15 (40 03 11)] Specifies the method that will be used to hear the sound that is output to the OUTPUT jacks. The optimal 3D effect will be achieved if you select Speaker when using speakers, or Phones when using headphones (p.84).
- Page 58 Effects Dly Tm L (Delay Time Left) Adjusts the time from the original sound until when the left delay sound is heard. Dly Tm R (Delay Time Right) Adjusts the time from the original sound until when the right delay sound is heard. Feedback (Feedback Level) -98%–+98% [3 (40 03 05)] Adjusts the proportion (%) of the processed sound that is...
- Page 59 24: 4 Tap Delay (Quadruple Tap Delay) The Quadruple Tap Delay has four delays. fig.9-27 Level Delay 4 Delay 3 Delay 2 Delay 1 Dly Tm 1 (Delay Time 1) 200–990ms/1sec [1 (40 03 03)] Adjusts the time delay from the direct sound until when the Delay 1 sound is heard.
- Page 60 Effects 26: Reverb The Reverb effect adds reverberation to the sound, simulating an acoustic space. fig.9-29 Reverb Type (ReverbType) Room1/2/Stage1/2/Hall1/2 [1 (40 03 03)] Selects the type of Reverb effect. Room1: dense reverb with short decay Room2: sparse reverb with short decay Stage1: reverb with greater late reverberation Stage2:...
- Page 61 28: 3D Delay This applies a 3D effect to the delay sound. The delay sound will be positioned 90 degrees left and 90 degrees right. fig.9-31 Level 3D Delay L 3D Delay C 3D Delay R Dly Tm C (Delay Time Center) Adjusts the time from the original sound until when the center delay sound begins.
- Page 62 Effects 30: Fb P.Shifter (Feedback Pitch Shifter) This pitch shifter allows the pitch shifted sound to be returned into the effect. fig.9-33 Pitch +P.Coarse (Coarse Pitch) -24–0–+12 [1 (40 03 03)] Adjusts the pitch of the pitch shifted sound in semitone steps (-2–+1 octaves).
- Page 63 32: 3D Manual This places the 3D effect at a desired location. fig.9-35 3D Locate +Azimuth 180/L168–0–R168 [1 (40 03 03)] Specifies the location. A setting of 0 positions the sound in the center. Out (Output Mode) Speaker/Phones [15 (40 03 11)] Specifies the method that will be used to hear the sound that is output to the OUTPUT jacks.
- Page 64 Effects Hum LPF (Hum Noise LPF) 250–6.3 k/Bypass [13 (40 03 0F)] Specifies the cutoff frequency of the low pass filter that is applied to the hum noise. Hum Level (Hum Noise Level) Specifies the volume of the hum noise. M/S (Mono/Stereo Switch) Mono/Stereo [15 (40 03 11)] Selects whether the effect sound will be monaural or stereo.
- Page 65 36: OD Flanger (Overdrive Flanger) This effect connects an overdrive and a flanger in series. fig.9-39 Overdrive Flanger OD Drive (Overdrive Drive) Adjusts the degree of overdrive distortion. The volume will change together with the degree of distortion. +OD Pan (Overdrive Output Pan) L63–0–R63 [2 (40 03 04)] Adjusts the stereo location of the overdrive sound.
- Page 66 Effects 38: DS Chorus (Distortion Chorus) This effect connects a distortion and a chorus in series. fig.9-41 Distortion Chorus DS Drive (Distortion Drive) Adjusts the degree of distortion. The volume will change together with the degree of distortion. +DS Pan (Distortion Output Pan) L63–0–R63 [2 (40 03 04)] Adjusts the stereo location of the distortion sound.
- Page 67 40: DS Delay (Distortion Delay) This effect connects a distortion and a delay in series. fig.9-43 Distortion Delay DS Drive (Distortion Drive) Adjusts the degree of distortion. The volume will change together with the degree of distortion. +DS Pan (Distortion Output Pan) L63–0–R63 [2 (40 03 04)] Adjusts the stereo location of the distortion sound.
- Page 68 Effects 42: EH Flanger (Enhancer Flanger) This effect connects an enhancer and a flanger in series. fig.9-45 Enhancer Flanger Enhancer +EH Sens (Enhancer Sensitivity) Adjusts the sensitivity of the enhancer. EH Mix (Enhancer Mix Level) Adjusts the proportion by which the overtones generated by the enhancer are combined with the direct sound.
- Page 69 44: Cho Delay (Chorus Delay) This effect connects a chorus and a delay unit in series. fig.9-47 Delay Chorus Cho Dly (Chorus Pre Delay) Adjusts the time delay from when the direct sound begins until the chorus sound is heard. Cho Rate (Chorus Rate) 0.05–10.0 [2 (40 03 04)] Adjusts the modulation speed of the chorus effect.
- Page 70 Effects 46: Cho Flanger (Chorus Flanger) This effect connects a chorus and a flanger in series. fig.9-49 Flanger Chorus Cho Dly (Chorus Pre Delay) Adjusts the time delay from when the direct sound begins until the chorus sound is heard. Cho Rate (Chorus Rate) 0.05–10.0 [2 (40 03 04)] Adjusts the modulation speed of the chorus effect.
- Page 71 RT H Slow (RT High Frequency Slow Rate) 0.05–10.0 [12 (40 03 0E)] Adjusts the speed of the high-range rotor for the slow- speed setting. RT H Fast (RT High Frequency Fast Rate) 0.05–10.0 [13 (40 03 0F)] Adjusts the speed of the high-range rotor for the fast-speed setting.
- Page 72 Effects 49: GTR Multi 2 (Guitar Multi 2) Guitar Multi 2 provides Compressor (Cmp), Overdrive or Distortion (OD), Equalizer (EQ), and Chorus or Flanger (CF) effects connected in series. fig.9-52 Cmp (Compressor) Cmp Atck (Compressor Attack) Adjusts the time over which the sound will rise after it is input.
- Page 73 50: GTR Multi 3 (Guitar Multi 3) Guitar Multi 3 connects Wah (Wah), Overdrive or Distortion (OD), Chorus or Flanger (CF), and Delay (Dly) effects in series. fig.9-53 Wah Fil (Wah Filter Type) Selects the type of filter. LPF: The wah effect will be produced over a broad frequency range.
- Page 74 Effects 51: Clean Gt Multi1 (Clean Guitar Multi 1) Clean Guitar Multi 1 connects Compressor (Cmp), Equalizer (EQ), Chorus or Flanger (CF), and Delay (Dly) effects in series. fig.9-54 Cmp (Compressor) Cmp Atck (Compressor Attack) Adjusts the time over which the sound will rise after it is input.
- Page 75 EQ (Equalizer) EQ L Gain (EQ Low Gain) Adjusts the low-range gain of the equalizer. EQ M Fq (EQ Mid Frequency) 200–6.3k [8 (40 03 0A)] Sets the center frequency for the equalizer mid-range. EQ M Q (EQ Mid Q) 0.5/1.0/2.0/4.0/9.0 [9 (40 03 0B)] Adjusts the width of the area centered at the EQ M Fq setting in which the gain will be affected.
- Page 76 Effects EQ (Equalizer) EQ L Gain (EQ Low Gain) -12–+12 [10 (40 03 0C)] Adjusts the low-range gain of the equalizer. EQ M Fq (EQ Mid Frequency) 200–6.3k [11 (40 03 0D)] Sets the center frequency for the equalizer mid-range. EQ M Q (EQ Mid Q) 0.5/1.0/2.0/4.0/9.0 [12 (40 03 0E)] Adjusts the width of the area centered at the EQ M Fq...
- Page 77 The teeth in Saw1 and Saw2 point in opposite directions. fig.9-58 Saw1 Saw2 +TP Mod RT (TP Modulation Rate) 0.05–6.40 [17 (40 03 13)] Adjusts the modulation speed. #TP Mod Dep (TP Modulation Depth) 0–127 [18 (40 03 14)] Adjusts the modulation depth. TP Sw (TP Switch) Turns tremolo or pan on/off.
- Page 78 Effects Effects that connect two types of effect in parallel (parallel 2) Effect types in which two different effects are connected in parallel allow you to apply different effects to L and R independently. By using parallel effects for the sound of two Parts, you can achieve a result as if two separate effect units were used.
- Page 79 57: FL/Delay (Flanger/Delay) This effect connects a flanger and a delay in parallel. fig.9-62 Flanger Balance Delay FL Dly (Flanger Pre Delay) Adjusts the time delay from when the direct sound begins until the flanger sound is heard. FL Rate (Flanger Rate) 0.05–10.0 [2 (40 03 04)] Adjusts the modulation speed of the flanger effect.
- Page 80 Effects 59: OD1/OD2 (Overdrive/Distortion 1, 2) This connects two effect units in parallel, each of which allows you to select Overdrive or Distortion. fig.9-64 Overdrive/ Distortion 1 Overdrive/ Distortion 2 OD1 (Overdrive/Distortion 1) OD1 Sel (OD1 Select) Odrv/Dist [1 (40 03 03)] Selects either Overdrive or Distortion for set 1.
- Page 81 RT H Slow (RT High Frequency Slow Rate) 0.05–10.0 [10 (40 03 0C)] Adjusts the speed of the high-range rotor for the slow- speed setting. RT H Fast (RT High Frequency Fast Rate) 0.05–10.0 [11 (40 03 0D)] Adjusts the speed of the high-range rotor for the fast-speed setting.
- Page 82 Effects 62: OD/Auto Wah (Overdrive/Distortion, Auto-wah)[11H, 06H] This connects an Overdrive or Distortion in parallel with an Auto-wah. fig.9-67 Overdrive/ Distortion Auto Wah OD (Overdrive/Distortion) OD Sel (OD Select) Odrv/Dist [1 (40 03 03)] Selects either Overdrive or Distortion. +OD Drive (OD Drive) Adjusts the degree of overdrive or distortion.
- Page 83 63: PH/Rotary (Phaser, Rotary) This connects a Phaser effect in parallel with a Rotary effect. fig.9-68 Phaser Rotary PH (Phaser) PH Man (Phaser Manual) Adjusts the center frequency at which the sound will be modulated. +PH Rate (Phaser Rate) 0.05–10.0 [2 (40 03 04)] Adjusts the modulation speed of the phaser.
- Page 84 Adjusts the output level. 0–127 [4 (40 03 06)] When using 3D effects The following four 3D effects utilize RSS (Roland Sound Space) technology to create a spaciousness that cannot be 0–127 [5 (40 03 07)] produced by delay, reverb, chorus, etc.
- Page 85 To apply an Insertion Effect to a certain Part using MIDI messages, transmit the fol- lowing System Exclusive Messages in turn. fig.9-72ce address 1. F0 41 10 42 12 [ 40 03 00 ] [ 2. F0 41 10 42 12 [ 40 03 03 ] [ [40 03 20 ] 3.
- Page 86 Effects Examples of Using Effect Controllers Here are some examples of how effect controllers can be used. In these examples MIDI messages are used to modify the settings. Hexadecimal values in the < Settings > sections denote Exclusive messages, and hexa- decimal values in the <...
- Page 87 Using Control Change 16 to modify the Wah Man value of 50:GTR Multi3 < Settings > Turn EFX on for Part 1. F0 41 10 42 12 40 41 22 01 5C F7 Set the effect type to 50: GTR Multi 3 F0 41 10 42 12 40 03 00 04 02 37 F7 Set Wah Man (address: 40H 03H 04H) to 0 (00H).
- Page 88 Effects Using Control Change 17 to modify the Feedback value of 10: Stereo Flanger Example 2:When Effect Control Depth is set to -100 < Settings > Turn EFX on for Part 1. F0 41 10 42 12 40 41 22 01 5C F7 Set the effect type to 10: Stereo Flanger F0 41 10 42 12 40 03 00 01 23 19 F7...
-
Page 89: Appendices
Does not operate on USB bus power supply Depending on how power is supplied to the USB connector of your computer, the SC-8820 may not be able to operate on bus power. If this is the case, use it with the AC adaptor connected. - Page 90 • Refer to the owner's manual of the included CD-ROM, and make the appropriate settings. • If the appropriate MIDI driver is not selected, the SC-8820 will not sound. Check the MIDI output settings of the software you are using.
- Page 91 • Are the output jacks of the SC-8820 correctly connected to the input jacks of your audio device? If the driver is not installed, the SC-8820 will not sound. Refer to the owner's manual of the included CD-ROM, and install the USB driver or serial MIDI driver.
- Page 92 Is USB enabled? Enable USB on your computer. If an unknown device is not detected when you first connect the SC-8820 to your computer via a USB cable, it is possible that the USB interface itself is disabled.Use the following procedure to check whether the USB interface is enabled.
- Page 93 The SC-8820 can play more than 16 parts only when connected via the USB connector or the serial connector. When the SC-8820 is connected via the MIDI connectors, it can play a maximum of 16 parts. Exclusive messages are not received...
- Page 94 EFX ON. Is there a way to automatically initialize every time? The SC-8820 will start up in a GS reset condition when the power is turned on. If an exclusive message that transmits a GS Reset is included at the beginning of a song, the SC-8820 will automatically be reset when a song starts.
-
Page 95: About Midi
Station A Station B Station C The cable from the antenna carries the TV signals from many broadcast stations. The SC-8820 is not equipped with MIDI THRU connector. The TV is set to the channel of the station you wish to watch. -
Page 96: What Is General Midi 2
MIDI functionality of sound modules that would allow certain types of com- patibility between manufacturers. It defines basic sound module specifications such as the number of parts, polyphony, and the sound map. Principle differences between General MIDI 2 and the GS Format (SC-8820) • Initialization message for sound source parameters [GS]... - Page 97 <Example> * The General MIDI 2 sound map differs from the GS format. The SC-8820 will normally operate in the GS format, but if a GM2 System On message is received, it will enter General MIDI 2 mode, and will use the special sound map.
-
Page 98: Midi Messages That Can Be Received By The Sc-8820
Reverb Send Level* Chorus Send Level* Active Sensing MIDI Messages That Can Be Received by the SC-8820 MIDI uses many different types of message to transmit musical performance data, and there are many types of MIDI message. For example, information indicating “which key was played how strongly”... - Page 99 These messages are used to select sounds. Sounds are selected by a Program num- bers 1–128. On the SC-8820, these messages will select sounds (Instruments). By us- ing Bank Select messages (which are a type of Control Change message), an even wider variety of sounds can be selected (p.22).
- Page 100 Appendices Pan (control change number 10) This message controls the stereo position of a Part. (p.27) Hold (1) (control change number 64) This message conveys the up/down movements of the damper pedal, causing the currently sounding notes to be sustained. When a Hold On message is received, notes will be sustained.
- Page 101 Using NRPNs with GS Sound Modules (p.104). With the initial settings, Aftertouch messages will have no effect when received by the SC-8820. In order for Aftertouch messages to do something, you need to set Aftertouch- related parameters. (p.32)
- Page 102 In order to recognize the device for which the data is intended, Roland Exclusive messages contain a manufacturer ID, device ID and model ID. The SC-8820 manufacturer’s ID is 41H. The device ID is 10H. The model ID is 42H. GM1 System On...
- Page 103 GS Reset (GS Format System Exclusive) When a GS Reset is received, the SC-8820 will be set to the basic GS settings. Also, NRPN messages defined by the GS format are recognized after a GS Reset has been received. A GS System Reset message is located at the beginning of song data bear- ing the GS logo.
- Page 104 Controller No. 98: 32 The SC-8820 has thus been made aware that it is the TVF Cutoff Frequency that you are going to change. To go ahead and make the actual change, you would then use the Data Entry Control Change message to supply the new value (xx) for the TVF Cutoff Frequency.
- Page 105 After altering sound parameters using an NRPN, we recommend that you make a habit of asserting a null by sending the RPN values shown below. This will tell the SC-8820 that you are finished working with the parameter that has been specified, and that it should stop waiting for any further new values for that parameter.
-
Page 106: Computer Cable Wiring Diagrams
Appendices Computer Cable Wiring Diagrams fig.11-5e For Apple Macintosh (Sold separately: RSC-15APL) mini DIN, 8-pin, male 6 7 8 3 4 5 For PC (9-pin) (Sold separately: RSC-15AT) mini DIN, 8-pin, male 6 7 8 3 4 5 For PC (25-pin) mini DIN, 8-pin, male 6 7 8 3 4 5... -
Page 107: Instrument List
Instrument List Piano CC00 SC-8820 Map Voices Piano 1 [Pro] UprightPiano Mild Piano Upright P w Mild Piano w European Pf [Pro] Piano + Str. [Pro] Piano + Str2 Piano+Choir1 Piano+Choir2 Piano 2 [Pro] Pop Piano Rock Piano Pop Piano w... - Page 108 Appendices Chromatic percussion CC00 SC-8820 Map Voices Celesta [Pro] Pop Celesta [Pro] Glockenspiel [Pro] Music Box [Pro] Music Box 2 St.Music Box Vibraphone [Pro] Pop Vibe. [Pro] Vibraphone w [Pro] Vibraphones [Pro] Marimba [Pro] Marimba w [Pro] Barafon [Pro] Barafon 2...
- Page 109 Organ CC00 SC-8820 Map Voices Organ 1 [Pro] Organ 101 [Pro] Ful Organ 1 Ful Organ 2 Ful Organ 3 Ful Organ 4 Ful Organ 5 Ful Organ 6 Trem. Organ [Pro] Organ o [Pro] Ful Organ 7 Ful Organ 8...
- Page 110 Appendices Guitar CC00 SC-8820 Map Voices Nylon-str.Gt [Pro] Ukulele [Pro] Nylon Gt.o [Pro] Velo Harmnix [Pro] Nylon Gt.2 [Pro] Lequint Gt. [Pro] Steel-str.Gt [Pro] 12-str.Gt [Pro] Nylon+Steel [Pro] Atk Steel Gt Mandolin [Pro] Mandolin 2 [Pro] MandolinTrem [Pro] Steel Gt.2...
- Page 111 Bass CC00 SC-8820 Map Voices Acoustic Bs. Rockabilly [Pro] Wild A.Bass [Pro] Atk A.Bass Bass + OHH [Pro] Fingered Bs. [Pro] Fingered Bs2 [Pro] Jazz Bass [Pro] Jazz Bass 2 [Pro] Rock Bass [Pro] Heart Bass AttackFinger Finger Slap ChorusJazzBs [Pro] F.Bass/Harm.
- Page 112 Appendices CC00 SC-8820 Map Voices Synth Bass 2 [Pro] SynthBass201 [Pro] Modular Bass [Pro] Seq Bass [Pro] MG Bass [Pro] Mg Oct Bass1 [Pro] MG Oct Bass2 [Pro] MG Blip Bs: [Pro] Beef FM Bass [Pro] Dly Bass [Pro] X Wire Bass...
- Page 113 Ensemble CC00 SC-8820 Map Voices Strings : [Pro] Bright Str: [Pro] ChamberStr : [Pro] Cello sect. [Pro] Bright Str.2 Bright Str.3 Quad Strings Mild Strings Orchestra [Pro] Orchestra 2 [Pro] Tremolo Orch [Pro] Choir Str. [Pro] Strings+Horn [Pro] Str.+Flute Choir Str.2 Choir Str.3...
- Page 114 Appendices CC00 SC-8820 Map Voices Voice Oohs Chorus Oohs Voice Oohs 2 Chorus Oohs2 OohsCodeMaj7 OohsCodeSus4 Jazz Scat Voice Dahs [Pro] JzVoice Dat JzVoice Bap JzVoice Dow JzVoice Thum VoiceLah Fem ChorusLahFem VoiceLuh Fem ChorusLuhFem VoiceLan Fem ChorusLanFem VoiceAah Fem VoiceUuh Fem Fem Lah&Lan...
- Page 115 Brass CC00 SC-8820 Map Voices Trumpet [Pro] Trumpet 2 [Pro] Trumpet : [Pro] Dark Trumpet Trumpet & Nz Flugel Horn [Pro] 4th Trumpets [Pro] Bright Tp. [Pro] Warm Tp. [Pro] Warm Tp.2 Twin Tp. Syn. Trumpet [Pro] Trombone [Pro] Trombone 2...
- Page 116 Appendices CC00 SC-8820 Map Voices Synth Brass2 [Pro] Soft Brass [Pro] Warm Brass [Pro] Synth Brass3 Sync Brass Fat SynBrass DeepSynBrass SynBrass sfz [Pro] OB Brass [Pro] Reso Brass [Pro] DistSqrBrass JP8000SawBrs Velo Brass 1 [Pro] Transbrass [Pro] Reed CC00...
- Page 117 Pipe CC00 SC-8820 Map Voices Piccolo [Pro] Piccolo : [Pro] [Pro] Nay Tremolo [Pro] [Pro] Flute [Pro] Flute 2 : [Pro] Flute Exp. [Pro] Flt Travelso [Pro] Flute + Vln [Pro] Pipe & Reed Tron Flute [Pro] Indian Flute Recorder...
- Page 118 Appendices CC00 SC-8820 Map Voices Saw Wave [Pro] OB2 Saw [Pro] Pulse Saw [Pro] Feline GR [Pro] Big Lead [Pro] Velo Lead [Pro] GR-300 [Pro] LA Saw [Pro] Doctor Solo [Pro] Fat Saw Lead [Pro] JP8000 Saw D-50 Fat Saw...
- Page 119 CC00 SC-8820 Map Voices Solo Vox [Pro] Solo Vox 2 Vox Lead [Pro] LFO Vox [Pro] Vox Lead 2 5th Saw Wave [Pro] Big Fives [Pro] 5th Lead [Pro] 5th Ana.Clav [Pro] 5th Pulse JP 5th Saw JP8000 5thFB 4th Lead [Pro] Bass &...
- Page 120 Appendices CC00 SC-8820 Map Voices Bowed Glass [Pro] SoftBellPad [Pro] JP8 Sqr Pad [Pro] 7thBelPad [Pro] Steel Glass Bottle Stack Metal Pad [Pro] Tine Pad [Pro] Panner Pad [Pro] Steel Pad Special Rave Metal Pad 2 Halo Pad [Pro] Vox Pad...
- Page 121 CC00 SC-8820 Map Voices Atmosphere [Pro] Warm Atmos [Pro] Nylon Harp [Pro] Harpvox [Pro] HollowReleas [Pro] Nylon+Rhodes [Pro] Ambient Pad [Pro] Invisible [Pro] Pulsey Key [Pro] Noise Piano [Pro] Heaven Atmos Tambra Atmos Brightness [Pro] Shining Star [Pro] OB Stab...
- Page 122 Appendices Ethnic, etc CC00 SC-8820 Map Voices Sitar [Pro] Sitar 2 [Pro] Detune Sitar [Pro] Sitar 3 [Pro] Sitar/Drone Sitar 4 Tambra [Pro] Tamboura [Pro] Banjo [Pro] Muted Banjo [Pro] Rabab [Pro] San Xian [Pro] Gopichant [Pro] [Pro] Oud+Strings [Pro]...
- Page 123 CC00 SC-8820 Map Voices Agogo [Pro] Atarigane [Pro] Tambourine [Pro] + Steel Drums [Pro] Island Mlt [Pro] Woodblock [Pro] + Castanets [Pro] + Angklung [Pro] Angkl Rhythm [Pro] Finger Snaps [Pro] + 909 HandClap [Pro] + HandClapMenu Taiko [Pro] +...
- Page 124 Appendices CC00 SC-8820 Map Voices Gt.FretNoise [Pro] Gt.Cut Noise [Pro] + String Slap [Pro] + Gt.CutNoise2 [Pro] + Dist.CutNoiz [Pro] + Bass Slide [Pro] + Pick Scrape [Pro] + Gt. FX Menu [Pro] Bartok Pizz. [Pro] Guitar Slap [Pro] +...
- Page 125 CC00 SC-8820 Map Voices Telephone 1 [Pro] + Telephone 2 [Pro] + DoorCreaking [Pro] + Door [Pro] + Scratch [Pro] + Wind Chimes [Pro] + Scratch 2 [Pro] + ScratchKey [Pro] + TapeRewind [Pro] + Phono Noise [Pro] + MC-500 Beep...
- Page 126 Appendices SC-55 Map (CM-64 Sound Map) CM-64 (PCM) CC00 Instrument Voices Piano 2 Piano 2 Piano 2 Honky-tonk Piano 1 Piano 2 Piano 2 E.Piano 1 Detuned EP1 E.Piano 2 Steel Gt. Steel Gt. 12-str.Gt Funk Gt. Muted Gt. Slap Bass 1 Slap Bass 1 Slap Bass 1 Slap Bass 1...
-
Page 127: Drum Set List
Drum Set List The drum sets of this unit are organized as follows. The SC-8820 map has 37 types, the SC-88Pro map has 25 types, the SC-88 map has 14 types, the SC-55 map has 10 types. SC-8820 map STANDARD 1... - Page 128 <– Room Snare 1 Room Snare 2 [Pro] : Same as the percussion sound of SC-8820 [88] : Same as the percussion sound of SC-88 [55] : Same as the percussion sound of SC-55 [EXC] : Percussion sound of the same number will not be heard at the same time.
- Page 129 SC-8820 Drum Set (2) * About Notes 0–21, and 95–127, refer to p.137. PC 11 PC 12 JUNGLE TECHNO <– <– <– <– <– <– <– <– <– <– <– <– <– <– Scratch Push 2 [EXC7] Scratch Push 2...
- Page 130 <– Small Club 1 Small Club 1 [Pro] : Same as the percussion sound of SC-8820 [88] : Same as the percussion sound of SC-88 [55] : Same as the percussion sound of SC-55 [EXC] : Percussion sound of the same number will not be heard at the same time.
- Page 131 SC-8820 Drum Set (4) * About Notes 0–21, and 95–127, refer to p.138. PC 30 PC 31 TR-707 [ Pro ] TR-909 <– <– <– <– <– <– <– <– <– <– <– <– <– <– Scratch Push 2 [EXC7]...
- Page 132 Applause [L] Brush Kick 2 [L] Brush Kick 1 [Pro] : Same as the percussion sound of SC-8820 [88] : Same as the percussion sound of SC-88 [55] : Same as the percussion sound of SC-55 [EXC] : Percussion sound of the same number will not be heard at the same time.
- Page 133 SC-8820 Drum Set (6) * About Notes 0–21, and 95–127, refer to p.139. PC 52 PC 53 KICK & SNARE 2 ASIA [Pro] CR-78 Kick 1 Gamelan Gong 1 [Pro] CR-78 Kick 2 Gamelan Gong 2 [Pro] TR-606 Kick Gamelan Gong 3...
- Page 134 Eruption Big Shot Percussion Bang [Pro] : Same as the percussion sound of SC-8820 [88] : Same as the percussion sound of SC-88 [55] : Same as the percussion sound of SC-55 [EXC] : Percussion sound of the same number will not be heard at the same time.
- Page 135 SC-8820 Drum Set (8) PC 61 SFX 2 Acoustic Bass Mute Noise Acoustic Bass Touch Noise Acoustic Bass Attack Noise Distortion Guitar Mute Noise Steel Guitar Slide Noise 1 Steel Guitar Slide Noise 2 Steel Guitar Slide Noise 3 Steel Guitar Slide Noise 4...
- Page 136 <– [Pro] House Snare 2 <– [Pro] : Same as the percussion sound of SC-8820 [88] : Same as the percussion sound of SC-88 [55] : Same as the percussion sound of SC-55 [EXC] : Percussion sound of the same number will not be heard at the same time.
- Page 137 SC-8820 Drum Set (10) * Notes 0–21 and 95–127 are as follows. PC 11 PC 12 JUNGLE TECHNO [88] Electric Kick 2 [88] Electric Kick 2 [88] Electric Kick 1 [88] Electric Kick 1 [Pro] CR-78 Kick 1 [Pro] CR-78 Kick 1...
- Page 138 Voice Tah [88] Slappy [88] Slappy [Pro] : Same as the percussion sound of SC-8820 [88] : Same as the percussion sound of SC-88 [55] : Same as the percussion sound of SC-55 [EXC] : Percussion sound of the same number will not be heard at the same time.
- Page 139 SC-8820 Drum Set (12) * Notes 0–21 and 95–127 are as follows. PC 42 PC 43 BRUSH 2 BRUSH 2 L/R <– <– <– <– <– <– <– <– <– <– <– <– <– <– <– <– <– <– <–...
- Page 140 Reverse Keyboard Typing 4 Reverse Keyboard Typing 5 Reverse Keyboard Typing 6 [Pro] : Same as the percussion sound of SC-8820 PC : Program Number (Drum Set Number) [88] : Same as the percussion sound of SC-88 <– : Same as the percussion sound of [55] : Same as the percussion sound of SC-55 "STANDARD1"(PC1).
- Page 141 SC-88Pro Drum Set (1) * About Notes 0-19 and 97-127, refer to p.147. STANDARD 1 STANDARD 2 MC-500 Beep 1 <– MC-500 Beep 2 <– Concert SD <– Snare Roll <– Finger Snap 2 Finger Snap High Q <– Slap <–...
- Page 142 Small Club 1 <– ---- [Pro] : Same as the percussion sound of SC-8820 [88] : Same as the percussion sound of SC-88 [55] : Same as the percussion sound of SC-55 [EXC] : Percussion sound of the same number will not be heard at the same time.
- Page 143 SC-88Pro Drum Set (3) * About Notes 0-19 and 97-127, refer to p.147. PC 27 PC 28 DANCE CR-78 <– <– <– <– <– <– <– <– Finger Snap 2 <– <– <– <– <– Scratch Push 2 [EXC7] Scratch Push 2 Scratch Pull 2 [EXC7] Scratch Pull 2...
- Page 144 <– <– <– Applause [Pro] : Same as the percussion sound of SC-8820 [88] : Same as the percussion sound of SC-88 [55] : Same as the percussion sound of SC-55 [EXC] : Percussion sound of the same number will not be heard at the same time.
- Page 145 SC-88Pro Drum Set (5) * About Notes 0-19 and 97-127, refer to p.147. PC 50 PC 51 ETHNIC [88] KICK & SNARE Finger Snap CR-78 Kick 1 Tambourine CR-78 Kick 2 Castanets TR-606 Kick Crash Cymbal 1 TR-707 Kick Snare Roll TR-808 Kick 1 Concert SD TR-909 Kick 1...
- Page 146 Eruption Big Shot Percussion Bang [Pro] : Same as the percussion sound of SC-8820 [88] : Same as the percussion sound of SC-88 [55] : Same as the percussion sound of SC-55 [EXC] : Percussion sound of the same number...
- Page 147 SC-88Pro Drum Set (7) * Notes 0–19 and 97–127 are as follows. PC 10 Hip-Hop PC 11 JUNGLE PC 12 TECHNO PC 25 ELECTRONIC PC 26 TR-808 PC 1 STANDARD 1 PC 27 DANCE PC 2 STANDARD 2 PC 28 CR-78 PC 3 STANDARD 3 PC 29 TR-606...
- Page 148 ---- ---- ---- ---- [Pro] : Same as the percussion sound of SC-8820 [88] : Same as the percussion sound of SC-88 [55] : Same as the percussion sound of SC-55 [EXC] : Percussion sound of the same number will not be heard at the same time.
- Page 149 SC-88 Drum Set (2) PC 26 PC 27 TR-808/909 DANCE <– <– <– <– <– <– <– <– Scratch Push2 [EXC7] Scratch Push2 Scratch Pull2 [EXC7] Scratch Pull2 <– <– <– <– <– <– <– <– 909 Bass Drum Dance Kick 808 Bass Drum Electric Kick 2 808 Rim Shot...
- Page 150 ---- Low Wood Block ---- [Pro] : Same as the percussion sound of SC-8820 [88] : Same as the percussion sound of SC-88 [55] : Same as the percussion sound of SC-55 [EXC] : Percussion sound of the same number will not be heard at the same time.
- Page 151 SC-55 Drum Set (1) PC 1 / PC 33 PC 9 STANDARD / JAZZ ROOM ---- ---- ---- ---- High Q <– Slap <– Scratch Push <– Scratch Pull <– Sticks <– Square Click <– Metronome Click <– Metronome Bell <–...
- Page 152 ---- ---- ---- ---- [Pro] : Same as the percussion sound of SC-8820 [88] : Same as the percussion sound of SC-88 [55] : Same as the percussion sound of SC-55 [EXC] : Percussion sound of the same number PC 128...
-
Page 153: Gm 2 Instrument List
GM 2 Instrument List The SC-8820 receives Initialize for General MIDI 2 (GM2 System On) message. CC32 Tone Name Piano Piano 1 Piano 1w European Pf Piano 2 Piano 2w Piano 3 Piano 3w Honky-tonk Honky-tonk 2 E.Piano 1 St.Soft EP... - Page 154 Appendices CC32 Tone Name Ensemble Strings Orchestra 60s Strings Slow Strings Syn.Strings1 Syn.Strings3 Syn.Strings2 Choir Aahs Chorus Aahs Voice Oohs Humming SynVox Analog Voice OrchestraHit Bass Hit 6th Hit Euro Hit Brass Trumpet Dark Trumpet Trombone Trombone 2 Bright Tb Tuba MutedTrumpet MuteTrumpet2...
- Page 155 Punch Heart Beat Footsteps Gun Shot Machine Gun Lasergun Explosion GM 2 Drum Set List V oices The GM 2 Drum Set corresponds to that of the SC-8820's as follows. GM2 Name STANDARD ROOM POWER ELECTRONIC ANALOG JAZZ BRUSH ORCHESTRA...
-
Page 156: Insertion Effect List
Appendices Insertion Effect List <Example of effect types and effect parameters> Parameter Setting Value Value (Hex.) 01 : Stereo-EQ Low Freq 200/400 • The MSB/LSB column shows the following ** portion of the Exclusive message. (Hexadecimal notation) (p.176) For Effect Type (Data section) F0 41 dev 42 12 40 03 00 ** ** sum F7 For Effect Parameter (LSB part of address) F0 41 dev 42 12 40 03 ** data sum F7... - Page 157 Parameter Setting Value Value (Hex.) 09 : Rotary Low Slow 0.05–0.35–10.0 Low Fast 0.05–6.40–10.0 Low Accl 0–3–15 Low Level 0–127 Hi Slow 0.05–0.90–10.0 Hi Fast 0.05–7.50–10.0 Hi Accl 0–11–15 Hi Level 0–64–127 Separate 0–96–127 + Speed Slow/Fast Low Gain -12–0–+12 Hi Gain -12–0–+12 # Level...
- Page 158 Appendices Effects that reverberate the sound (delay/reverb type) Parameter Setting Value Value (Hex.) 21 : Stereo Delay Dly Tm L 0–150ms–500ms Dly Tm R 0–300ms–500ms + Feedback -98%–+48%–+98% Fb Mode Norm/Cross Phase L Norm/Invert Phase R Norm/Invert HF Damp 315–8k/Bypass # Balance D>...
- Page 159 Others Parameter Setting Value Value (Hex.) 31 : 3D Auto Azimuth 180/L168–0–R168 + Speed 0.05–1.30–10.0 Clockwise # Turn Off/On Speaker/Phones Level 0–127 32 : 3D Manual + Azimuth 180/L168–0–R168 Speaker/Phones # Level 0–127 33 : Lo-Fi 1 Pre Filter 1–2–6 Lo-Fi Type 1–6–9 Post Filter...
- Page 160 Appendices Parameter Setting Value Value (Hex.) 41 : EH Chorus + EH Sens 0–64–127 EH Mix 0–127 Cho Dly 0–14ms–100ms Cho Rate 0.05–0.45–10.0 Cho Depth 0–101–127 # Cho Bal D> 0E–D=E–D 0<E Low Gain -12–0–+12 Hi Gain -12–0–+12 Level 0–80–127 42 : EH Flanger + EH Sens...
- Page 161 Parameter Setting Value Value (Hex.) 49 : GTR Multi 2 Cmp Atck 0–70–127 Cmp Sus 0–127 Cmp Level 0–90–127 Cmp Sw Off/On OD Sel Odrv/Dist + OD Drive 0–80–127 OD Amp Small/BltIn/2-Stk/3-Stk OD Amp Sw Off/On OD Sw Off/On EQ L Gain -12–+12 EQ M Fq 200–1k–6.3k...
- Page 162 Appendices Parameter Setting Value Value (Hex.) 55 : Keyboard Multi + RM Mod Freq 0–50–127 # RM Bal D> 0E–D>30E–D 0<E EQ L Gain -12–+3–+12 EQ M Fq 200–6.3k EQ M Q 0.5/1.0/2.0/4.0/9.0 EQ M Gain -12–+5–+12 EQ H Gain -12–-3–+12 PS Coarse -24–+7–+12...
- Page 163 Parameter Setting Value Value (Hex.) 63 : PH / Rotary PH Man 100–620–8k + PH Rate 0.05–0.85–10.0 PH Depth 0–64–127 PH Reso 0–16–127 PH Mix 0–127 PH Pan L63–0–R63 PH Level 0–127 RT L Slow 0.05–0.35–10.0 RT L Fast 0.05–6.40–10.0 RT Lo Accl 0–3–15 RT Lo Lev...
-
Page 164: Effect Parameter Value Conversion Table
Appendices Effect Parameter Value Conversion Table Here is a table for converting between the hexadecimal value and the actual setting for each parameter. These parameters are used in the following effect types. 1. Pre Delay Time 2. Delay Time1 10: Stereo Flanger 23: 3 Tap Delay 11: Step Flanger 24: 4 Tap Delay... - Page 165 Pre Delay Delay Delay Value Value Time Time 1 Time 2 (Hex.) (Dec.) (ms) (ms) (ms) 1000 – – – – – 1000 – 1000 – 1000 – 1000 – 1000 – 1000 – 1000 – 1000 Delay Delay Cutoff Time 3 Time 4 Rate1...
-
Page 166: Midi Implementation
0) expressed in decimal. Model SC-8820 Version 1.00 '99.10 * The SC-8820 recognizes the Bank Select LSB (Controller number 32) as a flag for switching between the SC-55MAP, the SC-88MAP, the SC-88ProMAP, and the SC- 8820MAP. With a Bank Select LSB of 00H, the map selected by the front panel INST MAP button will be selected. - Page 167 Portamento (Controller number 65) Status 2nd byte 3rd byte n = MIDI channel number: 0H – FH (Ch.1 – 16) vv = Control value: 00H – 7FH (0 – 127) 0 – 63 = OFF, 64 – 127 = ON * Not received when Rx.PORTAMENTO = OFF.
- Page 168 **NRPN** The NRPN (Non Registered Parameter Number) message allows an extended range of control changes to be used. On the SC-8820, NRPN messages can be used to modify sound parameters, etc. To use these messages, you must first use NRPN messages (Controller number 98 and 99, their order does not matter) to specify the parameter to be controlled, and then use Data Entry messages (Controller number 6) to specify the value of the specified parameter.
- Page 169 = data: 00H – 7FH (0 – 127) F7H: EOX (End Of Exclusive) The System Exclusive Messages received by the SC-8820 are; messages related to mode settings, Universal Realtime System Exclusive messages, Data Requests (RQ1), and Data Set (DT1). Appendices...
- Page 170 Sub ID#2 (General MIDI 2 On) EOX (End Of Exclusive) * When this message is received, the SC-8820 will be able to receive the messages specified by General MIDI 2, and use the General MIDI 2 sound map. GM System Off “GM System Off”...
- Page 171 = 03H Medium Hall (Hall1) vv = 04H Large Hall (Hall2) vv = 08H Plate (Plate) * The SC-8820 displays Reverb Type as described in the parenthesis. pp=1 Reverb Time vv = 00H – 7FH 0 – 127 Chorus Parameters...
- Page 172 181) in which a large amount of data is transmitted at once. The Exclusive message used when transmitting GS format data has a model ID of 42H and a device ID of 10H. (The SC-8820 does not allow you to change the Device ID setting.) Request data 1 This message requests the other device to send data.
- Page 173 System Exclusive messages “Identity Reply” and “Data Set 1 (DT1)” are the only System Exclusive messages transmitted by the SC-8820. When an appropriate “Identity Request Message” and “Data Request 1 (RQ1)” message are received, the requested internal data will be transmitted.
- Page 174 Appendices Parameter address map This map indicates address, size, Data (range), Parameter, Description, and Default Value of parameters which can be transferred using “Request data 1 (RQ1)” and “Data set 1 (DT1)”. All the numbers of address, size, Data, and Default Value are indicated in 7-bit Hexadecimal-form. Numbers in the explanatory column are given in decimal notation. The MODEL ID = 45H parameters are related to LCD display.
- Page 175 Address(H) Size(H) Data(H) 40 01 38 00 00 01 00 – 07 40 01 39 00 00 01 00 – 07 40 01 3A 00 00 01 00 – 7F 40 01 3B 00 00 01 00 – 7F 40 01 3C 00 00 01 00 –...
- Page 176 Patch Part parameters The SC-8820 has 16 Parts in Group A, Group B respectively. Parameters that can be set individually for each Part are called Patch Part parameters. If you specify a part in Group A, specify the address 40 ** ** using the block number to the corresponding part from PORT A (normally MIDI IN). If you specify a part in Group B, specify the address 40 ** ** using the block number to the corresponding part from PORT B.
- Page 177 00 00 01 * This parameter sets the Drum Map of the Part used as the Drum Part. The SC-8820 can simultaneously (in different Parts) use up to two Drum Maps (MAP1, MAP2). With the initial settings, Part10 (MIDI CH=10, x=0) is set to MAP1 (1), and other Parts are set to normal instrumental Parts (OFF(0)).
- Page 178 Appendices Address(H) Size(H) Data(H) 40 1x 33 00 00 01 00 – 7F 40 1x 34 00 00 01 00 – 7F 40 1x 35 00 00 01 00 – 7F 40 1x 36 00 00 01 00 – 7F 40 1x 37 00 00 01 00 –...
- Page 179 MAP 0 – 4 (= CC#32 : Bank number LSB) 00: SELECTED 01: SC-55 MAP 02: SC-88 MAP 03: SC-88Pro MAP 04: SC-8820 MAP TONE MAP-0 NUMBER 01: SC-55 MAP 02: SC-88 MAP 03: SC-88Pro MAP 04: SC-8820 MAP EQ ON/OFF...
- Page 180 User instrument You can modify the parameters of the SC-8820 sound to your taste, and save your new settings in Variation numbers 64 or 65 of the SC-8820 map/SC-88Pro map/SC-88 map. A sound saved in this way is called a User Instrument. You can save 256 different sounds in this way.
- Page 181 DRUM SETUP B * When data dumped by the SC-8820 is reloaded into the SC-8820, be aware that the data may not be set correctly if the transmission order of the packets is changed, if the time interval between packets is changed, or if other messages are inserted between packets.
- Page 182 00 00 04: SC-8820 MAP 00 mm bb mm = MAP# 01 – 04 ( 01 = SC-55 MAP, 02 = SC-88 MAP, 03 = SC-88Pro MAP, 04 = SC-8820 MAP) bb = BANK# 00 – 7F Instrument list dump (transmit only)
- Page 183 5. Supplementary material Decimal and Hexadecimal table (An “H” is appended to the end of numbers in hexadecimal notation.) In MIDI documentation, data values and addresses/sizes of Exclusive messages, etc. are expressed as hexadecimal values for each 7 bits. The following table shows how these correspond to decimal numbers. fig.11-22e Dec.
- Page 184 Equal Temperament This method of tuning divides the octave into 12 equal parts. It is currently the most widely used form of tuning, especially in occidental music. On the SC-8820, the default settings for the Scale Tune feature produce equal temperament.
- Page 185 SOUND Canvas Model SC-8820 Function... Basic Default Channel Changed Default Mode Messages Altered Note Number : True Voice Note On Velocity Note Off After Key's Touch Channel's Pitch Bend 0, 32 6, 38 Control Change 98, 99 100, 101...
-
Page 186: Specifications
Model:Sound Canvas SC-8820 (General MIDI System / GS Format) Number of parts Maximum Polyphony 64 (voices) Internal Sounds Sound Maps: 4 (SC-8820, SC-88Pro, SC-88, SC-55) Preset Sounds: 1608 Drum sound sets: 63 Effects Reverb (8 types) Chorus (8 types) Delay (10 types) -
Page 187: Index
Index Numerics ...61 2 Pitch Shifter ...58 3 Tap Delay ...62 3D Auto ...56 3D Chorus ...61 3D Delay ...84 3D effects ...63 3D Manual ...59 4 Tap Delay ...9 AC adaptor jack ...102 Active Sensing ...32, 101 Aftertouch ...101 All Notes Off ...101 All Sounds Off... - Page 188 Index ...35 Envelope ...46 EQ HIGH FREQ ...46 EQ HIGH GAIN ...46 EQ LOW FREQ ...46 EQ LOW GAIN ...27 EQ ON/OFF ...31 Equal Temperament ...46 Equalizer High Frequency ...46 Equalizer High Gain ...46 Equalizer Low Frequency ...46 Equalizer Low Gain ...46 Equalizer Parameters ...102...
- Page 189 ...40 Reverb parameters ...41 Reverb Pre-Delay Time ...40 Reverb Pre-LPF ...27, 100 Reverb Send Level ...41 Reverb Time ...76 Rhodes Multi ...10 Roland Super MPU II ...40 Room1 ...40 Room2 ...40 Room3 ...52 Rotary ...70 Rotary Multi ...101, 168 ...101 RPN LSB, MSB ...28...
-
Page 190: Operations Via Midi
Index ...99 Velocity ...29 VELOCITY SENSE DEPTH ...29 VELOCITY SENSE OFFSET ...33 Vib Delay ...33 Vib Depth ...33 Vib Rate ...33 Vibrato ...33, 104 Vibrato Delay ...33, 104 Vibrato Depth ...33, 104 Vibrato Rate ...21, 26 Voices ...99 Volume ...9 VOLUME Knob Operations via MIDI Applying Insertion Effect to a certain Part... - Page 191 IMPORTANT: THE WIRES IN THIS MAINS LEAD ARE COLOURED IN ACCORDANCE WITH THE FOLLOWING CODE. BLUE: NEUTRAL BROWN: LIVE As the colours of the wires in the mains lead of this apparatus may not correspond with the coloured markings identifying the terminals in your plug, proceed as follows: The wire which is coloured BLUE must be connected to the terminal which is marked with the letter N or coloured BLACK.
- Page 192 Information When you need repair service, call your nearest Roland/EDIROL Service Center or authorized Roland/EDIROL distributor in your country as shown below. SINGAPORE AFRICA AFRICA CRISTOFORI MUSIC PTE EGYPT Blk 3014, Bedok Industrial Park E, Al Fanny Trading Office...
Need help?
Do you have a question about the SC-8820 and is the answer not in the manual?
Questions and answers