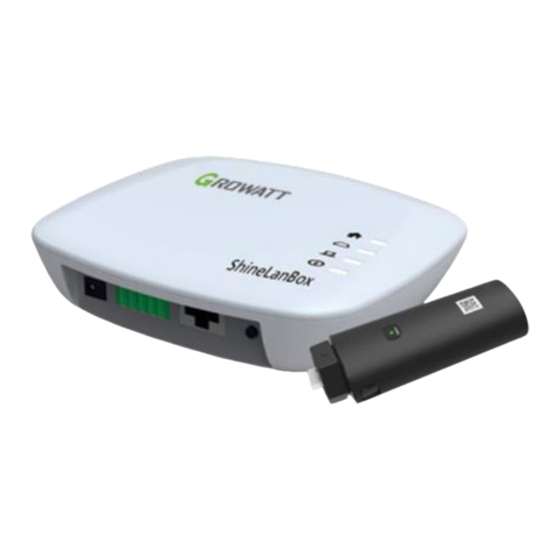
Growatt ShineWiFI-X Installation Manual

Growatt ShineWiFI-X Installation Manual

Hide thumbs Also See for ShineWiFI-X:

Advertisement

Installation Guide
for dataloggers and monitoring
Versie 0.1.4
Growatt New
Energy B.V.
04/05/2023

Advertisement

Table of Contents
loading
Need help?

Need help?

Do you have a question about the ShineWiFI-X and is the answer not in the manual?

Questions and answers

Subscribe to Our Youtube Channel

Summary of Contents for Growatt ShineWiFI-X

  • Page 1 Installation Guide for dataloggers and monitoring Versie 0.1.4 Growatt New Energy B.V. 04/05/2023...
  • Page 2: Table Of Contents

    Introduction This installation guide is intended to help you configure the Growatt data logger. In this guide you will find the configuration of the Shinewifi-X, Shinelink-X and Shinelan-X. Table of Contents Introduction ........................... 1 Types of dataloggers ..................... 2 Shinewifi-X ........................3 Supplies and preparation ....................
  • Page 3: Types Of Dataloggers

    The easiest way to recognize the data logger is to look at the sticker that is on the data logger, which always shows the model. Shinewifi-X Only supports a wi-fi connection. Shinelink-X The Shinelink-X consists of several parts, namely;...
  • Page 4: Shinewifi-X

    A Wi-Fi network on 2.4Ghz frequency Preparations: It is important that the inverter is switched on. Most Growatt inverters only turn on when the solar panels are connected and they provide sufficient power. This means that the configuration can only be done in sufficient daylight.
  • Page 5 Configuration Step 1 Open the Shinephone app on your smartphone, if you don't already have it you can download it in the Apple App S tore or the Google Play Store. Apple app store: ShinePhone on the App Store Google play store: ShinePhone on the Google Play Store Step 2 On the login screen, choose 'Configure data logger'.
  • Page 6 In that case, choose 'Manual' and enter the serial number and check code on the back of the Shinewifi-X. In the next step you can checkthe serial number and the check code (CC), which must match the serial number and check code (CC) of the Shinewifi-X.
  • Page 7 Activate the hotspot modus on the Shinewifi-X by briefly pressing the button once (do not hold down), at the bottom of the Shinewifi-X. After a few seconds the light turns solid blue, this means that the hotspot mode is on and ready to connect. Press 'Next' to continue.
  • Page 8 Connect to the hotspot by pressing 'Go to set', the app will now go to your Wi-Fi settings on your smartphone. Here you can see all available networks in the vicinity. Choose the network with the name of the serial number of the Shinewifi-X, in most cases it starts with XGD.
  • Page 9 Step 7 Check that the serial number of the Shinewifi-X and the name of the hotspot match, if so, press 'Next'. Is this the case? Then go back to the Wi-Fi settings of your smartphone and check if you are connected to the Wi-Fi network of the Shinewifi-X hotspot.
  • Page 10: Data Logger Status And Malfunctions

    Shinewifi-X is connected to your WiFi network. Data logger status and malfunctions On the Shinewifi-X there are a total of 3 LED lights that provide information about the status of the Shinewifi-X. The Shinewifi-X is connected to the inverter but still needs to be configured.
  • Page 11: Installation

    Installation The new generation dataloggers are connected to the USB port of the inverter, the port on the inverter is indicated as 'USB'. Before you can connect the data logger to the inverter, you must first loosen the cap on the inverter, you do this by turning the cap counterclockwise.
  • Page 12: Shinelink-X Pairing

    Make sure the network cable is connected The network cable is not directly to a modem or router. Do not connect the connected network cable to a network switch or powerline adapters. The connection to the server is blocked. This may Shinelanbox is not be caused by a firewall setting on the Internet connected to the server...
  • Page 13: Shinelink-X Lights Correct, But Inverter Offline

    A modem or router with a free network port Preparations: It is important that the inverter is switched on. Most Growatt inverters only turn on when the solar panels are connected and they provide sufficient power. This means that the configuration can only be done in sufficient daylight.
  • Page 14: Account

    16 Account If you don't have an account yet, you'll need to create one via the Shinephone app or the website https://server.growatt.com/ Installers code To create an account you need an installer code. You can request this from the installer who installed the system with you .
  • Page 15 Step 2 – Create account Fill in your personal details. Country of The country in which you live region Username Think of a unique username (tip: use your email address) Password Come up with a password Repeat Repeat the password password Phone number Your phone number...
  • Page 16: Registration Via The Website

    Registration via the website Go to: https://server.growatt.com/ Choose 'Register an account' to register a new account. Step 2 – Create account Fill in your personal details. Country The country in which you live Username Think of a unique username (tip: use your email address)
  • Page 17 Step 3 – Create plant Fill in details of your system. Plant name Come up with a name for your installation Installation date Date the system was installed in Time zone Time zone Plant address Address where the system is installed PV capacity The power of your inverter (in watts) Plant type...
  • Page 18: Troubleshooting

    Do you suspect that the data logger is linked to another account, for example to the account of a previous occupant of the house? Then send an e-mail to Growatt (service.nl@ginverter.com) with the request to disconnect the data logger. Clearly state the...

This manual is also suitable for:

Shine lan-xShinelink-x

Table of Contents