Table of Contents
Advertisement
Advertisement
Table of Contents

Related Manuals for Growatt Shine WebBox


Summary of Contents for Growatt Shine WebBox
- Page 1 Shine WebBox User Manual...
-
Page 2: Table Of Contents
3.3.4 Connection via Network Switch ................17 3.4 Connection to PV System ....................17 3.4.1 RS485 Connection ....................17 Internal Server Setting ..................... 18 4.1 Access to WebBox Internal Server ................18 Shine WebBox Settings via Internal Sever ............... 21 4.2.1 System Settings ...................... 21... - Page 3 6.3 Manage Active and Reactive Power Together .............. 32 Device Maintenance ......................32 Firmware Update ..................... 32 Restart WebBox ....................... 32 Reset the Shine WebBox ..................33 Clearing up the Record ..................... 33 Troubleshooting ....................... 34 Maintenance and Care ..................... 34 Technical Data .........................
-
Page 4: User Manual Information
1.2 About Manual Dear Customer, thank you very much for your trust in our Shine WebBox product, which is developed and manufactured by our R&D department. We sincerely hope it can satisfy your need, also, we’re glad to receive your suggestions on improving our product. -
Page 5: Guideline
Growatt. 1.4 Guideline Before using the Shine WebBox, please read the manual carefully. In the meantime, please keep it well, lest maintenance staff may not find it later. All the content, pictures, logos, symbols are reserved. No part of this document may be transmitted in any form without the prior written permission of our internal staff. -
Page 6: Production Description
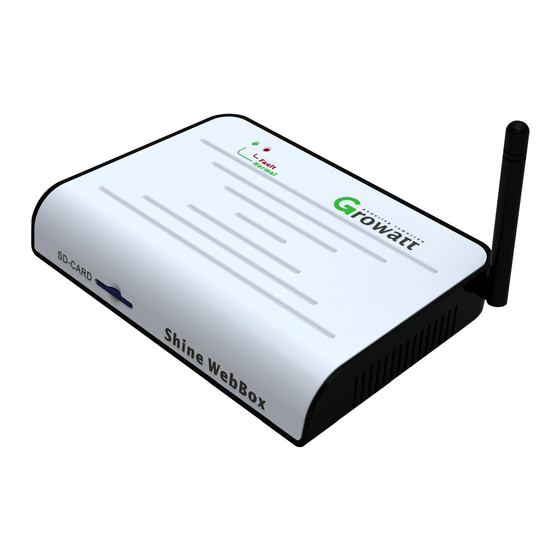
2 Production Description 2.1 Device Overview... -
Page 7: Interface
2.1.1 Interface The description of Shine WebBox Interface is listed below. Number Name Function SWITCH Power Switch:Turn On/Off Shine WebBox Power Port Power Line:Connect the power line to charger LAN Port RJ45 port:Connect Shine WebBox to the local network and build connection with Shine Server... -
Page 8: Unpacking And Checking
No SD card inserted Long lighting with Go out Inverters report error Bumming 2.2 Unpacking and Checking 2.2.1 Packing List The Shine WebBox and accessories can be found as below. Label Name Amount Shine WebBox 1pcs 5V Power Adapter 1pcs... -
Page 9: Serial Number And Check Code
“check code” is “validate code” in the shine server. 2.3 Shine WebBox Function Introduction Shine WebBox can monitor the PV devices via RS485 cable, see below picture of the monitoring system. Shine WebBox can connect to a local area network via router or switch machine. You... -
Page 10: Installation And Connection
3 Installation and Connection 3.1 Requirements for Installation Location The installation and operation environment need consider below tips: Indoor installation Temperature: from 0 – 45 degree (℃) Avoid humid environment Avoid being exposed to directly sun radiation ... -
Page 11: Shine Webbox Installation
3.2 Shine WebBox Installation 3.2.1 Wall-mounted Installation Installation Procedure: 1. Install the bracket on the vertical plane of the wall. Dig two holes according to the dimension of the bracket, there are two screw holes. Use hammer or suitable tools to hit the plastic columns into the two hold on the wall. - Page 12 4. Connect all inverter’s RS485 in parallel with RS485 cables, then connect to the WeBox RS48 connector of WebBox. 5. Connect the network cable: insert the network connector to the LAN port on Shine WebBox. 6. Insert the SD card: Insert the SD card into the SD card port on Shine WebBox,...
-
Page 13: Horizontally Installation
Note: The SD card must be inserted before powering on Shine WebBox, otherwise the SD card would not be recognized. 7. Connect the power line: connect the power line to the power port on Shine WebBox. 8. Turn on the power switch to power on Shine WebBox. - Page 14 Protocol version 4 (TCP/IPv4)” → double click to open “Internet Protocol TCP/IP Properties” → “Use the following IP address”, make sure the IP address of the PC and Shine WebBox are in the same network segment. You can set the IP address referring below pictures:...
- Page 15 Click to open “Network” → “Connection to a network” → “Local Connection” → “Internet Protocol version 4 (TCP/IPv4)”, change the IP address of the PC, make sure the IP address of the PC and Shine WebBox are in the same network segment. You can set the IP address referring below pictures:...
-
Page 16: Connect Webbox To The Pc
3.3.2 Connect WebBox to the PC 1. Power on the Shine WebBox, and connect WebBox to the PC with network cables via the RJ45 ports. 2. Set the IP address of CP or laptop to be in the same network segment, refer to section 3.4.1, if already set, go ahead. -
Page 17: Connection Via Network Switch
1. Connect the PC and Shine WebBox to the network ports of network switch. 2. Set the IP address of the PC and Shine WebBox to be in the same segment. 3. Power on the PC, Shine WebBox and network switch then it’s available to get access to Shine WebBox internal server on the PC. -
Page 18: Internal Server Setting
ShineWebBox COM port 2. While monitoring several inverters together, inverters are in parallel connected and then connected to Shine WebBox. The maximum number of inverter can be monitored by Shine WebBox is 32 units. 3. The monitoring of smart meter and environment monitor is similar to inverter, smart meter or weather station and inverters in parallel and then connect to Shine WebBox with RS485 cables. - Page 19 192.168.1.230 in the address bar. To get access to WebBox internal server from PC, please make sure the IP address of PC and WebBox are in the same segment. Note: when WebBox connects to local network, please confirm the IP address 192.168.1.230 is not occupied by other device.
- Page 20 4. Shine WebBox will search inverters according to the inverter address range setting. Any new inverter is detected, will display in the “Record” page, and will update inverter data automatically. 5. Log out from the Shine WebBox internal server when you finish visiting, to do so, just close the Web browser.
-
Page 21: Shine Webbox Settings Via Internal Sever
Shine WebBox address settings include: IP address, subnet mask, gateway and DNS settings. As shown in Figure 4-5 below, if the network IP address of the Shine WebBox is the same as the three digits in front of the gateway, you only need to set the IP address to Shine WebBox, no need to set the subnet mask, gateway or DNS. - Page 22 3. The subnet mask of the Shine WebBox and that of the network or router which Shine WebBox accesses should be the same. 4. Set the default gateway of the Shine WebBox same as that of the router which WebBox connects to.
-
Page 23: Set Polling Interval Time
International user server domain url is: server.growatt.com Chinese user server domain url is: server-cn.growatt.com The default domain name is "server.growatt.com", as shown in Figure 4-9. If you visit the Shine WebBox internal server and found the domain url not correct, please change to "server.growatt.com"... -
Page 24: Set Date And Time
WebBox. 4.2.5 Set Weather Station and Smart Meter When the Shine WebBox is connected to weather station or a smart meter, you need to enable this feature through the Shine WebBox internal server settings. 1. If there is a weather station in the system need monitored, please enable it first, in "Environment: address"... -
Page 25: Set Anti-Reflux Meter And Anti-Reflux Switch
"Host", and click "Save" to open the Shine WebBox power adjustment. As shown in Figure 4-15 to open the power adjustment, in the same local network, only one "host", all other settings for the "slave". -
Page 26: Set Combiner Box Address And Switch
4.2.11 Inverter Fault Indication There are two ways to indicate the inverter fault: 1. The status LED of the Shine WebBox will turn to red, accompanying with beeping for 1 min. 2. In the integrated server interface of the Shine WebBox, the data about the... -
Page 27: Uploading Data To Shine Server
5 Uploading Data to Shine Server 5.1 Registration and Login On Shine WebBox internal server, you can only check the real-time data. But you can check your plant data at anytime in everywhere from Shine server account, Shine WebBox can upload all your system information to Shine Server database every 5 minutes, you can check real-time data and history data on Shine server. -
Page 28: View The Monitoring Data
Figure 5-2 5.2 View the Monitoring Data (1) After register, it will automatically jump to the Shine Server main interface. Click on the "power plant" → "plant data", as shown in Figure 5-3, the information displayed for the daily power chart of the plant. In drop-down list "select Datalog", you can choose to see inverter data and chart. -
Page 29: Power Management
To enable power management, a ripple control receiver is required. This function is available when user activates it. The COM ports of the Shine WebBox are shown as below. Pin 1,3,5,7,9,11 are used to connect the ripple control receiver. -
Page 30: Active Power Reduction
6.1 Active Power Reduction There are 4 power levels, 100%, 60%, 30% and 0%. The connection between ripple control receiver and Shine WebBox is shown as below. The output power of inverter depends on the operating relay. The detail information is shown as below. -
Page 31: Reactive Power Control
6.2 Reactive Power Control There are 4 power factor levels, 0.99, 0.98, 0.97, and 0.95. The connection between ripple control receiver and Shine WebBox is shown as below. The output reactive power of inverter depends on the operating relay. The detail information is shown as below. -
Page 32: Manage Active And Reactive Power Together
7.1 Firmware Update There are 2 ways to update WebBox firmware: 1. You can update WebBox firmware by using a USB flash disk, please contact Growatt service department for the latest firmware version and update guide. 2. If your WebBox is well monitored by Growatt Shine Server, Growatt engineer can help update your WebBox firmware remotely, just make sure your WebBox online. -
Page 33: Reset The Shine Webbox
7.3 Reset the Shine WebBox Before rest the Shine WebBox, please login Shine WebBox internal server, and in bottom of “Parameter” page: 1. Select “Enable_Reset” as below picture. Figure 7-1 2. Click on “save”, then Shine WebBox would restore factory settings after restarts. -
Page 34: Troubleshooting
Make sure PC or laptop connect Can't access to Growatt PC or laptop not connect to internet, and make sure visit Shine Sever to internet correctly the right website www.growatt.com... -
Page 35: Technical Data
8 Technical Data 8.1 Shine WebBox Mechanical data Width*height*depth 185mm* 125mm * 30mm Net weight 420g Environmental conditions 0 ℃… 45℃ Ambient temperature Degree of protection IP 20 Mounting location Indoor Communication Rs485 communication Maximum 30 inverters Wireless communication ZigBee ,maximum 15 inverters... -
Page 36: Accessories
8.3 Accessories 8.3.1 SD Card There is a SD card of Shine WebBox with 2G memory, and valid for 5 years. The SD card storages WebBox system files and monitoring data, when WebBox is not connect to Shine Server correct, and upload to Shine Server when on-line again. -
Page 37: Contact
9 Contact If you have technical problems concerning our products, please contact the Growatt serviceline. GROWATT NEW ENERGY Building B, Jiayu Industrial Zone, #28 Guanghui Road, Longteng Community, Shiyan, Baoan District, Shenzhen, P.R.China. Service hotline: +86 755 27471942 E-mail: service@ginverter.com Website: www.ginverter.com...
Need help?
Do you have a question about the Shine WebBox and is the answer not in the manual?
Questions and answers