Table of Contents
Advertisement
Quick Links
01604020
01604030
01604040
01604120
01604130
01604140
Luci della Ribalta srl, Via Berna 14, 46042 Castel Goffredo MN, Italy. tel +39 0376 771 777 ‐ email info@ldr.it
operating instructions
Bedienungsanleitung
Stella 8/22 W 3200K
Stella 18/36 W 3200K
Stella 30/55 W 3200K
Stella 8/22 C 6000K
Stella 18/36 C 6000K
Stella 30/55 C 6000K
istruzioni per l'uso
instrucciones de
mode d'emploi
gebruiksaanwijzing
manejo
Advertisement
Table of Contents

Related Manuals for LDR Stella 8/22 W 3200K


Summary of Contents for LDR Stella 8/22 W 3200K
- Page 1 Bedienungsanleitung instrucciones de manejo mode d'emploi gebruiksaanwijzing Stella 8/22 W 3200K 01604020 Stella 18/36 W 3200K 01604030 Stella 30/55 W 3200K 01604040 Stella 8/22 C 6000K 01604120 01604130 Stella 18/36 C 6000K 01604140 Stella 30/55 C 6000K Luci della Ribalta srl, Via Berna 14, 46042 Castel Goffredo MN, Italy. tel +39 0376 771 777 ‐ email info@ldr.it...
-
Page 2: Table Of Contents
page 11 13.15‐E Exit Hidden Menu page 11 14.Cleaning and maintenance………………………………………………..……………….. page 11 15. Spare parts………………………………………………………………………………………… page 12 16. Warranty.…..………………………………………………….………………………………….. page 12 17. Summary of Controls and functions.…………………………………………………. page 13 18. DMX charts……………………………………………………………………………………….. page 14 18.1 DMX chart 1……………………………………………………………………………………. page 14 18.2 DMX chart 2……………………………………………………………………………………. page 14 18.3 DMX chart 3……………………………………………………………………………………. page 14 18.4 DMX chart 4……………………………………………………………………………………. page 15 LDR Conformity Certificate – Certificato di Conformità – Konformitätserklärung p age 16 Complaint form – Modulo di reclamo – Reklamationsformular ………………………….page 17 WEEE Directive – Direttiva RAEE – WEEE Richtlinie ……………………………………………page 18 1 Luci della Ribalta srl, Via Berna 14, 46042 Castel Goffredo (MN) Italy Tel. +39 0376 771 777 – fax +39 0376 772 140 – email info@ldr.it – web www.ldr.it ... -
Page 3: Important Safety Norms
The instructions given here ensure a safe and correct usage of this product. A user’s failure to comply with the installation, operating, maintenance and safety procedures mentioned in this manual, as well as those generally applicable to this lighting equipment, may cause the unit not to perform as expected. Luci della Ribalta accepts no liability for direct, indirect, incidental, special, or consequential damages resulting from the customer’s failure to follow the installation, operating, maintenance and safety procedures in this manual or those generally applicable to lighting equipment. The limitation extends to damages for personal injury, property damage, loss of operations, loss of profits, loss of product or loss of time, whether incurred in by the customer, the customer’s employees or a third party. Apart from the instructions given on this manual, all relevant safety and health standards of the appropriate Directives of the country where the unit will be installed must be complied with. 1. IMPORTANT SAFETY NORMS This product is a professional lighting fixture, namely a profile spot, fitted with a LED light source, which can only be operated by professional staff This product must be fitted with a secondary fixing system such as a safety chain or bond. Should this not be supplied as a standard accessory, please make sure you buy it separately and install it before using the product Warning, high voltage ignition. Disconnect the unit from power before servicing Continuous mains power is required for this spotlight as an internal dimmer controls the intensity via DMX or local rotary knob. Use of a phase control dimmed mains supply may damage the internal electronics This product features fan‐assisted ventilation. Make sure you do not cover the fans or obstruct the air flow at any time Make sure all fans are working correctly at any one time. Should you detect even the slightest malfunction, switch the luminaire off and carry out the necessary servicing. Replace the fans if necessary. 2 Luci della Ribalta srl, Via Berna 14, 46042 Castel Goffredo (MN) Italy Tel. +39 0376 771 777 – fax +39 0376 772 140 – email info@ldr.it – web www.ldr.it ... - Page 4 Repairing and replacement of any component of this product must be carried out exclusively by professional personnel in conformity with the relevant safety and health standards and only with original Luci della Ribalta srl components. Replacement of any part of the wiring system must be carried out exclusively by professional personnel in compliance with the original wiring diagram and with components identical to or compatible with those originally fitted. Installation of this product must be exclusively carried out by professional personnel in compliance with the safety norms in force in the country where the product is used WARNING: DANGER OF ELECTRICAL SHOCK DO NOT OPERATE ON LIVE EQUIPMENT Disconnect power before opening this fixture to access its light source or electronics. The replacement of the LED source or any of its electronic components can be carried out exclusively by professional personnel upon LDR’s written authorization and only with original Luci della Ribalta srl components. Failure to obtain the manufacturer’s authorization to carry out the replacement/repair, will immediately invalidate the product’s warranty WARNING: EYE DAMAGE HAZARD Make sure this fixture is installed so as to avoid prolonged direct staring at its operating light source (LED) from a distance of less than 7m / 23ft. WARNING: FIRE HAZARD Never locate this fixture on any flammable surface. Minimum distance of any part of the body of the luminaire from any flammable surface or object: 0,5m / 20in ...
-
Page 5: Box Content
Using a Phillips screw‐driver remove the two cross‐head screws from the sides of the iris plate. Slide the diaphragm in or out the gate area. By pushing (to insert) or pulling (to remove) from the lever handle, slide the iris diaphragm out / in the gate area Tighten the screws back in position MOUNTING / REPLACING THE GOBO‐HOLDER – not supplied Stella profile spots can be fitted with a gobo holder – not supplied in standard delivery but obtainable as a separate accessory, for the projection of: A‐or B‐size metal gobos part # A20100807 A‐size glass gobo part # A20100807/A B‐size glass gobo part # A20100807/B The gobo holder must be inserted in the gate area instead of the iris diaphragm. Usage of both accessories at the same time is not possible. In order to fit or replace a gobo holder, please: Remove the iris diaphragm if fitted (see above) Slide the gobo‐holder in the gate area – bent metal wings must look to the LED‐house Make sure it is correctly positioned and apply pressure to the plastic holder if needed 4 Luci della Ribalta srl, Via Berna 14, 46042 Castel Goffredo (MN) Italy Tel. +39 0376 771 777 – fax +39 0376 772 140 – email info@ldr.it – web www.ldr.it ... -
Page 6: Important Notice Before The Installation/Installation
The mounting stirrup is mounted on the rear profiles of the LED‐house and is designed to allow the spotlight to be suspended from above using a C‐clamp with M12 screw or a DIN plate CAUTION DO NOT TURN THE LUMINAIRE UPSIDE‐DOWN BUT ALWAYS TURN THE STIRRUP IF YOU NEED TO MOUNT IT ON A STAND OR BRACKET As the stirrup does not rotate around the LED‐house, in case you need to mount the luminaire on a stand or bracket you will have to remove the stirrup with its holding brackets from its original position turn it and re‐mount it so that the stirrup looks downwards, as follows. Position the Stella on a solid and stable work‐bench With the aid of a M5 cross‐head battery screw‐driver slacken and remove all the 8 screws holding the stirrup brackets to the lens‐tube Do not try to remove the stirrup from its holders Using both hands gently slide both brackets backwards, and pull the assembly out Turn the assembly so that the stirrup looks downwards Using both hands slide the assembly back in position Strongly tighten all 8 screws If not supplied choose a suitable clamp or spigot and make sure it is correctly fixed and strongly tightened to the stirrup according to the clamp’s / spigot manufacturer’s instructions This fixture must be fitted with 2x safety bonds. If not supplied choose a suitable model of safety cable or bond. Clamp each safety bond to the eyelet provided on the side of each stirrup bracket (see picture here below), run it twice around the stirrup and the structure the luminaire is hung to so as to bond them together and close the loop. 5 Luci della Ribalta srl, Via Berna 14, 46042 Castel Goffredo (MN) Italy Tel. +39 0376 771 777 – fax +39 0376 772 140 – email info@ldr.it – web www.ldr.it ... -
Page 7: Wiring
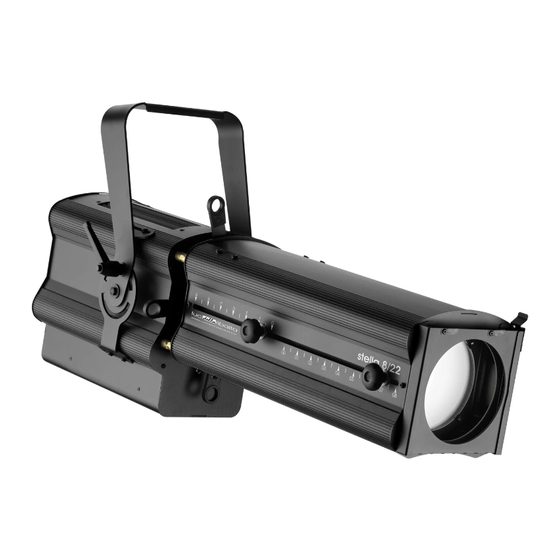
Before you finally position this product for use, temporarily connect it to a properly fused power supply to check the LED works correctly. VOLTAGE Before operating this unit please refer to the product label mounted at the back of the luminaire to check you are operating with the correct voltage. The STELLA profile can be operated between 90V and 260V and the electronic PSU inside the fixture will automatically switch to the available voltage. FREQUENCY Frequency on this product is automatically selected by the inner electronic PSU (50/60Hz) 10. MECHANICAL OPERATION Installation: this fixture is fitted with a mounting stirrup which is factory‐set for the installation from above (suspended) using a C‐clamp or similar. In case you need to install the fixture on a tripod or support, see Chapter 6 of this manual for reference Note: the spotlight’s location must provide suitable ventilation for the LED module. For minimum distance from flammable and lit surface please refer to the FIRE HAZARD section in this manual or to the product’s label Focus control: the STELLA range of LED profile spots is available in 3 variable beam angle models, including 8° to 22°, 18° to 36° and 30° to 55°. Two large, easy‐to‐grab control knobs on the right‐ hand side of the lens‐tube control the focus. 6 Luci della Ribalta srl, Via Berna 14, 46042 Castel Goffredo (MN) Italy Tel. +39 0376 771 777 – fax +39 0376 772 140 – email info@ldr.it – web www.ldr.it ... -
Page 8: Connect To The Power Supply
Balance: the design of the stirrup allows for balance adjustment. The balance is factory‐set for each model (8/22, 18/36 and 30/55) but should you for any reason need to adjust the balance please: Slightly slacken all 8 screws holding the stirrup brackets in position (lower and upper profiles of the LED‐house Using both hands gently slide the full stirrup assembly (brackets + stirrup) backwards or forwards within the allowed run Strongly tighten the screws back in position 11. CONNECT TO THE POWER SUPPLY Connect the unit to a continuous mains power source Make sure the power supply is protected by a suitable thermal magnetic circuit breaker This fixture must be grounded LOCAL CONTROL PANEL AND OPERATION OPERATION: LCD display for DMX address, system setup and status details. POWER: power LED status indicator, red colour. ON= power DMX: DMX LED status indicator, green colour. LED OFF = DMX OFF and manual control activated, LED ON = DMX MODE activated with no DMX signal, FLASHING LED = receiving DMX MENU: rotary switch selector to select and modify the operational modes. Turn left or right to navigate through the menu and press to select or to confirm DMX IN: input DMX signal (pin1=0, pin2= DATA‐, pin3=DATA+). DMX OUT: Loop through DMX signal output POWER IN: Mains power input POWER OUT: Mains power output 7 Luci della Ribalta srl, Via Berna 14, 46042 Castel Goffredo (MN) Italy Tel. +39 0376 771 777 – fax +39 0376 772 140 – email info@ldr.it – web www.ldr.it ... -
Page 9: Menu
3 8/16b 3 8/16b PRESS THE ROTARY TURN TO SELECT 8 OR SELECTOR TO 16 BITS AND PRESS TO 16 BITS 8 BITS 8 BITS ACTIVATE CONFIRM 13.4 LOST DMX SIGNAL (DMXMem) In case of signal failure this function allows to store in memory the last DMX value. Factory setting is ON. Three options are available: PRESS TO ACTIVATE 4 DMXMem 4 DMXMem THE MENU. AN LAST SCENE HOLD ARROW SHOULD APPEAR 8 Luci della Ribalta srl, Via Berna 14, 46042 Castel Goffredo (MN) Italy Tel. +39 0376 771 777 – fax +39 0376 772 140 – email info@ldr.it – web www.ldr.it ... - Page 10 LINEAR DIMMING LINEAR CONTROL 13.8 CUT OFF DIMMING RESPONSE (CutOff) This function allows to select a LED behaviour simulating a tungsten or halogen lamp during the dimming cut off. Factory setting is SLOW. PRESS TO ACTIVATE 8 CutOff 8 CutOff THE MENU. AN SOFT LED DIMMING AT SLOW ARROW SHOULD SLOW SHUT DOWN APPEAR 8 CutOff DIRECT DIMMING RESPONSE AT SHUT FAST DOWN 9 Luci della Ribalta srl, Via Berna 14, 46042 Castel Goffredo (MN) Italy Tel. +39 0376 771 777 – fax +39 0376 772 140 – email info@ldr.it – web www.ldr.it ...
- Page 11 ##°C ###°F CONFIRM APPEAR 13.13 SOFTWARE VERSION (SwVer) This function allows to check the software version. 13.14 MANUAL DIMMER TYPE (Manu) This function allows to select the manual dimmer type. Factory setting is ENCODER. PRESS TO ACTIVATE 14 Manu 14 Manu THE MENU. AN MANUAL DIMMING BY ENCODER ARROW SHOULD ENCODER ROTARY SWITCH APPEAR 14 Manu MANUAL DIMMING BY EXTERNAL SLIDER POTENT (OPTIONAL) 10 Luci della Ribalta srl, Via Berna 14, 46042 Castel Goffredo (MN) Italy Tel. +39 0376 771 777 – fax +39 0376 772 140 – email info@ldr.it – web www.ldr.it ...
-
Page 12: Cleaning And Maintenance
PRESS TO CONFIRM APPEAR 13.15‐D CALIBRATION (Set Min) It allows to calibrate the minimum level of the output. PRESS TO ACTIVATE TURN TO ASSIGN Choose Set Min Set Min THE MENU. AN THE CALIBRATION Set Min ARROW SHOULD #### VALUE AND PRESS TO #### APPEAR CONFIRM 13.15‐E EXIT HIDDEN MENU (Exit) It allows to exit from the hidden menus. 14. CLEANING AND MAINTENANCE To ensure maximum performance of the product, a regular maintenance service should be carried out. Please make sure the product is cold and disconnected from power supply when doing this. 11 Luci della Ribalta srl, Via Berna 14, 46042 Castel Goffredo (MN) Italy Tel. +39 0376 771 777 – fax +39 0376 772 140 – email info@ldr.it – web www.ldr.it ... -
Page 13: Spare Parts
General maintenance * Clean all reflective parts such as lenses opening the product, if necessary. * Check the lenses and replace any visibly damaged component. * Clean air ducts and fans in order to allow proper ventilation activity on the product. * Check internal and external wiring and replace any cable which should be damaged by heat or mechanical agents. Cleaning of optical components LEDhouse lenses: Open the lens compartment lid by removing the two M4 cross head screws at the rear of the led‐house tube and slide the top lid free Remove the condensor lenses assembled block by removing the two M5 cross head screws. Clean the lenses with a soft cloth and re‐position Zoom lenses: Slide the front zoom panels positioned at the bottom of the lens tube and clean with a soft cloth. 15. SPARE PARTS All components are available as spare parts. We strongly recommend you always use original LDR components as spare parts. Please refer to our technical assistance should you need to order and/or replace any part of the unit. 16. WARRANTY Our warranty covers all structural and manufacture defects for two years from the date you purchased this product. In case of complaints we strongly recommend you use the complaint form at the end of this manual or contact the local dealer who supplied the product to you. In any case please report the serial number of the product. In case of complaints under warranty proof of purchase will have to be provided. 12 Luci della Ribalta srl, Via Berna 14, 46042 Castel Goffredo (MN) Italy Tel. +39 0376 771 777 – fax +39 0376 772 140 – email info@ldr.it – web www.ldr.it ... -
Page 14: Summary Of Controls And Functions
# Function Description Available Options Factory Setting PRO = Enables access to all functions; Sets the functions available from A ProBasic BASIC = Limits the access to: PRO the control menu 1 Mode, 2 Addr, 11 TBoard, 12 Tled and 13 SwVer B RESET Factory RESET Returns to factory settings ‐‐‐ Sets the ID number to activate the C ID Rem Remoto control unit to upload and From 000 (no remote control) to 250 000 download firmware Sets the minimum level of the D Set Min From 000 to 9999 ‐‐‐ output E Exit Exits from hidden menus ‐‐‐ 13 Luci della Ribalta srl, Via Berna 14, 46042 Castel Goffredo (MN) Italy Tel. +39 0376 771 777 – fax +39 0376 772 140 – email info@ldr.it – web www.ldr.it ... -
Page 15: Dmx Charts
181 ‐ 200 72% ‐ 78% Step Strobe speed 10 (maximum frequency) 201 ‐ 220 79% ‐ 86% Step Closed 221 ‐ 255 87% ‐ 100% STELLA 600W White Table name: DMX512 Functions chart 3 (Strobe) Issue: 1 Date: 20/05/2023 Product: 14 Luci della Ribalta srl, Via Berna 14, 46042 Castel Goffredo (MN) Italy Tel. +39 0376 771 777 – fax +39 0376 772 140 – email info@ldr.it – web www.ldr.it ... -
Page 16: Dmx Chart 4
221 ‐ 255 87% ‐ 100% Table name: DMX512 Functions chart 4 (16 bits + Stella 600W White Issue: 1 Date: 20/05/2023 Product: Strobe) Luci della Ribalta srl reserves the right to modify the present document without prior notice. 15 Luci della Ribalta srl, Via Berna 14, 46042 Castel Goffredo (MN) Italy Tel. +39 0376 771 777 – fax +39 0376 772 140 – email info@ldr.it – web www.ldr.it ... - Page 17 P .iva 01815640204 c.iso IT01815640204 Luci della Ribalta srl, Via Berna 14, 46042 Castel Goffredo MN Italy - tel +39 0376 771777 - web www.ldr.it - email info@ldr.it IT/015/MN/11 VAT registration # It01815640204 - REA MN 198438 - Authorized Exporter #...
- Page 18 - Namen der Firma, die Ihnen das Produkt verkauft hat - Nom de la société qui vous a vendu ce produit - Nombre de la compañia donde han comprado el producto: ____________________________________________________________________________________________________ 01604020 Stella 8/22 W 3200K Prodotto difettoso 01604030 Stella 18/36 W 3200K...
- Page 19 local de escoamento de residuos, ou a loja na qual efectuou a compra. Richtlinie 2002/96/EU (Elektro- und Elektronik- Altgeräte - WEEE): Benutzerinformationen. Dieses Produkt entspricht Richtlinie WEEE-symbolet (Waste Electrical 2002/96/EU. Das Symbol des auf dem Gerät Electronic Equipment). dargestellten, durchgestrichenen Korbes gibt an, dass Bruken av WEEE-symbolet indikerer at dette Produkt Ende...
- Page 20 Luci della Ribalta srl, Via Berna 14, 46042 Castel Goffredo mn Italy. tel +39 0376 771 777 ‐ fax +39 0376 772 140 ‐ email info@ldr.it...
Need help?
Do you have a question about the Stella 8/22 W 3200K and is the answer not in the manual?
Questions and answers