Table of Contents
Advertisement
Quick Links
istruzioni per l'uso
operating instructions
Bedienungsanleitung
instrucciones de
manejo
mode d'emploi
gebruiksaanwijzing
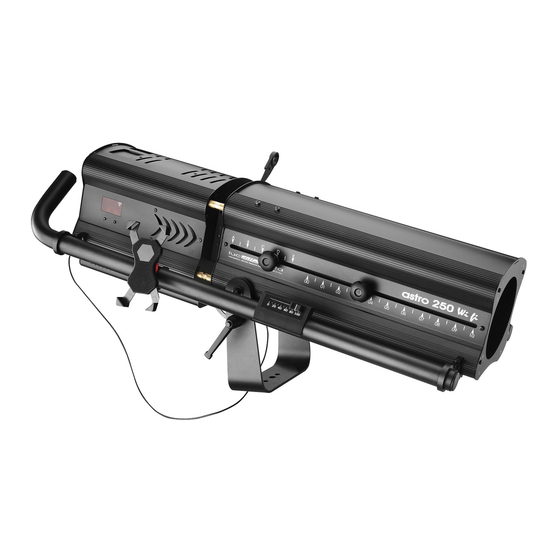
Astro 250 Wi‐fi RGBW
01207190
DMX512+RDM LED
Astro 250 Wi‐fi RGBW HP
01207390
DMX512+RDM LED
Luci della Ribalta srl, Via Berna 14, 46042 Castel Goffredo mn Italy. tel +39 0376 771 777 ‐ fax +39 0376 772 140 ‐ email info@ldr.it
Advertisement
Table of Contents

Subscribe to Our Youtube Channel
Related Manuals for LDR Astro 250 Wi-fi RGBW DMX512+RDM LED


Summary of Contents for LDR Astro 250 Wi-fi RGBW DMX512+RDM LED
- Page 1 Bedienungsanleitung instrucciones de manejo mode d'emploi gebruiksaanwijzing Astro 250 Wi‐fi RGBW 01207190 DMX512+RDM LED Astro 250 Wi‐fi RGBW HP 01207390 DMX512+RDM LED Luci della Ribalta srl, Via Berna 14, 46042 Castel Goffredo mn Italy. tel +39 0376 771 777 ‐ fax +39 0376 772 140 ‐ email info@ldr.it...
-
Page 2: Table Of Contents
page 13 16.17 Software version page 13 16.18 Net page 13 16.19 Sub‐Net page 14 16.20 Universe page 14 16.21 Manual dimmer Type page 14 16.22‐a Pro or basic control page 14 16.23‐b Factory setting page 15 16.24‐c ID REMOTO page 15 16.25‐d Calibration page 15 16.26‐e IP address page 16 16.27‐f Subnet Mask page 16 16.28‐g Service set identifier( SSID) page 16 16.29‐H Password page 16 1 Luci della Ribalta srl, Via Berna 14, 46042 Castel Goffredo (MN) Italy Tel. +39 0376 771 777 – fax +39 0376 772 140 – email info@ldr.it – web www.ldr.it ... - Page 3 Astro 250 Wi‐Fi RGBW and HP version, DMX 512+ RDM LED followspot ‐ User’s Manual – 2.0 16.30‐i Exit Hidden menu page 16 17. App settings from LDR mobile controller…………………………………………… page 17 18. App settings and operations from user’s android mobile controller….. page 18 18.1 Settings page 19 18.2 Operationg the Astro Wi fi page 22 18.3 Creating, storing and deleting Colours page 23 19.App settings and operations from user’s IOs mobile controller…………… page 25 19.1 Operating the Astro wi fi page 27 19.2 Creating, storing and deleting colours page 27 20. Universal 360° rotating mobile device holder supplier……………………….. page 29 21. Positioning your device mobile…………………………………………………………… page 29 22. Recharging your mobile battery……………..………………………………………….. page 30 23. Clamp‐on mobile digital dimmer………………………………………………………… page 30 24. Focusing……………………………………………………………………………………………… page 30 25. Cleaning and maintenance………………………………………………………….……… page 30 26. Spare sparts……………………………………………………………………………………….. page 31 27. Warranty……………………………………………………………………………………………. page 31 28. Summary of controls and functions…………………………………………………….. page 32 29. DMX charts…………………………………………………………………………………………. page 33 29.1 DMX CHART 1 (16 bit dimmer and strobe disabled) page 33 29.2 DMX CHART 2 (16 bit dimmer inabled, strobe disabled) page 33 29.3 DMX CHART 3 (strobe functions inabled, 8 bit dimmer) page 34 29.4 DIMX CHART 4 (16 bit dimmer and strobe inabled) page 35 LDR Conformity Certificate – Certificato di Conformità – Konformitätserklärung page 35 Complaint form – Modulo di reclamo – Reklamationsformular …………………………. page 36 ...
-
Page 4: Important Safety Norms
Luci della Ribalta accepts no liability for direct, indirect, incidental, special, or consequential damages resulting from the customer’s failure to follow the installation, operating, maintenance and safety procedures in this manual or those generally applicable to lighting equipment. The limitation extends to damages for personal injury, property damage, loss of operations, loss of profits, loss of product or loss of time, whether incurred in by the customer, the customer’s employees or a third party. Apart from the instructions given on this manual, all relevant safety and health standards of the appropriate EU Directives must be complied with. 1. IMPORTANT SAFETY NORMS This product is a professional lighting fixture, namely a followspot, fitted with a LED light source, which can only be operated by professional staff. Warning, high voltage ignition. Disconnect the unit from power before servicing Continuous mains power is required for this spotlight as an internal dimmer controls the intensity via DMX or local rotary knob. An accessory clamp‐on digital dimmer is furthermore available for positioning on the side grab handles of the followspot Use of a phase control dimmed mains supply may damage the internal electronics This product features fan‐assisted ventilation. Make sure you do not cover the fans or obstruct the air flow at any time Make sure all fans are working correctly at any one time. Should you detect even the slightest malfunction, switch the luminaire off and carry out the necessary servicing. Replace the fans if necessary. This product is rated IP 20 and is therefore designed for interior use only. For details on maximum ambient temperature and tilt angle please refer to what indicated on the product label or screen‐printing on the side of the lens‐tube or the rear of the LED‐house 3 Luci della Ribalta srl, Via Berna 14, 46042 Castel Goffredo (MN) Italy Tel. +39 0376 771 777 – fax +39 0376 772 140 – email info@ldr.it – web www.ldr.it ... - Page 5 Repairing and replacement of any component of this product must be carried out exclusively by professional personnel in conformity with the relevant safety and health standards and only with original Luci della Ribalta srl components. Replacement of any part of the wiring system must be carried out exclusively by professional personnel in compliance with the original wiring diagram and with components identical to or compatible with those originally fitted. Installation of this product must be exclusively carried out by professional personnel in compliance with the safety norms in force in the country where the product is used. WARNING: DANGER OF ELECTRICAL SHOCK DO NOT OPERATE ON LIVE EQUIPMENT Disconnect power before opening this fixture to access its light source or electronics. The replacement of the LED source or any of its electronic components can be carried out exclusively by professional personnel upon LDR’s written authorization and only with original Luci della Ribalta srl components. Failure to obtain the manufacturer’s authorization to carry out the replacement/repair, will immediately invalidate the product’s warranty WARNING: EYE DAMAGE HAZARD Make sure this fixture is installed so as to avoid prolonged direct staring at its operating light source (LED) from a distance of less than 7m / 23ft. WARNING: FIRE HAZARD Never locate this fixture on any flammable surface. Minimum distance of any part of the body of the luminaire from any flammable surface or object: 0,5m / 20in ...
-
Page 6: Box Content
A spigot is supplied in standard delivery for you to tripod‐mount your followspot. Make sure the tripod you are going to use can withstand the product load as indicated on the product’s label Make sure the tripod you are going to use features a top aperture over 28mm/1.12in dia. Remove the M12 nut and the washer from the spigot. Insert the spigot in the central hole of the yoke of the followspot from beneath the yoke. Add the plain screw and the M12 self‐ locking nut and tighten the nut with a suitable tool. Mount the followspot on the tripod. 5. MOUNTING / REPLACING THE IRIS DIAPHRAGM ‐ supplied The iris diaphragm supplied with the followspot has 20 leaves to size the beam from a maximum aperture of 68mm/2.67in to a minimum of 5mm/0.19in. The iris comes already fitted, so you will only have to refer to this section in case you need to remove or replace the iris. Using a Phillips screw‐driver (M3) remove the cross‐head screws from the top lids of the gate area (2 lids, 2 screws each) Using a Phillips screw‐driver (M4) remove the two cross‐head screws from the sides of the iris plate By pulling (to remove) or pushing (to insert) from the lever handle, slide the iris diaphragm out / in the gate area Fix the iris in position by tightening the previously removed screws 5 Luci della Ribalta srl, Via Berna 14, 46042 Castel Goffredo (MN) Italy Tel. +39 0376 771 777 – fax +39 0376 772 140 – email info@ldr.it – web www.ldr.it ... -
Page 7: Mounting / Replacing The Gobo-Holder - Not Supplied
Make sure the unit is totally cold before attempting to remove it, protect you hands with gloves and avoid skin direct contact with its metal surface 7. BLACK SHUTTER BLADES (accessory, part nr. R80208019 x 4) Black shutter blades are not supplied with the unit but are available as separate accessory. They are sold as single items and relevant part number is R80208019, 4 are required. 8. ADJUSTING THE YOKE This followspot is provided with a yoke balancing adjustment. The balancing point is factory set for the standard product configuration supplied (without colour). However, should you need to adjust the balancing, please follow the procedure here below: The followspot must be mounted on the tripod stand with all relevant accessories attached. Using a Phillips screw driver, loosen the 2x M5 screws on each side of the yoke. Gently slide the followspot backwards or forwards to the required position. Make sure the yoke is correctly aligned horizontally. Tighten the 4x M5 screws 6 Luci della Ribalta srl, Via Berna 14, 46042 Castel Goffredo (MN) Italy Tel. +39 0376 771 777 – fax +39 0376 772 140 – email info@ldr.it – web www.ldr.it ... -
Page 8: Important Notice Before The Installation / Installation
To perform a correct wiring, please note that the cores in this mains lead are colour‐coded as follows: Ground: green+yellow – Neutral: blue ‐ Phase: brown In case the colours of the wires do not correspond to the colour of the connection points on your plug, please proceed as follows: The green or green and yellow wire must be connected to the connection point marked with the letter E or with the symbol or coloured in green or in green‐yellow The blue wire must be connected to the connection point marked with the letter N or coloured in black The brown wire must be connected to the connection point marked with the letter L or coloured in red Before you finally position this product for use, temporarily connect it to a properly fused power supply to check the unit works correctly. 11. VOLTAGE Before operating this unit please refer to the product label mounted at the back of the luminaire to check you are operating with the correct voltage. The Astro 250 LED can be operated between 100V and 260 VAC. 12. FREQUENCY Frequency on this product is automatically selected by the electronic PSU (50/60Hz) 13. CONNECT TO THE POWER SUPPLY Connect the unit to a continuous mains power source 7 Luci della Ribalta srl, Via Berna 14, 46042 Castel Goffredo (MN) Italy Tel. +39 0376 771 777 – fax +39 0376 772 140 – email info@ldr.it – web www.ldr.it ... -
Page 9: Mechanical Operation
Beam‐dimming and black‐out: this followspot can be dimmed by: ‐ Local manual control, rotary switch on the backplate of the unit ‐ Local, via clamp‐on digital dimmer, supplied in the standard and kit version – see relevant instructions ‐ Remote, by DMX512 signal CAUTION: Make sure you always use one of the above options to black‐out the light and never the sizing iris diaphragm, as keeping the latter closed may cause overheating, damage and even fire inside the LED‐house. Pan & Tilt control: this unit is fitted with 2 soft, comfortable side bars covering the full length of the followspot for an easy and safe control of the pan and tilt angle by the followspot’s operator from any position The stirrup is factory‐balanced and fitted with a positive friction clamp controlled by a user‐friendly, effective lever‐knob. Turn the knob anticlockwise to release it, position the followspot at the desired tilt angle and turn the lever clockwise to hold the desired position. Press the button at the top of the lever and keep it pressed while turning the lever if you need to change its position. Make sure the lever is softly tightened at any time during operation A smooth pan‐movement is guaranteed by the provided spigot. For extra stability and smoothness a spigot with fluid head, pictured here below, is available as extra accessory under part # A20102100 15. LOCAL CONTROL PANEL AND OPERATION OPERATION: LCD display for DMX address, system setup and status details. POWER: power LED status indicator, red colour. ON= power DMX: DMX LED status indicator, green colour. LED OFF = DMX OFF and manual control activated, LED ON = DMX MODE activated with no DMX signal, FLASHING LED = receiving DMX MENU: rotary switch selector to select and modify the operational modes. Turn left or right to navigate through the menu and press to select or to confirm DMX IN: input DMX signal (pin1=0, pin2= DATA‐, pin3=DATA+). DMX OUT: Loop through DMX signal output 8 Luci della Ribalta srl, Via Berna 14, 46042 Castel Goffredo (MN) Italy Tel. +39 0376 771 777 – fax +39 0376 772 140 – email info@ldr.it – web www.ldr.it ... -
Page 10: Menu
16. MENU There are twenty‐one different menus to control the settings of ASTRO RGBW LED. The rotary selector is used to adjust the settings and to navigate through the menu. Turn left or right to select the menu and push to access or to confirm the selected data or functions. To exit the selected menus without saving the data, press the rotary selector for at least 1 second. 16.1 Wi‐Fi, DMX OR MANUAL (Mode) Colour control of the Astro is achieved through a totally innovative technology. The Astro Wi‐Fi generates a proprietary Wi‐Fi access which will recognize one device only and whose range reaches 12m. Access is to the Wi‐Fi access is protected by password. A universal mobile phone holder (3.5/6.5in), rotatable over 360°, supplied with the Astro and clamped on the side bar, allows the installation of a mobile device, either IOS or Android to take control of the followspot. If the Astro was purchased complete with the LDR controller A20702074 Smartphone Honor 75 Black, pre‐loaded with the Android Art‐Net Controller app, relevant settings and libraries, (available as an optional accessory), it is ready to be operated. In case you are using your own mobile device, please refer to chapter 12 and 13 of this manual for all the necessary steps needed to set up the control system Select the LED control mode between Wi‐Fi (factory setting – if you want to control the colour mixing through a mobile device), DMX and manual. To change the control mode press once the rotary selector until an arrow ( ) appears on the menu. Turn the selector to the right or the left to select the desired mode of operation and press to confirm your selection. In order to work properly with an external mobile device the Astro must be set in Wi‐Fi mode at the default settings. If default settings have been changed, please refer to chapter 5.23‐B to reset the product to factory settings. PRESS TO ACTIVATE TURN TO SELECT Wi‐ 1 Mode 1 Mode 1 Mode ... -
Page 11: Dmx Address Page
APPEAR 4 DMXMem DIM THE LED TO 80% OF ITS MAXIMUM POWER OFF=80% 4 DMXMem DIM THE LED TO 0% OFF=00% 16.5 STROBE (Strobe) This function allows to activate the strobe function. Factory setting is DISABLE. PRESS TO ACTIVATE 5 Strobe 5 Strobe TURN TO ENABLE OR 5 Strobe THE MENU, AN DISABLE STROBE AND ARROW SHOULD DISABLE DISABLE ENABLE PRESS TO CONFIRM APPEAR 16.6 STROBE SPEED (SetStr) It allows to set the strobe speed. This menu is not active when the strobe function is disabled or when it is remotely controlled through DMX. Factory setting is OPEN. 10 Luci della Ribalta srl, Via Berna 14, 46042 Castel Goffredo (MN) Italy Tel. +39 0376 771 777 – fax +39 0376 772 140 – email info@ldr.it – web www.ldr.it ... - Page 12 RESPONSE AT SHUT FAST DOWN 16.9 DIMMING BEHAVIOUR (Smooth) This function allows to set the LED dimming response. Factory setting is NORMAL. PRESS TO ACTIVATE 9 Smooth 9 Smooth THE MENU, AN FAST DIMMING ARROW SHOULD RESPONSE = 150ms NORMAL NORMAL APPEAR 9 Smooth SLOW DIMMING RESPONSE = 300ms SLOW 9 Smooth IMMEDIATE DIMMING RESPONSE FAST 11 Luci della Ribalta srl, Via Berna 14, 46042 Castel Goffredo (MN) Italy Tel. +39 0376 771 777 – fax +39 0376 772 140 – email info@ldr.it – web www.ldr.it ...
- Page 13 ARROW SHOULD AutoOFF AutoOFF 30 SECONDS APPEAR 11 BackL LCD BACKLIGHT ALWAYS ON ON 16.12 RED COLOUR INTENSITY (Red) This function allows to set the intensity of red color for manual mode. Selecting the manual mode, 100% is automatically set. PRESS TO ACTIVATE 12 Red 12 Red 12 Red TURN TO SELECT THE THE MENU, AN RED INTENSITY AND ARROW SHOULD ###% ###% ###% PRESS TO CONFIRM APPEAR 12 Luci della Ribalta srl, Via Berna 14, 46042 Castel Goffredo (MN) Italy Tel. +39 0376 771 777 – fax +39 0376 772 140 – email info@ldr.it – web www.ldr.it ...
- Page 14 OR °F AND PRESS TO ARROW SHOULD ##°C ##°C ###°F CONFIRM APPEAR 16.17 SOFTWARE VERSION (SwVer) This function allows to visualize the software version. 16.18 NET (Net) The apps used in Wi‐Fi mode work with Art‐Net 3 protocol. The Port‐Address is composed of three separate fields: NET, SUB‐NET and UNIVERSE. This function allows to set the NET field, in a range between 0 and 128. Factory setting is 000. PRESS TO ACTIVATE 18 Net 18 Net 18 Net TURN TO SELECT THE THE MENU, AN NET NUMBER AND ARROW SHOULD 000 ### ### PRESS TO CONFIRM APPEAR 13 Luci della Ribalta srl, Via Berna 14, 46042 Castel Goffredo (MN) Italy Tel. +39 0376 771 777 – fax +39 0376 772 140 – email info@ldr.it – web www.ldr.it ...
- Page 15 ENCODER EXTERNAL SLIDER POTENT APPEAR There are also nine different hidden menus which allow to select the advanced settings of the ASTRO WI‐FI RGBW. To activate this function turn OFF and then ON again the Astro by pressing the rotary switch at power on. 16.22‐A PRO or BASIC CONTROL (ProBasic) The PRO‐BASIC control is a special function which allows to limit the access to the control menu. Select ProBasic with the rotary switch and press to access the menu. Select: PRO, to enable access to all the functions BASIC, to limit the access to functions 16.1 Wi‐Fi, DMX or MANUAL MODE, 16.2 DMX ADDRESS, 16.12 ‐ 16.13 ‐ 16.14 ‐ 16.15 RGBW Colour intensity in manual mode, 16.16 Temperature Control, 16.17 Software version and 16.18 ‐ 16.19 ‐ 14.20 Net, Sub‐Net and Universe for Art‐Net Port‐ Address. Factory setting is PRO. PRESS TO ACTIVATE Choose MenuType MenuType TURN TO SELECT PRO THE MENU, AN OR BASIC MENU AND ARROW SHOULD ProBasic PRO BASIC PRESS TO CONFIRM APPEAR 14 Luci della Ribalta srl, Via Berna 14, 46042 Castel Goffredo (MN) Italy Tel. +39 0376 771 777 – fax +39 0376 772 140 – email info@ldr.it – web www.ldr.it ...
- Page 16 #### CONFIRM TURN TO ASSIGN Min BLUE Min BLUE THE CALIBRATION VALUE AND PRESS TO #### #### CONFIRM TURN TO ASSIGN Min WHITE Min WHITE THE CALIBRATION VALUE AND PRESS TO #### #### CONFIRM IMPORTANT NOTICE If the Astro is used in Wi‐Fi mode, DO NOT CHANGE the default levels because the colours generated by the controlling App depend on these. 15 Luci della Ribalta srl, Via Berna 14, 46042 Castel Goffredo (MN) Italy Tel. +39 0376 771 777 – fax +39 0376 772 140 – email info@ldr.it – web www.ldr.it ...
- Page 17 SSID THE LETTER, NUMBER PRESS TO ACTIVATE OR SYMBOL AND THE MENU SSID Astro### ######## PRESS TO CONFIRM 16.29‐H PASSWORD (PassWord) It allows to set the password to connect the controller to the network generated by Astro. Default password is “AstroNet”. We strongly recommend you change the SSID name of your Astro should you have purchased more than one unit. You will be allowed to create an 8 digit SSID of your choice. NOTICE: Reset (see chapter 16.23‐B) doesn’t restore the default settings of password. TURN TO ASSIGN THE Choose PASSW PASSW LETTER, NUMBER OR PRESS TO ACTIVATE SYMBOL AND PRESS THE MENU PassWord AstroNet ######## TO CONFIRM 16.30‐I EXIT HIDDEN MENU (Exit) It allows to exit from hidden menus. 16 Luci della Ribalta srl, Via Berna 14, 46042 Castel Goffredo (MN) Italy Tel. +39 0376 771 777 – fax +39 0376 772 140 – email info@ldr.it – web www.ldr.it ...
- Page 18 Astro 250 Wi‐Fi RGBW and HP version, DMX 512+ RDM LED followspot ‐ User’s Manual – 2.0 17. APP SETTINGS AND OPERATION FROM LDR MOBILE CONTROLLER SMARTPHONE HONOR 7S BLACK – # A20702074 – optional accessory If the Astro was purchased complete with the LDR controller A20702074 Smartphone Honor 75 Black, (available as an optional accessory), pre‐loaded with the Android Art‐Net Controller app, relevant settings and libraries, it is ready to be operated. In case you are using your own mobile device, please refer to chapter 13 and 14 of this manual for all the necessary steps needed to set up the control system under either IOS or Android. Set the Operation Mode of the ASTRO to WI‐FI (refer to chapter 16.1) Make sure the controller is connected to the network generated by Astro. From the home screen, tap Settings Wi‐Fi and check that the controller is connected to the Wi‐Fi network “Astroxxx”. Click on the Art‐Net Controller icon: from the home screen, tap Pb 0v, which will bring you to the existing library of colours, which also includes 3 whites (2700K, 3200K and 5600K) and a black‐out option. Click on the chosen colour to have it on. In order to change colour simply click on the following one. Art-Net Controller Should you need to create and store more cues, please refer to chapter 18.3 of this manual. 17 Luci della Ribalta srl, Via Berna 14, 46042 Castel Goffredo (MN) Italy Tel. +39 0376 771 777 – fax +39 0376 772 140 – email info@ldr.it – web www.ldr.it ...
-
Page 19: App Settings And Operations From User's Android Mobile Controller
On the Apps screen, tap Settings Flight mode. Drag the Flight mode switch to the right. Select Settings Wi‐Fi. Drag the Wi‐Fi mode switch to the right, select “Astroxxx” from the list of detected Wi‐Fi networks and tap CONNECT. 18 Luci della Ribalta srl, Via Berna 14, 46042 Castel Goffredo (MN) Italy Tel. +39 0376 771 777 – fax +39 0376 772 140 – email info@ldr.it – web www.ldr.it ... - Page 20 Astro 250 Wi‐Fi RGBW and HP version, DMX 512+ RDM LED followspot ‐ User’s Manual – 2.0 Enter the password (default AstroNet) and press CONNECT. When the device is connected to the network, exit from the Wi‐Fi settings and tap on the Art‐Net Controller Libraries icon. Please to chapter 10.28G and 10.29H to reset your SSID code and password. Tap Create/Update Fixtures Library and wait until loading is completed. 19 Luci della Ribalta srl, Via Berna 14, 46042 Castel Goffredo (MN) Italy Tel. +39 0376 771 777 – fax +39 0376 772 140 – email info@ldr.it – web www.ldr.it ...
- Page 21 Scroll the fixtures library and select GENERIC_RGBW.D4. Insert “1” in the following fields: Start DMX, n° Fixtures and Start ID. Tap Patch it and then exit the Patch menu. 20 Luci della Ribalta srl, Via Berna 14, 46042 Castel Goffredo (MN) Italy Tel. +39 0376 771 777 – fax +39 0376 772 140 – email info@ldr.it – web www.ldr.it ...
- Page 22 Open the main menu and select Settings. Enter your ASTRO’s IP address in the “Art‐net broadcast/unicast to:” fields Please refer to chapter 14.26‐E of this user guide to know the IP address to be used. Scroll the Settings window downwards, enter “99” in the PlayBacks fields and confirm (Apply). 21 Luci della Ribalta srl, Via Berna 14, 46042 Castel Goffredo (MN) Italy Tel. +39 0376 771 777 – fax +39 0376 772 140 – email info@ldr.it – web www.ldr.it ...
- Page 23 Astro 250 Wi‐Fi RGBW and HP version, DMX 512+ RDM LED followspot ‐ User’s Manual – 2.0 In order to load on your device the LDR colour libraries and settings the “Astro RGBW‐LDR revxxx.show.zip” file is needed. The file can be obtained by email or WhatsUp directly from LDR or your dealer. Open the main menu and select Files Load share and Search for your SHOW.ZIP file (for example in the download folder if received by e‐mail or downloaded by the LDR’s website) and confirm (OK): the LDR settings and libraries will be loaded and saved. Your mobile device is now ready to control the Astro Wi‐Fi 18.2 OPERATING THE ASTRO WI‐FI Make sure the clamp‐on digital dimmer is connected and its fader above zero. Please see relevant instruction manual supplied with the item. From the home screen (Prog), tap Pb 0v (Play‐Backs) in the main app toolbar, and you will get the latest available library of saved colours. These currently also include 3 different whites (2700K, 3200K and 5700K) plus a black‐out option. Tap on the desired colour to get the Astro to reproduce it, and choose the next one when needed. A Rec function (top‐right button, above the colours) is active by default. If accidentally pressed it will cause the settings of your colours (scenes) to change. We strongly recommend you de‐activate this function as follows: ...
-
Page 24: Creating, Storing And Deleting Colours Page
Astro 250 Wi‐Fi RGBW and HP version, DMX 512+ RDM LED followspot ‐ User’s Manual – 2.0 WARNING: the levels for RGBW set on the 4 virtual channels in the Prog window will always take precedence over the levels set when creating and storing a colour in the Pb 0v menu. In order to avoid undesired changes to the stored colours and problems during their reproduction, tap Clear when in the Prog window before selecting any colour (scene) from the Pb 0v window. 18.3 CREATING, STORING AND DELETING COLOURS ART‐NET Controller allows you to create any desired colour and to store up to 99 different options at one time. If you want to create and store a new colour (or scene), select Prog in the main app toolbar to view the RGBW faders and set each colour (Red, Green, Blue, White) to the required level by sliding each fader to the right (higher level) or to the left (lower level) until you get the desired colour. Select Pb 0v, tap Rec and then the desired position in your colour palette (in the above example position n.19) 23 Luci della Ribalta srl, Via Berna 14, 46042 Castel Goffredo (MN) Italy Tel. +39 0376 771 777 – fax +39 0376 772 140 – email info@ldr.it – web www.ldr.it ... - Page 25 Astro 250 Wi‐Fi RGBW and HP version, DMX 512+ RDM LED followspot ‐ User’s Manual – 2.0 Tap and hold the PB button to access the colour’s details view. Type in the name for your PB Button, choose its colour (Color Edit) and confirm (OK). Your new colour has been stored. In order to delete any of the stored colours (scenes), tap Rec ( Delete) then the desired PB Button. To avoid undesired or accidental changes to the stored colours (scenes), carefully make sure the App is set to Play mode: open the main menu and select Options Mode=Play. Use the CLEAR option to cancel any undesired or accidental modification. WARNING: by default the App always starts in Rec Mode. 24 Luci della Ribalta srl, Via Berna 14, 46042 Castel Goffredo (MN) Italy Tel. +39 0376 771 777 – fax +39 0376 772 140 – email info@ldr.it – web www.ldr.it ...
-
Page 26: App Settings And Operations From User's Ios Mobile Controller
From the App Store, purchase, download and install Luminair 3. The price of this app will depend on the country you are purchasing it from. From Settings set your device to Airplane Mode first, as this will avoid any interference from in‐ coming calls, emails or messages. Drag then the Wi‐Fi switch to the right and select “Astroxxx” from the list of detected Wi‐Fi networks, in order to connect your device to the Astro network. 25 Luci della Ribalta srl, Via Berna 14, 46042 Castel Goffredo (MN) Italy Tel. +39 0376 771 777 – fax +39 0376 772 140 – email info@ldr.it – web www.ldr.it ... - Page 27 Astro 250 Wi‐Fi RGBW and HP version, DMX 512+ RDM LED followspot ‐ User’s Manual – 2.0 Enter the password (default AstroNet) and press join to connect to the network. Once the device is connected, exit from the Wi‐Fi settings and tap on the Luminair icon. The App will start at the default factory settings, specifically with a Factory Test Project. By default, Luminair broadcasts Art‐Net over the network to Net 0, Subnet 0 and Universe 0. In this scenario, data will be delivered to all Art‐Net interfaces on the local network and then no special configuration should be necessary. To load the LDR settings which will allow you to control the Astro, please request the “Astro RGBW ‐ LDR revxxx.luminair” file and open it with Luminair App. This file can be requested directly from LDR or your dealer and can be received by email or WhatsUp or downloaded from the LDR website. 26 Luci della Ribalta srl, Via Berna 14, 46042 Castel Goffredo (MN) Italy Tel. +39 0376 771 777 – fax +39 0376 772 140 – email info@ldr.it – web www.ldr.it ...
-
Page 28: Creating, Storing And Deleting Colours Page
By default, Luminair will take you to the buttons area. Each button carries a reference number and the description of the stored colour. Tap on the desired colour to get the Astro to reproduce it, and choose the next one when needed. Use the clamp‐on digital dimmer to dim the light output. 19. 2 Creating, storing and deleting colours In addition to the supplied library of colours, Luminair 3 allows you to create and store any extra customized colour. To add a new colour (scene), select Controls in the main app toolbar to view the RGBW faders and set the desired channel levels for R, G, B and W. Scroll Channels levels 27 Luci della Ribalta srl, Via Berna 14, 46042 Castel Goffredo (MN) Italy Tel. +39 0376 771 777 – fax +39 0376 772 140 – email info@ldr.it – web www.ldr.it ... - Page 29 Any change to the colour levels made when a colour (scene) is selected/active will automatically be recorded into that scene. Switching between (colours) scenes will automatically recall the levels last auto‐saved into the newly selected scene. Luminair will fade between colours based upon the fade time assigned to that colour scene. Tap on the scene’s name label to access the scene details view. To avoid undesired or accidental changes to the stored colours, always make sure you recall the Scenes view from the main app toolbar. To delete a stored colour (scene), tap and hold on the scene’s name label and press Delete. Scene details 28 Luci della Ribalta srl, Via Berna 14, 46042 Castel Goffredo (MN) Italy Tel. +39 0376 771 777 – fax +39 0376 772 140 – email info@ldr.it – web www.ldr.it ...
-
Page 30: Universal 360° Rotating Mobile Device Holder Supplier
Astro 250 Wi‐Fi RGBW and HP version, DMX 512+ RDM LED followspot ‐ User’s Manual – 2.0 To avoid undesired or accidental changes to a project, uncheck Auto‐Save Projects from the Settings menu. 20. UNIVERSAL, 360° ROTATING MOBILE DEVICE HOLDER, supplied Your Astro Wi‐FI will have been delivered with an universal, 360° rotating, mobile device holder.The holder is factory‐mounted in a convenient position on the right‐hand side control bar, in order to avoid damages in transit. You can re‐position the holder anywhere on one of the two control bars, at your best convenience. In order to do so, slacken the knob at the bottom of the clamp, slide or remove the mobile holder, position where desired and re‐tighten the clamp. 21. POSITIONING YOUR MOBILE DEVICE Because the WI‐FI signal emitted by the Astro covers a distance of approximately 12m (provided there are no obstacles to its diffusion), you can choose to position your mobile device on the provided mobile holder, or anywhere else within the range of transmission and actually have the colour changing of the Astro remotely controlled by a second operator. In order to fit your mobile device to the supplied holder, move the red button at the rear of the holder to the OPEN position, and, while keeping it pressed, rotate the orange toothed wheel until the desired opening of the 4 holding arms is reached and turn it again clockwise to close the arms and have your mobile securely held. Rotate your mobile to the desired angle and operate the followspot. In order to remove your mobile from the holder, press the orange button at the rear of the holder to release the arms open. 29 Luci della Ribalta srl, Via Berna 14, 46042 Castel Goffredo (MN) Italy Tel. +39 0376 771 777 – fax +39 0376 772 140 – email info@ldr.it – web www.ldr.it ... -
Page 31: Clamp-On Mobile Digital Dimmer
24. FOCUSING This fixture features a variable beam angle from 8° to 22°. The variable beam is modified by adjusting the front and rear zoom lenses in relation to each other. The front lens defines the beam spread, the rear lens defines the focus degree of ‘softness’ or ‘hardness’ of the beam edge or shutters. 25. CLEANING AND MAINTENANCE To ensure maximum performance of the product, a regular maintenance service should be carried out. Please make sure the product is cold and disconnected from power supply when doing this. General maintenance * Clean all reflective parts such as lenses opening the product, if necessary. * Check the lenses and replace any visibly damaged component. * Clean air ducts and fans in order to allow a proper ventilation activity on the product. * Check internal and external wiring and replace any cable which should be damaged by heat or mechanical agents. Cleaning of optical components LEDhouse lenses: Open the lens compartment door by removing the two M4 cross head screws on the top of the LEDhouse tube and slide the top cover free Remove the condensor lenses assembled block by removing the two M5 cross head screws. Clean the lenses with a soft cloth and re‐position Zoom lenses: Slide the front zoom panels positioned at the bottom of the lens tube and clean with a soft cloth. 30 Luci della Ribalta srl, Via Berna 14, 46042 Castel Goffredo (MN) Italy Tel. +39 0376 771 777 – fax +39 0376 772 140 – email info@ldr.it – web www.ldr.it ... -
Page 32: Spare Sparts
Astro 250 Wi‐Fi RGBW and HP version, DMX 512+ RDM LED followspot ‐ User’s Manual – 2.0 26. SPARE PARTS All components are available as spare parts. We strongly recommend you always use original LDR components as spare parts. Please refer to our technical assistance should you need to order and/or replace any part of the unit. 27. WARRANTY Our warranty covers all structural and manufacture defects for one year from the date you purchased this product. In case of complaints we strongly recommend you use the complaint form at the end of this manual or contact the local dealer who supplied the product to you. In any case please report the serial number of the product. 31 Luci della Ribalta srl, Via Berna 14, 46042 Castel Goffredo (MN) Italy Tel. +39 0376 771 777 – fax +39 0376 772 140 – email info@ldr.it – web www.ldr.it ... -
Page 33: Summary Of Controls And Functions
SLOW = ACTIVE NORMAL = 150ms; SLOW = Smooth Dimmer response 300ms FAST = Immediate NORMAL response AUTO = regulated by Tled; Fan Fan setting SILENT = slow speed, low noise; AUTO 0 SILENT = constant speed ON; AutoOFF = LCD light off after BackL LCD screen retro‐illumination AutoOff 1 1'30" Tled Visualize the LED temperature Select the LED Temp in °C or F° °C 2 SwVer Visualize the software version ‐‐‐ 3 ENCODER = Rotary switch; Manu Select the manual dimmer type ENCODER 4 POTENT = External slider 32 Luci della Ribalta srl, Via Berna 14, 46042 Castel Goffredo (MN) Italy Tel. +39 0376 771 777 – fax +39 0376 772 140 – email info@ldr.it – web www.ldr.it ... -
Page 34: Dmx Charts
DMX Type of Function Effect Decimal Percentage Channel Control Master Adjusts luminous output intensity 1 Proportional 0 255 0% 100% Dimmer from 0 to 100% 2 Dimmer Fine Proportional Fine dimmer control 16 bit 0 255 0% 100% Table name: DMX512 Functions Date: Projector: Astro Wifi Edition: 1 chart 2 (16 bits) 16/05/2018 33 Luci della Ribalta srl, Via Berna 14, 46042 Castel Goffredo (MN) Italy Tel. +39 0376 771 777 – fax +39 0376 772 140 – email info@ldr.it – web www.ldr.it ... - Page 35 79% 86% frequency) Step Closed 221 255 87% 100% Table name: DMX512 Functions Date: Projector: Astro Wifi Edition: 1 chart 3 (Strobe) 16/05/2018 34 Luci della Ribalta srl, Via Berna 14, 46042 Castel Goffredo (MN) Italy Tel. +39 0376 771 777 – fax +39 0376 772 140 – email info@ldr.it – web www.ldr.it ...
- Page 36 161 180 64% 71% Step Strobe speed 9 181 200 72% 78% Strobe speed 10 (maximum Step 201 220 79% 86% frequency) Step Closed 221 255 87% 100% Table name: DMX512 Functions Date: Projector: Astro Wifi Edition: 1 chart 4 (16 bits + Strobe) 16/05/2018 Luci della Ribalta srl reserves the right to modify the present document without prior notice. 35 Luci della Ribalta srl, Via Berna 14, 46042 Castel Goffredo (MN) Italy Tel. +39 0376 771 777 – fax +39 0376 772 140 – email info@ldr.it – web www.ldr.it ...
- Page 37 P .iva 01815640204 c.iso IT01815640204 Luci della Ribalta srl, Via Berna 14, 46042 Castel Goffredo MN Italy - tel +39 0376 771777 - web www.ldr.it - email info@ldr.it IT/015/MN/11 VAT registration # It01815640204 - REA MN 198438 - Authorized Exporter #...
- Page 38 Reklamationsformular ‐ formulaire de réclamation ‐ hoja de reclamaciones email: info@ldr.it Azienda ed Indirizzo ‐ Company's name and address ‐ Firmenname und Addresse ‐ Nom et adresse ‐ Nombre y direcciòn _______________________________________________________________________________________________________ _______________________________________________________________________________________________________ Nome del rivenditore da cui il prodotto è stato acquistato ‐ Name of the dealer where you have purchased the product ‐ Namen der Firma, die Ihnen das Produkt verkauft hat ‐ Nom de la société qui vous a vendu ce produit ‐ Nombre de la compañia donde han comprado el producto: ____________________________________________________________________________________________________ 01207190 Astro 250 Wi‐fi RGBW Prodotto difettoso DMX512+RDM LED Faulty product 01207390 Astro 250 Wi‐fi RGBW HP Defekte s Produkt DMX512+RDM LED Produit défectueux Producto defectuoso Descrizione del problema /Problem found/Beschreibung des Defekts/Description du défaut/Descripciòn del problema ________________________________________________________________________________________________________ ________________________________________________________________________________________________________ ________________________________________________________________________________________________________ ________________________________________________________________________________________________________ Data d'acquisto ‐ Date of purchase ‐ Kaufdatum ‐ Date de l'achat ‐ Fecha de compra ________________________ Si prega di allegare prova d'acquisto ‐ Please attach copy of purchase invoice ‐ Bitte Kaufnachweis beilegen ‐ Veuillez joindre une quittance d'achat ‐ Les rogamos incluyan lcopia de la factura de compra. Nome e qualifica ‐ Name and position ‐ Name und Funktion ‐ Nom et fonction ‐ Nombre y cargo ____________________________________________________________________ Data ‐ Date ‐ Datum ‐ Date ‐ Fecha _____________________________...
- Page 39 local de escoamento de residuos, ou a loja na qual efectuou a compra. Richtlinie 2002/96/EU (Elektro- und Elektronik- Altgeräte - WEEE): Benutzerinformationen. Dieses Produkt entspricht Richtlinie WEEE-symbolet (Waste Electrical 2002/96/EU. Das Symbol des auf dem Gerät Electronic Equipment). dargestellten, durchgestrichenen Korbes gibt an, dass Bruken av WEEE-symbolet indikerer at dette Produkt Ende...
- Page 40 Luci della Ribalta srl, Via Berna 14, 46042 Castel Goffredo mn Italy. tel +39 0376 771 777 ‐ fax +39 0376 772 140 ‐ email info@ldr.it...
Need help?
Do you have a question about the Astro 250 Wi-fi RGBW DMX512+RDM LED and is the answer not in the manual?
Questions and answers