
Related Manuals for Raymarine ST1000+


Summary of Contents for Raymarine ST1000+
- Page 1 ST1000 Plus & ST2000 Plus Tiller Pilots Owner’s Handbook Document number: 81130-5 Date: June 2005...
- Page 2 Autohelm, HSB (High Speed Bus), SailPilot, SeaTalk and SportPilot are registered trademarks of Raymarine Ltd. Raymarine, AST (Advanced Steering Technology), AutoAdapt, AutoLearn, AutoRelease, AutoSeastate, AutoTack, AutoTrim, FastTrim, GyroPlus, RayGyro, RayPilot and WindTrim are trademarks of Raymarine Ltd. Handbook contents © Raymarine Ltd 2005.
-
Page 3: Table Of Contents
Contents Contents... 1 Chapter 1: Introduction ...3 1.1 Overview ... 3 1.2 Specifications ... 4 1.3 About this handbook ... 5 Important Information ... 5 Product disposal ... 6 Chapter 2: Using the Tiller Pilot ...7 2.1 Overview ... 7 2.2 Using Auto mode ... - Page 4 Installation accessories ...34 4.3 Cabling and socket installation ...40 Mounting the socket ...41 Power supply ...43 SeaTalk cabling ...44 NMEA cabling ...47 Chapter 5: Commissioning the Tiller Pilot ...49 5.1 Functional tests ...49 Switch on ...49 Operating sense ...49 Checking the navigation interface ...50 Checking the wind instrument interface ...51 Checking the SeaTalk interface ...52 5.2 Initial sea trial ...53...
-
Page 5: Chapter 1: Introduction
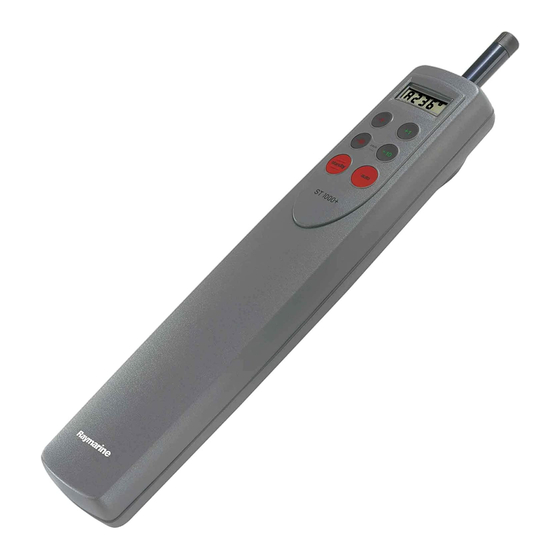
Chapter 1: Introduction 1.1 Overview Your Raymarine tiller pilot is a totally self-contained autopilot designed for tiller steered sailboats. The autopilot is mounted between the tiller and a single attachment point on the boat’s structure. It is designed for owner installation and is ready for use after connection to the boat’s 12 V electrical system. -
Page 6: Specifications
• SeaTalk compatibility also allows additional fixed and hand-held autopilot control units to be easily connected at secondary steering and control posi- tions The ST1000 Plus and ST2000 Plus tiller pilots can also be used with any navigator transmitting NMEA 0183 or NMEA 0180 data. The tiller pilot can be calibrated to suit each installation to provide maximum performance with many types of boat. -
Page 7: About This Handbook
Important Information Warranty To register your new Raymarine product, please take a few minutes to fill out the warranty card. It is important that you complete the owner information and return the card to us to receive full warranty benefits. -
Page 8: Safety Notices
Your Raymarine autopilot will add a new dimension to your boating enjoyment. However, it is the skipper’s responsibility to ensure the safety of the boat at all times by following these basic rules: •... -
Page 9: Chapter 2: Using The Tiller Pilot
Chapter 2: Using the Tiller Pilot Chapter 2: Using the Tiller Pilot 2.1 Overview WARNING: Passage making under autopilot control is an enjoyable experience that can, if you are not careful, lead to the relaxation of the permanent watch. Always maintain a permanent watch no matter how clear the sea may appear to be. -
Page 10: Using Auto Mode
2.2 Using Auto mode Engaging the autopilot (Auto mode) 1. Steady the boat on the required heading. 2. Place the pushrod over the tiller pin. If necessary, extend or retract the push- rod using the -1 , +1 , -10 , and +10 keys. 3. -
Page 11: Changing Course
Chapter 2: Using the Tiller Pilot Changing course In Auto mode, use the -1 and -10 (port) and +1 and +10 (starboard) keys to change course in steps of 1° and 10°. Port Starboard D3320-3 For example: press -10 three times for a 30° course change to port: Original 30˚... -
Page 12: Dodging Obstacles
AutoTack - Port Wind Dodging obstacles 1. To avoid an obstacle when you boat is under autopilot control, select a course change in the appropriate direction. For example, press -10 three times for a 30°dodge to port. 2. When safely clear of the obstacle, you can either: •... -
Page 13: Off Course Alarm
Chapter 2: Using the Tiller Pilot Resumed course Obstacle Original course Dodge SECOND If you do not press auto while the display is flashing, the autopilot will maintain Note: the current heading. Off course alarm The off course alarm sounds if the locked autopilot heading and the boat’s current page 62 heading differ by more than the value set in calibration level 6 (see ) for 20... -
Page 14: Automatic Deadband Control (Auto Seastate)
You can revert to normal operation by pressing either -1 and +10 or +1 and -10 together again. Automatic deadband control (Auto Seastate) In Auto, WindTrim or Track modes, the tiller pilot is set to AutoSeastate (automatic deadband control) as a default. This causes the pilot to gradually ignore repetitive movements of the boat and respond only to true course variations. -
Page 15: Operating Hints - Trim Changes
Chapter 2: Using the Tiller Pilot To switch back to AutoSeastate, press -1 and +1 again. The autopilot reverts to Automatic Deadband Control each time you select Standby Note: mode. Operating hints – trim changes CAUTION: Only make major course changes when steering MANUALLY. This ensures that the boat will safely clear any obstructions or other boats, and you can take into account the changed wind and sea conditions on the new heading before engaging the autopilot. -
Page 16: Switching Display Illumination On And Off
• In severe conditions, it may be advisable to remove the mainsail altogether and sail under headsail only. 2.3 Switching display illumination on and off You can switch the display illumination on and off when the tiller pilot is in Standby mode: •... - Page 17 Chapter 2: Using the Tiller Pilot • manual acquisition – when Cross Track Error is the only available information Automatic track acquisition If cross track error and bearing to waypoint data are both available (via SeaTalk or NMEA), the pilot can acquire a track automatically: 1.
- Page 18 Manual track acquisition If your navigator only provides cross track error information, you must acquire the track manually: 1. Steer the boat to within 0.1 nm of track. 2. Bring the heading to within 5° of the bearing to the next waypoint. 3.
-
Page 19: Returning To Auto From Track Mode
Chapter 2: Using the Tiller Pilot Returning to Auto from Track mode To return to Auto mode from Track mode: • press auto , or • press -10 and +10 together. Cross track error (XTE) Cross track error (XTE) is the distance between your current position and the planned route. -
Page 20: Tidal Stream Compensation
Tidal stream compensation Under most operating conditions, Track mode will hold the selected track to within ±0.05 nm (300 ft) or better. The autopilot takes account of the boat’s speed when computing course changes to ensure optimum performance over a wide range of boat speeds. If speed data is available, the autopilot will use the measured boat speed. -
Page 21: Dodges In Track Mode
Chapter 2: Using the Tiller Pilot Arrival As the boat passes the target waypoint, the navigator manually or automatically selects the next target waypoint. The pilot will then: • detect the new target waypoint name • sound the waypoint advance alarm •... -
Page 22: Verifying Computed Positions
Confirming position at the start of a journey • At the start of a journey you must always use an easily identifiable fixed object to confirm the fix given by the navigation system. • Check for fixed positional errors and compensate for them. Verifying computed positions •... -
Page 23: Waypoint Advance
Chapter 2: Using the Tiller Pilot Track data error The tiller pilot displays this message if you select Track mode when the navigator has lost its fix.This display will clear as soon as the navigator regains its fix. Large cross track error This alarm sounds if cross track error exceeds 0.3 nm. -
Page 24: Using Windtrim Mode
• SeaTalk wind instrument • NMEA wind instrument • Raymarine pushpit wind vane (part number Z159) connected via supplied SeaTalk interface In WindTrim mode the tiller pilot maintains a course relative to an apparent wind angle. The pilot uses WindTrim to eliminate the effects of turbulence and short term wind variations. -
Page 25: Exiting Windtrim Mode
Chapter 2: Using the Tiller Pilot Exiting WindTrim mode To exit WindTrim mode: • press standby to return to Standby mode • press auto to return to Auto mode Returning to the previous apparent wind angle If you have steered the boat away from the selected apparent wind angle (for example, performing a dodge maneuver or selecting Standby) you can return to the previous apparent wind angle: 1. -
Page 26: Operating Hints For Windtrim Mode
To cancel the wind shift alarm: • check that the new course does not take the boat into danger • press standby and auto together momentarily to accept the alarm and reset the wind shift alarm value to the current compass heading Operating hints for WindTrim mode •... -
Page 27: Chapter 3: Maintenance & Fault Finding
• To minimize these effects and enable you to get the best possible perfor- mance from your Raymarine equipment, guidelines are given in the installa- tion instructions, to enable you to ensure minimum interaction between different items of equipment, i.e. -
Page 28: Product Support
3.2 Product support Raymarine products are supported by a worldwide network of distributors and Authorized Service Representatives. Before you consider returning the autopilot, make sure that the power supply cable is sound and that all connections are tight and free from corrosion. - Page 29 Chapter 3: Maintenance & Fault Finding SYMPTOM The autopilot appears to be unstable on Northerly headings in the North- ern hemisphere (or Southerly head- ings in the Southern hemisphere). Display shows ‘CAL OFF’ when enter- ing calibration. The autopilot will not ‘talk’ to other SeaTalk instruments.
- Page 30 ST1000 Plus & ST2000 Plus Tiller Pilots...
-
Page 31: Chapter 4: Installing The Tiller Pilot
Chapter 4: Installing the Tiller Pilot Chapter 4: Installing the Tiller Pilot 4.1 Planning the installation Before you start installing your tiller pilot system, use the illustration to check the parts supplied. Then read through the following information and the relevant installation sections in this chapter. -
Page 32: Emc Installation Guidelines
This will not damage the equipment, but may cause the loss of some information and may change the operating mode. • Raymarine specified cables are used. Cutting and rejoining these cables can compromise EMC performance and must be avoided unless doing so is detailed in the installation manual. -
Page 33: Emc Suppression Ferrites
Always use these ferrites supplied by Raymarine. Connections to other equipment If your Raymarine equipment is to be connected to other equipment using a cable not supplied by Raymarine, a suppression ferrite MUST always be attached to the cable near to the Raymarine unit. - Page 34 460 mm (18 in) To measure the critical dimensions: 1. Clamp the tiller on the boat’s center line. 2. Mark dimensions A and B and use masking tape to locate the fixing points. For standard installations, dimension A is measured on the starboard side of the Note: cockpit.
-
Page 35: Basic Installation
Chapter 4: Installing the Tiller Pilot Basic installation After establishing control dimensions A and B, you can usually mount the tiller pilot directly onto the cockpit seat. Mounting socket Installing the tiller pin 1. Drill a 6 mm ( you have marked on the tiller. 2. -
Page 36: Installation Accessories
Pushrod Extensions If you need to increase the pushrod length (because of the distance from the mounting socket location to the center line), use a Raymarine pushrod extension. Identifying the correct pushrod extension 1. Clamp the tiller on the boat’s center line. -
Page 37: Tiller Brackets
3. Screw the pushrod end into the pushrod extension. Tiller brackets If the tiller is higher or lower than the mounting socket, you can use a Raymarine tiller bracket to vary the tiller pin offset so the pilot is horizontal. - Page 38 Dimension D (pushrod below tiller) 102 mm (4 in) 127 mm (5 in) ST1000 Plus & ST2000 Plus Tiller Pilots Dimension E (pushrod above tiller) 127 mm (5 in) 152 mm (6 in) Bracket part no. D159 D160 D3194-2 D3195-2...
-
Page 39: Cantilever Mounting
Cantilever mounting If you need to attach the tiller pilot to a vertical face (such as the cockpit sidewall), use a Raymarine cantilever socket assembly (part number D031): • the maximum possible extension offset is 254 mm (10 in) • you cut the cantilever to the exact length during mounting Cutting the cantilever rod to length 1. - Page 40 Mounting the cantilever assembly To mount the cantilever assembly: 1. Temporarily assemble the cantilever by screwing the rod into the mounting ring. 2. Ensure the tiller pilot is horizontal and then mark the location of the mount- ing ring and its mounting holes. 3.
-
Page 41: Pedestal Socket Mounting
Pedestal socket mounting If you need to raise the height of the mounting socket to keep the tiller pilot horizontal, use a Raymarine pedestal socket assembly. Identifying the correct pedestal socket 1. Clamp the tiller on the boat’s center line. -
Page 42: Alternative Tiller Pins
When the tiller pilot is not in use, you can unscrew the complete rod assembly to Note: leave the cockpit unobstructed. Alternative tiller pins Your Raymarine dealer can also supply the following alternative lengths of tiller pin for other non-standard installations. Description Small threaded tiller pin... -
Page 43: Mounting The Socket
Chapter 4: Installing the Tiller Pilot Mounting the socket Install the tiller pilot socket as follows: Cable 1. Attach the template (provided at the back of this handbook) to the selected bulkhead. 2. Carefully drill a 21 mm ( 3. Drill 4 pilot holes (2.5 mm or 4. - Page 44 ST1000+ and ST2000+ Bulkhead Connector 3 Not used 2 Blue (0 volts) 1 Brown (12 volts) 7. Assemble the rubber cap to one of the 4 self-tapping screws. 8. Secure the socket to the bulkhead using the 4 self-tapping screws. 9.
-
Page 45: Power Supply
Chapter 4: Installing the Tiller Pilot 11. The retaining ring is designed as a stop for the plug nut to prevent accidental disassembly. After you have tightened the floating nut, slide the retaining ring back up the plug to retain the nut. Power supply 12 A fuse •... -
Page 46: Seatalk Cabling
SeaTalk data, the tiller pilot can also be used to supply power to the SeaTalk instruments. Raymarine produce a range of SeaTalk accessory cables you can use to connect the tiller pilot to SeaTalk instruments and control units: • flat plugs for recent SeaTalk equipment (e.g. ST30, ST40, ST60) •... - Page 47 Chapter 4: Installing the Tiller Pilot Extension cables - flat moulded plugs at each end Part no. D284 D285 D286 D287 D288 Conversion cables - flat moulded plug to round plug Part no. D187 D188 Extension cables - round plugs at each end Part no.
-
Page 48: Remote Control Cabling
Remote control cabling If required, you can operate the tiller pilot using: • a full-function ST600R remote control unit (part no: A12016), or • a SeaTalk hand-held remote control (part no: Z101) The following illustration shows how to connect a remote control. 12 A fuse SeaTalk instruments... -
Page 49: Nmea Cabling
Chapter 4: Installing the Tiller Pilot NMEA cabling If required, you can connect a NMEA navigator or wind instrument to the tiller pilot. It can then use this information for Track and WindTrim modes. Recognized NMEA data The following table lists the recognized NMEA sentences. Information Cross Track Error Bearing to Waypoint... -
Page 50: Connecting Nmea And Seatalk
Connecting NMEA and SeaTalk 12 A fuse Supply (+12 V DC) ST1000 Plus & ST2000 Plus Tiller Pilots Supply (0 V) Screen (0 V) Red (12 V) with 5 A fuse SeaTalk instruments NMEA - NMEA + Yellow Navigator (SeaTalk or wind data) instrument... -
Page 51: Chapter 5: Commissioning The Tiller Pilot
Chapter 5: Commissioning the Tiller Pilot Chapter 5: Commissioning the Tiller Pilot This chapter explains how to commission your tiller pilot after installation. This consists of a number of simple functional tests followed by a short sea trial. 5.1 Functional tests Switch on 1. -
Page 52: Navigation Error Screens
1. Press -1 and +1 together for 5 seconds. 2. The display shows the new operating sense (port or starboard) for 5 seconds, and then the autopilot reverts to normal operation. Checking the navigation interface If you have connected the tiller pilot to a navigator, check the interface as follows: 1. -
Page 53: Checking The Wind Instrument Interface
Chapter 5: Commissioning the Tiller Pilot Track data not received D3268-2 This error message indicates that data has not been received. The most likely reason is a cabling error – either open circuit, short circuit or wires reversed. Track data error D3269-2 This error message indicates that the navigator has lost its fix. -
Page 54: Checking The Seatalk Interface
ST1000 Plus & ST2000 Plus Tiller Pilots D3270-2 If the display continues to show a flashing ‘C’ and the current heading, the tiller pilot is not receiving any wind data. The most likely reason is a cabling error – either open circuit, short circuit or wires reversed. Checking the SeaTalk interface If you have linked the tiller pilot to other instruments or control units via SeaTalk, check the link as follows:... -
Page 55: Initial Sea Trial
Chapter 5: Commissioning the Tiller Pilot 3. The tiller pilot should immediately respond by switching off its display illumi- nation. If the illumination does not switch off, there is a cabling fault between the tiller pilot and the instruments or control unit. 5.2 Initial sea trial CAUTION: Failure to carry out the sea trial may result in impaired autopilot... - Page 56 1. Extend or retract the pushrod so you can place the pushrod end onto the tiller pin. 2. Press and hold standby for 1 second – a series of dashes will cycle around the display. 3. Keeping boat speed below 2 knots, use the -10 and +10 keys to turn the boat in slow circles.
-
Page 57: Heading Alignment
Chapter 5: Commissioning the Tiller Pilot Heading alignment 1. Use the -1 and +1 keys to increase or decrease the displayed heading until it agrees with the heading on the boat’s steering compass, or a known transit bearing. 2. Exit compass linearization and heading alignment and store the compass cor- rection/alignment values as follows: •... -
Page 58: Adjusting Autopilot Performance
Port 5. Press standby and remove the pilot to return to hand steering. 5.3 Adjusting autopilot performance The factory setting for rudder gain provides stable control for initial sea trials. However, different boats can vary widely in their response to the helm and further adjustment to the rudder gain may improve the autopilot’s steering characteristics. - Page 59 Chapter 5: Commissioning the Tiller Pilot It is easier to recognize these actions in calm sea conditions where wave action Note: does not mask basic steering performance. 2. Refer to the calibration menu diagram in tings , for instructions on how to adjust the rudder gain setting. 3.
- Page 60 ST1000 Plus & ST2000 Plus Tiller Pilots...
-
Page 61: Chapter 6: Adjusting Tiller Pilot Settings
Chapter 6: Adjusting Tiller Pilot Settings Chapter 6: Adjusting Tiller Pilot Settings 6.1 Introduction The tiller pilot is calibrated at the factory to provide stable performance for most boats. However, you can fine tune many of the calibration features to match your personal preferences, and the type of boat and steering system. - Page 62 Calibration menu SECONDS REPEAT THE ABOVE KEYPRESS WITHIN 10 SECONDS TO ENTER CALIBRATION SECONDS Does not appear if Level 10 is set to 0. ST1000 Plus & ST2000 Plus Tiller Pilots 1 = Rudder gain 5 = Average cruise speed 6 = Off course alarm angle 9 = Local magnetic variation 10 = Northerly/Southerly...
-
Page 63: Calibration Features
Chapter 6: Adjusting Tiller Pilot Settings Calibration features • The number on the left identifies the calibration feature and the number on the right the currently selected value. • You can enter the calibration menu to view the existing values without alter- ing them. -
Page 64: Calibrating The Tiller Pilot
Calibration Levels 2,3,4,7,8 and 12 are not available. If Calibration Level 10 is set to Note: 0, level 11 will also be omitted. 6.2 Calibrating the tiller pilot Calibration Level 1: Rudder gain Use Calibration Level 1 to adjust the rudder gain. This must be set when your boat is under way, as described on Calibration Level 5: cruise speed Use Calibration Level 5 to set the boat’s normal cruising speed for operation in... -
Page 65: Calibration Level 9: Magnetic Variation
Chapter 6: Adjusting Tiller Pilot Settings Calibration Level 9: magnetic variation Use Calibration Level 9 to input the level of magnetic variation present at the boat’s current position. • -ve variation = west • +ve variation = east The tiller pilot transmits this value onto the SeaTalk bus, so it can be picked up by other SeaTalk instruments. -
Page 66: Calibration Level 11: Boat's Current Latitude
Calibration Level 11: boat’s current latitude When you have switched on heading error correction (Level 10), you need to use Calibration Level 11 to input the boat’s current latitude (to the nearest degree). Set the latitude using the -1 , +1 , -10 and +10 keys. If the correction is switched off in Calibration Level 10 (i.e. - Page 67 ST1000+ and ST2000+ tiller drives: socket template Drill 2.5 mm (3/32 inch) diameter pilot hole (4 positions) Drill 21 mm (53/64 inch) diameter hole D3362-2...
- Page 68 ST1000 Plus & ST2000 Plus Tiller Pilots...
- Page 69 Adjusting autopilot performance 56 Adjusting tiller pilot settings 59–64 Alarms and warnings Large XTE 17, 21 Off course alarm 11 Track data error 21 Track data not received 20 Waypoint advance 19, 21 Wind shift 23 Auto mode 8–13 Automatic deadband 12 AutoTack 9 Changing course 9 Dodging obstacles 10...
- Page 70 Lighting 14 Magnetic variation 63 Maintenance 25 Mounting socket 33 Navigation information pages 11 NMEA Cabling 47 Recognized data 47 Northerly heading error correction 63 Off course alarm 11 Off course alarm angle 62 Operating modes 7–24 Auto mode 8–13 Track mode 14–21 WindTrim mode 22–24 Operating sense, reversing 49...
-
Page 71: Limited Warranty
For any Raymarine product or system that (i) has been installed on your vessel by a Raymarine-certified service agent or by a Raymarine OEM, and (ii) has a MSRP equal to or greater than USD $2,500, you are eligible to receive warranty service by a Raymarine certified service agent on-board your vessel (‘On Board Warranty Service’) for a period of 12... - Page 72 Other conditions This Warranty is fully transferable provided that you furnish the original proof of purchase to Raymarine or, in the case of On Board Warranty Service, to a Raymarine-certified service agent. This Warranty is void if the label bearing the serial number has been removed or defaced.
- Page 73 2 years (24 months), subject to the limits contained in this warranty document. In the case of a product installed, by a Raymarine certified OEM installer, on a new boat prior to the sale of the boat to a customer, the 2-year period will begin on the date of the sale of the boat to the customer.
- Page 74 Raymarine Service Agent) at no further cost and promptly returned to the customer. 3.3 In cases where the customer is making a warranty claim and the product has been installed by a Raymarine certified installer, (boat builder, installer, dealer etc.) i.e. Onboard warranty, the nearest Raymarine approved service agent should be contacted and onboard service requested (which will be subject to the limits referred to in paragraph 4.12 below).
- Page 75 Raymarine World Wide Warranty 4.10 If repairs are necessary under the warranty, the affected product must be forwarded to a Raymarine facility or a Raymarine approved service agent, at the owner’s expense. 4.11 The Raymarine warranty does not cover any differences in material, coloring or size between those alluded to in corporate advertising, literature or published on the internet, which are not specifically objected to at the time of delivery.
- Page 76 North and South America Raymarine Technical Support 1-800-539-5539 or, +1 603-881-5200 Product Repair and Service Raymarine Product Repair Center 21 Manchester Street, Merrimack, NH 03054-4801 Help us to help you To allow us to respond to your needs faster, please quote the Equipment type,...
Need help?
Do you have a question about the ST1000+ and is the answer not in the manual?
Questions and answers
Does Raymarine st2000+ tiller autopilot stay on compass settings at low speeds?
Yes, the Raymarine ST2000+ tiller autopilot maintains compass settings at low speeds. During compass calibration, the boat must turn in slow circles at speeds below 2 knots, ensuring accurate deviation detection and heading alignment.
This answer is automatically generated