Table of Contents
Advertisement
Advertisement
Table of Contents

Subscribe to Our Youtube Channel
Summary of Contents for Raymarine SmartPilot S1
- Page 1 SmartPilot S1 & S1G Service Manual Document number 83183-1 Nov. 05...
- Page 2 SeaTalk® is a Registered Trademark of Raymarine SeaStar® is a Registered Trademark of Teleflex Incorporated BayStar is a Trademark of Teleflex Incorporated NMEA® is a Registered Trademark of the National Marine Electronics Association All other trademarks used in this document are acknowledged.
-
Page 3: Table Of Contents
Contents Important Information ....................3 Safety notices .............................3 CE marking of equipment/replacement parts ..................3 EMC conformance ..........................3 Waste Electrical and Electronic (WEEE) Directive ................3 Technical accuracy..........................3 Warranty ............................3 Introduction ........................4 General description ..........................4 Type S1G assembly drawing.......................4 Spares ..........................5 Functional tests ...................... -
Page 5: Important Information
The WEEE Directive requires the recycling of waste electrical and electronic equipment. Whilst the WEEE Directive does not apply to some of Raymarine’s products, we support its requirements as par t of our environmental policy and we ask you to be aware of how you should dispose of this product. -
Page 6: Introduction
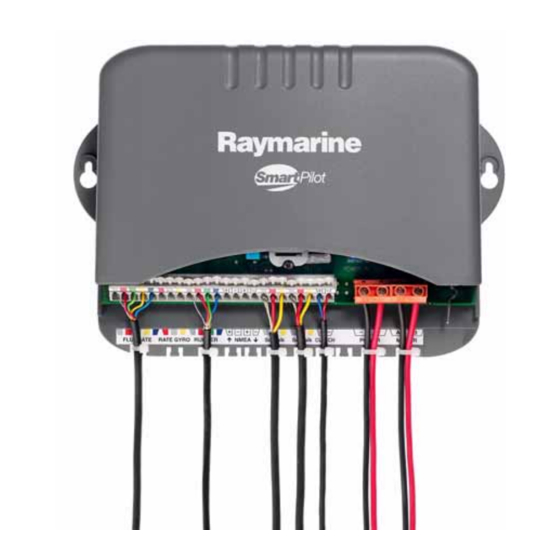
Introduction This manual describes the service and maintenance procedures for the Raymarine type S1 and S1G Course Computer. General description The Course Computer processes information from the sensors in the autopilot system so it can steer the boat using the drive unit. -
Page 7: Spares
Spares Item Spare /Accessory Part Number Comments Connector cover Housing Fuse 15 A Fuse 2 A less gyro Gyro A18069 Kionix - from Aug. 2005 (Revision E PCBs) -
Page 8: Functional Tests
Unless otherwise stated, the following tests should be carried out with 12V applied to the Course Computer. If the unit fails any of the following diagnostic checks (except Step 3), return the PCB to Raymarine and obtain a service exchange unit. Component level replacement must only be carried out by the factory. -
Page 9: Step 2 - System Checks
Voltage test-point + 5V-DIG HD-PWR PWR-0V locations Step 2 - System checks 1. Check that the display shows a compass heading (the actual heading displayed is unimportant at this stage) and that a rudder angle bar is displayed. This confirms that the Seatalk communications are functioning correctly. From October 2005 revision E PCB s have Verado software installed. -
Page 10: Step 5 - Rudder Reference
Note: Ensure that you hold the compass with the cable protruding downwards. Step 5 - Rudder Reference 1. Check that the rudder offset value is set to zero. (To adjust, use the Dealer Calibration screens.) 2. Move the rudder reference into the central position. 3. -
Page 11: Disassembly And Reassembly
Disassembly and reassembly CAUTION: Electrostatic Discharge (ESD) This product contains components that can be damaged by electrostatic discharge. If the cover is removed, any work on the product must be carried out at a properly equipped anti- static station by personnel wearing anti-static straps. Tools required To assemble/disassemble the Course Computer you will need: •... -
Page 12: Software
It is very important that during the actual file transfer that power is not removed from the Course Computer. If power is lost, only a partial transfer will take place and will render the unit inoperable. In this case the unit will have to be returned to Raymarine. RS232 connections... - Page 13 5. Make sure that every other line is a red ’ACK’ as shown below. If it is not, power off the course computer and then power it on again. 6. Select Download and click on Download application. 7. In the dialog box, select *.BIN file required for download. CAUTION: DO NOT SWITCH OFF POWER TO THE COURSE COMPUTER DURING THE FILE DOWNLOAD! 8.
-
Page 14: Product History
Product history Technical updates Update Title TU228 Fluxgate Compass Circuit Fault TU232 Introduction of new “Kionix” Rate Gyro module... - Page 15 PCB 3015-286 issue E (Aug 05) Ref: Tech note TU228 Ref: Tech note TU232 capacitor correctly orientated resistor value 113k (Kionix gyro) PCB 3015-286 issue A to E Ref: Tech note TU228 Ref: Tech note TU232 capacitor incorrectly orientated resistor value 110k (Murata gyro)
- Page 16 Issue Number: TU228 Technical Update Page 1of 2 Date: 1 August 2005 Author: Bob Sims SmartPilot S1 & S1G Course Computers, Corepacks & Product Description: Systems Serial Number(s): Fluxgate Compass Circuit Fault Subject Please be advised that infield feedback has highlighted a potential fluxgate compass circuit fault, which can affect current S1 and S1G SmartPilot course computers.
- Page 17 Service Details and Procedures C43 Polarised Capacitor 2.2uF 6.3v Wrongly Placed on PCB! Service Procedure: Remove PCB from plastic casing Locate C43 Capacitor Unsolder & Remove from PCB Replace & re-solder in reverse Correctly Placed C43 Technical Update Issue Number: TU 228 Page 2 of 2...
-
Page 18: Diagrams
Issue Number: TU232 Technical Update Page 1of 2 Date: 19 September 2005 Author: Bob Sims Product Description: SmartPilot S1G, S2G, S3G Serial Number(s): S1G – E12115 – 0850001 S2G – E12091 – 0850001 S3G – E12092 – 0850054 S3G IPS – E12177 - 0850003 Introduction of new “Kionix”... - Page 19 Kionix Gyro (new) Murata Gyro (early) S2G & S3G SmartPilot PCB S1G SmartPilot PCB S2G & S3G S1G Pilot Change R145 and R147 Change R18 Murata Gyro 10K (0805) Murata Gyro 100k (0603) Kionix Gyro 11.3K (0805) Kionix Gyro 113k (0603) Gyro assembly onto PCB: The new Kionix Gyro is mounted onto the PCB in the same orientation as the Murata Gyro.


Need help?
Do you have a question about the SmartPilot S1 and is the answer not in the manual?
Questions and answers