
Related Manuals for ensto Pro EVF100


Summary of Contents for ensto Pro EVF100
- Page 1 Ensto Pro EVF100 / EVF200 / EVF300 Installation instructions Operation instructions RAK112_ENG 14.7.2020 © Ensto 2020...
-
Page 2: Table Of Contents
9. Technical Data......................31 10. Dimension Drawings..................... 33 11. Installation / Commissioning Checklist............... 36 12. Maintenance / Preventive Maintenance Instructions........37 13. EVF100 Internal Wiring Diagram Example............38 14. Troubleshooting....................40 15. Warranty......................... 40 RAK112_ENG / © Ensto 2020 2 / 40... -
Page 3: Evf100 / Evf200 / Evf300
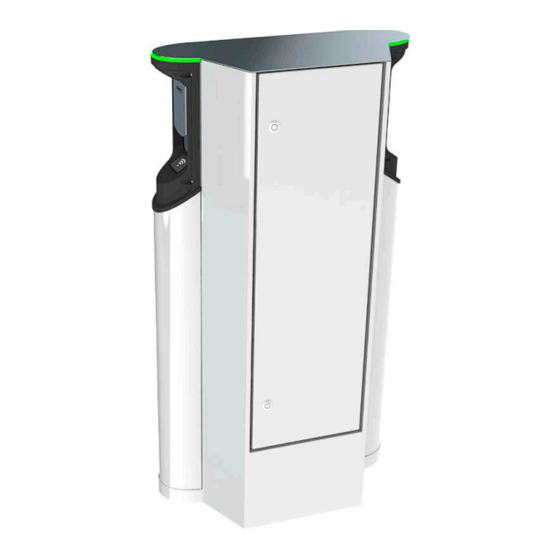
Ensto Pro 1. EVF100 / EVF200 / EVF300 Ensto Pro (EVF) is a solution for charging one or two electric vehicles. It is engineered especially for fast AC charging, but the station can be equipped also with domestic sockets. EVF100: Single charging station... -
Page 4: Delivery Contents
Ground mounting on Anchor bolts from a local supplier concrete at site Ground mounting on Concrete foundation, concrete foundation product code SJR-08 from Sähkö-Jokinen Oy, https://www.sahkojokinen. fi/en EVTL35.00: Ground mounting EVTL37.00: Adapter RAK112_ENG / © Ensto 2020 4 / 40... - Page 5 From Unimi Solutions: from top Unimi concrete founda- Concrete foundation, product code 100-1 tion Cover plate Adapter, product code 100-13 www.unimi.se Wall mounting EVTL31.00: Wall installation kit including installation box and rail RAK112_ENG / © Ensto 2020 5 / 40...
-
Page 6: Accessories
EVTL32.00 is a ground mounting box with cable entry from bottom. Cable entry Cable glands M40x1.5 Ground mounting box for EVF100 / EVF200 EVTL34.00 EVTL34.00 is a ground mounting box with cable entry from top. Cable entry Cable route Cable glands M40x1.5 RAK112_ENG / © Ensto 2020 6 / 40... - Page 7 The concrete foundation adapter is designed to be used with a concrete foundation, product code SJR-08, supplied by Sähkö-Jokinen Oy. Please order the foundation from: https://www.sahkojokinen.fi/en If you want to use a foundation from another manufacturer, make sure that the foundation is compatible with the adapter. RAK112_ENG / © Ensto 2020 7 / 40...
- Page 8 EVF100 / EVF200 Wall Installation kit EVTL31.00 EVTL31.00 is a wall installation kit including installation box and rail. Cable glands M40x1.5 RAK112_ENG / © Ensto 2020 8 / 40...
- Page 9 Mounting box for EVF300 EVTL35.00 EVTL35.00 is a ground mounting box with cable entry from bottom to the main board. Cable glands M40x1.5 RAK112_ENG / © Ensto 2020 9 / 40...
- Page 10 If you want to use a foundation from another manufacturer, make sure that the foundation is compatible with the adapter. Washer Installation M12 DIN125 A2 plate Threaded bar Threaded bar M12x128 A4 M12x90 A4 Washer 13/37 DIN9021 A2 Hexagon nut M12 DIN934 A2 Tube Ø 133 505.4 RAK112_ENG / © Ensto 2020 10 / 40...
-
Page 11: Mounting Instructions
Remove the package around the charging station. Remove the film protecting the metal parts only after the installation is finished. Note! When selecting the installation location, take into consideration the minimum space needed for operat- ing and maintenance. EVF100 / EVF200 EVF300 RAK112_ENG / © Ensto 2020 11 / 40... -
Page 12: Evf100 / Evf200 Mounting On Concrete Casting At Site
Cable protection pipe Ø110 Horizontal adjustment Washer upper surface measured from ground level 43 (EVTL32.00) 38 (EVTL34.00) Anchor bolt Concrete Select anchor bolts depending on the thickness and strength of the concrete RAK112_ENG / © Ensto 2020 12 / 40... - Page 13 Connect the supply cable wires to the supply terminal blocks. Ensure that the PE is connected to the EVF. Switch on F0, F1, F2 (if present) and QF1. Close the maintenance door. RAK112_ENG / © Ensto 2020 13 / 40...
-
Page 14: Evf100 / Evf200 Mounting On Ground Mounting Frame
Connect the supply cable wires to the supply terminal blocks. Ensure that the PE is connected to the EVF. Switch on F0, F1, F2 (if present) and QF1. Close the maintenance door. RAK112_ENG / © Ensto 2020 14 / 40... - Page 15 M12 Threaded bar Ground mounting box EVTL32.00 or EVTL34.00 Ground level Ground mounting frame EVTL28.00 Concrete Cable protection pipe ~500 RAK112_ENG / © Ensto 2020 15 / 40...
-
Page 16: Evf100 / Evf200 Mounting On Concrete Foundation
Connect the supply cable wires to the supply terminal blocks. Ensure that the PE is connected to the EVF. Switch on F0, F1, F2 (if present) and QF1. Close the maintenance door. RAK112_ENG / © Ensto 2020 16 / 40... - Page 17 Adapter EVTL36.00 Concrete foundation Cable protection pipe Ø110 Gravel RAK112_ENG / © Ensto 2020 17 / 40...
-
Page 18: Evf100 / Evf200 Mounting On Unimi Concrete Foundation
Please order the following items from www.unimi.se Concrete foundation Ensto Pro, product code 100-1 1 pcs Cover plate 1 pcs Ensto EVF compatible adapter element, product code 100-13 1 pcs Installation steps Figure 1 • Prepare trenching for cable conduits and the concrete foundation to necessary depths. - Page 19 Connect the supply cable wires to the supply ter- minal blocks. • Ensure that the PE is connected to the EVF. • Switch on F0, F1, F2 (if present) and QF1. • Close the maintenance door. RAK112_ENG / © Ensto 2020 19 / 40...
-
Page 20: Evf100 / Evf200 Wall Mounting
Connect the supply cable wires to the supply terminal blocks. Ensure that the PE is connected to the EVF. Switch on F0, F1, F2 (if present) and QF1. Close the maintenance door. RAK112_ENG / © Ensto 2020 20 / 40... - Page 21 Install to wall with 6 pcs hole screws / bolts Ø 16 Mounting box Bolt the EVF on Remove the cable sheath the mounting box beginning from the cable gland exit Supply cable direction RAK112_ENG / © Ensto 2020 21 / 40...
-
Page 22: Evf300 Mounting On Concrete Casting At Site
Use the ground mounting box as a jig. Put the anchor bolts in place and tighten the anchor bolt nuts. Adjust nuts and washers on the anchor bolts horizontally. Place the ground mounting box on the concrete. RAK112_ENG / © Ensto 2020 22 / 40... - Page 23 Pull electrical cables through the ground mounting box cable gland(s) approx. 450 mm measured from the upper surface of the mounting box. Tighten the cable gland. Close the unused cable entries with cable gland plugs. Concrete Anchor bolt RAK112_ENG / © Ensto 2020 23 / 40...
- Page 24 Install the second charging point module accordingly. Secure the top cover plate on the charging point and distribution cabinet modules with the washer and screw included in the delivery. Close the maintenance doors. Top cover plate RAK112_ENG / © Ensto 2020 24 / 40...
-
Page 25: Evf300 Mounting On Concrete Foundation
The pit floor should be trampled and horizontal. • Fill the pit with gravel. Trample the filling around the foundation to ensure stability. Ground Adapter EVTL37.00 Cable protection pipe Ø110 Concrete foundation Gravel RAK112_ENG / © Ensto 2020 25 / 40... - Page 26 Install the second charging point module accordingly. Secure the top cover plate on the charging point and distribution cabinet modules with the washer and screw included in the delivery. Close the maintenance doors. Top cover plate RAK112_ENG / © Ensto 2020 26 / 40...
-
Page 27: Supply Connections
System dimensioning must be done by a qualified electrical designer. EVF200 Possible supply connections: • Use separate supply cables for each charging point • Use one supply cable and chain internally to the charging points L1 L2 RAK112_ENG / © Ensto 2020 27 / 40... - Page 28 NOTE! If phase rotation is needed, it can be carried out with charging point 1 and 2 supply terminals (L1, L2, L3). The phase rotation should be done in accordance to the electrical plan. RAK112_ENG / © Ensto 2020 28 / 40...
-
Page 29: Commissioning
Insert the USB cable so that the longer edge of the facing is away from you. Do not remove any existing USB devices from any of the controller units! Please see detailed commissioning instructions on https://evwiki.ensto.technology/ RAK112_ENG / © Ensto 2020 29 / 40... -
Page 30: User Instructions
When you stop the charging event, the indicator light turns to waving green and you are able to unplug the charging cable. • After you have unplugged, you are logged out from the charging point and the charging point is free for the next user. RAK112_ENG / © Ensto 2020 30 / 40... -
Page 31: Technical Data
Low control voltage Default 12 VDC Optional features RCD autoreset RCD remote test Surge, overvoltage protection Automatic release for Mode 3 socket in case of sudden power outage Temperature sensor Tilt sensor RAK112_ENG / © Ensto 2020 31 / 40... - Page 32 Connectivity and EVF100 EVF200 EVF300 communication Connectivity Default: GSM (3G, 4G) Optional: Ethernet, Wifi Communication Default: OCPP 1.5 or OCPP1.6, both fully implemented RAK112_ENG / © Ensto 2020 32 / 40...
-
Page 33: Dimension Drawings
10. Dimension Drawings EVF100 Ensto Pro with one charging point. The charging point is placed on the left side seen from the maintenance door. Note! Domestic socket is optional. RAK112_ENG / © Ensto 2020 33 / 40... - Page 34 EVF200 Ensto Pro with two charging points. Note! Domestic sockets are optional. RAK112_ENG / © Ensto 2020 34 / 40...
- Page 35 EVF300 Ensto Pro with two charging points and a distribution cabinet. Note! Domestic sockets are optional. Distribution cabinet depth 160 mm Mounting plate inside the cabinet width 350 mm height 1250 mm RAK112_ENG / © Ensto 2020 35 / 40...
-
Page 36: Installation / Commissioning Checklist
Verify that when charging point’s LED is green, there is no power at the socket con- tact (L1, L2, L3, N). Test the functioning of Mode 3; LED colors from green to blue. Use Mode 3 tester. RAK112_ENG / © Ensto 2020 36 / 40... -
Page 37: Maintenance / Preventive Maintenance Instructions
Test PE conductor resistance, must be less than 3 Ω. Test the surge arrester, if there is any. SW update if needed (if in service contract). Restart the station from F0, ensure it will restart properly. Maintenance performed by: Date: RAK112_ENG / © Ensto 2020 37 / 40... -
Page 38: Evf100 Internal Wiring Diagram Example
RCCB Motor Switch Protector L1 L2 L3 L1 L2 L3 Note! All signal wires must be at a sufficient distance from the power wires or protected with insulating shield / plastic spiral. RAK112_ENG / © Ensto 2020 38 / 40... - Page 39 Opener DIODE Power IN AC TEST RESET IC11000 EX SOCKET XBU6000 CHAGO PE (M5) WALLBOX Controller XKL6000 XKL6001 XKL6002 TYPE3 LED2 LED1 LED Board RFID RFID Board Ethernet OPTION USB to Ethernet RAK112_ENG / © Ensto 2020 39 / 40...
-
Page 40: Troubleshooting
If not, update the related Windows driver. 15. Warranty Warranty conditions, see the product card on www.ensto.com Ensto Chago Oy Ensio Miettisen katu 2, P.O. Box 77 FIN-06101 Porvoo, Finland Tel. +358 20 47 621 Customer service +358 200 29 007...
Need help?
Do you have a question about the Pro EVF100 and is the answer not in the manual?
Questions and answers