Table of Contents
Advertisement
Quick Links
Assembly and operating instructions
Translation of the Original Assembly Instructions EN
ES40-100-SL
◼
ES40-100
◼
ES40-200
◼
ES40-300
◼
ES40-400
◼
ES40-500
◼
Assembly Instructions EN
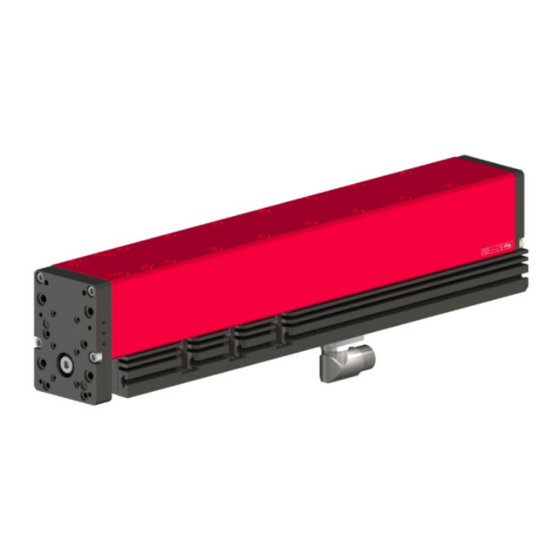
Electric slide
ES40
Order no.: 50465218
Order no.: 50465219
Order no.: 50465220
Order no.: 50465221
Order no.: 50465222
Order no.: 50465223
◼
◼
ES40
01.06.2023
I
ES40-HP
ES40-100-HP-SL
◼
ES40-100-HP
◼
ES40-200-HP
◼
ES40-300-HP
◼
ES40-400-HP
◼
ES40-500-HP
◼
◼
V1.2
Order no.: 50465225
Order no.: 50465226
Order no.: 50465227
Order no.: 50465228
Order no.: 50465229
Order no.: 50465230
1–59
Advertisement
Table of Contents

Subscribe to Our Youtube Channel
Related Manuals for Afag ES40


Summary of Contents for Afag ES40
- Page 1 Assembly and operating instructions Electric slide ES40 ES40-HP Translation of the Original Assembly Instructions EN ES40-100-SL Order no.: 50465218 ES40-100-HP-SL Order no.: 50465225 ◼ ◼ ES40-100 Order no.: 50465219 ES40-100-HP Order no.: 50465226 ◼ ◼ ...
- Page 2 Your Afag team © Subject to modifications The electric slides have been designed by Afag Automation AG according to the state of the art. Due to the constant technical development and improvement of our products, we reserve the right to make technical changes at any time.
-
Page 3: Table Of Contents
2.8.4 Danger due to high temperatures ............14 2.8.5 Mechanical hazards ................14 Technical data ...................... 15 Electric slide ES40 ..................15 3.1.1 Dimension drawing ES40 ..............15 3.1.2 Technical data ES40 ................16 3.1.3 Preferred combinations ES40 .............. 17 3.1.4 Module loads ES40 ................18 3.1.5 Motor overview ES40 ................ - Page 4 Product description ..................26 Accessories ....................27 5.3.1 MagSpring .................... 27 5.3.2 External position measuring system for ES40 and ES40-HP ....32 5.3.3 Servo controller ..................34 5.3.4 Controllers, cables, plugs ..............38 5.3.5 Transformers and power supplies ............42 Installation, assembly &...
- Page 5 Table of contents 10.2 Decommissioning ..................57 10.3 Disposal ...................... 57 Declaration of incorporation ................58 ◼ ◼ ◼ Assembly Instructions EN ES40 01.06.2023 V1.2 5–59...
-
Page 6: General
These assembly instructions contain important information on assembly, commissioning, functioning and maintenance of the electric slide to ensure safe and efficient handling of the electric slide ES40 and ES40-HP. Consistent compliance with these assembly instructions will ensure: ▪ permanent operational reliability of the electric slide, ▪... -
Page 7: Additional Symbols
In these assembly instructions the following symbols are used to highlight instructions, results, references, etc. Symbol Description Instructions (steps ...) Results of actions References to sections ◼ Enumerations not ordered ◼ ◼ ◼ Assembly Instructions EN ES40 01.06.2023 V1.2 7–59... -
Page 8: Applicable Documents
This does also apply to defective accessories and wear parts. Normal wear and tear are excluded from the warranty). The warranty covers the replacement or repair of defective Afag parts. Further claims are excluded. The warranty shall expire in the following cases: ▪... -
Page 9: Safety Instructions
Any use other than or beyond the intended use described above is considered a misuse/improper use of the electric slides. Especially the following use is considered a misuse: ▪ Use in potentially explosive atmospheres ◼ ◼ ◼ Assembly Instructions EN ES40 01.06.2023 V1.2 9–59... -
Page 10: Obligations Of The Operator And The Personnel
▪ the operating company shall be solely responsible for such damage, and ▪ AFAG does not accept any liability for damages caused by improper use. 2.4 Obligations of the operator and the personnel 2.4.1... -
Page 11: Obligations Of The Personnel
Operator (trained personnel): Authorized persons who due to their specialized professional training, expertise and experience are capable of identifying risks and preventing possible hazards arising from the use of the machine. ◼ ◼ ◼ Assembly Instructions EN ES40 01.06.2023 V1.2 11–59... -
Page 12: Personal Protective Equipment (Ppe)
2.7 Changes & modifications No changes may be made to the electric slides which have not been described in these assembly instructions or approved in writing by Afag Automation AG. AFAG Automation AG accepts no liability for unauthorised changes or improper assembly, installation, commissioning, maintenance or repair work. -
Page 13: General Hazards / Residual Risks
▪ Only qualified personnel may work with or on the electric slides. ▪ Read the assembly instructions carefully before carrying out any work on or with the electric slides. ◼ ◼ ◼ Assembly Instructions EN ES40 01.06.2023 V1.2 13–59... -
Page 14: Danger Due To Electricity
Limbs can be crushed by moving components! ▪ Work on and with the electric slides may only be carried out by qualified personnel. ▪ Never reach into the system during normal operation! 14 – 59 ◼ ◼ ◼ Assembly instructions EN ES40 01.06.2023 V1.2... -
Page 15: Technical Data
Technical data Technical data 3.1 Electric slide ES40 3.1.1 Dimension drawing ES40 Fig. 1 Dimensional drawing of electric slide ES40 ◼ ◼ ◼ Assembly Instructions EN ES40 01.06.2023 V1.2 15–59... -
Page 16: Technical Data Es40
Technical data 3.1.2 Technical data ES40 16 – 59 ◼ ◼ ◼ Assembly instructions EN ES40 01.06.2023 V1.2... -
Page 17: Preferred Combinations Es40
Technical data 3.1.3 Preferred combinations ES40 ◼ ◼ ◼ Assembly Instructions EN ES40 01.06.2023 V1.2 17–59... -
Page 18: Module Loads Es40
Technical data 3.1.4 Module loads ES40 18 – 59 ◼ ◼ ◼ Assembly instructions EN ES40 01.06.2023 V1.2... -
Page 19: Motor Overview Es40
Technical data 3.1.5 Motor overview ES40 Module Stroke Motor Stator Stator no Rotor Rotor no. ES40-100-SL P01-48x240F/90x240-C PS01-48x240F 50467386 PL01-28x410/330 50467392 ES40-100 P01-48x240F/90x240-C PS01-48x240F 50467386 PL01-28x410/330 50467392 ES40-200 P01-48x240F/180x330-C PS01-48x240F 50467386 PL01-28x500/420 50467396 ES40-300 P01-48x240F/300x450-C PS01-48x240F 50467386 PL01-28x620/540 50467397 ES40-400... -
Page 20: Electric Slide Es40-Hp
Technical data 3.2 Electric slide ES40-HP 3.2.1 Dimensional drawing ES40-HP Fig. 2 Dimensional drawing of electric slide ES40-HP 20 – 59 ◼ ◼ ◼ Assembly instructions EN ES40 01.06.2023 V1.2... -
Page 21: Technical Data Es40-Hp
Technical data 3.2.2 Technical data ES40-HP ◼ ◼ ◼ Assembly Instructions EN ES40 01.06.2023 V1.2 21–59... -
Page 22: Preferred Combinations Es40-Hp
Technical data 3.2.3 Preferred combinations ES40-HP 22 – 59 ◼ ◼ ◼ Assembly instructions EN ES40 01.06.2023 V1.2... -
Page 23: Module Loads Es40-Hp
Technical data 3.2.4 Module loads ES40-HP ◼ ◼ ◼ Assembly Instructions EN ES40 01.06.2023 V1.2 23–59... -
Page 24: Transport, Packaging And Storage
This information sheet must be read by every person who carries out work with and on the electric slides! Fig. 3 Scope of delivery electric slide ES40 Unt. ES40 Module ES40 Centering sleeves ø 12x4.8 mm... -
Page 25: Transport
▪ Relative air humidity: < 90%, non condensing 4.4 Packaging The electric slides are transported in the transport packaging of AFAG Automation AG. If no AFAG packaging used, the electric slides must be packed so that they are protected against shock and dust. NOTICE... -
Page 26: Structure And Description
Structure and description Structure and description 5.1 Design electric slides Fig. 4 Design of the electric slide (example ES40) 1. Base element 2. Slide 5.2 Product description The electric slides are designed according to the state of the art and the recognised safety regulations. -
Page 27: Accessories
(counterbalance in vertical mounting position). The dropping of the periphery or the workpiece is prevented, when the electric slide is de-energized. The MagSpring is offered with a holder, suitable for the electric slides ES40. This can be mounted laterally, left, right, or in front of the axle. - Page 28 The MagSpring for the front attachment is supplied as a set and consists the following components: MagSpring Stator and rotor Compensating element Bracket Adapter Hexagon nut Mounting parts 28 – 59 ◼ ◼ ◼ Assembly instructions EN ES40 01.06.2023 V1.2...
- Page 29 Structure and description Overview MagSpring ES40 and ES40-HP ◼ ◼ ◼ Assembly Instructions EN ES40 01.06.2023 V1.2 29–59...
- Page 30 Structure and description Technical data MagSpring ES40 40N-60N 30 – 59 ◼ ◼ ◼ Assembly instructions EN ES40 01.06.2023 V1.2...
- Page 31 Structure and description ◼ ◼ ◼ Assembly Instructions EN ES40 01.06.2023 V1.2 31–59...
-
Page 32: External Position Measuring System For Es40 And Es40-Hp
Structure and description 5.3.2 External position measuring system for ES40 and ES40-HP The contactless position measuring system on a magnetic basis with integrated evaluation electronics is used everywhere, where you cannot safely reference the axes. In addition, a high positional accuracy and a high accuracy are achieved and quiet driving behaviour. - Page 33 The sensor is installed parallel to the belt using a feeler gauge. The value can be found in the table below. Sensor Distance min. Distance max. Recommended distance type [mm] [mm] [mm] 1MSA501 distance Fig. 8 External position measuring system (example illustration) ◼ ◼ ◼ Assembly Instructions EN ES40 01.06.2023 V1.2 33–59...
-
Page 34: Servo Controller
Structure and description 5.3.3 Servo controller Fig. 9 Overview of servo controllers 34 – 59 ◼ ◼ ◼ Assembly instructions EN ES40 01.06.2023 V1.2... - Page 35 Structure and description Technical data servo controllers Controller C11xx ◼ ◼ ◼ Assembly Instructions EN ES40 01.06.2023 V1.2 35–59...
- Page 36 Structure and description Controller C12xx 36 – 59 ◼ ◼ ◼ Assembly instructions EN ES40 01.06.2023 V1.2...
- Page 37 Structure and description Controller E12xx ◼ ◼ ◼ Assembly Instructions EN ES40 01.06.2023 V1.2 37–59...
-
Page 38: Controllers, Cables, Plugs
Structure and description 5.3.4 Controllers, cables, plugs The C11xx and C12xx controllers are supplied with a plug set. 38 – 59 ◼ ◼ ◼ Assembly instructions EN ES40 01.06.2023 V1.2... - Page 39 Structure and description ◼ ◼ ◼ Assembly Instructions EN ES40 01.06.2023 V1.2 39–59...
- Page 40 Structure and description Cable types Motor cable M17-0-1-1 Motor cable extension to M17-0-0-1/-2 Motor cable-M22-0-2-1 40 – 59 ◼ ◼ ◼ Assembly instructions EN ES40 01.06.2023 V1.2...
- Page 41 Structure and description Motor cable-M23-0-1-x ◼ ◼ ◼ Assembly Instructions EN ES40 01.06.2023 V1.2 41–59...
-
Page 42: Transformers And Power Supplies
Structure and description 5.3.5 Transformers and power supplies Power supply S01-72/500, 1 phase 42 – 59 ◼ ◼ ◼ Assembly instructions EN ES40 01.06.2023 V1.2... - Page 43 Structure and description Power supply S01-72/1000, 3 phases ◼ ◼ ◼ Assembly Instructions EN ES40 01.06.2023 V1.2 43–59...
-
Page 44: Installation, Assembly & Setting
▪ Take appropriate measures to ensure safe operation! liability assumed damages caused improper installation/assembling work carried out by the operator. chap. 2 „Safety instructions“ in this Also observe the safety instructions in manual. 44 – 59 ◼ ◼ ◼ Assembly instructions EN ES40 01.06.2023 V1.2... -
Page 45: Assembly & Attachment
Installation, assembly & setting 6.2 Assembly & attachment The electric slides (up to sizes ES40-300) can be installed in any position, the mounting holes (M8 and M6) are on the slide. Use the centering sleeves included in the scope of delivery. -
Page 46: Centering Bushing
Installation, assembly & setting 6.2.2 Centering bushing Use the centring sleeves supplied for positioning. Insert the centering sleeves in two diagonally opposed holes of the installation grid. ES40 Base element Slide Hole grid 60 x 60 mm 60 x 60 mm... -
Page 47: Tightening Torques
6x M6 with centring Ø 9 H7 hole pitch 48 x 48 mm 6x M4 with centring Ø 7 H7 hole pitch 30 x 30 mm Fig. 12 Electric slide ES40 (mounting of the slide) 6.2.5 Mounting ES40 (basic element) Mounting of the module (base element): Ø... -
Page 48: Rotatability Of C Motor Connector (Es40)
▪ Keep sufficient distance from other magnetic sources. 6.2.6 Rotatability of C motor connector (ES40) If C-motor connector are provided for the ES40 modules, the C-connector can be rotated in both directions (see Fig. 14). In this case, the maximum rotatability of the C-connector must be observed. -
Page 49: Programming Of The Electric Slides
▪ Replace the defective position sensor or limit switch cable immediately. 6.3.2 Programming The programming differs depending on the control system used. Observe the respective manuals of the control system manufacturer! ◼ ◼ ◼ Assembly Instructions EN ES40 01.06.2023 V1.2 49–59... -
Page 50: Commissioning
▪ Only connect or disconnect the cables when the control unit is switched off. ▪ Observe the operating instructions of the controller used! Observe the safety instructions in chapter 2 "Safety instructions" of these mounting instructions! 50 – 59 ◼ ◼ ◼ Assembly instructions EN ES40 01.06.2023 V1.2... -
Page 51: Preparatory Activities For Commissioning
3. Connect the cable to the electric slide and the system control. 4. Perform test run: Start with slow movements Then continue under normal operating conditions Commissioning is completed. ◼ ◼ ◼ Assembly Instructions EN ES40 01.06.2023 V1.2 51–59... -
Page 52: Setting Up & Retrofitting
▪ Ensure that the movement of the electric slide is not restricted by mounted attachments. ▪ Take appropriate measures to ensure safe operation! 52 – 59 ◼ ◼ ◼ Assembly instructions EN ES40 01.06.2023 V1.2... -
Page 53: Fault Elimination
▪ Reduce payload Slide does not move ▪ Slide blocked by foreign matter ▪ Remove foreign matter ▪ Module defect ▪ Send module to Afag for overhaul ▪ Check connections and connect ▪ Module incorrectly connected module correctly ▪ Incorrect control ▪... -
Page 54: Maintenance And Repair
▪ Before starting any activities, switch off the media supply and make sure it cannot be switched on again unintentionally! chap. 2 „Safety instructions“ in this Also observe the safety instructions in manual. 54 – 59 ◼ ◼ ◼ Assembly instructions EN ES40 01.06.2023 V1.2... -
Page 55: Maintenance Activities And Maintenance Intervals
▪ If the electric slides are to be operated in an environment with abrasive dusts or corrosive or aggressive vapours, gases or liquids, the approval of Afag Automation AG must be obtained in advance. 9.3.1 Overview of the maintenance points Grease nipple Fig. -
Page 56: Further Maintenance
AFAG for repair within the warranty period. After expiry of the warranty period, the customer may replace or repair defective modules or wear parts himself or send them to the AFAG repair service. Please note that AFAG does not provide any warranty for modules that have... -
Page 57: Decommissioning And Disposal
▪ Electronic parts, electrical scrap, auxiliary and operating materials must be disposed of by approved specialist companies. ▪ Information on proper disposal can be obtained from the responsible local authorities. ◼ ◼ ◼ Assembly Instructions EN ES40 01.06.2023 V1.2 57–59... - Page 58 The relevant technical documentation were created according to Annex VII, Part B of the above-mentioned Directive. Authorised representative for compiling the technical documentation: Niklaus Röthlisberger, Product Manager, Afag Automation AG, CH-6144 Zell Zell, 31.05.2023 Adrian Fuchser Klaus Bott...
- Page 59 Afag Automation Americas Afag Automation APAC Schaeff Machinery & Services LLC. Afag Automation Technology (Shanghai) Co., Ltd. 883 Seven Oaks Blvd, Suite 800 Room 102, 1/F, Bldg. 56, City Of Elite Smyrna, TN 37167 No.1000, Jinhai Road, Pudong New District...
Need help?
Do you have a question about the ES40 and is the answer not in the manual?
Questions and answers