
Subscribe to Our Youtube Channel
Related Manuals for Afag aflex 150


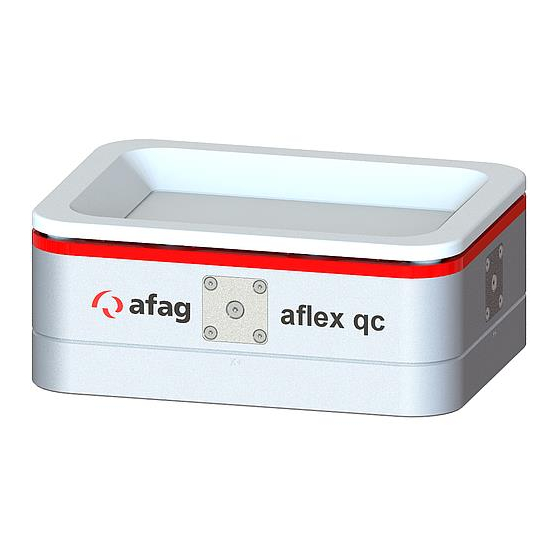
Summary of Contents for Afag aflex 150
- Page 1 Flexible feeding system aflex 150 / aflex 200 Original Operating Manual Copyright by Afag GmbH...
- Page 2 50436237 with black POM plate for transported material 50436238 with white PTFE plate for transported material 50436239 aflex 150 with background lighting and white POM plate for transported material 50436240 with background lighting and white PTFE plate for transported material...
-
Page 3: Table Of Contents
Table of Contents Declaration of installation for a complete machine ........5 Safety instructions .................... 6 Explanation of symbols and instructions ....................6 Basic safety instructions ........................7 2.2.1 Electrical Connection........................7 2.2.2 Danger zones ..........................7 Intended use ............................8 Obligations of the operator ......................... - Page 4 Sub menu clients ..........................49 5.7.1 Client Nodes Functions ......................51 5.7.2 T4X Client Node ........................53 5.7.3 Profibus Module ........................57 Sub menu Fieldbus configuration ....................... 58 Sub menu aflex module ........................62 5.9.1 Soft Release Mode ........................66 Software update ...........................
-
Page 5: Declaration Of Installation For A Complete Machine
1 Declaration of installation for a complete machine Declaration of installation according to EG guidelines for machines 2006/42/EG, Appen- dix II B The manufacturer: Afag GmbH, Wernher-von-Braun-Straße 1, D-92224 Amberg – Tel. +49 (0)9621 650 27-0 www.afag.com declares herewith that the incomplete machine: Aflex flexible feeding device... -
Page 6: Safety Instructions
2 Safety instructions Explanation of symbols and instructions Symbols: Installation and commissioning shall be done only by qualified personnel according to operating manual. Please observe the importance of following explanation symbols and instructions. They are divided and classified in danger levels according to ISO 3864-2. DANGER Indicates a direct potential danger. -
Page 7: Basic Safety Instructions
Protective earth connections must be checked for proper functioning after assembly. 2.2.2 Danger zones Instruction The flexible feeding devices from Afag are built according to EG machine guidelines, state of the art and the recognized technical safety regulations. Nevertheless during use, danger to life and Release: 02.0... -
Page 8: Intended Use
limb of the operators or third parties or impairments to aflex or other material assets can arise. Intended use The aflex serves for the excitation of conveyed goods, in particular piece goods through me- chanical vibrations. With regard to the maximum permissible dimensions and weights of con- veyed goods, the instructions in chapter 3.3 Table 1: Technical data Table 1: Technical data must be observed. - Page 9 Release: 02.0 2017-01-13 Page 9...
-
Page 10: Description Of The Device
Instruction All persons working at the aflex as well as persons who are em- ployed under the Temporary Employment Act have a duty to co- operate for safety and health protection at the workplace. You must be instructed about using the aflex. Instruction Reasonably foreseeable misuse, the dangers for the user, third parties or for the... -
Page 11: Function Description
via the BackSideBus In the standard configuration, this control consists of one control unit and two T4X driver units. The advantages of the aflex system are: Building of an individual system adapted to the respective application Simple expansion or replacement of individual control units Quick and easy parametrization of the modules via the configuration software Selection between different fieldbus interfaces Simple assembly and commissioning of the control... -
Page 12: Technical Data
Technical data Figure 1: Dimension sheet aflex Table 1: Technical data Description Unit aflex 150 aflex 200 [mm] [mm] [mm] [mm] [mm] 64.3 90.5 [mm] 18 18 Dimensions [mm] 12 12 [mm] [mm] [mm] 32.5 32.5 [mm] [mm] 131.5 [mm]... - Page 13 [mm] Max. part size [mm] < 10 < 20 Max. part weight < 5 < 20 Voltage supply Total current [max] 10 A 10 A Recommended fuse C10A / 10A GL T C10A / 10A GL T Relative duty cycle of the actuator <...
- Page 14 Table 3: Technical data of the driver unit T4X Evaluation Description Symbol Unit Min. Type Max. 24.0 Working voltage DC smoothed 23.0 DC 25.0 DC Input current Reverse polarity protection Voltage supply – Output voltage Output + 0.5 Output current Output Pulse width Output Frequency output [Hz]...
- Page 15 Evaluation Description Symbol Unit Min. Type Max. Working voltage DC smoothed 23.0 24.0 25.0 Input current aflex 150 λ Wavelengths aflex 150 - red [nm] Input current aflex 200 λ Wavelengths aflex 200 - white Release: 02.0 2017-01-13 Page 15...
-
Page 16: Electrical/Control Components
Electrical/Control Components Instruction Work on the electrical supply can only be done by qualified per- sonnel. Figure Overview electrical components Control Unit: Intelligence and memory of the aflex controller Driver units: Outputs for controlling the aflex actuators PB-Node: Optional field bus interface for communication with the higher-level control via Profibus. -
Page 17: Installation Instructions
4.2.1 Drilling pattern for assembly Figure 3: Drilling pattern in mounting level Table 6: Dimension for drilling pattern Description Aflex 150 Aflex 200 Drilling distance X in [mm] Drilling distance Y in [mm] Diameter of the central bore in [mm] Release: 02.0... -
Page 18: Dismantling Adaptor Plate
-0,3 Diameter of the 4 fixing bores in [mm] 12.7 4.2.2 Dismantling adaptor plate Remove the four side countersunk head screws with the corresponding hexagon socket screwdriver. Subsequently, remove the aflex smoothly from the top of the adap- tor plate. Figure 4: Dismantling adaptor plate Figure 5: Dismantling adaptor plate Max. -
Page 19: Assembly Of The Flex Sockets
4.2.3 Assembly of the flex sockets Insert the flex bushings flush into the pre-drilled mounting plate. Figure 6: Assembly of the flex sockets -0,3 Diameter of the 4 fixing bores in [mm] 12.7 4.2.4 Assembly of the adaptor plate on the mounting level Set the adaptor plate on the flex sockets and screw this with the delivered M6 screws and the corresponding securing disc. -
Page 20: Connection Of The Device
Use the original countersunk-head screws. Observe that maximum torque of this countersunk head screw for fixing of aflex on the adaptor plate: 2.9 Nm Figure 8: Assembly of the adaptor plate Pay at- tention to the ca- Connection of the device The actuator of aflex is connected via the 16-pole sockets on the bottom side. -
Page 21: Connection Of The Control
Connection of the control All modules of the control are mounted on a profile rail with BackSideBus. The modules are fixed via end terminals and the terminating resistors of the BackSide- Bus are thus protected. Below is a drawing of the controller. The profile rail is delivered with a length of 142.0 mm, the BackSideBus with a length of 123.0 mm. - Page 22 Instruction It is possible to separate the screw terminals of the modules from the housing via the clip lock in order to connect the lines. However, do not interchange the individual terminals. 7. Optionally it is possible to connect the aflex system via the Profibus. The addi- tional module PB Node is used for this purpose.
-
Page 23: Software Description
5 Software description Instruction This operating manual describes the software "aflexConfigura- tor" as from version v2.0 The following section describes the "aflexConfigurator" in detail. The control is set up and preconfigured to the desired application via this Windows application. The aflexConfigurator is used to set the aflex on the components to be fed. Figure 10: aflexConfigurator Start page Installation of the Software Install the software included in the scope of delivery. -
Page 24: User Groups
User groups To enable easier operation for the standard user, complex functions are distributed to different user levels. The current user group is displayed in the upper right of the aflex- Configurator. Figure 11: Display the current user Clicking on this button changes the user group. Figure 12: User switching User: "Standard"... -
Page 25: Start Page
Start page When the program is started, the start page opens, this is shown in the following figure. Start the "aflexConfigurator". Figure 13: Overview window (1) User switching (2) Help page (3) Search for devices in the network (4) Display the control unit In order to establish a connection to the control unit of the aflex controller, this must be connected to the computer via Ethernet interface. -
Page 26: Control Unit States
Search Devices (3) The aflexConfigurator searches for existing control units using the "Search Devices" button in the network Display the control units (4) This field lists the control units found on the network. Also stored control units are displayed from previous program starts. 5.3.1 Control unit States The control units found or stored in the network have different device status properties. - Page 27 Series number (4) The series number of the Control unit. This can also be found on the housing, in the side inscription field. Network status, Subnet (5) To establish a connection to the control unit, the two participants must be found in the same subnet.
- Page 28 Figure 16: missing ping response The control unit and computers are located in the same subnet and the ping process is started. However, a valid response is missing. This can have the following causes: The control unit is switched off The network connection has been interrupted.
-
Page 29: Advanced Display Administrator
5.3.2 Advanced display Administrator If the user "admin" is activated, further displays and options are visible on the start page. These are described below. Figure 18: Start page display admin In Administrator mode, the computer's local Ethernet endpoints are displayed. This is used to search the devices in the network via UDP Broadcast. -
Page 30: Connection Set-Up
5.3.3 Connection set-up After pressing the "connect" button the TCP/IP connection is established and the data of the control unit is read out. Figure 20: Connection set-up If another aflexConfigurator is already connected to the control unit, no TCP/IP con- nection is established. - Page 31 Figure 22: Main menu Figure23: Main menu extended view (1) Operating mode (2) Release (3) control interface (4) controller menu (5) client nodes (6) aflex modules (7) fieldbus config Operating mode (1) The current operating status is given back on the display status. The sliding button can be used to toggle between automatic/manual modes.
- Page 32 The aflex controller automatically switches to automatic mode when the con- nection to the "aflexConfigurator" is interrupted. If the control unit is in manual mode, it cannot be set to the "automatic mode" via the fieldbus interface. The aflexConfigurator takes precedence. If the aflex- Configurator is closed and the connection is interrupted, the control unit auto- matically changes to the "automatic mode".
- Page 33 User Switching (1) User change for extended display of options. Further information on the user groups can be found in the section5.2 Return to home page (2) Deletes the connection to the current control unit and returns to the start page. Release: 02.0 2017-01-13 Page 33...
-
Page 34: Control Interface
Control interface The menu "control interface" provides all functions for the manual operation of the aflex. Instruction The operating mode "manual" is a prerequisite for controlling the aflex via aflexConfigurator. 5.5.1 Aflex control panel The aflex control panel is used to manually control and configure the aflex control panel. - Page 35 (6) vertical phase (7) horizontal max power (8) vertical max power (9) frequency aflex Control Pad(1) The aflex control pad is used to control the aflex manually. The left mouse button is pressed and the mouse pointer is moved over the control pad. The intensity increases as the mouse pointer moves away from the centre of the control pad.
- Page 36 Horizontal Max. Power & Vertical Max. Power (7) (8) In addition to the intensity of the total system, the maximum strength and ratio of the horizontal and vertical actuators can be adjusted via these two sliders. If, for example, the aflex is controlled with an intensity of 100%, the horizontal actuators can be con- trolled by the max.
-
Page 37: Aflex Configurations
Vibration frequency (1) All actuators are controlled according to the oscillation frequency. The process is re- peated periodically. The on and off times of the actuators are defined in percent [%]. �� For example, a start time of 50% corresponds to a half period . - Page 38 Figure 27: Aflex configuration standard view Figure 28: aflex configuration advanced view Figure 29: aflex configuration admin view (1) Available configurations (2) Load configuration (3) Help page (4) Import/Export of Configurations (5) Select configuration number (6) Configuration name Input (7) Save configuration (8) Delete configuration Available configurations (1) Display saved configurations.
-
Page 39: Control Unit Power Output
Import/Export of Configurations (4) A new window opens in which the parameter records saved in the computer are loaded. The current parameter set can also be stored locally. Only the current aflex parameters are exported or overwritten during import. This must be observed. INSTRUCTION Import Configuration: The current parameters are overwritten with the imported ones. -
Page 40: Simulation Of The External Control
5.5.4 Simulation of the external control In automatic mode, the aflex should only be operated in short pulses between 100 and 500 ms in order to keep the cycle times as low as possible. This function is pro- vided to take account of this pulsed control already dur- ing the creation of the aflex configurations. - Page 41 Creating a new simulation (4) From user level "advanced" visible. Opens the "demo configurator" to create a new simulation. Information on the "demo configurator" can be found in the following sec- tion. Editing the selected simulation (5) From user level "advanced" visible. Opens the "demo configurator" to edit the current simulation.
- Page 42 Demo Name Description Export Import (10) Save (11) Cancel Select configuration (1) A different configuration can be loaded in each sequence. If the same configuration is used for the previous sequence, it is not reloaded. If no configuration is selected, there is also no loading process.
-
Page 43: Sub Menu Controller
Sub menu controller The control unit is parametrized in the "controller menu". The TCP/IP connection is configured, the telnet server is activated and backups are saved or imported. Figure 35: Sub menu controller user "Standard" Figure 36: Sub menu controller user "Advanced" (1) Display Control Unit information (2) Interrupt connection (3) Restart Control Unit... - Page 44 Disconnects the connection between aflexConfigurator and control unit. The aflexCon- figurator opens the start page. Restart Control Unit (3) This button restarts the control unit. The connection must then be re-established. General release (4) The aflex controller requires a general release to switch power outputs. This can be set with a command from the fieldbus interface or the button "General Release"...
- Page 45 Figure 37: Control Unit Digital IO & Power Output 24V Status of the digital input/output Help page DigitalIO Help page PowerOuptut 24V PWM Power output Status of the digital input/output (1) The digital inputs and outputs are the simplest form of the control and communication of the aflex controller.
- Page 46 Figure 38: TCP / IP Configuration (1) Help page (2) Enter new settings, including the "Device name" of the control unit (3) Transfer settings (4) Displays the current TCP/IP settings Help page (1) Opens an extract from the operating manual TCP/IP Configuration This section describes the TCP/IP configuration of the aflex controller.
- Page 47 Figure 39: Save / Restore Controller Configuration (1) Create a backup file from all the control data (2) Overwrite all control settings from a backup file. Backup of the control data All settings are stored on the control unit. To back up these settings you can create a complete backup of the EEPROM.
- Page 48 Figure 40: Telnet Configuration (1) Activate Telnet-Server (2) Telnet Port (3) Console for Telnet-Control (4) Telnet Heartbeat (5) Establish connection (6) Login (7) Sending the command line (8) Delete the receiving messages Telnet-Server Each control unit has a telnet server from which the aflex can communicate with a higher-level control.
-
Page 49: Sub Menu Clients
Telnet Heartbeat (4) The Telnet Heartbeat is visualized through this display. The blinking LED shows the active Telnet connection. If the LED is not blinking green, no active connection is pre- sent. Establish connection (5) Connect to Telnet Server Login (6) Login with username and password. - Page 50 Operating modes of the client nodes (1-4) The different operating modes are shown in colour. Depending on the operating mode, various functions are activated or deactivated. Offline (1) If the client's power supply is interrupted or the client is not connected to the control unit via the BackSideBus, this is displayed as "offline".
-
Page 51: Client Nodes Functions
Unregistered (4) The client is located on the BackSideBus and a connection to the control unit is possi- ble. However, the client is not registered in the control unit. It is possible to register the client with a mouse click. The client switches to the "connected" or "bootloader" status and the corresponding functions become available. - Page 52 Figure 47: Client Node Functions "Admin" View (1) Reboot (2) Activate Bootloader (3) Save to EEPROM (4) Add Client Node (5) Change Client Node (6) Delete Client Node Reboot (1) Restart the client node Activate Bootloader(2) This function is available from the user level "advanced". Enables bootloader mode and restarts the client node.
-
Page 53: T4X Client Node
Change Client Node (4) This function is available from user level "admin" and is used to exchange client nodes. The serial number of the new client node is entered in the text field. All settings of the currently selected client node are transferred to the new one. The current client node is then deleted. - Page 54 must be specified with a support request. Under this information the individual chan- nels of the T4X Node are displayed. The user level "standard" has no access rights to it. This is visualized via the prohibition signs. Figure 51: T4X Client Node "Advanced" view (1) Status Release From the user level "advanced"...
- Page 55 Power (1) Activate the T4X channel. The power can be adjusted from 0-100%, in this case the duty cycle of the PWM is adjusted. Frequency(2) The control frequency of the T4X channel. At this frequency, the PWM output is pulsed. Channel Phase (3) The PWM output is not controlled permanently, but pulsed.
- Page 56 Instruction The min/max power of the individual channels is already pre-set in the delivery state and should only be adapted when an aflex exchange is used. Pulse Mode (2) An aflex is always controlled with the "Pulse Mode Continuous" during operation. In this mode, each actuator is pulsed with the set frequency and channel phase.
-
Page 57: Profibus Module
5.7.3 Profibus Module The control module "Profibus module" is used to integrate the aflex control into a Pro- fibus system. This module is optional and is only required in connection with the Profi- bus. Figure 54: Profibusmodul "standard" view Figure 55: Profibusmodul "advanced" view Client Node Information Line Profibus Address Data width of the fieldbus inputs... -
Page 58: Sub Menu Fieldbus Configuration
Sub menu Fieldbus configuration This menu is visible from the user level "advanced". The aflex is addressed by the higher-level controller via the fieldbus interface. The control unit provides eight digital inputs/outputs as well as a Telnet server. In addition, fieldbus modules, e.g. - Page 59 Load a configuration (1) This function provides several standard configurations. These comprise all the param- eters which are required for a complete control of the aflex. It is highly recommended to use these configurations. Clicking on the button opens the window shown below. The corresponding configuration is selected in the upper combo box Figure 57: Loading a fieldbus configuration Save the fieldbus settings (2)
- Page 60 Overview of the fieldbus input (7) Display the fieldbus input. Display the fieldbus configuration (8) Display the fieldbus configuration. Figure 58: Structure of the inputs/outputs Fieldbus interface Command identification addressed parameters Addressed control module whose parameter is controlled Symbol for fieldbus input Identification number of the fieldbus input Delete the fieldbus input Data range of the fieldbus input...
- Page 61 bit is defined as 16 bit further input, it corresponds to 100% (32 bit = 4294967295 dec.) 65535 decimal is given. Byte Offset of the Fieldbus Inputs (8) The byte offset defines the position at which the parameter is located in the fieldbus. A standard application of aflex, which uses both flipping and feeding, requires the fol- lowing fieldbus inputs: Direction = Direction of movement...
-
Page 62: Sub Menu Aflex Module
Sub menu aflex module The aflex is parametrized in this menu. The aflex is displayed in the control unit. The driver outputs of the T4X client nodes are linked to their actuators. If the aflex is con- trolled, the control unit recognizes which driver outputs are to be controlled and con- trols the client nodes accordingly. - Page 63 Figure 61: aflex Modul "admin" view Add an aflex module Delete the aflex module Save the aflex module Select the used client nodes Help page Transfer the selection to the control unit Display of the assigned channels Assign channel / disconnect Help page (10) Unassigned channels...
- Page 64 This function is available from user level "admin". Deletes the currently selected aflex module Save the aflex module (3) This function is available from user level "advanced". Saves the setting of the aflex module. Select the used client nodes (4) This function is available from user level "Admin".
- Page 65 Unassigned channels (10) The available channels not assigned yet. For the proper function of the aflex, all driver channels must be assigned and must match the electrical wiring. Transfer the assignment to the Control Unit (11) Transmits all current assignments to the control unit. These settings must be trans- ferred to the non-volatile memory using the "Save to EEPROM"...
-
Page 66: Soft Release Mode
5.9.1 Soft Release Mode The "Soft Release Mode" is used to reduce the aflex vibration. This mode is not re- quired for all components. In the case of very light components, however, the vibration of the aflex can lead to the components moving in one direction in an undefined man- ner. -
Page 67: Software Update
The software update of the control unit differs from that of the client nodes. It is per- formed using the application "control unit Bootloader" installed with the "aflexConfigu- rator". The application can be found in the Afag GmbH folder via the start menu. Pro- ceed as follows: ... - Page 68 In order for the bootloader to become active, the control unit must be re- started. In the "aflexConfigurator", execute a restart of the control unit via the "Restart Controller" button. The bootloader is active, the three status LEDs flash in the same clock. Instruction After each reboot, the bootloader mode is activated in the control unit for only 15 seconds.
- Page 69 recorded in the delivery state can be found on the supplied USB stick in the directory "Firmware Files" Figure 66: Software update Control Unit 3 Run software update Start the software update via the "Erase-Program-Verify" button (1). The bootloader application loads the new software update in the Control Unit. Af- ter successful completion, the confirmation "Verification successful"...
-
Page 70: Software Update Client Node
5.10.3 Software update Client Node The software update of a client node is performed in the "aflexConfigurator". If the client node is in bootloader mode and the user level is "advanced", the corresponding menu is displayed in the client node. Figure 68: Activate Bootloader (1) Activate Bootloader A prerequisite for the firmware update is the active bootloader mode of the client node. - Page 71 If a firmware update process is already active, the client node serial number used there is displayed. Instruction It is not possible to provide a firmware update for several client nodes simultaneously. For this reason, the currently used Client Node Serial is displayed. Procedure for installing a new client firmware: 1.
-
Page 72: First Commissioning
6 First commissioning Assembly of the system The aflex is mounted. Information on this can be found in the chapter installation in- structions. The control unit is installed and connected according to the circuit diagram. Refer also to the chapter installation instructions and the circuit diagram attached to the operating manual. -
Page 73: Configure Software Modules
Configure software modules The aflex software module is already configured in the delivery state. The T4X client nodes are assigned to the individual channels. Two configurations are already prede- fined. One configuration is suitable for separating components ("flip") the second for conveying components ("move"). - Page 74 Set General Release General release without which all power outputs are disa- bled. Must be set to use the aflex. Intensity Control intensity of the aflex. If this is greater than "0", the aflex is activated with the cur- rently selected direction and activated configuration. To turn the aflex off, set it to "0".
-
Page 75: Development Of Transfer Values
6.6.1 Development of transfer values Due to the various fieldbus interfaces, the command range of the individual commands is variable. Depending on the interface, commands of 1-32 bits can be widely defined. Depending on the defined command range, the transmission values must be calcu- lated. -
Page 76: Digital Input/Output
6.6.2 Digital input/output The control unit has eight 24V DC digital inputs and outputs. The following figure shows an integration to a "customer device". Figure 71: Digital IO Connection Control Unit LED - actual states Input Output In contrast to other fieldbus interfaces, the "load config #" command must be used instead of the "load config number"... - Page 77 Because only eight digital inputs are available, the possibilities to integrate the aflex are limited. Two different strategies are described in more detail below. Strategy 1: Components are not supported at all, but up to three different configurations can be called up. The intensity can be controlled in seven steps from 0-100%. Strategy 2: Components can be separated and conveyed with two configurations.
- Page 78 6.6.2.1 Strategy 1 No conveying of components is given up. Components are merely isolated. In this case, the "Direction" command is not required. For this, there is the possibility to call up more different configurations and to control the intensity steps. If it is mandatory to promote the development of components, Strategy 2 must be applied.
- Page 79 Figure72: Fieldbus Configuration IO Type1 Because the Direction command is not controlled in this strategy, it is important to set the Horizontal Max Power to 0%. In this way, the configuration is independent of the direction since the horizontal actuators are deactivated. The following figure shows the corresponding slider from the sub-menu "control interface".
- Page 80 6.6.2.2 Strategy 2 There is the possibility to convey the components in different directions, but only two configurations can be called and the intensity cannot be controlled level-wise. Input Load Load General Direction Direction Direction Command Power Config Config Intensity Release Output The possible states are described below.
- Page 81 In the aflexConfigurator, you must configure the fieldbus interface as shown in the fol- lowing figure. By configuring the outputs equal to the inputs, you get a response about the current values of the aflex system. Figure 74: Fieldbus Configuration IO Type 2 Release: 02.0 2017-01-13 Page 81...
-
Page 82: Telnet-Server
6.6.3 Telnet-Server In addition to the digital inputs / outputs, the control unit has a Telnet server. Like the digital inputs / outputs, the configured fieldbus interfaces are addressed. The bit ad- dress can be used to access each input / output. The port of the Telnet server is defined via the menu of the control unit in the "aflexConfigurator". - Page 83 Command Separator Separator Value CR LF dress Space Space XXXXXXXXXX \r\n Space \r\n Set Input "SI" An input of the aflex system is set via the Set Input command. This is defined by the bit address. The transferred value is set as new. The value and bit address is passed ASCII-coded.
- Page 84 ER Error notification If a faulty structure is transferred to the Telnet server, it sends an error message. The Telnet server distinguishes between the following errors. Table 10: Telnet error codes Error code Designation Faulty command Faulty value Faulty Bit Address The error message for a non-existent or incorrect bit address is defined as follows: "ER 4\r\n"...
-
Page 85: Profibus Module
End the connection using a command The Telnet server is dis- connected Heartbeat of the Telnet server for que- If connection terminations rying the connection are detected, the Telnet server closes the current connection. A new con- nection can be estab- lished. - Page 86 Figure 77: Profibus module FieldbusConfig In order to establish a connection via the Profibus, an ID and a maximum available data range are assigned to the Profibus module. In this example, ID 7 and a maximum of 32 byte input/output data. These settings must match the settings of the Profibus master.
-
Page 87: Input Commands
With these configurations, the individual commands are addressed with the following addresses and command lengths. Address Command Command lengths 1 Byte Load Config Number 2 Byte Aux Power Output 1 Byte Controller Restart 1 Byte AutoMode: 1 Byte General Release 2 Byte Direction 2 Byte... - Page 88 Control Unit: Load Con- Load a saved configuration (No. #1) 1 Bit fig Number Control Unit: Load Con- Load a saved configuration (No. #2) 1 Bit fig Number Control Unit: Load Con- Load a saved configuration (No. #3) 1 Bit fig Number Control Unit: Load Con-...
- Page 89 T4X Driver Channel1 Separate setting of the phase shifts of individ- 32 Bit Phase Off ual driver outputs T4X Driver Channel2 Separate setting of the phase shifts of individ- 32 Bit Phase Off ual driver outputs T4X Driver Channel3 Separate setting of the phase shifts of individ- 32 Bit Phase Off ual driver outputs...
-
Page 90: Output Commands
6.6.6 Output commands All fieldbus outputs can be freely defined via the "aflexConfigurator", both in the data range as well as in the data position. The suggested range of data listed in the table below indicates the original data range of the command. These are recommended for e.g. - Page 91 T4X Driver Channel2 Power Status of the control intensity of driver 32 Bit output T4X Driver Channel3 Power Status of the control intensity of driver 32 Bit output T4X Driver Channel4 Power Status of the control intensity of driver 32 Bit output T4X Driver Channel1 Phase...
-
Page 92: Operating Manual
7 Operating manual The aflex is integrated in automated industrial systems and operated in the automatic mode via the communication interface. In addition, manual operation is possible via the configuration software. Safety instructions for operation WARNING Danger of injury through electro-magnetic fields Persons who carry pacemakers or other active medial implants may be particularly vulnerable to EMF. -
Page 93: Maintenance Instructions
con err pwr Reporting Power supply IO, connected to control modules Power supply IO, no connection to further control modules Fault occurred during operation "Bootloader" mode is active "Bootloader" mode active, no executable program available PB Node: Table 16: PB Node con err pwr pbcon Reporting Power supply IO, connected to control modules... -
Page 94: Order Address
9 Order address Germany: Switzerland: Afag GmbH Afag Automation AG Wernher-von-Braun-Straße 1 Zuführtechnik D – 92224 Amberg Fiechtenstrasse 32 CH – 4950 Huttwil Tel.: ++49 (0) 96 21 / 65 0 27-0 Fax: ++49 (0) 96 21 / 65 0 27-490 Tel.: ++41 (0) 62 / 959 86 86... - Page 95 Release: 02.0 2017-01-13 Page 95...
Need help?
Do you have a question about the aflex 150 and is the answer not in the manual?
Questions and answers