Rangemaster Kitchener 110 Electric Users Manual & Installation
Installation & service instructions
Hide thumbs
Also See for Kitchener 110 Electric:
- User's manual & installation instructions (48 pages) ,
- User's manual & installation instructions (44 pages)

Related Manuals for Rangemaster Kitchener 110 Electric


Summary of Contents for Rangemaster Kitchener 110 Electric
-
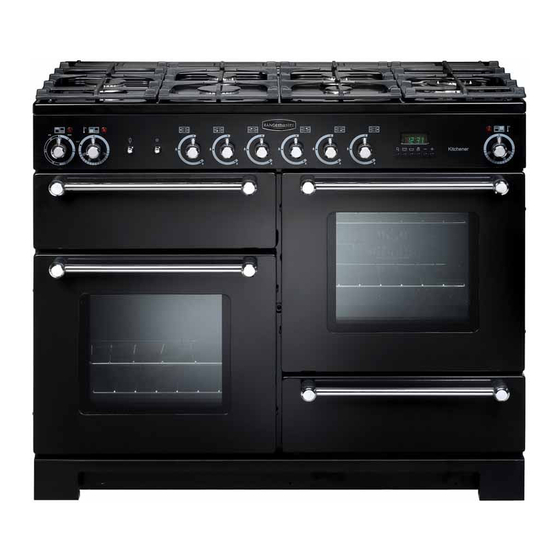
Page 1: Users Guide
Kitchener 110 Ceramic Users Guide & Installation & Service Instructions U107350 - 01... -
Page 2: Peculiar Smells
Be safe Warning Accessible parts will become hot in use. To avoid burns and scalds children should be kept away Do not stand or rest heavy objects on the hob. Although the ceramic surface is very strong, a sharp blow or sharp falling object might cause the surface to crack. -
Page 3: Table Of Contents
Contents Users guide The Hob The Grill The Ovens Storage Oven cooking guide Cleaning your cooker Troubleshooting General Safety Instructions Installation Servicing Circuit Diagram Technical Data The Clock Cooking using the timer The Handyrack Oven light The Browning Element Page 4 Page 6 Page 7 Page 8... -
Page 4: The Hob
The Hob When you cook on a ceramic hob its very important to use the right sort of pans... Use only pans that are suitable for ceramic hobs. We recommend stainless steel and enamelled steel pans because pots and pans with copper or aluminium bases leave traces on the hob that are diffi... - Page 5 Although the ceramic surface is very strong, a heavy or sharp falling object (a salt cellar for example) might cause the surface to crack. If you fi nd a crack in the surface immediately disconnect the appliance from the supply and arrange for its repair.
-
Page 6: The Grill
The Grill Caution: Accessible parts may be hot when the grill is in use. Young children should be kept away. Before using for the fi rst time, to dispel manufacturing odours, turn on the grill and run for 30 minutes with the grill pan in position, pushed fully back, and the grill door open. -
Page 7: The Right Hand Oven
The Ovens During use the appliance becomes hot. Care should be taken to avoid the touching heating elements inside the oven. Before using for the fi rst time, to dispel manufacturing odours, turn the ovens to 240°C and run for an hour. Make sure the room is well ventilated to the outside air, by opening windows or turning on a cooker hood for example. -
Page 8: To Start/Stop Oven Automatically
The Clock You can use the timer to turn the ovens on and off . The clock must be set to the time of day before the ovens will work. To set the time of day Press and hold as above. At the same time, press (-) or (+) until the correct time shows. -
Page 9: Both Ovens
Clock Special Features Key Lock When the key lock is activated, the clock can be operated as usual but the oven is locked and will not come on. This means that your child could select a cook program but the program will not be activated and oven will not be switched on. -
Page 10: Oven Shelves
The wire shelves should always be pushed fi rmly to the back of the oven. Baking trays meat tins etcetera should be placed level centrally on the oven’s wire shelves. Keep all trays and containers away from the sides of the oven, as overbrowning of the food may occur. -
Page 11: The Handyrack
The Handyrack The maximum weight that can be held by the Handyrack is 5.5kg (12lb). It should only be used with the supplied meat tin, which is designed to fi t the Handyrack. Any other vessel could be unstable. The Handyrack fi ts to the left hand oven door only. Food cooking on it is easy to attend to, because it’s accessible when the door is open. - Page 12 The oven control settings and cooking times given in the table opposite are intended to be used only as a guide. Individual tastes may require the temperature to be altered to provide a preferred result. When baking in the right hand fanned oven, use the minimum cooking time shown in the table.
-
Page 13: Oven Cooking Guide
Oven cooking guide LH Convection Oven Food Temperature FISH ROAST MEATS Beef with bone Beef without bone Lamb Pork Stuff ed and rolled - Add approx. 10 mins. per 500g to above cooking times or cook at 200°C for 20mins. then 160°C for remainder. -
Page 14: Essential Information
Cleaning your cooker Essential information Before thorough cleaning isolate the electricity supply. Remember to switch on the electricity supply before use. Never use paint solvents, washing soda, caustic cleaners, biological powders, bleach, chlorine based bleach cleaners, coarse abrasives or salt. Don’t mix diff... -
Page 15: Cleaning Table
Cleaning Table Hobplate Part Finish Ceramic Hob Glass with anodised aluminium surround. Outside of cooker Part Door, Door surround and Storage Drawer exterior. Sides and Plinth Splashback/Rear Grille Control panel Control Knobs/Handles Oven Door Glass Oven and Grill Part Sides, fl oor & roof of oven - NOT COOK &... -
Page 16: Troubleshooting
Ovens The ovens have removable panels that have been coated with a special enamel that partly cleans itself. This does not stop all marks on the lining, but helps to reduce the amount of manual cleaning needed. The Cook & Clean panels work better above 200°C. - Page 17 If there is an installation problem and I don’t get my original installer to come back to fix it who pays? You do. Service organisations will charge for their call- outs if they are correcting work carried out by your original installer.
-
Page 18: General Safety Instructions
General Safety Instructions The cooker must be installed by a qualifi ed electrician in accordance with the installation instructions. It should be serviced by a qualifi ed service engineer and only approved spare parts used. Have the installer show you the location of the cooker control switch. - Page 19 Never leave a chip pan unattended. Always heat fat slowly, and watch as it heats. Deep fry pans should be only one third full of fat. Filling the pan too full of fat can cause spill over when food is added. If you use a combination of oils or fats in frying, stir them together before heating, or as the fats melt.
-
Page 20: Positioning The Cooker
Check the ap pli ance is electrically safe when you have fi nished. Installation Dear Installer Before you start your installation, please complete the details BELOW. If your customer has a problem relating to your installation they will be able to contact you easily. Installer’s Name Installer’s Company Installer’s Telephone number... -
Page 21: Unpacking The Cooker
Check the ap pli ance is electrically safe when you have fi nished. *Any cooker hood should be installed in accordance with the hood man u fac tur er’s instructions. Surfaces of furniture and walls at the sides and rear of the appliance should be heat, splash and steam resistant. -
Page 22: Electrical Connection
Check the ap pli ance is electrically safe when you have fi nished. Make sure you lower BOTH REAR ROLLERS. There are two adjusting nuts, one for each roller, at both the front bottom corners of the cooker. Unfold the rear edge of pack base tray. Carefully push the cooker backwards out of the base pack. -
Page 23: Fitting The Plinth
Check the ap pli ance is electrically safe when you have fi nished. Current Operated Earth Leakage Breakers Where the installation is protected by a 30 milliamp sensitivity residual current device (RCD), the combined use of your cooker and other domestic appliances may oc ca sion al ly cause nuisance tripping. -
Page 24: Servicing
WARNING SERVICING TO BE CARRIED OUT ONLY BY AN AUTHORISED PERSON Disconnect from electricity before servicing. Check appliance is safe when you have finished. Servicing Disconnect from electricity supply before commencing servicing, particularly before removing any of the following: control panel, side panels, ceramic hob, or any of the electrical components or cover boxes. - Page 25 WARNING SERVICING TO BE CARRIED OUT ONLY BY AN AUTHORISED PERSON Disconnect from electricity before servicing. Check appliance is safe when you have finished. to the control panel by fi rst lining up the raised key on its body with the cut-out in the control panel and pushing it in from the front.
- Page 26 WARNING SERVICING TO BE CARRIED OUT ONLY BY AN AUTHORISED PERSON Disconnect from electricity before servicing. Check appliance is safe when you have finished. 13. To Change Oven Door Seal Open oven door. The seal is held in place by small hooks on the rear face.
- Page 27 WARNING SERVICING TO BE CARRIED OUT ONLY BY AN AUTHORISED PERSON Disconnect from electricity before servicing. Check appliance is safe when you have finished. 19. To Remove the LH Oven Bottom and Top Elements Disconnect from the electricity supply. Bottom Element Pull the cooker forward to access the cover boxes at the rear of the unit.
-
Page 28: Circuit Diagram
Circuit Diagram... -
Page 30: Technical Data
Technical Data INSTALLER: Please leave these instructions with the User. DATA BADGE LOCATION : Cooker back, serial number repeater badge below oven door opening. Dimensions Overall height Overall width Overall depth Space for fixing Minimum space above hotplate Ratings Ovens Energy efficiency class : on a scale of A (more effi... - Page 32 150206...
Need help?
Do you have a question about the Kitchener 110 Electric and is the answer not in the manual?
Questions and answers