Rangemaster Professional 110 Dual Fuel Users Manual & Installation
Installation instructions
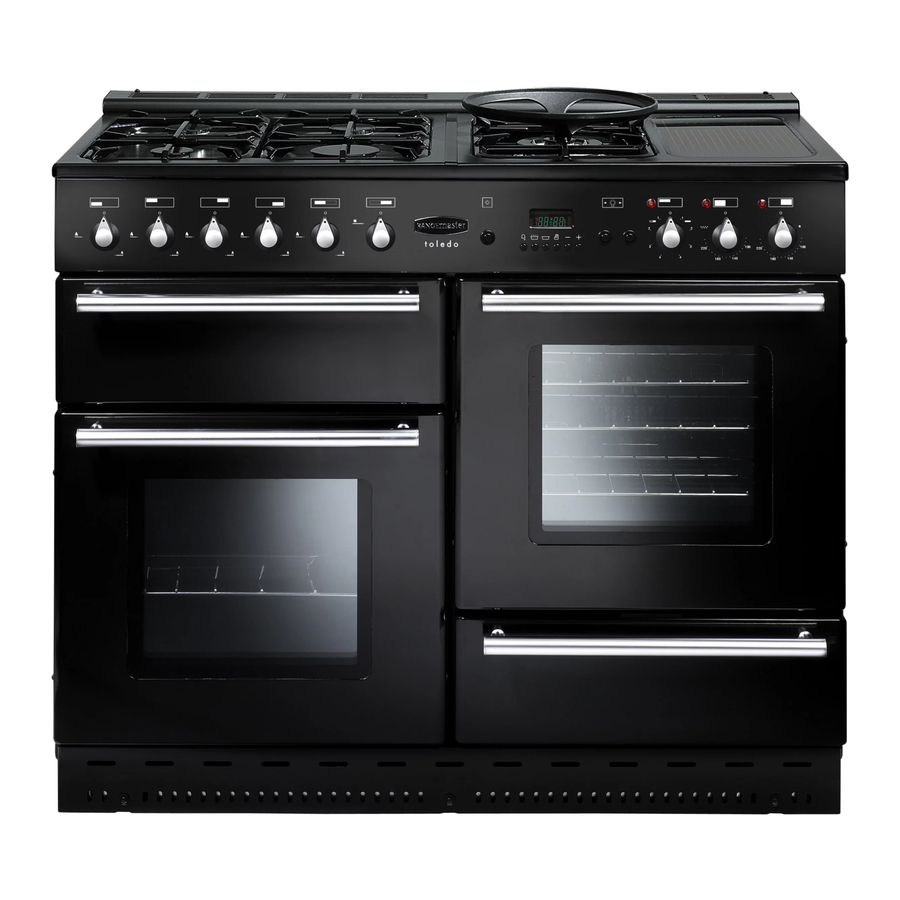
Hide thumbs
Also See for Professional 110 Dual Fuel:
- User's manual & installation instructions (40 pages) ,
- User manual (36 pages) ,
- Users manual & installation (36 pages)
Table of Contents
Advertisement
Advertisement
Table of Contents

Related Manuals for Rangemaster Professional 110 Dual Fuel


Summary of Contents for Rangemaster Professional 110 Dual Fuel
- Page 1 110 Dual Fuel Users Guide & Installation Instructions U1 216 02...
-
Page 2: Table Of Contents
Contents 2 Minute Tour The Hotplate burners The Griddle The Warmer The Grill The Ovens Oven shelves The Handyrack The Browning Element Cooking using the timer The clock Moving your cooker Oven cooking guide Cleaning your cooker Troubleshooting General Safety Instructions Installation Circuit Diagram Technical Data... -
Page 3: Peculiar Smells
Be safe You need clean fresh air - so does your cooker. Burner flames produce exhaust gases, heat and moisture. Make sure that the kitchen is well ventilated: keep natural ventilation holes open or install a powered cooker hood that vents outside. If you have several burners on or use the cooker for a long time, open a window or turn on an extractor fan. - Page 4 RIDDLE More about the griddle on page 8 The griddle fits a single pan support, front to back. It is designed for cooking food on directly. Don’t use pans of any kind on it. The griddle surface is non-stick and metal cooking utensils (e.g. spatulas) will damage the surface.
- Page 5 RILL More about the grill on page 8 : Accessible parts may be hot when the grill is in use. Young children should be AUTION kept away. Remove the pan from the bottom of the grill compartment. For best results preheat for 2 minutes with the grill pan in position.
-
Page 6: To Set The Time Of Day
OVEN More about the oven on page 9 Turn the oven knob to the temperature you need. EFT HAND The left hand conventional oven is fitted with two heating elements, one visible in the top of the oven and the second under the oven base. -
Page 7: Oven Light
Handyrack More about the Handyrack on page 10. The Handyrack should only be used with the supplied meat tin which is designed to fit it. Any other vessel could be unstable. The maximum weight which can be held by the Handyrack is 5.5kg (12lb). -
Page 8: The Hotplate Burners
The Hotplate burners You should read ‘hotplate burners’ in the ‘2 Minute Tour’ before all the following information When the spark button (IGN) is pressed, sparks will be made at every burner, this is normal. If after lighting, a hotplate burner’s flame goes out, turn it off and leave it for one minute before relighting it. -
Page 9: The Ovens
• The right hand oven is a fanned oven. The fan circulates hot air continuously which results in faster heat transfer to the food. • The left hand conventional oven is fitted with two heating elements, one visible in the top of the oven and the second under the oven base. -
Page 10: The Handyrack
The Handyrack You should read ‘the oven’ in the ‘2 Minute Tour’ before all the following information. The Handyrack should only be used with the supplied meat tin which is designed to fit it. Any other vessel could be unstable. The maximum weight which can be held by the Handyrack is 5.5kg (12lb). -
Page 11: The Clock
The clock To set the correct time of day. See the ‘2 Minute Tour’ at the beginning of this guide. To time something that’s cooking (minute minder) Press and hold as above. At the same time press (-) or (+) until the time you want to cook for is shown, as below. -
Page 12: Moving Your Cooker
The oven control settings and cooking times given opposite are intended to be used only as a guide. Individual tastes may require the temperature to be altered to provide a preferred result. Food is cooked at lower temperature in a fan oven than in a conventional oven. When using recipes, reduce the temperature by 10°C and the cooking time by 5-10 minutes. -
Page 13: Oven Cooking Guide
Oven cooking guide LH Convection Oven Food FISH ROAST MEATS Beef with bone Beef without bone Lamb Pork Stuffed and rolled - Add approx. 10 mins. per 500g to above cooking times or cook at 200°C for 20mins. then 160°C for remainder. -
Page 14: Cleaning Your Cooker
Cleaning your cooker Essential information Before thorough cleaning isolate the electricity supply. Remember to switch on the electricity supply before use. Never use paint solvents, washing soda, caustic cleaners, biological powders, bleach, chlorine based bleach cleaners, coarse abrasives or salt. Don’t mix different cleaning products - they may react together with hazardous results. -
Page 15: Control Panel And Doors
When reassembling the Wok burner, turn over the large base ring and find the ‘D’ shaped area. Turn the head until the ‘D’ matches the one on the burner base. Turn the head over and place it on the burner base. To fit the small inner burner, find the larger electrode notch in the burner rim. - Page 16 with a lint free cloth and hot soapy water. The panels should then be dried and replaced and the oven heated at 200°C for about one hour. This will ensure the Cook & Clean panels are working effectively. Don’t use steel wool (Brillo) or any other materials which will scratch the surface.
-
Page 17: Troubleshooting
Troubleshooting Steam is coming from the oven When cooking foods with a high water content (e.g. oven chips) there may be some steam visible at the rear grille. Take care when opening the oven door, as there may be a momentary puff of steam when the oven door is opened. Stand well back and allow any steam to disperse. - Page 18 Troubleshooting Oven not coming on when turned on manually Is the power on? Is the clock illuminated? If not there may be something wrong with the power supply. Is the cooker supply on at the isolator switch? Is the clock flashing 0.00? If so, set it to the correct time of day.
-
Page 19: General Safety Instructions
General Safety Instructions The cooker must be installed by a CORGI registered engineer in accordance with the installation instructions. The installation must comply with the relevant regulations and also the local gas and electricity supply companies requirements. IF YOU SMELL GAS Don’t turn electric switches on or off. - Page 20 Never wear loose-fitting or hanging clothes while using the appliance. Be careful when reaching for items stored in cabinets over the hotplate. Flammable material could be ignited if brought in contact with a hot surface unit and may cause severe burns. Take great care when heating fats and oils, as they will ignite if they get too hot.
-
Page 21: Dear Installer
Dear Installer Before you start your installation, please complete the details BELOW. If your customer has a problem relating to your installation they will be able to contact you easily. Thank you Installer’s Name Installer’s Company Installer’s Telephone number... -
Page 22: Provision Of Ventilation
You must be aware of the following safety requirements & regulations Prior to installation, ensure that the local distribution conditions (nature of the gas and gas pressure) and the adjustment of the appliance are compatible. This appliance shall be installed in accordance with the regulations in force and only in a well ventilated space. - Page 23 You will need the following equipment to complete the cooker installation satisfactorily STABILITY BRACKET If the cooker is to be supplied with gas through a flexible hose, a stability bracket or chain must be fitted. These are not supplied by with the cooker but are available at most builders merchants.
-
Page 24: Positioning The Cooker
Positioning the Cooker The diagrams below show the minimum recommended distance from the cooker to nearby surfaces. The hotplate surround should be level with, or above, any adjacent work surface. Above hotplate level a gap of 75mm should be left between each side of the cooker and any adjacent vertical surface. -
Page 25: Moving The Cooker
Moving the Cooker The cooker is very heavy. Take great care. We recommend two people manoeuvre the cooker. Ensure that the floor covering is firmly fixed, or removed to prevent it being disturbed when moving the cooker around. You will need the levelling tool. From the back tilt the cooker forward and remove the rear half of the polystyrene base pack. -
Page 26: Fitting A Stability Bracket
Fit the Handles Remove the 4mm Allen screws from the doors with the hexagon key tool. Use the screws to fit the door handles. The handles should be above the fixings. Remove the 4mm Allen screws from the top corners of the fascia and fix the front handrail in position. -
Page 27: Electrical Connection
Gas Connection The gas supply needs to terminate with a down facing bayonet. The rear cover boxes limit the position of the supply point. view from the rear position for gas supply connector appliance gas inlet Because the height of the cooker can be adjusted and each connection is different it is difficult to give precise dimensions. -
Page 28: Fitting The Plinth
Oven Light Press the oven light switch and check that the light is working. NB. The oven light bulb is not included in the guarantee Hotplate Check each burner in turn. Push in tap and turn to the large flame symbol. Press ignition switch on facia panel. -
Page 29: Circuit Diagram
Circuit Diagram... -
Page 30: Technical Data
Technical Data This cooker is category II It is supplied set for either:- A conversion kit from NG to LP gas is available. INSTALLER: Please leave these instructions with the User. DATA BADGE LOCATION: Country of Destination: GB/IE Natural Gas 20mbar Butane 29mbar...
Need help?
Do you have a question about the Professional 110 Dual Fuel and is the answer not in the manual?
Questions and answers
Does the rangemaster professional plus 110 have to **** ovens
Yes, the Rangemaster Professional 110 Dual Fuel has two ovens: one conventional oven and one fan oven.
This answer is automatically generated